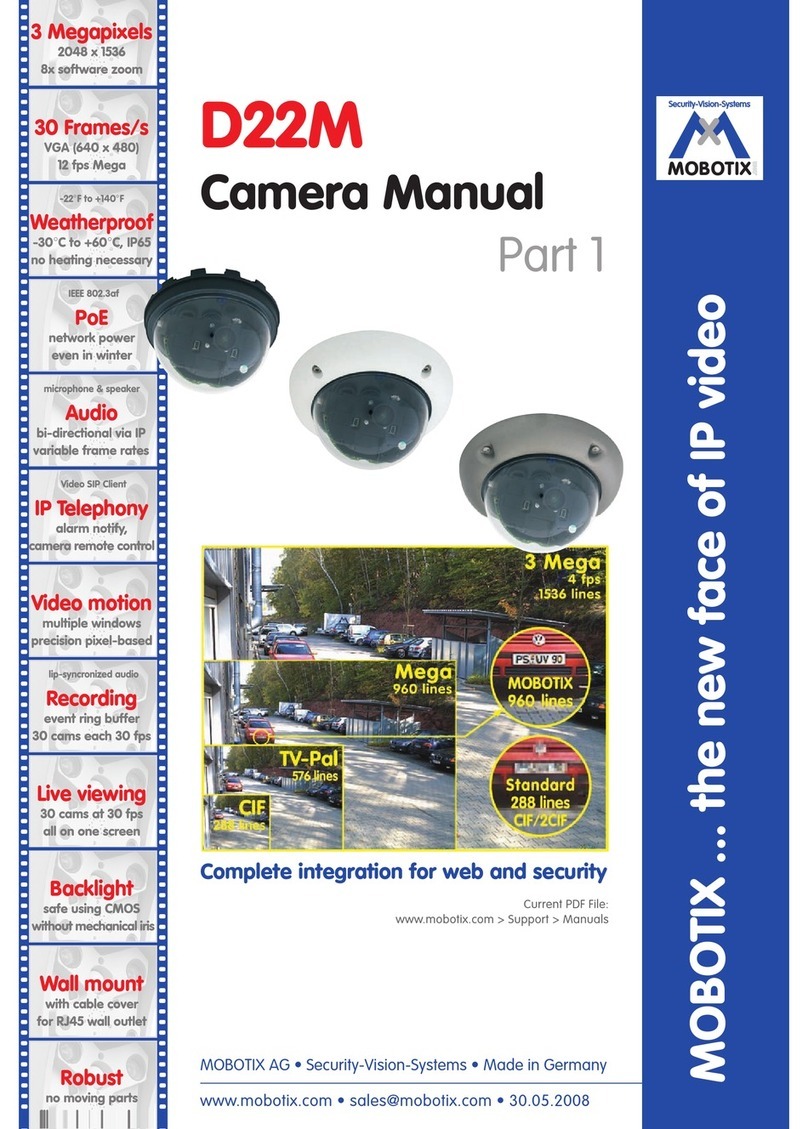
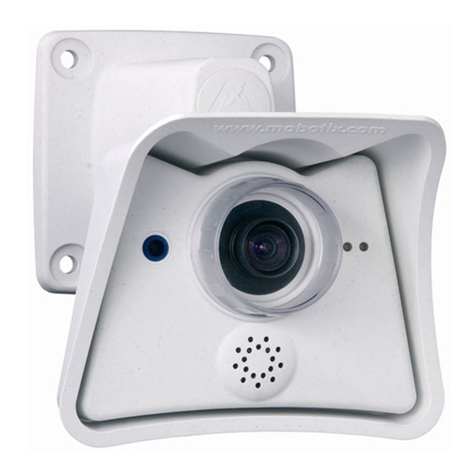
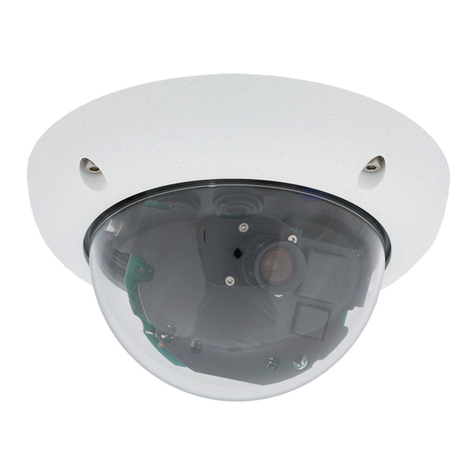
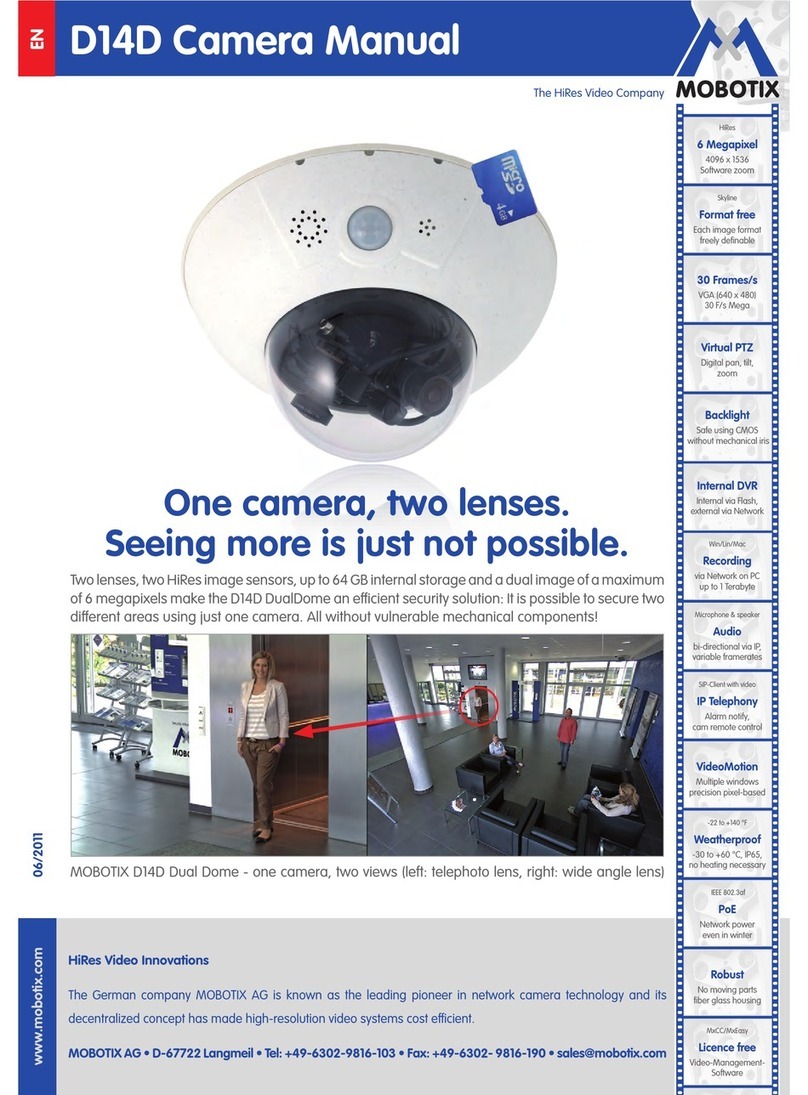
Mobotix D12 User manual

MOBOTIX AG • Security-Vision-Systems • Made in Germany
Current PDF File:
www.mobotix.com > Services > Manuals
3 mm Beschnitt umlaufend
Complete integration for web and security
D12
Camera Manual
MOBOTIX ... the new face of IP video
Part 1
Wall bracket
with cable cover
for RJ45 wall outlet
30 Frames/s
VGA (640 x 480)
10 fps Mega
-22°F to +140°F
Weatherproof
-30°C to +60°C, IP65
no heating necessary
IEEE 802.3af
PoE
network power
even in winter
Video SIP Client
IP-Telephony
alarm notify,
cam remote control
lip-syncronized audio
Recording
event-ringbuffer
30 cams each 30 fps
Backlight
safe using CMOS
without mechanical iris
Video motion
multiple windows
precision pixel-based
microphone & speaker
Audio
bi-directional via IP
variable framerates
Live viewing
30 cams at 30 fps
all on one screen
VGA
30 fps
480 lines
CIFCIF
30 fps
288 lines
Mega
10 fps
960 lines
Megapixel
1280 x 960
software zoom
Robust
no moving parts
fiber glass housing
X
MOBOTIX
Security-Vision-Systems
.
com
Image
detail

© MOBOTIX AG • Security-Vision-Systems • Made in Germany
D12 Camera Manual Part 1
MOBOTIX Camera Data
Enter the data of your camera here!
Camera Model:
Camera Name:
Factory IP Address:
Current IP Address:
DHCP: activated deactivated
Admin User Name:
Admin Password:
ISDN Dial-In Number:
ISDN User Name:
ISDN Password:
Notes:
Note: MOBOTIX offers inexpensive seminars that include a workshop and
practical excercises: Basic Seminar 2 days, Advanced Seminar 2
days. For more information, see www.mobotix.com
.
.
.
.
.
.

D12 CAMERA MANUAL PART1
1 INTRODUCTION 8
1.1 The Concept behind the MOBOTIX D12 9
1.2 Product Advantages of the MOBOTIX D12 14
1.3 The MOBOTIX D12D-Fixdome Outdoor 16
1.3.1 The Concept of the MOBOTIX D12D-Outdoor 16
1.3.2 Product Advantages of the MOBOTIX D12D-Outdoor 18
1.4 Feature List 19
1.5 Hard- and Software Differences of the MOBOTIX D10/D12 21
1.6 Important Notes 22
1.6.1 Password for the Administration Menu 22
1.6.2 Password for ISDN Dial-In 22
1.6.3 Permanently Deactivating the Microphone 22
1.6.4 Starting the Camera Using the Factory IP Address 23
1.6.5 Resetting the Camera to Factory Defaults 23
1.6.6 Activating Event Control for Security Applications 23
1.6.7 Deactivating Text and Logo Options 23
1.6.8 Deactivating the Daily Reboot of the Camera 24
1.6.9 ISDN Compatibility Note 24
1.6.10 Browser Hints 24
1.6.11 Safety Notes for Operating MOBOTIX Cameras 24
1.6.12 Additional Information 25
2 INSTALLING THE CAMERA & THE OUTDOOR WALL MOUNT 26
2.1 Quick Start 26
2.2 Delivered Parts, Camera Components and Dimensions 26
2.2.1 Delivered Parts and Camera Components of the MOBOTIX D12D 26
2.2.2 Camera Casing and Connectors of the MOBOTIX D12D 27
2.2.3 Delivered Parts and Components of the Outdoor Wall Mount 28
2.2.4 Dimensions of the Outdoor Wall Mount 29
2.3 Optional Accessories 30
2.4 Planning Where to Install the Camera 32
2.4.1 Mounting to a Ceiling 32
2.4.2 Fixing to a Wall 32
2.4.3 Installation Using the Outdoor Wall Mount 33
2.4.4 Deciding on the Connections (Network/ISDN/RS232) 34
2.4.5 Selecting the Power Supply 36
2.4.6 Using Uninterruptible Power Supplies (UPS) 37
2.4.7 Providing the Connections (Network/ISDN/RS232) 38
2.4.8 Further Options 38
2.5 MOBOTIX D12 Lens Options 39
© MOBOTIX AG • Security-Vision-Systems • Made in Germany
1/96
D12 Camera Manual Part 1

2.6 Preparing the Camera 41
2.6.1 Presetting the Lenses, Connecting the Lens Cables 41
2.6.2 Basic Options for Positioning the Lenses 41
2.6.3 Connectiong the CAT5 Cables 42
2.6.4 Connecting a Cable to the Serial interface (RS232) 44
2.7 Mounting the Casing to a Wall or Ceiling, Connecting the Cables 46
2.7.1 Drilling the Holes for the Fixtures Using the Supplied Drilling Template 46
2.7.2 Planning and Connecting the CAT5 Cables 46
2.8 Installing the Camera with the Outdoor Wall Mount 47
2.8.1 Setting the Direction of the Passive Infrared Sensor (PIR) 47
2.8.2 Installing the Outdoor Wall Mount 48
2.8.3 Determining the Position of the Camera on the Bottom Plate 50
2.8.4 Fixing the Camera to the Bottom Plate 51
2.8.5 Connecting the Camera and Attaching the Bottom Plate 52
2.9 Completing the Installation 53
2.9.1 Establishing a Connection to the Camera 53
2.9.2 Adjusting the Lenses, Visual Check 53
2.9.3 Attaching the Camera's Outer Shell 54
2.10 Assembling and Disassembling the Camera 55
2.10.1 Assembling the Camera (Detailed Description) 55
2.10.2Disassembling the Camera (Detailed Description) 58
2.11 Cleaning Instructions 62
2.11.1 Cleaning the Dome 62
2.11.2 Cleaning the Lenses 62
2.12 Wiring, Fire Prevention, Lightning and Surge Protection 62
2.12.1 Wiring 62
2.12.2 Fire Prevention 63
2.12.3 Lightning and Surge Protection 63
3 OPERATING THE CAMERA 64
3.1 General Procedure 64
3.1.1 Establishing the Power Supply of the Camera 64
3.1.2 Connecting the Camera 64
3.2 Overview of the Configuration Settings 66
3.3 Connecting the Camera 68
3.3.1 Ethernet: Power Supply Using a Network Power Adapter (MX PoE) 68
3.3.2 Ethernet: Power Supply Using a Network Power Rack (MX PoE) 69
3.3.3 Ethernet: Power Supply Using PoE Products (Power over Ethernet) 70
3.3.4 ISDN: Power Supply Using a Network Power Adapter 71
3.3.5 ISDN: Directly Supplying Power Using the External Power Supply 72
3.3.6 Ethernet and ISDN 72
3.3.7 Camera Startup Sequenze 73
3.4 The First Image from the Camera 74
3.4.1 Preparing the Ethernet Connection 74
3.4.2 Preparing the ISDN Connection 76
© MOBOTIX AG • Security-Vision-Systems • Made in Germany
2/96 D12 Camera Manual Part 1

3.4.3 Simultaneously Using ISDN and Ethernet Connections (Gateway) 76
3.4.4 The First Image in the Browser 77
3.4.5 Additional Information 78
3.4.6 Camera Screens in the Browser 79
3.4.7 The First Image in MxViewer 80
3.5 Starting the Camera With an Automatic IP Address (DHCP) 84
3.6 Starting the Camera Using the Factory IP Address 85
3.7 Connecting External Devices and Sensors: MX Interface Connector
and MOBOTIX Cam-IO 86
3.7.1 MX Interface Connector for Direct Connections 86
3.7.2 MOBOTIX Cam-IO: Expansion Module for Easy Installation 87
3.8 Signal Input/Output, RS-232 Interface 88
3.8.1 Signal Input Pins 88
3.8.2 Signal Output Pins 89
3.9 Drilling Templates D12 90
APPENDIX:
HARDWARE AND SOFTWARE FEATURES 92
IP65 CERTIFICATE 94
DECLARATION OF CONFORMITY 95
DRILLING TEMPLATES
© MOBOTIX AG • Security-Vision-Systems • Made in Germany
3/96
D12 Camera Manual Part 1
Note
The following chapters (4 and higher) are all part of the Camera
Software Manual. The main headings are listed below to give you an
overview of the
Software Manual
contents.

SOFTWARE MANUAL PART2
4 CAMERA USER INTERFACE
4.1 The First Image in the Browser
4.2 The First Image in MxViewer
4.3 Screens of the Camera
4.4 The Live Screen in the Browser
4.5 The Playback Screen in the Browser
4.6 The MultiView Screen in the Browser
4.7 PDA Screen
4.8 Guest Screen
4.9 Browser Settings
4.10 Configuring the Softbuttons
4.11 Fast Video Streaming
4.12 Operating Multiple Cameras
5 BASIC CAMERA CONFIGURATION
5.1 Overview
5.2 Quick Installation
5.3 Connection Test
5.4 Basic Settings
5.5 Image Controls
5.6 Logos
5.7 Exposure Settings
5.8 Day & Night Modes
5.9 Managing Settings
6 SOFTWARE UPDATES
6.1 Overview
6.2 Preparatory Steps
6.3 Updating the Camera Software
6.4 Update Checklist
7 EVENTS, ACTIONS AND MESSAGES
7.1 Overview
7.2 Functional Overview
© MOBOTIX AG • Security-Vision-Systems • Made in Germany
4/96 D12 Camera Manual Part 1

7.3 General Remarks on Operating the Camera
7.4 Screen Display of Event Settings in Live Image
7.5 Arming
7.6 Events
7.7 Actions and Messaging, Action and Messaging Profiles
7.8 Working with Profiles
7.9 Time Tasks
8 RECORDING
8.1 Overview
8.2 Recording Modes
8.3 Recording Types
9 TELEPHONY FEATURES
9.1 Overview
9.2 VoIP Settings for IP Telephony
9.3 Camera Phone (Listen, Speak and Intercom Modes)
9.4 Phone Profiles: Outbound Phone Calls
9.5 Voice Dial-In: Inbound Phone Calls
9.6 Remotely Controlling the Camera Using a Phone
9.7 Sample Configurations for IP Telephony via Internet
9.8 Sample Configurations for IP Telephony via LAN
10 MOBOTIX CAMERAS ON THE WEB
10.1 Overview
10.2 Displaying Cameras on the Web
10.3 Configuring Routers and Firewalls
10.4 Configuring DynDNS
10.5 Updating Web Pages
11 SOFTWARE INTERFACES
11.1 Overview
11.2 Accessing Live Images
11.3 Accessing the Second Image Channel
11.4 Video Streaming
11.5 The HTTP API
© MOBOTIX AG • Security-Vision-Systems • Made in Germany
5/96
D12 Camera Manual Part 1

12 TROUBLESHOOTING
12.1 Overview
12.2 Troubleshooting Checklist
12.3 Diagnostic Tools of the Camera
12.4 Monitoring Tools of the Camera
12.5 Potential Other Problems
12.6 Additional Information
12.7 Sending Back the Camera
12.8 Warranty
© MOBOTIX AG • Security-Vision-Systems • Made in Germany
6/96 D12 Camera Manual Part 1
Technical information subject to change without notice!
No part of this manual may be reproduced by any means
without our written approval!
Copyright © MOBOTIX AG, Kaiserslautern, Germany
Note
Download the newest version of this document as a PDF file from
www.mobotix.com from Services> Manuals.

© MOBOTIX AG • Security-Vision-Systems • Made in Germany
7/96
D12 Camera Manual Part 1
Notes:

1 INTRODUCTION
The D12 camera range represents the next model of the second
generation of MOBOTIX network cameras. Now more powerful
than ever, the new models are capable of creating high-resoluti-
on live video streams with high frame rates. When showing VGA
video (640x480), the camera can deliver up to 30 fps. Even Mega-
pixel video (1280x960) will still generate up to 10 fps. The camera transmits
realtime sound from the microphone, even in the browser.
Similar to previous MOBOTIX cameras, D12 cameras are available as SECURE, IT,
WEB and BASIC models with differing software features. The WEB and BASIC mo-
dels do not have a microphone. The D12 can be fitted with all MOBOTIX M14 high-
performance lenses.
Like all other MOBOTIX cameras, D12 models are more than "just a camera"; the
integrated software features (Secure/IT models) include a multitude of functions,
such as video motion detection, long-term recording, alarm messaging and vi-
deo IP telephony. In camparison to camera systems from other manufacturers,
buying and installing additional software on the computer is thus unnecessary.
Instead of using a web browser, you can also download the free MxViewer for
Windows from www.mobotix.com, which
allows displaying multiple cameras on one
monitor. Moreover, MxViewer can also pro-
cess incoming alarms from the camera and
allows for comfortably searching and evalua-
ting the alarm video clips (including audio).
Because of the low power consumption of
only 3Watts, the MOBOTIX D12 cameras fea-
ture the highest operating temperature range
in the market from -30 to + 60°C (-20 to
140°F). Since MOBOTIX cameras neither fog
up nor require heating, power can be supp-
lied using standard PoE products. All models
come with a wall mount that covers wall
outlets and perfectly conceals the cabling.
Using the new MX Interface Connector with D Sub
15 HD socket, you can directly connect external
lamps, devices, sensors, microphones and audio
amplifiers. The MOBOTIX Cam-IO expansion box
simplifies installing the camera and expands on these
possibilities: All external devices, sensors and the
Ethernet cabling are connected directly to the installa-
tion box. Likewise, the MOBOTIX Cam-IO installation box (available
from Q1 2007) hooks up to the mains and supplies power to the came-
ra, without requiring any other type of power supply.
© MOBOTIX AG • Security-Vision-Systems • Made in Germany
8/96 D12 Camera Manual Part 1
30 frames per second!
Everything integrated!

1.1 The Concept Behind the MOBOTIX D12
High-Resolution Live Video (640x480) with up to 30 Frames/s
The second generation of cameras from MOBOTIX now delivers smooth live video
display in VGA format with synchronous live audio, yet it keeps the network load to
a minimum (approx. 2Mbps). Live video display now match the performance of
analog video systems. When recording, MOBOTIX systems easily outperform ana-
log systems, since MOBOTIX cameras store the same resolution and quality with
the same frame rates as in the live display. MOBOTIX technology thus allows si-
multaneously recording the video from 30 cameras in continuous recording
mode on one standard PC at 30fps each, including the audio channel of the
cameras.
Low Bandwidth Requirements
MOBOTIX' patent pending MxPEG streaming format allows fast live video with au-
dio at extremely low network load (1 to 2Mbps). Since the MOBOTIX camera itself
detects movements in the image, video is only transmitted if movements occur,
and when the video and audio data are stored.
Voice over IP and ISDN
Moreover, MxPEG provides for synchronized audio and two-way communication
between the camera and your computer. Room surveillance with audio is possible
using Internet Explorer or MxViewer. Alarm notification on your mobile via Internet
(SIP) or ISDN telephony is just as easy as event-controlled voice messages directly
from the camera.
IP Telephony and Video SIP
All telephone features can be used via Internet telephony thanks to the integrated
SIP client. The SIP client allows remote-controlling the camera using the touchtone
keys and also places the alarm calls of the camera. Video SIP establishes audio/vi-
deo connections to the camera using Windows Messenger or similar applications
(e.g. Counterpath x-Lite/eyebeam).
Long-Term Storage Included
MOBOTIX cameras have an integrated long-term storage system for Linux,
Windows and Mac OS X computers. Every camera manages its own storage space
as a ring buffer on the shared folder. Thanks to this decentralized approach, 30 live
cameras can store images on a regular Pentium 4-class computer with 30 fps
each, including audio (also depends on the operating system).
Event Storage on SD Card
An SD card can be inserted into the integrated slot to increase the internal memory
of MOBOTIX D12 cameras (SD cards will be supported after a software update,
which will be available at the end of 2006). A 2GB card can permanently store up
to 65,000 images in CIF format, 40,000 images in VGA format or 13,000 Megapixel
© MOBOTIX AG • Security-Vision-Systems • Made in Germany
9/96
D12 Camera Manual Part 1
IP Telephony!

images, which are not lost in the event of a power failure. If long-term storage on a
file server has been set up, the SD card adds yet another layer of security against
loss of data, as the SD card can easily bridge longer network outages.
30 Live Cameras Using MxViewer
The free MxViewer Windows client for viewing up to 30 MOBOTIX cameras with
audio now features an integrated layout editor for quick assembly of building
plans-using full drag&drop support for positioning the live camera images. Load a
floor plan as background image, drag&drop the cameras; done.
Event and Time-controlled
Just like event-controlled recording upon detecting movements in the image, the
camera can also record when the volume picked up by the microphone exceeds a
set trigger value. Using scheduled recording, time tasks can start or stop video re-
cording, uploading of images to a web site or sending of emails with video/audio
clips. Special programs control vacation times and holidays.
Remote Alert Popup
In case of an alarm, MOBOTIX cameras automatically pop up windows or activate
other functions at a remote security control center. The cameras can use network/
wireless, GSM/GPRS/UMTS (3G) or Internet connections for this purpose.
© MOBOTIX AG • Security-Vision-Systems • Made in Germany
10/96 D12 Camera Manual Part 1
Download MxViewer free
of charge from
www.mobotix.com

Day & Night
MOBOTIX Night models with two image sensors (color and B/W) deliver brilliant co-
lor images during the day and crisp B/W images at night. Cameras switch lenses
automatically, depending on the illumination.
Integrated Power over Ethernet
Power is supplied via the network cables using either MOBOTIX Network Power
Adapters with power supplies or the Network Power Racks (4/8/20 cameras per
rack) or devices that supply PoE according to IEEE 802.3af. Since the camera's
plastic housing insulates well and does not fog up, no additional heating or fans
are necessary. This is why MOBOTIX cameras have low power requirements
(3Watts) and can be operated every day of the year indoors as well as outdoors
and why PoE can be used for supplying power—unlike in other cameras.
Weatherproof
MOBOTIX D12 cameras are certified according to IP65 and are designed for out-
door as well as indoor usage. As the cameras do not have any moving parts, they
are extremely robust and resistant against heat or cold (-30°C to +60°C; -20°F to +
140°F).
Expanded Connections—MX Interface Connector D Sub 15 HD
Depending on your requirements, you can connect additional sensors via the D
Sub 15 HD socket, allowing you to expand the range of sensors already in the ca-
mera. Likewise, you can use the signal outputs of the camera to switch external
devices or to trigger external devices, such as alarm systems. This socket also pro-
vides a Line In pin, a Line Out pin, power supply for USB devices, USB master data
signals and a pin for connecting a backup power supply, which can also be used
by solar panels.
© MOBOTIX AG • Security-Vision-Systems • Made in Germany
11/96
D12 Camera Manual Part 1
No heating required -
PoE is no problem even
in the wintertime!

Easy Installation Using the Cam-IO Installation Box
The Cam-IO Installation box greatly facilitates setting up a security system as this
module carries all pins of the MX Interface Connector and simplifies connecting
external devices and sensors. Besides supplying power to the camera, the installa-
tion box can power lamps with up to 500W/230V (max. 4A) and has heavy-duty
connectors for the remain-
ing pins of the D Sub 15
HD socket (e.g. Line In/Out
or signal inputs of the
camera).
Logos, Animated or Freestyle
The Logo generator of MOBOTIX cameras allows integrating different banners and
graphics (including files loaded from any URL) into the current camera
images—with optional scheduler control. MOBOTIX cameras are the only network
IP cameras supporting animated and transparent graphics.
© MOBOTIX AG • Security-Vision-Systems • Made in Germany
12/96 D12 Camera Manual Part 1
See section 3.7.2 for
more detailed information
Logo generator integrated

© MOBOTIX AG • Security-Vision-Systems • Made in Germany
13/96
D12 Camera Manual Part 1
Notes:

1.2 Product Advantages of the MOBOTIX D12
• MOBOTIX D12 camera models support the Power-over-Ethernet standard
IEEE 802.3af as well as MOBOTIX PoE technology.
•Individual lens configuration possible:
• Internal memory can be expanded using non-volatile SD cards (available
from end 2006 after updating the software).
• Optional Wireless or UMTS/3G functionality thanks to CF cards (only instal-
led by MOBOTIX; available in future versions).
• High image quality with max. 1.3M pixels resolution. The proven MOBOTIX
software scaling delivers crisp images even for the smaller formats (PDA, CIF,
VGA).
• Fully browser-based—no software installation required.
• Simple connection to IP network or DSL using the integrated 10/100 Ether-
net interface, or ISDN.
• Camera configuration and playback of recorded images from any standard
browser.
•Synchronous audio and intercom features when camera calls using in-
tegrated IP telephony or ISDN.
• Audio room surveillance using standard browser (Internet Explorer). The ca-
mera microphone can be irreversibly deactivated.
•Minimal network load thanks to innovative MxPEG compression scheme
(patent pending).
• Integrated event-controlled and scheduled recording.
• Live recording of up to 30 cameras simultaneously with full 30fps each,
including audio on one standard PC.
• No limitation regarding the number of cameras and storage media; the sys-
tem is infinitely scalable.
•Long-term storage of video including audio or individual images in a freely
selectable data storage (ring buffer) on a standard PC or file server.
© MOBOTIX AG • Security-Vision-Systems • Made in Germany
14/96 D12 Camera Manual Part 1

•Integrated data storage (ring buffer) can bridge network failures of up to
4,000 images or 6 minutes video; this can be further expanded when using
an SD card.
• Maintenance-free and weatherproof from -30 to +60°C (-22 to 140°F)
because the system has no moving parts.
• Alarm notification via e-mail, SMS or phone call.
•Backlight correction with predefined and customized exposure areas.
• Professionally equipped with integrated sensors: Video motion detection,
microphone and speaker.
•D Sub 15 HD socket of the camera allows connecting three signal inputs
(e.g. external sensors), three signal outputs (e.g. alarm systems), Line In, Line
Out, USB devices, power backup.
• Can be further expanded using MOBOTIX Cam-IO, which allows direct
connection to door openers, lamps, sirens, an external microphone (with
pre-amplifier), a loudspeaker, external sensors (e.g. light barrier). Hooks up
directly to the mains and supplies power to the camera via the network cab-
le to the camera (PoE).
• Free MxViewer for Windows to display and manage MOBOTIX cameras;
includes alarm management, background images, etc.
•Layout editor in free-of-charge MOBOTIX MxViewer for quickly creating
building layout plans with cameras.
• Platform-independent SDK allows developing applications; includes sample
applications (MxPlayer, MxPEG-to-MJPEG converter) and sample source
code.
© MOBOTIX AG • Security-Vision-Systems • Made in Germany
15/96
D12 Camera Manual Part 1

1.3 The MOBOTIX D12D-Fixdome Outdoor
1.3.1 The Concept of the MOBOTIX D12D-Outdoor
As an innovative camera system, the MOBOTIX D12D-FixDome has captured an
impressive piece of market share in the network camera market. Thanks to its two
image sensors, this camera system delivers video surveillance of one scene in day/
night mode (Night models) or it can monitor two different areas using different day
or night lenses.
The D12D-Outdoor and the wall mount now allow mounting this unique camera
system outside for enhanced outdoor surveillance. Besides the many advantages
inherent to the MOBOTIX concept, the outdoor wall mount offers these additional
benefits:
Perfect weather protection for an innovative camera system
When mounted to the outdoor wall mount, the MOBOTIX D12D reaches protection
class IP65 (absolutely dustproof, resistant against water jets). Operating
temperatures may vary between -30°C and +60°C (-22°F to 140°F), making it the
ideal camera for the most demanding weather situations. From stations in
Antarctica to production monitoring at a steel smelting plant - the MOBOTIX D12D
offers unmatched flexibility and versatility.
Simply mounted outdoors
Since the wall mount and the wall sealing have been designed to fit over outdoor
wall outlets, providing the network connection can be separated from actually
mounting the camera. After the position of the wall mount has been determined,
the installer of the MOBOTIX camera system can connect the camera system to an
installed network outlet, which has been properly tested and configured by the
network installer.
© MOBOTIX AG • Security-Vision-Systems • Made in Germany
16/96 D12 Camera Manual Part 1
The two image sensors
can look into the same or
into different directions
Elegantly covers wall
outlets

Robust design makes for a long life
The outdoor wall mount is made from PBT-30GF (Polybutyleneterephtalate with
30% fiberglass). This material is used heavily in the automotive industry and is
sturdy, resistant against high temperatures, environmental influences, chemicals,
etc. Combined with the purely software-based design of the MOBOTIX D12D and
the free software updates, the whole surveillance system has a long product life
and thus provides a high return on investment (ROI).
Extreme environmental conditions (sand storms, high levels of salt in the air, heavy
rain, etc.) may lead to higher abrasion than usual; the wall mount should thus be
checked on a regular basis. When planning an application under extreme environ-
mental conditions, you should consider the MOBOTIX M10 camera models as they
are more robust due to their factory-preset and locked lenses, absence of moving
parts and the lower weight. This applies especially to locations that are subjected
to vibrations (e.g. when mounted to a ski-lift) and other environmental conditions,
(e.g. sand storms, near coast lines, etc.).
Easy to clean
Cleaning the D12D-Outdoor is simple enough - wipe the dome using a lint-free
cotton cloth and a mild household detergent without abrasive particles.
Open for enhancements
The outdoor wall mount's design provides for easy integration of WiFi (WLAN) or
GSM/GPRS modules within the casing without disturbing the overall appearance of
the surveillance unit. Likewise, relays for alarm sirens or lights can be installed
easily and elegantly within the outdoor wall mount.
More mounting options using the MOBOTIX corner and mast mount
MOBOTIX offers an additional mount that allows securely attaching the outdoor
wall mount to 90-degree corners of buildings and to masts. Thanks to the
unmatched flexibility when positioning the MOBOTIX D12D-Outdoor's image sen-
sors, large outdoor areas can be monitored using only a few cameras.
© MOBOTIX AG • Security-Vision-Systems • Made in Germany
17/96
D12 Camera Manual Part 1
MOBOTIX D12 models
are better suited for
extreme conditions:
- No moving parts
- Locked-in-place lenses
- Lower weight

1.3.2 Product Advantages of the MOBOTIX D12D-Outdoor
Besides the many product advantages inherent to the MOBOTIX D12, the MOBOTIX
D12D-Outdoor offers these additional benefits:
•Attractive design blends in well with building facades.
•Perfect weather protection for the MOBOTIX D12D: IP65, -30 to +60°C (-22
to 140°F)
•Easily mounted and perfect cover for outdoor wall outlets.
•Weatherproof and easy to clean thanks to casing built from PBT-30GF.
• Ample room for extension modules (WiFi, GSM/GPRS) stored within the cas-
ing of the outdoor wall mount.
•Highreturn on investment (ROI) thanks to the software-based MOBOTIX
design and free updates.
• Mounting to building corners and masts easily accomplished using the
Corner and Pole Mount.
•Uniqueflexibility when setting the direction of the image sensors provides
for thorough video surveillance while requiring relatively few cameras.
© MOBOTIX AG • Security-Vision-Systems • Made in Germany
18/96 D12 Camera Manual Part 1
Outdoor Corner and Pole
Mount
Robust network video
system for indoor and
outdoor applications
Corner and Pole Mount (rear view)Outdoor Wall Mount with Corner and Pole Mount
+
=
D12D
Outdoor-wall mount
D12D-Outdoor
Other manuals for D12
2
Table of contents
Other Mobotix IP Camera manuals

Mobotix
Mobotix D14D User manual

Mobotix
Mobotix M12 User manual

Mobotix
Mobotix D22M with Vandalism Set User manual

Mobotix
Mobotix M22 Mounting instructions

Mobotix
Mobotix D22 Original operating instructions

Mobotix
Mobotix M24M Allround CS-Vario User manual

Mobotix
Mobotix V15D Instructions for use

Mobotix
Mobotix V16 Vandalism Instructions for use

Mobotix
Mobotix Mx-c26A User manual

Mobotix
Mobotix M22 Original operating instructions