Mobotix M22 Mounting instructions

MOBOTIX AG • Security-Vision-Systems • Made in Germany
Current PDF File:
www.mobotix.com > Services > Manuals
3 mm Beschnitt umlaufend
Complete Integration for Web and Security
Concealed cabling
Wall bracket
with cable cover
for RJ45 wall outlet
30 Frames/s
VGA (640 x 480)
10 F/s Mega
-22°F ... +140°F
Weatherproof
-30°C to +60°C, IP65
no heating necessary
IEEE 802.3af
PoE
Power over Ethernet
even in the Winter
Video SIP Client
IP Telephony
alarm notify,
cam remote control
Realtime audio
Recording
event-ringbuffer
30 cams each 25 fps
Backlight
safe using CMOS
without mechanical iris
Video motion
multiple windows
precision pixel-based
Microphone & speaker
Audio
bi-directional via IP
variable framerates
Live viewing
30 cams at 25 fps
all on one screen
Megapixel
1280 x 960
software zoom
Robust
no moving parts
fiber glass housing
Software
Camera Manual
MOBOTIX ... the new face of IP video
X
MOBOTIXAG
Security-Vision-Systems
Part 2
VGA
30 fps
480 lines
CIFCIF
30 fps
288 lines
Mega
10 fps
960 lines
Zoom

MOBOTIX ... the new face of IP video
© MOBOTIX AG • Security-Vision-Systems • Made in Germany
Software Camera Manual Part 2
Note: MOBOTIX offers seminars that include a workshop and practical
excercises:
Basic Seminar 2 days, Advanced Seminar 2 days.
For more information, see www.mobotix.com
Note
Chapters 1 to 3 can be found in the
Camera Manual Part 1
for your
camera.
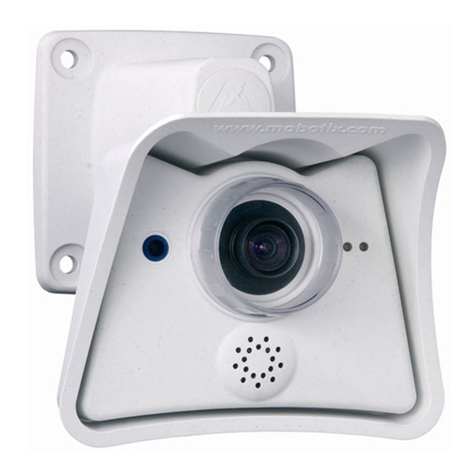
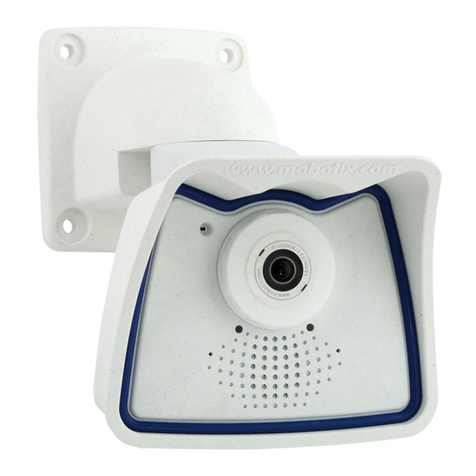
M22
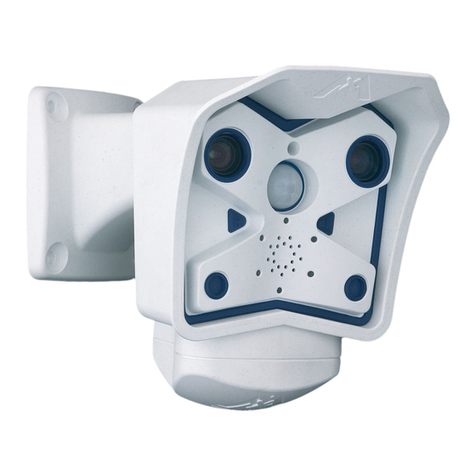
M12
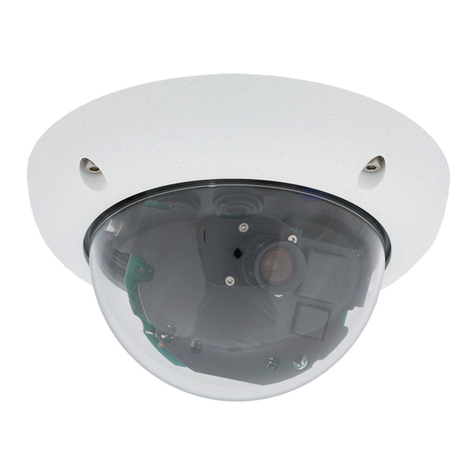
D12
D12 Outdoor
V12

INTRODUCTION 6
4 CAMERA USER INTERFACE 8
4.1 The First Image in the Browser 8
4.1.1 Additional Information 9
4.1.2 Camera Screens in the Browser 10
4.2 The First Image in MxViewer 11
4.3 The Live Screen in the Browser 15
4.3.1 Controls 15
4.3.2 Image Settings 22
4.3.3 Browser Settings, Operating Mode 24
4.3.4 Saving the Settings 25
4.3.5 JPEG, MxPEG and Audio 26
4.3.6 Background Information on JPEG, MxPEG and Audio 28
4.4 The Playback Screen in the Browser 30
4.4.1 Controls 30
4.4.2 Events and Storage Options 32
4.4.3 Recording Modes 34
4.4.4 Image Search Using Date & Time 36
4.4.5 Archiving 36
4.5 The MultiView Screen in the Browser 37
4.5.1 Controls 37
4.5.2 Defining Cameras 38
4.5.3 Configuring Image Areas 39
4.5.4 Creating Customized Screens 41
4.6 PDA Screen 42
4.6.1 Accessing the PDA Screen 42
4.6.2 Controls and Event List 42
4.7 Guest Screen 44
4.8 Browser Settings 46
4.9 Configuring the Softbuttons 48
4.9.1 Configuring a Softbutton 48
4.9.2 Managing Softbutton Functions 49
4.10 Fast Video Streaming 51
4.10.1 Overview 51
4.10.2MOBOTIX Camera 51
4.10.3Browser 52
4.10.4MxViewer 53
4.10.5Installing and Starting MxViewer 54
4.10.6Windows Processes 55
4.11 Operating Multiple Cameras 56
4.11.1 Overview 56
4.11.2 Simultaneously Displaying Several Cameras with High Image Rates 57
© MOBOTIX AG • Security-Vision-Systems • Made in Germany
1/288
Software Camera Manual Part 2

5 GENERAL CAMERA CONFIGURATION 60
5.1 Overview 60
5.1.1 The Admin Menu 61
5.1.2 The Setup Menu 62
5.2 Quick Installation 64
5.2.1 Overview 64
5.2.2 Quick Installation Pages in Detail 66
5.3 Connection Test 80
5.4 Basic Settings 82
5.4.1 Users, User Groups, Passwords, Supervisor Mode 82
5.4.2 Date and Time / Time Zones and Time Server 92
5.4.3 LED Signals and LED Configuration 96
5.4.4 Language and Entry Page 100
5.4.5 Microphone and Speaker 102
5.5 Image Controls 104
5.5.1 Overview 104
5.5.2 General Image Settings 104
5.5.3 Text Settings 108
5.5.4 Placeholders and Variables in the Comment Field 110
5.5.5 Examples for Placeholders and Variables in the Comment Field 111
5.5.6 Compression Format and Image Quality 112
5.5.7 Color Settings (Color Profile and Saturation) 114
5.6 Logos 116
5.6.1 Overview 116
5.6.2 Managing Image Files 116
5.6.3 Logo Profiles 118
5.7 Exposure Settings 122
5.7.1 Overview 122
5.7.2 Automatic Exposure 122
5.7.3 Backlight Correction 123
5.7.4 Automatic Exposure Setting Parameters 124
5.7.5 Exposure Setting Options 124
5.7.6 Exposure Windows 125
5.7.7 Setting the Exposure Windows 126
5.7.8 Custom Exposure Windows (Extra) 128
5.7.9 Exclusion Windows 129
5.8 Day & Night Modes 130
5.8.1 Overview 130
5.8.2 Reduction of Dark Noise 131
5.8.3 Configuration Hints 131
5.9 Managing Settings 132
5.9.1 Overview 132
5.9.2 The Configuration File 132
5.9.3 Loading Configuration Files 134
5.9.4 Copying Configuration Files to Other Cameras 135
© MOBOTIX AG • Security-Vision-Systems • Made in Germany
2/288 Software Camera Manual Part 2

6 SOFTWARE UPDATES 136
6.1 Overview 136
6.2 Preparatory Steps 136
6.3 Updating the Camera Software 137
6.4 Update Checklist 139
7 EVENTS, ACTIONS AND MESSAGES 140
7.1 Overview 140
7.2 Functional Overview 142
7.3 General Procedure 143
7.4 Screen Display of Event Settings in Live Image 144
7.5 Arming 146
7.6 Events 151
7.6.1 Event Selection 151
7.6.2 Video Motion Detection 159
7.6.3 Event Filter (EC Event) 166
7.6.4 Event Logic (EL Event) 167
7.7 Actions and Messaging, Action and Messaging Profiles 169
7.7.1 Signal Out (Action SO) 172
7.7.2 File Transfer (Action FT) 173
7.7.3 Visual Alarm (Action VA) 174
7.7.4 Sound on Event (Message SD) 174
7.7.5 E-Mail Action (Message EM) 175
7.7.6 Phone Call-Out (Message CL) 175
7.7.7 IP Notify (Message IP) 175
7.8 Working with Profiles 176
7.8.1 Overview 176
7.8.2 FTP Profiles 177
7.8.3 E-Mail Profiles 180
7.8.4 Phone Profiles 183
7.8.5 IP Notify Profiles 186
7.8.6 Time Tables 189
7.8.7 Image Profiles 192
7.8.8 Logo Profiles 195
7.9 Time Tasks 198
7.9.1 Overview 198
7.9.2 Time Tasks 198
7.9.3 Scheduled Tasks Using the Time Task Event (TT) 202
8 RECORDING 204
8.1 Overview 204
© MOBOTIX AG • Security-Vision-Systems • Made in Germany
3/288
Software Camera Manual Part 2

8.2 Recording Modes 208
8.2.1 Configuring the Recording Modes 208
8.2.2 General Settings of the Recording Modes 209
8.2.3 Settings of Snap Shot Recording 210
8.2.4 Settings of Event Recording 212
8.2.5 Settings of Continuous Recording 214
8.2.6 Settings of History Recording 216
8.3 Recording Types 218
8.3.1 Recording in the MOBOTIX Camera 218
8.3.2 Recording on External File Servers 219
8.3.3 Recording on a Windows Computer 220
8.3.4 Recording on a Linux/UNIX Computer 226
8.3.5 Recording on a Mac OS X Computer 230
8.3.6 Notes on the Storage Folder Structure 234
9 TELEPHONY FEATURES 236
9.1 Overview 236
9.2 VoIP Settings for IP Telephony 238
9.3 Camera Phone (Listen, Speak and Intercom Modes) 241
9.4 Phone Profiles: Outbound Phone Calls 242
9.5 Phone Call-In: Inbound Phone Calls 245
9.6 Remotely Controlling the Camera Using a Phone 248
9.7 Sample Configurations for IP Telephony via Internet 252
9.7.1 Overview 252
9.7.2 Configuring a MOBOTIX Camera 253
9.7.3 Setting up an IP Phone 257
9.7.4 Setting up a Softphone 259
9.8 Sample Configurations for IP Telephony via LAN 260
9.8.1 Overview 260
9.8.2 Configuring a MOBOTIX Camera 261
9.8.3 Setting up an IP Phone 265
9.8.4 Setting up a Softphone 267
9.9 Video Telephony 268
9.9.1 Overview 268
9.9.2 Remotely Controlling the Camera Using a Softphone 269
9.9.3 Video Telephony Example: Intercom System 270
9.9.4 Configuring a MOBOTIX Camera for Video Telephony 272
9.9.5 Configuring a Softphone for Video Telephony 273
INDEX 274
© MOBOTIX AG • Security-Vision-Systems • Made in Germany
4/288 Software Camera Manual Part 2

10 MOBOTIX CAMERAS ON THE WEB
10.1 Overview
10.2 Displaying Cameras on the Web
10.3 Configuring Routers and Firewalls
10.4 Configuring DynDNS
10.5 Updating Web Pages
11 SOFTWARE INTERFACES
11.1 Overview
11.2 Accessing Live Images
11.3 Accessing the Second Image Channel
11.4 Video Streaming
11.5 The HTTP API
12 TROUBLESHOOTING
12.1 Overview
12.2 Troubleshooting Checklist
12.3 Diagnostic Tools of the Camera
12.4 Monitoring Tools of the Camera
12.5 Other Problems
12.6 Additional Information
12.7 Sending Back the Camera
12.8 Warranty
© MOBOTIX AG • Security-Vision-Systems • Made in Germany
5/288
Software Camera Manual Part 2
More information:
www.mobotix.com
The following chapters of the manual are still
under development! Download the PDF file
from www.mobotix.com
Note
Download the newest version of this document as a PDF file from
www.mobotix.com.
Technical information subject to change without notice!
No part of this manual may be reproduced by any means
without our written approval!
Copyright © MOBOTIX AG, Kaiserslautern, Germany

INTRODUCTION
One Camera, Two Manuals
The accompanying documentation of a MOBOTIX camera consists of two manu-
als: The Camera Manual Part 1, which is different for each camera model and the
Camera Software Manual Part 2, which is the same for all cameras.
Apart from this Introduction, the Camera Manual Part 1 contains instructions for
Installing and Operating the corresponding MOBOTIX camera (M22, D12, M12,
etc.) as well as information on the hardware features and other information, e.g.
the drilling templates for each model.
The model-specific Camera Manual Part 1 is structured as follows:
1 Introduction
2 Mounting the Camera
3 Operating the camera
This Camera Software Manual Part 2 describes the software features of all mod-
els and model variants; it should guide you through the numerous features that are
inherent to MOBOTIX cameras.
Model Feature List
The Camera Software Manual Part 2 describes all software features of all
MOBOTIX camera models and model variants.
The adjacent icon indicates all sections of the manuals, where differences in the
software functionality of the different models and model variants are present.
In this case, you should consult the
Software Features of all Models
table on the
opposite page to see if your model has the corresponding feature.
As the features are constantly updated, you should consult the Products > Feature
Overview file on www.mobotix.com for the most recent information on the soft-
ware features of your model.
Typographic Conventions
User Input
If the user is supposed to enter information, the corresponding text is shown using
the Courier or Courier bold fonts.
Controls of the User Interface
Controls and labels of the user interface are shown in bold print.
Cross References
Cross references to other chapters or sections are shown in
italics
.
© MOBOTIX AG • Security-Vision-Systems • Made in Germany
6/288 Software Camera Manual Part 2
To download the newest
version of these manuals
as PDF files, open
www.mobotix.com,
Services> Manuals.
This icon indicates
sections, where
different models
have different software
features
X
X
-
-
-
-
X
X
Kamerafunktionen
Kameramodell

© MOBOTIX AG • Security-Vision-Systems • Made in Germany
7/288
Software Camera Manual Part 2
Basic Models
W
eb Models
IT Models
Secure Models
Software Features (All Models)
Digital zoom (2x, 4x) with panning X X
Motion JPEG/MxPEG video streaming
Custom exposure windows
Video Motion Detector
Time and event control (FTP, email, logos)
X/X
X
X/X
X
X
X
X
X
X/X
X
X/X
X
X
X
X
X
Time tables definable
Web functionality (FTP, email)
Quad/MultiView in browser
Recording/Playback in browser
X
X
X
X
X
X
X
X
Logo generator, animated
Single image recording (pre-/post-alarm images)
Terabyte ring buffer (Win/Lin/Mac) via network
Continuous video/audio recording, 0.2 to 30 fps
3
X
3
X
X
X
X
X
X
X
X
X
10
X
50
X
X
X
X
Video/audio recording (event-triggered)
Event-controlled frame rate with continuous sound
Flexible event logic
Master/Slave arming by one camera
Scheduled privacy zones, several areas
Bidirectional audio (IP) from/to browser
Customized voice messages
VoIP telephony (Audio/Video, SIP)
X
X
X
X
X
X
X
X
X
X
X
X
X
Alarm calls to softphones (SIP) e.g. Xten
Remote alarm notification (via TCP/IP, IP Notify)
RS232 Data Logger/Terminal
Programming interface/HTTP API
Model Limitations
Image size
Image sensor (color / B/W)
VGA
Color
Mega
Color
X
X
X
X
X
X
X
X
VGA
Color & BW
Mega
Color & BW
Standard lens for software version
Audio support (Microphone/Speaker)
L43
-/S
L43
-/S
L22
M/S
L22
M/S
M12
D12
M22M

4 CAMERA USER INTERFACE
Once the Ethernet connection has been established (see section 3.4.1 of the
Cam-
era Manual
,
Preparing the Ethernet Connection
), you have the following possibili-
ties to see the first image of the camera:
•Direct access using a browser (section 4.1,
The First Image in the Browser
)
•Display the camera using MxViewer (free Windows client for MOBOTIX
cameras; section 4.2,
The First Image in MxViewer
)
Open the browser-based user interface of the camera to complete the remaining
configuration tasks (see section 4.3,
The Live Screen in the Browser
).
4.1 The First Image in the Browser
Now that you have successfully started the
camera for the first time, you can access the
camera using your preferred browser to see
the live video stream and the user interface.
Internet Explorer, Mozilla, Firefox, Safari,
Camino or any other graphical browser with activated JavaScript is suitable. The
operating system is of no importance, even PDAs can be used without any prob-
lems.
© MOBOTIX AG • Security-Vision-Systems • Made in Germany
8/288 Software Camera Manual Part 2
This chapter contains
valuable information!
Read carefully!
Camera access:
http://10.1.0.99 (example
IP)
The factory IP address is
printed on the sticker on
the camera
Administration menu:
User name: admin
Password: meinsm
Softbuttons are freely
configurable Softbuttons
Camera screens Quick-Controls
Camera status
and help
Video Motion Window
Logo display

After entering the camera's IP address in the browser address bar (e.g. http://
10.1.0.99), you will see the Live screen of the MOBOTIX camera with its user
interface controls, such as softbuttons, buttons for the different camera screens,
pull-down menus (
Quick Controls
), icons for accessing the online help and the
camera status, as well as status information elements above and below the live
image.
4.1.1 Additional Information
For more information on this topic, see the News and Functional Overview pages
in the online help of the camera's browser interface. Click on the yellow icon in
the top right corner to open the camera's online help.
In order to get more information on the camera and its current configuration, open
the Camera Status dialog by clicking on the yellow icon in the top right corner
of the camera's browser interface.
Another source of information on all dialogs and parameters of the MOBOTIX cam-
era is the Reference Manual that you can download from www.mobotix.com.
© MOBOTIX AG • Security-Vision-Systems • Made in Germany
9/288
Software Camera Manual Part 2
Changing the factory IP
address: Admin Menu>
Ethernet Interface
Free download:
www.mobotix.com
Camera Help
Camera Status
Note
Factory Defaults: Every MOBOTIX camera has its individual factory IP
address (e.g. 10.1.0.99). If you have started the camera using
DHCP or you have set the IP address manually, use the new IP
address (e.g. 192.168.0.99) instead of the factory IP address. Pres-
sing the "R" key of the camera will prompt the camera to announce
its current IP address over the speaker. For additional information on
this topic, see section 3.5,
Starting the Camera With an Automatic IP
Address (DHCP)
, in the corresponding
Camera Manual
.
Troubleshooting: If your web browser does not show the camera's
Live screen after you have entered the IP address, you should try to lo-
cate and resolve the error as described in chapter 12,
Troubleshooting
.
MxViewer: In order to see the live image of the camera, you can also
use other applications or the integrated programming interface of the
MOBOTIX camera. MxViewer for Windows is such an application and
is provided free of charge by MOBOTIX. Besides its ability to display
fast live video of up to 30 cameras with 30 fps each on one PC,
MxViewer also allows recording and playing back video clips with re-
altime audio via the network and can control pan/tilt heads using a
joystick or the mouse. Download the newest version of MxViewer from
the MOBOTIX website. The website contains more information on MO-
BOTIX systems as well as the MxViewer help.

4.1.2 Camera Screens in the Browser
By factory default, the MOBOTIX camera first shows the Live screen. You can set a
different entry page in order to prevent others from changing settings; you can
assign user names and passwords to prevent unauthorized access or you can
restrict access to the current live image only, by setting the Guest screen as entry
page.
The following screens are available:
•Guest screen: Only shows the current live image with reduced frame rate.
•Live screen: Shows the current live image and allows changing the
image and event settings of the camera.
•Playback screen: Shows all recorded images or video clips with
extended functions for searching and downloading images, regardless
of where the images are stored (in the internal or the external ring buffer on
a file server or PC).
•MultiView screen: Shows multiple cameras or the last events in a freely
definable layout.
•PDA screen and PDA Event List: Both screens are optimized for PDAs with a
focus on fast data transmission with low bandwidth requirements (GSM,
GPRS) on devices with small displays (PDAs, mobile phones, sub notebooks).
The PDA Event List in particular gives a quick overview of the last events since
the live image of the camera is not transferred.
For more information on camera screens, see the online help of the camera's
browser interface. Click on the yellow icon in the top right corner of the Live
screen to open the corresponding page of the online help.
© MOBOTIX AG • Security-Vision-Systems • Made in Germany
Software Camera Manual Part 2
Use the Administration
menu to set the camera
screen that should appear
initially when accessing
the camera IP address
(Admin Menu> Language
and Entry Page)
http://10.1.0.99/pda
opens the PDA screen
Live/Playback/MultiView:
Click on to open the
online help pages for the
camera screens
Note
Open Admin Menu > Language and Entry Page to set a different
start page when accessing the camera.
Open Admin Menu > Users and Passwords and Admin Menu >
Group Access Control Lists to set user rights and to prevent unautho-
rized access to certain screens (see section 5.4.1,
Users, User Groups,
Passwords, Supervisor Mode
).
10/288

4.2 The First Image in MxViewer
The MOBOTIX MxViewer is a free Windows application that allows displaying
multiple MOBOTIX cameras on one computer and provides alarm management
functions. It can easily handle displaying 30 cameras with CIF resolution
(320x240 pixels) at 30 fps each in MxPEG format on one standard PC with Intel
Pentium 4 and 3 GHz.
MxViewer can do quite a bit more than simply display the video and audio data
from MOBOTIX cameras. The unique features of the MOBOTIX MxViewer with one
or more MOBOTIX cameras create a full-featured security system with intelligent
alarm handling, extensive possibilities of arranging the cameras on layouts (Mul-
tiView screens), ability to display cameras that are sending alarm notifications and
integrated camera management functions.
© MOBOTIX AG • Security-Vision-Systems • Made in Germany
11/288
Software Camera Manual Part 2
Download MxViewer
free of charge from
www.mobotix.com
MxViewer Windows client
with background image
and freely positionable
cameras

Installing and Starting MxViewer
Follow these steps to install MxViewer:
• Download the newest version of MxViewer:
www.mobotix.com/services/software_downloads/
• Download and install the MSI file (Windows Installer file).
You can also download the EXE file for manual installation:
• Download the EXE file to a suitable folder.
• Create a shortcut by right-clicking on MxViewer.exe in this folder.
• Copy the shortcut to the desktop.
Double-click the shortcut or the program file itself to start MxViewer.
Defining Video Sources
If you start MxViewer for the first time on a computer without having defined any
video sources (MOBOTIX cameras) before, the MxViewer Video Sources dialog will
appear.
Depending on the task at hand, select the appropriate option in the Select video
sources group:
•Scan network for
MOBOTIX cameras
(default): Click on OK to
open the Scan Network
for MOBOTIX Cameras
dialog. The camera will
automatically scan the
subnet for MOBOTIX cam-
eras and will display the
list of camera IP
addresses.
•Define video sources manually: Click on OK to open the Define Video
Sources Manually dialog and manually add the cameras.
In the Layout options group, select Show video sources in default layout. This
will prompt MxViewer to automatically generate a standard layout that comprises
all video sources (i.e. cameras) once they have been defined either automatically
or manually.
© MOBOTIX AG • Security-Vision-Systems • Made in Germany
12/288 Software Camera Manual Part 2
Free download of
MxViewer!
You should always let the
camera search automati-
cally for other MOBOTIX
cameras

Automatically Searching MOBOTIX Cameras in the Same Subnet
MxViewer displays the Scan network for MOBOTIX cameras dialog:
• Click on the Subnet dropdown list and select the
desired subnet.
• Click on Scan to start the camera search.
If MxViewer finds only one subnet, the scanning proc-
ess will start automatically.
In the first pass, MxViewer searches the selected subnet for MOBOTIX cameras
and in the second pass, MxViewer verifies if it can access the cameras.
MxViewer then highlights all cameras in the list, which have a status of
OK
or
Access denied
:
Using the Highlighted Cameras
Click on OK to use the
highlighted
cameras and to include them in the default lay-
out generated by MxViewer:
© MOBOTIX AG • Security-Vision-Systems • Made in Germany
13/288
Software Camera Manual Part 2

Automatically Searching MOBOTIX Cameras in all Subnets
Future versions of MxViewer will be able to search MOBOTIX cameras not only in
the current subnet of the computer, but also in all subnets, which can be reached
within the same physical network (e.g. not closed off by routers or other mecha-
nisms).
This means that MxViewer can find cameras with factory IP address (e.g.
10.1.0.99 as in our sample), although the computer is in a different subnet (e.g.
172.16.0.0).
MxViewer can thus find MOBOTIX cameras automatically and without chang-
ing the computer configuration if the camera has been plugged into the same
switch as the computer, for example.
Manually Defining MOBOTIX Cameras
If you have selected the Define video sources manually option in the MxViewer
Video Sources dialog, you can manually add the IP addresses or DNS names of
the MOBOTIX cameras.
•Add: Add the IP address or DNS name of the MOBOTIX camera you entered
to the list.
If possible, MxViewer shows the image of the last camera you added in the pre-
view window. Click on OK to use
all
cameras in the list and to include them in the
default layout generated by MxViewer:
Displaying MxPEG Video Clips
MxPEG video clips represent the files that contain the video and audio data stored
by either MOBOTIX cameras or MxViewer. These clips can be displayed in
MxViewer just like the camera images. In order to display one or more MxPEG
video clips, activate the Layout Editor, right-click the desired camera windows of
the layout one by one and select the Load Clip command.
To download sample MxPEG video clips, open the MOBOTIX website
www.mobotix.com.
© MOBOTIX AG • Security-Vision-Systems • Made in Germany
14/288 Software Camera Manual Part 2
Enhanced search features
Manually adding cameras
and loading recorded
video streams
MxViewer can show mul-
tiple MxPEG clips at once!

4.3 The Live Screen in the Browser
4.3.1 Controls
The Live screen shows the camera's live image using the selected image
resolution (size). This screen allows setting the most prominent image
parameters, executing important functions and getting specific camera informa-
tion. Icons, displayed text, the status bar, the Quick Controls above the Live image
and other display elements within the Live image help getting the required infor-
mation.
Icons
The three screen icons in the upper left corner allow switching between the Live,
Playback, and MultiView screens. The icon will open the camera's online help,
the icon displays information about the camera's operating parameters.
Text Display
The text displayed in the upper left corner of the live image can be customized and
positioned freely anywhere in the image, or it can be hidden (Setup Menu > Text
& Display Settings). In order to improve readability, you can select different back-
ground colors (with adjustable transparency) for the text in the live image. The text
itself can also be displayed in different colors. Apart from simple texts, the camera
can display status information using variables, e.g. camera IP address, image size
in bytes, time of the last event, frame rate, text transferred from external devices
using the serial interface, etc. For additional information on this topic, read section
5.5.4,
Placeholders and Variables in the Comment Field
, as well as
Placeholders for
Dynamic Image Text
in the camera help and the reference manual.
© MOBOTIX AG • Security-Vision-Systems • Made in Germany
15/288
Software Camera Manual Part 2
Quick Control
Manage Settings>
Store Complete Configu-
ration to store the set-
tings permanently
The help pages contain
links to more information
and hints on certain topics
Online help
Camera status
X
X
-
-
-
-
X
X
Kamerafunktionen
Kameramodell

Help pages
Info button
Help pages
Picture in picture
(only dual lens
models)
Text display
Status bar
(can be disabled)
Screen selection:
- Live
- Player
- Multiview
Admin Menu
Setup Menu
(Image, Events)
User Click
Softbuttons
Update
MOBOTIX
Homepage
Quick Controls (can be disabled):
Frame rate Image settings Parameters
Live image

Status Bar
The event status bar at the bottom of the live image displays the event control and
the recording status, the number of stored events (alarms) as well as other mes-
sages (e.g. when actions or messages cannot be executed). Like the regular text,
the event status bar can also be hidden (Setup Menu > Text and Display Set-
tings). For additional information on this topic (camera symbols and the corre-
sponding events, actions, messages and recording modes), see the camera help
and the reference manual.
Softbuttons
The softbuttons on the left side of the Live, Player and MultiView screens allow
executing various camera functions and configuration tasks with one click. These
buttons can be adapted to execute customized functions and to show different
button background colors. For your convenience, the factory configuration of the
user interface displays several preset softbuttons. For additional infor-
mation on this topic, see chapter 4.9,
Configuring the Softbuttons
.
•Admin Menu: Clicking this button will open the administration
menu, which controls the settings for Ethernet, ISDN, FTP, e-
mail, external ring buffer (file server), the serial interface
(RS232), telephony and other hardware parameters. This
screen is only accessible for users, which belong to the
admins user group.
Note: You can remove the Admin Menu button ([Shift]-click the
softbutton); after that, accessing the Admin menu is only possi-
ble using the direct link: http://10.1.0.99/admin.
•Setup Menu: This menu allows changing the recording
parameters, the image settings and the event control settings,
e.g. activating events or assigning actions and messages to
events takes place in the dialogs of this menu.
Note: You can remove the Setup Menu button ([Shift]-click the
softbutton); after that, accessing the Admin menu is only possi-
ble using the direct link: http://10.1.0.99/control.
© MOBOTIX AG • Security-Vision-Systems • Made in Germany
16/288 Software Camera Manual Part 2
Event Symbols:
UC: User Click
VM: Video motion
detection
Action Symbols:
VA: Visual Alarm
REC: Recording
FS: File Server
FT: FTP file transfer
Softbuttons can be custo-
mized to execute specific
functions.
Administration menu:
User name: admin
Password: meinsm
Level meter with current Passive Infrared (PI) sensor value
Number of last event
Enabled events (red = currently active) Enabled actions (yellow)
Remaining event deadtime
Trigger value for creating an event

Expanded Softbuttons
•Arm & Record: This button opens
the Arm and Record dialog. Click-
ing on the Yes button will set the
most important parameters that
are required to arm the camera
and to record the alarm images.
The dialog itself contains a list of
the settings that will be changed.
•Audio on: This button opens the
Enable Audio dialog. Clicking on
the Yes button will set the parame-
ters that are required to transmit
the sound from the camera micro-
phone to the browser. You will
then hear the audio channel of the
camera microphone on your PC
speaker.
Note: This feature is only available
when using an ActiveX-capable
browser (Internet Explorer under
Windows).
•MxPEG on and MxPEG off: These buttons activate the MxPEG codec (
MxPEG
on
) or the JPEG codec (
MxPEG off
) for generating images. For additional infor-
mation on this topic, see sections 4.3.5 and 4.3.6 of this manual.
•Fast Mode (30 fps): This button
opens the Fast Mode (30fps) dia-
log. Clicking on the Yes button will
set the parameters that are
required to obtain the fastest pos-
sible frame rate in the browser
window, while maintaining an
acceptable image quality. The dia-
log itself contains a list of the set-
tings that will be changed.
This dialog may contain other
steps as shown here, e.g. if the
ActiveX plug-in has already been
installed.
© MOBOTIX AG • Security-Vision-Systems • Made in Germany
17/288
Software Camera Manual Part 2
Expanded softbuttons:
Activate audio:
Sound in the browser only
when using Internet Ex-
plorer on Windows and
with installed MxPEG
ActiveX plug-in
Fast video streaming:
Preferably using Internet
Explorer on Windows and
with installed MxPEG
ActiveX plug-in
X
X
-
-
-
-
X
X
Kamerafunktionen
Kameramodell
•Quality Mode: This button opens the
Quality Mode dialog. Clicking on the
Yes button will set the parameters that
are required to obtain the best possible
image quality while showing the video
in the browser window using a medium
to fast frame rate. You should select this setting if image quality is more
important than a high frame rate.
Action Softbuttons
•UC Event: This predefined softbutton uses the User Click (UC) event to trig-
ger the storage of an image or video clip. The stored images can then be
played back in the Playback screen. Make sure that the User Click (UC)
event is activated in Setup Menu > Event Settings; the camera displays the
UC event symbol in the bottom left corner of the live image.
This softbutton is perfectly suited to test the camera recording or for manually
storing an event image or video clip. If recording has been configured prop-
erly, the camera will increment the event counter in the bottom left corner of
the live image.
•LEDs Blink: This button will let the camera LEDs blink several times at one-
second intervals.
This feature can help identifying the camera of a large installation currently
shown in the browser, e.g. if it is to be repositioned.
Note that LEDs need to be activated (Admin Menu > LED Setup).
•Play Sound: This button will play back the default voice message on the
speaker of the MOBOTIX camera ("
This is your MOBOTIX camera calling
")
Using this button can also help identifying the camera of a large installation
currently shown in the browser, e.g. if it is to be repositioned.
Make sure that the speaker is activated in the Admin Menu > Loudspeaker
and Microphone dialog.
Event Softbuttons
•Play Last Event: This button activates the Playback screen and automatically
plays back the last event video clip the camera recorded.
© MOBOTIX AG • Security-Vision-Systems • Made in Germany
18/288 Software Camera Manual Part 2
Quality Mode:
Optimizes the display in
the browser to obtain the
best image quality
Action Softbuttons:
Event Softbuttons:
X
X
-
-
-
-
X
X
Kamerafunktionen
Kameramodell
X
X
-
-
-
-
X
X
Kamerafunktionen
Kameramodell
Other manuals for M22
1
This manual suits for next models
3
Table of contents
Other Mobotix IP Camera manuals

Mobotix
Mobotix D22 Original operating instructions

Mobotix
Mobotix D14D User manual

Mobotix
Mobotix M12 Original operating instructions

Mobotix
Mobotix MX-i25 Instructions for use

Mobotix
Mobotix Mx-c26A User manual

Mobotix
Mobotix NAS 251 G Instructions for use

Mobotix
Mobotix V15D Instructions for use

Mobotix
Mobotix D22M with Vandalism Set User manual

Mobotix
Mobotix M22 Original operating instructions

Mobotix
Mobotix M12 User manual