manuals.online logo
Brands
  1. Home
  2. •
  3. Brands
  4. •
  5. Mocka
  6. •
  7. Indoor Furnishing
  8. •
  9. Mocka Denham User manual

Mocka Denham User manual

Denham Bookcase
Assembly Instructions
mocka.co.nz | mocka.com.au | PO BOX 6171, Maroochydore, QLD, 4558
1
bolt
x30
A B C D EFG H
JKLO
I
Hardware Supplied
dowel
x36
screw
x6
P
screw
x36
locking
nut x30
screw
x18
handle
x3
hinge
x6
M N
bolt
x8
plastic
glide
x4
adjuster
x1
bracket
x4
bolt
x16
wedge
x12
screw
x12
Allen
Key
x1
Wall Strap
x2
washer
Z
Y
wall
anchor
x1
X
safety
strap x1
WV
screw
x1
wall
screw
x1
WARNING: Any furniture that is not anchored to a wall has the potential to tip over in certain
circumstances, i.e. if a child attempts to climb up on the furniture or in the event of an earthquake.
Accordingly, we recommend that all furniture is anchored to a wall. We supply a free safety wall anchor
with all furniture sold and we recommend these are used to prevent your product tipping. The fixing device
provided should fit most wall types, but please note that different wall materials may require different fixing
devices from those supplied.
For quicker assembly, we recommend the
use of a power drill on a low-speed setting.
Phillips & Flathead screwdrivers
and hammer required
Thank you for your purchase. Please follow the instructions for correct assembly.
While we took great effort to ensure these assembly instructions were correct at
the time of printing, sometimes updates are required post production. For the
most up to date versions please refer to the product page on our website.
mocka.com.au/mocka.co.nz
Denham Bookcase
Assembly Instructions
mocka.co.nz | mocka.com.au | PO BOX 6171, Maroochydore, QLD, 4558
2
Panel layout 1
C
Insert 8x bolts (C) into panel [1] and 2x bolts (C) into panel [13]. Tighten
with a screwdriver.
C
CC
C
C
C
C
C
C
X4
C
1
3
3
4
4
4
5
5
9
10
11
12
13
40 41
5
6
6
7
7
8
8
8
2
1
13
Denham Bookcase
Assembly Instructions
mocka.co.nz | mocka.com.au | PO BOX 6171, Maroochydore, QLD, 4558
3
2 3
Insert 8x bolts (C) into panel [2]. Turn it over insert 2x bolts (C) into
panel [2].Tighten with a screwdriver.
Insert 8x bolts (C) into panel [12]. Turn it over insert 2x bolts (C) into
panel [12].Tighten with a screwdriver.
C
C
C
C
C
C
C
C
C
C
C
C
CC
C
C
C
CC
C
FLIPFLIP
2
2
12
12
Denham Bookcase
Assembly Instructions
mocka.co.nz | mocka.com.au | PO BOX 6171, Maroochydore, QLD, 4558
4
54
Slide panel [5] down along the grooves between the panels [3] and [6] to form
the back of the unit as shown.
Attach panels [3], [6], [4] and [8] to panel [1] with 6x dowels (A) and secure
with 8x locking nuts (D). Tighten with a screwdriver.
A
A
D
D
D
DA
A
A
A
D
D
D
D
1
3
3
6
6
5
84
Denham Bookcase
Assembly Instructions
mocka.co.nz | mocka.com.au | PO BOX 6171, Maroochydore, QLD, 4558
5
6 7
Attach panels [4], [9], [10] and [8] to panel [2] with 6x dowels (A) and secure
with 8x locking nuts (D). Tighten with a screwdriver.
Attach panel [2] to panels [3], [6], [4] and [8] with 6x dowels (A) secure
with 2x locking nuts (D) and 6x screws (B). Tighten with a screwdriver.
DDA
A
A
B
B
B
B
B
B
B
D
D
D
D
D
DD
A
A
A
A
A
A
3
6
2
4
8
2
4
8
9
10
Denham Bookcase
mocka.co.nz | mocka.com.au | PO BOX 6171, Maroochydore, QLD, 4558
6
89
Assembly Instructions
AA
AA
AA
D
D
B
B
B
B
B
B
9
9
4
12
8
10
10
5
Slide panel [5] down along the grooves between the panels [9] and
[10] to form the back of the unit as shown.
Attach panel [12] to panels [8], [4], [9] and [10] with 6x dowels (A)
and secure with 6x screws (B) and 2x locking nuts (D). Tighten with
a screwdriver.
Denham Bookcase
Assembly Instructions
mocka.co.nz | mocka.com.au | PO BOX 6171, Maroochydore, QLD, 4558
7
1110
A
A
A
A
A
A
D
D
D
D
DD
D
12
3
6
4
8
3
6
5
Slide panel [5] down along the grooves between the panels [3] and
[6] to form the back of the unit as shown.
Attach panels [3], [6], [4] and [8] to panel [12] with 6x dowels (A) and
secure with 8x locking nuts (D). Tighten with a screwdriver.
Denham Bookcase
Assembly Instructions
mocka.co.nz | mocka.com.au | PO BOX 6171, Maroochydore, QLD, 4558
8
1312
Attach 4x brackets (J) to legs [40] using 8x bolts (I). Tighten with a
screwdriver. Attach legs [40] to panel [13] using 16x bolt (L) as shown.
Tighten with an Allen key (F). Turn 1x support leg [41] into panel
[13] until firm. Insert the adjuster (M) into the middle support leg.
Attach 4 x plastic glide (K) to legs [40] as shown.
A
A
A
B
B
B
B
B
B
DD
L
L
L
M
L
J
J
M
I
K
L
L
K
K
K
K
F
3
6
4
8
13
13
40
40
40
40
41
40
Attach panel [13] to panels [3], [6], [4] and [8] with 6x dowels (A) and
secure with 6x screws (B) and secure with 2x locking nuts (D) . Tighten
with a screwdriver.
front
back
J
J
Denham Bookcase
Assembly Instructions
mocka.co.nz | mocka.com.au | PO BOX 6171, Maroochydore, QLD, 4558
9
1514
x2
PP
PP
PP
PP
PP
H
H
H
H
H
P
P
P
E
G
G
GE
E
E
E
E
7
11
11
10
7
3
3
7
Attach 6x hinges (H) to panels [11] and [7] using 12x screws (P),
Tighten with a screwdriver.
Attach hinges on panels [7] and [11] to the unit using 24x screws (P).
Tighten with a screwdriver. Ensure the doors open and close easily.
Attach 3x handles (G) to panels [7] and [11] secure with 6x screws
(E).Tighten with a screwdriver
NOTE: If the doors are uneven or there is
a gap in the middle, loosen or tighten the
screw on thedoor hinge until they are sitting
flush.
Denham Bookcase
Assembly Instructions
mocka.co.nz | mocka.com.au | PO BOX 6171, Maroochydore, QLD, 4558
10
1716
Attach 12x wedges (O) into the corners of the back of the unit and
secure with 12x screws (N). Tighten with a screwdriver. Attach 1x
safety straps (V) to the top of the back side of the unit as shown
using 1x washer (Z) and 1x screw (W). Tighten with a screwdriver.
Once assembled lift furniture into place, do not drag. Use a drill to
create a small hole lining up with the top of the safety strap (V).
Fasten to the wall using 1x washer (Z), 1x wall anchor (X) and
1x wall screw (Y). Ensure unit is balanced and steady before use.
You’re done, enjoy!
O
o
N
N
N
O
O
N
O
N
O
N
O
N
O
V
Z
W
W
Z
V
V
XZY
wall
anchor
screw
strap
washer
Denham Bookcase
Assembly Instructions
mocka.co.nz | mocka.com.au | PO BOX 6171, Maroochydore, QLD, 4558
11
HOW TO ADJUST THE HINGES TO
ALIGN THE DOORS IF NEEDED.
Open the door.
1. 2. 3.
1. 2. 3.
1. 2. 3.
STEP 1
Adjuse the door panelsupward or downward
STEP 2
Adjuse the flush between door panel and side panel
STEP 3
Adjuse the Gap beteen door
panel and side panel
STEP 4
Loosen this screw a bit. MOVE DOOR BACK OR
FORTH Re-tighten this screw.
Panel
Door
Unscrew 2 screws in round
holes loosen 2 screws in oval
holes a bit.
Tighten 2 screws in oval
holes. Screw in 2 screws in
round holes
MOVE DOOR UPWARD
OR DOWNWARD
MOVE DOOR OUTWARD
by turning this screw
counter-clockwise
KEEP DOOR IN RIGHT
POSITION MOVE DOOR OUTWARD
by turning this screw clockwise

Other manuals for Denham

1

Other Mocka Indoor Furnishing manuals

Mocka Zara User manual

Mocka

Mocka Zara User manual

Mocka Replica Eames Lounge Chair & Ottoman User manual

Mocka

Mocka Replica Eames Lounge Chair & Ottoman User manual

Mocka Hamptons Buffet User manual

Mocka

Mocka Hamptons Buffet User manual

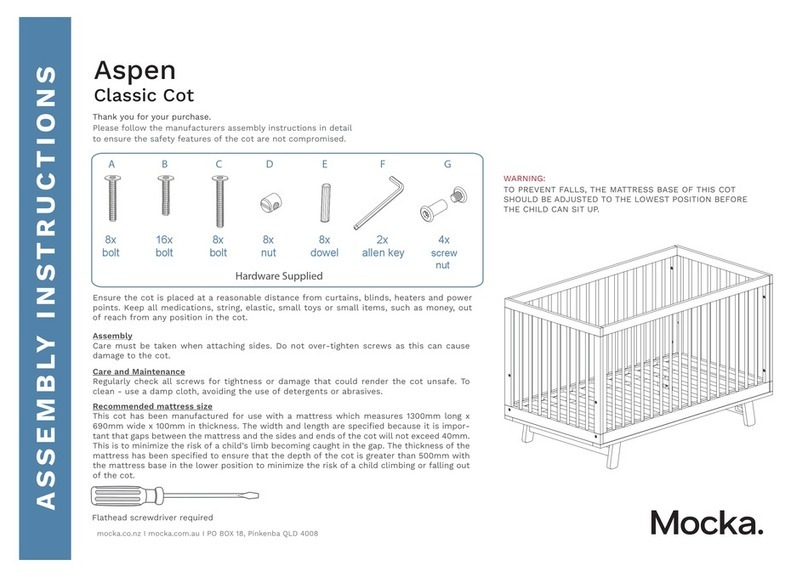
Mocka Aspen Classic Cot User manual

Mocka

Mocka Aspen Classic Cot User manual
Mocka Leon User manual

Mocka

Mocka Leon User manual

Mocka Daisy Entertainment Unit User manual

Mocka

Mocka Daisy Entertainment Unit User manual

Mocka Haywood Desk User manual

Mocka

Mocka Haywood Desk User manual

Mocka Detroit Trolley Shelf User manual

Mocka

Mocka Detroit Trolley Shelf User manual

Mocka Porto Bookcase User manual

Mocka

Mocka Porto Bookcase User manual

Mocka Leon User manual

Mocka

Mocka Leon User manual

Mocka Hamptons Entertainment Unit User manual

Mocka

Mocka Hamptons Entertainment Unit User manual

Mocka Toby Desk User manual

Mocka

Mocka Toby Desk User manual

Mocka Belinda User manual

Mocka

Mocka Belinda User manual

Mocka Eclipse Coffee Table User manual

Mocka

Mocka Eclipse Coffee Table User manual

Mocka Vigo Bedside Table User manual

Mocka

Mocka Vigo Bedside Table User manual

Mocka Essentials 3 Cube User manual

Mocka

Mocka Essentials 3 Cube User manual

Mocka Porto Full Length Hanger User manual

Mocka

Mocka Porto Full Length Hanger User manual

Mocka Kirra Buffet User manual

Mocka

Mocka Kirra Buffet User manual

Mocka Sadie Queen bed User manual

Mocka

Mocka Sadie Queen bed User manual

Mocka Jesse User manual

Mocka

Mocka Jesse User manual

Mocka Vigo Entertainment Unit User manual

Mocka

Mocka Vigo Entertainment Unit User manual

Mocka Savannah User manual

Mocka

Mocka Savannah User manual

Mocka Mod Headboard User manual

Mocka

Mocka Mod Headboard User manual

Mocka Sintra User manual

Mocka

Mocka Sintra User manual

Popular Indoor Furnishing manuals by other brands

BDI MARGO 5201 manual

BDI

BDI MARGO 5201 manual

HOMCOM 835-219 operating instructions

HOMCOM

HOMCOM 835-219 operating instructions

Comfort Products JNFF Assembly instructions

Comfort Products

Comfort Products JNFF Assembly instructions

Benjara BM235459 Assembly instructions

Benjara

Benjara BM235459 Assembly instructions

RST CAPRI OP-ALSOF88-CAP Assembly instructions

RST

RST CAPRI OP-ALSOF88-CAP Assembly instructions

Nags Head Hammocks Classic Adirondack Chair instructions

Nags Head Hammocks

Nags Head Hammocks Classic Adirondack Chair instructions

Gima 28513 Use and maintenance book

Gima

Gima 28513 Use and maintenance book

GALA MEBLE PRESTO K2DP Assembly manual

GALA MEBLE

GALA MEBLE PRESTO K2DP Assembly manual

Germania 3255 Assembly instruction

Germania

Germania 3255 Assembly instruction

Songmics VASAGLE LBC10V1 manual

Songmics

Songmics VASAGLE LBC10V1 manual

Cooper Lighting Nimbus II Wall Series 701-IW specification

Cooper Lighting

Cooper Lighting Nimbus II Wall Series 701-IW specification

Universal Furniture Explore Home 507964 instruction sheet

Universal Furniture

Universal Furniture Explore Home 507964 instruction sheet

Bob's Discount Furniture PowerBob Elite owner's manual

Bob's Discount Furniture

Bob's Discount Furniture PowerBob Elite owner's manual

Manhattan Comfort Hampton quick start guide

Manhattan Comfort

Manhattan Comfort Hampton quick start guide

kupper 70750 Assembly instruction

kupper

kupper 70750 Assembly instruction

LDI Spaces SAFCO Task Master 5100 Assembly instructions

LDI Spaces

LDI Spaces SAFCO Task Master 5100 Assembly instructions

Bouclair 9391549 Assembly instructions

Bouclair

Bouclair 9391549 Assembly instructions

Rustic State PASSI ZIMAY128 Assembly instructions

Rustic State

Rustic State PASSI ZIMAY128 Assembly instructions

manuals.online logo
manuals.online logoBrands
  • About & Mission
  • Contact us
  • Privacy Policy
  • Terms and Conditions

Copyright 2025 Manuals.Online. All Rights Reserved.