manuals.online logo
Brands
  1. Home
  2. •
  3. Brands
  4. •
  5. Mocka
  6. •
  7. Indoor Furnishing
  8. •
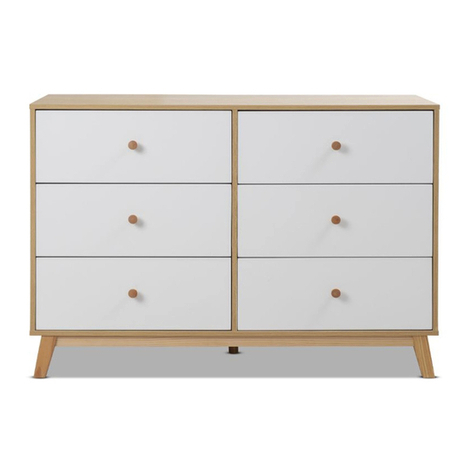
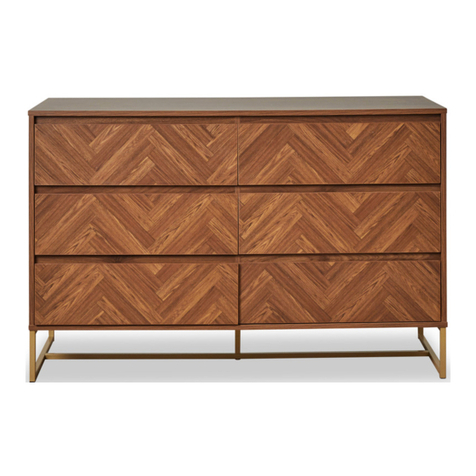
  9. Mocka Jolt Six Drawer - Wide User manual

Mocka Jolt Six Drawer - Wide User manual

A B C D E F G
HJ K L M N
IO
Phillips & Flathead screwdriver and hammer required
Hardware Supplied
dowel
x31
screw
x36 bolt
x13
small bolt
x30
locking
nut x13
small
screw x60
small
locking nut
x30
L + R slide
rail x6
L + R slide
rail x6
long
screw x4
plastic
glide x6 long
dowel x6
nail
x28
*We recommend using a Flathead screwdriver to tighten all locking nuts 100% before first use.
Please clear any loose wood from the locking nut holes before inserting the nut to ensure it locks 100%.
PQ
Wall Strap
wall
strap x1 screw
x1
wall
anchor
x1
r/washer
screw
x1
washer
x2
RS
T
WARNING: Any furniture that is not anchored to a wall has the
potential to tip over in certain circumstances, i.e. if a child
attempts to climb up on the furniture or in the event of an
earthquake. Accordingly, we recommend that all furniture is
anchored to a wall. We supply a free safety wall anchor with all
furniture sold and we recommend these are used to prevent
your product tipping. The fixing device provided should fit most
wall types, but please note that different wall materials may
require different fixing devices from those supplied.
Jolt Six Drawer - Wide
ASSEMBLY INSTRUCTIONS
1
mocka.co.nz | mocka.com.au
Thank you for purchasing a Mocka Kit.
Please follow the instructions below for correct assembly.
E
F
E
EF
E
E
E
E
E
EF
2
G
G
G
E
E
E
E
E
E
E
E
E
3
12
A
A
A
A
A
A
C
C
3
C
A
A
A
A
A
A
C
C
C
2
To begin assembly attach 3x slide rails (F) & (G) in place on each of the
panels [2] and [3] using 3x small screws (E) in each rail bracket. Fasten
all screws with a screwdriver.
Screw 6x bolts (C) and insert 18x dowels (A) into corresponding holes
in panels [2] and [3].
E
E
Jolt Six Drawer - Wide
ASSEMBLY INSTRUCTIONS
2
mocka.co.nz | mocka.com.au
34
E
E
EF
E
E
EFE
EF
E
4
E
E
E
E
E
E
E
E
E
G
G
G
4
D
A
C
3
5
5
5
6
Attach 3x slide rails (F) and (G) into each side of panel [4] using 18x
small screws (E). Fasten all screws with a screwdriver.
Slot 3x panels [5] into the dowels in panel [3]. Place a bolt (C) and
dowel (A) into panel [6] and attach connecting parts with a locking nut
(D). Tighten with a screwdriver.
A
C
D
E
E
E
F
E
EF
E
E
E
E
E
EF
2
G
G
G
E
E
E
E
E
E
E
E
E
3
12
A
A
A
A
A
A
C
C
3
C
A
A
A
A
A
A
C
C
C
2
To begin assembly attach 3x slide rails (F) & (G) in place on each of the
panels [2] and [3] using 3x small screws (E) in each rail bracket. Fasten
all screws with a screwdriver.
Screw 6x bolts (C) and insert 18x dowels (A) into corresponding holes
in panels [2] and [3].
E
E
Jolt Six Drawer - Wide
ASSEMBLY INSTRUCTIONS
3
mocka.co.nz | mocka.com.au
56
D
4
3
6
N
N
N
4
3
5
5
5
Connect panel [4] to panel [6] with a locking nut (D) and tighten with a
screwdriver.
Connect remaining 3x panels [5] with 6x long dowels (N) on panel [4].
Jolt Six Drawer - Wide
ASSEMBLY INSTRUCTIONS
4
mocka.co.nz | mocka.com.au
56
D
4
3
6
N
N
N
4
3
5
5
5
Connect panel [4] to panel [6] with a locking nut (D) and tighten with a
screwdriver.
Connect remaining 3x panels [5] with 6x long dowels (N) on panel [4].
7 8
D
D
3
4
7
8
DM
M
L
L
M
M
M
M
D
D
3
2
6
Attach panels [7] and [8] to panel [3] using 2x locking nuts (D) and
tighten with a screwdriver.
Use 4x long screws (L) to secure panels [7] and [8]. Attach panel [2] with
3x locking nuts (D). Hammer 6x plastic glides (M) into base.
Jolt Six Drawer - Wide
ASSEMBLY INSTRUCTIONS
5
mocka.co.nz | mocka.com.au
910
D
D
C
C
A
A
A
2
3
O
9
9
O
x28
Insert 6x bolts (C) and 6x dowels (A) into top panel [1]. Slot together
with rest of the cabinet. Place 6x locking nuts (D) into corresponding
holes and tighten with a screwdriver.
1
Attach both back panels [9] to the cabinet using 28x nails (O) and a
hammer.
Jolt Six Drawer - Wide
ASSEMBLY INSTRUCTIONS
6
mocka.co.nz | mocka.com.au
910
D
D
C
C
A
A
A
2
3
O
9
9
O
x28
Insert 6x bolts (C) and 6x dowels (A) into top panel [1]. Slot together
with rest of the cabinet. Place 6x locking nuts (D) into corresponding
holes and tighten with a screwdriver.
1
Attach both back panels [9] to the cabinet using 28x nails (O) and a
hammer.
11 12
A
K
K
K
K
K
JJ
BB
B
12
12
12
10
10
16
13
13
13
14
15
Assemble the drawers by screwing 4x small bolts (J) into the front
panel [10]. Attach to side panels [12] and [13] using 4x small locking
nuts (K). Attach the support panel [16] with a dowel (A), small bolt (J)
and locking nut (K) into panel [10]/[11].
Slide the base panel [14] into place in the grooves on side and front
panel, and in between the support panel. Fasten back panel [15] into
place using 6x screws (B) into the holes on the side and support panels.
Drawers (x6)
11
10 11
11
Jolt Six Drawer - Wide
ASSEMBLY INSTRUCTIONS
7
mocka.co.nz | mocka.com.au
13 14
E
E
H
I
E
E
13
12
10
11
Flip drawer over and attach slide rails (H) and (I) to both left and right
underside of the drawer using 4x screws (E).
Slide all six drawers into place on the rails in the cabinet unit as shown,
making sure all panel 10 drawer fronts are on the left side and all panel
11 drawer fronts are on the right. Ensure all drawers slide easily open
and closed.
Jolt Six Drawer - Wide
ASSEMBLY INSTRUCTIONS
8
mocka.co.nz | mocka.com.au
13 14
E
E
H
I
E
E
13
12
10
11
Flip drawer over and attach slide rails (H) and (I) to both left and right
underside of the drawer using 4x screws (E).
Slide all six drawers into place on the rails in the cabinet unit as shown,
making sure all panel 10 drawer fronts are on the left side and all panel
11 drawer fronts are on the right. Ensure all drawers slide easily open
and closed.
15 16
Attach the safety strap (P) to the top of the back side of the unit using
1x screw (S) and 1x washer (T). Tighten with a screwdriver. Once
assembled lift furniture into place, do not drag.
Move drawer unit into desired location against a wall. Use a drill to
create a small hole lining up with the top of the safety strap (P). Fasten
to wall using wall anchor (R), washer (T) and screw (Q). Ensure the set is
balanced and steady before use. You’re done, enjoy!
P
r/washer
screw
P
S
wall
anchor
wall
screw
Washer
Strap
P
R
T
Q
T
T
Wall Strap
Jolt Six Drawer - Wide
ASSEMBLY INSTRUCTIONS
9
mocka.co.nz | mocka.com.au

Other manuals for Jolt Six Drawer - Wide

1

Other Mocka Indoor Furnishing manuals

Mocka Edmond User manual

Mocka

Mocka Edmond User manual

Mocka Zara User manual

Mocka

Mocka Zara User manual

Mocka Leon User manual

Mocka

Mocka Leon User manual

Mocka Edmond User manual

Mocka

Mocka Edmond User manual

Mocka Hudson Bar Stool User manual

Mocka

Mocka Hudson Bar Stool User manual

Mocka Kennedy Entertainment Unit User manual

Mocka

Mocka Kennedy Entertainment Unit User manual

Mocka Essentials 3 Cube User manual

Mocka

Mocka Essentials 3 Cube User manual

Mocka Sadie User manual

Mocka

Mocka Sadie User manual

Mocka Betti Bobbin Tallboy User manual

Mocka

Mocka Betti Bobbin Tallboy User manual

Mocka Charli Bedside Table User manual

Mocka

Mocka Charli Bedside Table User manual

Mocka Kuranda Cabinet User manual

Mocka

Mocka Kuranda Cabinet User manual

Mocka Hamptons Tallboy User manual

Mocka

Mocka Hamptons Tallboy User manual

Mocka Aspen User manual

Mocka

Mocka Aspen User manual

Mocka Orlando User manual

Mocka

Mocka Orlando User manual
Mocka Asta Armchair User manual

Mocka

Mocka Asta Armchair User manual

Mocka Edmond User manual

Mocka

Mocka Edmond User manual

Mocka Sadie Bedside Table User manual

Mocka

Mocka Sadie Bedside Table User manual

Mocka Southport Rattan Decor Stand User manual

Mocka

Mocka Southport Rattan Decor Stand User manual

Mocka Cody Dining Table User manual

Mocka

Mocka Cody Dining Table User manual

Mocka Blair User manual

Mocka

Mocka Blair User manual

Mocka Watson Entertainment Unit User manual

Mocka

Mocka Watson Entertainment Unit User manual

Mocka Eclipse User manual

Mocka

Mocka Eclipse User manual

Mocka Bronte Bedside Table User manual

Mocka

Mocka Bronte Bedside Table User manual

Mocka Claremont Buffet User manual

Mocka

Mocka Claremont Buffet User manual

Popular Indoor Furnishing manuals by other brands

Zenna Home 9437CH Assembly instructions

Zenna Home

Zenna Home 9437CH Assembly instructions

HAT collective S-COLLECTION SX installation instructions

HAT collective

HAT collective S-COLLECTION SX installation instructions

DITALIA CD-664 Assembly manual

DITALIA

DITALIA CD-664 Assembly manual

Monarch Specialties I 2377 Assembly instructions

Monarch Specialties

Monarch Specialties I 2377 Assembly instructions

INOSIGN Vitus 153 Assembly instructions

INOSIGN

INOSIGN Vitus 153 Assembly instructions

ofichairs graffit manual

ofichairs

ofichairs graffit manual

overstock WDTB instruction manual

overstock

overstock WDTB instruction manual

Lightolier Tangent FXPDT specification

Lightolier

Lightolier Tangent FXPDT specification

Gami H27-GRASLA 860 manual

Gami

Gami H27-GRASLA 860 manual

Whittier Wood 1317AFGAC Assembly instructions

Whittier Wood

Whittier Wood 1317AFGAC Assembly instructions

Maxax MXML01-77 Operation manual

Maxax

Maxax MXML01-77 Operation manual

Staples Carder 59236V instructions

Staples

Staples Carder 59236V instructions

FIAM. Tango Quick start quide

FIAM.

FIAM. Tango Quick start quide

Bouclair 9396855 Assembly instructions

Bouclair

Bouclair 9396855 Assembly instructions

BROSA Theron Daybed Assembly guide

BROSA

BROSA Theron Daybed Assembly guide

Pinnacle Design TV63003 parts list

Pinnacle Design

Pinnacle Design TV63003 parts list

Costway HW63258 user manual

Costway

Costway HW63258 user manual

nolte 041.2 Assembly instructions

nolte

nolte 041.2 Assembly instructions

manuals.online logo
manuals.online logoBrands
  • About & Mission
  • Contact us
  • Privacy Policy
  • Terms and Conditions

Copyright 2025 Manuals.Online. All Rights Reserved.