manuals.online logo
Brands
  1. Home
  2. •
  3. Brands
  4. •
  5. modway
  6. •
  7. Indoor Furnishing
  8. •
  9. modway MOD-5347 User manual

modway MOD-5347 User manual

Customer Service 908-368-1025︱www.modwayfurniture.com Page 1 of 6
Screw M4x20mm x16
PHILLIPHS HEAD SCREW DRIVER
NOT PROVIDED
6
6
5
1
1
2
3
7
8
5
4
2
Hardware:
Component:
A Bolt M8x25mm x16
E Flat Washer M8 x16
H Allen Wrench M5 x1
1 Short Board x2
Thank you for purchasing the MOD-5347/5348/5349/5350/5351/5352 TWIN/FULL/QUEEN BED FRAME!
Before you start, here is some helpful advice:
1.We suggest you spend a short time reading through this leaflet and then follow the simple step by step
instructions.
2.Owing to the size and weight of the bed frame, we recommend that it is assembled by two adults, on a carpeted
or padded area, in the room that it is intended for. Approx assembly time: 45 minutes.
3.Please do not use any tools other than those provided or recommended in these instructions.
4.Please do not throw away any of the packaging or the instruction until you have checked all the components and
hardware and the furniture is fully assembled. Please ensure that the packaging is disposed of in a safe
environmentally friendly way.
5.Assemble all components loosely until advised to tighten. Depending on use, it may be necessary to tighten the
components from time to time, so please save the tools that has been provided.
6.Please keep all fitting out of reach of children.
B Bolt M6x45mm x16
C Screw M4x35mm x14
D Flat Washer M6 x16
F Spring Washer M8 x16
G Allen Wrench M4 x1
2 Long Board x2 3 Center Rail x1 4 Support Leg x2
MODWAY BED FRAME
5 7 Slats x10 8 Metal Corner Plate x4
Leg Ⅰx2 Leg Ⅱ x2
6
J Connect Plate x4
K
Customer Service 908-368-1025︱www.modwayfurniture.com Page 2 of 6
Bx8 Dx8 Gx1
STEP 1:
Hardware & Tool required
STEP 2:
1
5
6
1
6
B
D
G
B
D
B
B
B
B
Bx8 Dx8 Gx1 Hardware & Tool required
Place 1 piece of Long Board (2) to 2 pieces of assembled Short Board (1) by two adults
Attach them by using 4 pieces of Bolt (B) and 4 pieces of Flat Washer (D) as shown.
Use Allen Wrench (G) to tighten the Bolts (B) clockwise until secure.
Repeat the same steps for the remaining 1 piece of Long Board (2).
1
1
2
2
1
2
B
B
B
B
B D
G
D
B
MODWAY BED FRAME
Note: There are two kinds of legs designed for
this Bed Frame(Mod-5355 or Mod 5356) .
Mod-5355 Leg Mod-5356 Leg
Put 1 piece of Short Board (1) upside down on a carpeted or padded area by two adults
Attach 1 piece of Leg (5) and 1 piece of Leg (6) into the Short Board (1) by using 4 pieces of Bolt (B) and 4 pieces
of Flat Washer (D) as shown.
Use Allen Wrench (G) to tighten the Bolts (B) clockwise until secure.
Repeat the same steps for the remaining 1 piece of Short Board (1) ,1 piece of Leg (5) and 1 piece of Leg (6).
Customer Service 908-368-1025︱www.modwayfurniture.com Page 3 of 6
Cx4 Phillips Head Screw
Driver( not provided)
STEP 3:
Attach 2 pieces of Support Leg (4) into the Center Rail (3) as shown.
Secure the Support Leg (4) into the Center Rail (3) by using 4 pieces of Screw (C) as shown.
Tighten the Screws (C) with Phillips Head Screw Driver (Not provided).
Hardware & Tool required
STEP 4:
3
4
C
Ax16 Ex16 Hx1
Fx16 Hardware & Tool required
Secure 1piece of Metal Corner Plate (8) into the Short Board (1) and Long Board (2) by using 4 pieces of Bolt (A)
with 4 pieces of Spring Washer (F), 4 pieces of Flat Washer (E) as shown.
Repeat the same steps for the remaining 3 pieces of Metal Corner Plate (8).
Place the assembled Center Rails (3) to the Short Board(1).
Insert the hook on the each end of Center Rail(3) into the notch on the Short Board (1).
Repeat the same steps for the remaining assembled Center Rail (3).
1
2
1
A
8
C
4
2
1
1
3 3
Notch on the
Short Board
Hooks on the
end of Center Rail
2
F
E
H
3
4
MODWAY BED FRAME
Customer Service 908-368-1025︱www.modwayfurniture.com Page 4 of 6
STEP 5:
Place the Slats (7) to the Long Boards (2) as shown.
Secure 4 pieces of Slat (7) which have countersink Holes on each end into the Long Board (2) by using 8 pieces of
Screw (C) as shown.
Tighten the Screws (C) with Phillips Head Screw Driver (Not provided).
Hardware & Tool required
Assembly is completed. The bed frame is ready to use now!
NOTE: Hardware may loosen over time. Periodically check that all connections are tight.
Cx2 Phillips Head Screw
Driver( not provided)
Jx4
Kx16
2
2
7 7
7 7
7
7
7
7
7
7
C
2
7
MODWAY BED FRAME
Hardware & Tool required
Cx8 Phillips Head Screw
Driver( not provided)
STEP 6:
In order to strengthen the construction of bed, Please do the steps as below.
Secure 4 pieces of Connect Plate (J) to each corner of assembled bed by using 16 pieces of Screw (K) as shown.
Secure 2 pieces of Screw (C) into the Slat (7) on the top of Support Legs (4) as shown.
Tighten the Screws (C&K) with Phillips Head Screw Driver (Not provided).
7
7 4
4
7
4
C
K
J
Note: No pre-drilled holes are designed at this step. Please
secure the Screw (K) into Short/Long Board (1/2) directly
when Connect Plate (J) are on the right position. Note: No pre-drilled holes are designed at this step.
Pease make sure Screws (C) are on the center of
Slat (7) and Center Rail (3) during securing.
Customer Service 908-368-1025︱www.modwayfurniture.com Page 5 of 6
A Bolt M6x45mm x4
C Flat Washer M6xD22mm x4
F Allen Wrench M4 x1
D Spring Washer M6 x4
Hardware:
1 2 Bed Frame x1
(Style may vary)
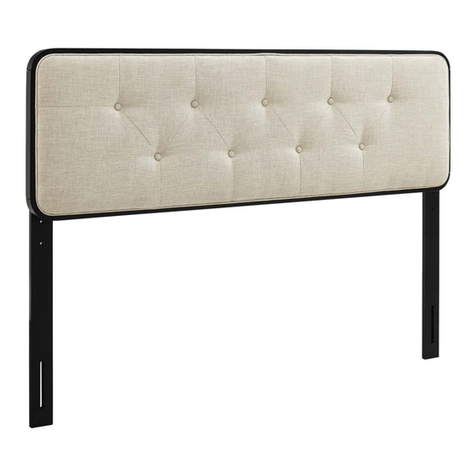
Headboard x1
(Style may vary)
1
2
Component:
ASSEMBLY INSTRUCTIONS
MODWAY CONNECTING BED FRAME TO HEADBOARD
Important: All the hardware is packed with the
headboard you are buying. Please only use the
above hardware from Headboard Hardware Package
to assemble the Bed Frame and Headboard.
Note: This is assembly instruction for MODWAY Full/Twin/Queen/King Bed Frame MOD5347/5348/5349/5350/
5351/5352/5353/5354 to connect Headboard MOD 5365/5366/5367/5368/5369/5370/5371/5372/5373/5374/
5375/5376/5377/5378/5379/5380/5381/5382/5383/5384/5385/5386/5387/5388/5389/5390/5391/5392/5393/5394/
5395/5396/5397/5398/5399/5400/5401/5402/5403/5404/5405/5406/5407/5408.
Customer Service 908-368-1025︱www.modwayfurniture.com Page 6 of 6
Ax4 Cx4 Dx4 Fx1 Hardware & Tool required
STEP 2:
2
Assembly is completed. The bed is ready to use now!
NOTE: Hardware may loosen over time. Periodically check that all connections are tight.
1 1
2
A
D
C
F
Line up the Bed Frame (2) board’s pre-drilled holes to match those of the Headboard (1).
Secure the Headboard (1) to the Bed Frame (2) by using 2 pieces of Bolt (A) with 2 pieces of Spring Washer (D), 2 pieces
of Flat Washer (C) into the Bed Frame (2).
Then tighten the Bolts (A) by using the Allen Wrench (F).
Repeat the same procedure for each bolt and each side of the Bed Frame (2).
STEP 1:
MODWAY CONNECTING BED FRAME TO HEADBOARD
Carefully position the assembled bed to the desired location by four adults.

This manual suits for next models

5

Other modway Indoor Furnishing manuals
modway Sector EEI-2874 User manual

modway

modway Sector EEI-2874 User manual

modway MOD-6077 User manual

modway

modway MOD-6077 User manual

modway EEI–2803 User manual

modway

modway EEI–2803 User manual

modway EEI -1328 User manual

modway

modway EEI -1328 User manual

modway MOD-6247 User manual

modway

modway MOD-6247 User manual

modway Nolan EEI-6639 User manual

modway

modway Nolan EEI-6639 User manual

modway EEI-6278 User manual

modway

modway EEI-6278 User manual

modway EEI-4404 User manual

modway

modway EEI-4404 User manual

modway MOD-7079 User manual

modway

modway MOD-7079 User manual

modway EEI-3837 User manual

modway

modway EEI-3837 User manual

modway EEI-4633 LOVESEAT User manual

modway

modway EEI-4633 LOVESEAT User manual

modway EEI-6577 User manual

modway

modway EEI-6577 User manual

modway MOD-7063 User manual

modway

modway MOD-7063 User manual

modway EEI-6349 User manual

modway

modway EEI-6349 User manual

modway EEI-6604 User manual

modway

modway EEI-6604 User manual

modway EEI-4228 User manual

modway

modway EEI-4228 User manual

modway MOD-6242 User manual

modway

modway MOD-6242 User manual

modway EEI-2253 User manual

modway

modway EEI-2253 User manual

modway EEI-2120 User manual

modway

modway EEI-2120 User manual

modway EEI-4262 User manual

modway

modway EEI-4262 User manual

modway EEI-4449 User manual

modway

modway EEI-4449 User manual

modway EEI –3040 User manual

modway

modway EEI –3040 User manual

modway EEI-2589 User manual

modway

modway EEI-2589 User manual

modway EEI-3901 User manual

modway

modway EEI-3901 User manual

Popular Indoor Furnishing manuals by other brands

JWA CHINON 68717 Assembly instruction

JWA

JWA CHINON 68717 Assembly instruction

Costway JV10895WH manual

Costway

Costway JV10895WH manual

sweeek. TOBIAS IKSCANDITB manual

sweeek.

sweeek. TOBIAS IKSCANDITB manual

CUGGL 706/3868 manual

CUGGL

CUGGL 706/3868 manual

Accentrics Home Hudson Accent 315-D481-700 Assembly instructions

Accentrics Home

Accentrics Home Hudson Accent 315-D481-700 Assembly instructions

Edsal Super Rack SR100 Assembly instructions

Edsal

Edsal Super Rack SR100 Assembly instructions

MATTRESS FIRM 500 owner's manual

MATTRESS FIRM

MATTRESS FIRM 500 owner's manual

Keter 390 L 101 US GAL Assembly instructions

Keter

Keter 390 L 101 US GAL Assembly instructions

Hafele Moovit drawer Mounting instructions

Hafele

Hafele Moovit drawer Mounting instructions

Core Products VG105 Assembly instructions

Core Products

Core Products VG105 Assembly instructions

Scott Living 1181WS-14-900 Assembly / care & use instructions

Scott Living

Scott Living 1181WS-14-900 Assembly / care & use instructions

Diphano Alexa instruction manual

Diphano

Diphano Alexa instruction manual

OSP NCL3126 operating instructions

OSP

OSP NCL3126 operating instructions

ROOMS TO GO HF1133421 Assembly

ROOMS TO GO

ROOMS TO GO HF1133421 Assembly

Steelcase Flex 120 Straight manual

Steelcase

Steelcase Flex 120 Straight manual

NorthStar DOC0056 installation instructions

NorthStar

NorthStar DOC0056 installation instructions

overstock WF289498 Assembly instructions

overstock

overstock WF289498 Assembly instructions

FIAM. GRAPH 2280 manual

FIAM.

FIAM. GRAPH 2280 manual

manuals.online logo
manuals.online logoBrands
  • About & Mission
  • Contact us
  • Privacy Policy
  • Terms and Conditions

Copyright 2025 Manuals.Online. All Rights Reserved.