manuals.online logo
Brands
  1. Home
  2. •
  3. Brands
  4. •
  5. modway
  6. •
  7. Indoor Furnishing
  8. •
  9. modway MOD-6706 User manual

modway MOD-6706 User manual

Component:
01 of 03
Customer Service 609-256-9000 www.modway.com
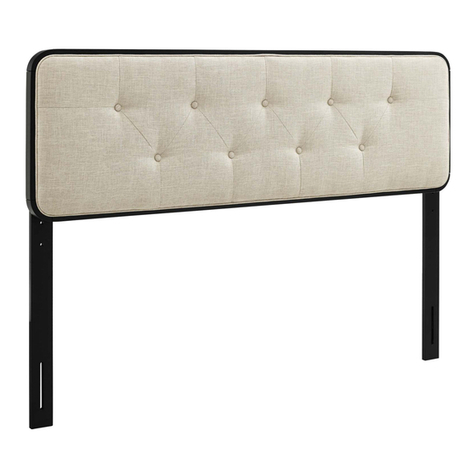
HEADBOARD
SUPPORT WOOD
BED FRAME
(DOES NOT INCLUDE
WITH THE PURCHASE)
1 PC
2 PCS
A
B
C-
Thank you for purchasing the MODWAY BED!
Before you start, here are some helpful advice:
1. We suggest you spend a short time reading through this leaflet and then follow the simple step instructions.
2. Owing to the size and weight of the bed, we recommend that it is assembled by two adults, on a carpeted or
padded area, in the room that it is intended for. Approximate assembly time: 20 minutes.
3. Please do not use any tools other than those provided or recommended in these instructions.
4. Please do not throw away any of the packaging or the instruction until you have checked all the components and
hardware and the furniture is fully assembled. Please ensure that the packaging is disposed of in a safe
environmentally friendly way.
5. Assemble all components loosely until advised to tighten. Depending on use, it may be necessary to tighten the
components from time to time, so please save tools that have been provided.
6. Please keep all fitting out of reach of children.
MOD - 6356
MOD-6706
02 of 03
Customer Service 609-256-9000 www.modway.com
STEP 1
JCBB BOLT M8 x 60mm
M8 FLAT WASHER
M5 ALLEN KEY
JCBB BOLT M6 x 60mm
4 PCS
4 PCS
1 PC
JCBB BOLT M6 x 35mm
M6 FLAT WASHER
M6 SPRING WASHER
M6 HEX NUT
M4 ALLEN KEY
4 PCS
4 PCS
8 PCS
4 PCS
4 PCS
1 PC
HARDWARE BED FRAMEHARDWARE HEADBOARD
4
5
6
7
8
9
1
2
3
A
B3
1
2
MOD - 6356
Note: Hardware may loosen over time.
Periodically check that all connections are tight.
1.1 Open the zip at the Headboard (A) backing and take out all the parts.
1.2 Align pre-drilled Support Wood (B) holes over the pre-drilled headboard holes according to
your desired Headboard (A) height.
1.3 Secure each Support Wood (B) by using 2x JCBB Bolt (1) and 2x M8 Flat Washer (2).
Tighten with supplied Allen Key (3).
Repeat the same procedure to secure the other side.
03 of 03
Customer Service 609-256-9000 www.modway.com
STEP 2
B8
STEP 3
6
6
7
4
9
C
MOD - 6356
2.1 Line up the Bed Frame (C)
board's pre-drilled holes to match
those of the Headboard (A).
2.2 Secure the Headboard (A) to
the Bed Frame (C) by using 2x bolt
(4) for the thicker bed frame, and 2x
Bolt (5) for the thinner bed frame.
Before inserting each bolt, place a
Spring Washer (7) and Flat
Washer (6) on each bolt. Then fit a
Flat Washer (6) on the screw as it
protrudes through the other side of
the bed frame.
2.3 Place a Hex Nut (8) after the
Flat Washer (6) at the end of each
screw. Then tighten by using the
Allen Key (9).
2.4 Repeat the same procedure for
each screw and each side of the
bed frame.
Thank you for purchasing the MODWAY BED!
Before you start, here are some helpful advice:
1. We suggest you spend a short time reading through this leaflet and then follow the simple step instructions.
3. Please do not use any tools other than those provided or recommended in these instructions.
4. Please do not throw away any of the packaging or the instruction until you have checked all the components and
hardware and the furniture is fully assembled. Please ensure that the packaging is disposed of in a safe
environmentally friendly way.
5. Assemble all components loosely until advised to tighten. Depending on use, it may be necessary to tighten the
components from time to time, so please save tools that have been provided.
6. Please keep all fitting out of reach of children.
Hardware:
1WOOD SCREW M4 x 20mm 2 PCS
2WOOD SCREW M4 x 25mm 12 PCS
3
4JCBB BOLT M8 x 30mm 4 PCS
5
M8 SPRING WASHER
4 PCS
6
M8 FLAT WASHER
4 PCS
Component:
A. HEADBOARD
C. SIDE RAIL (L/R)
D. CENTER RAIL
E. CENTER RAIL LEG
F. CENTER RAIL SUPPORT
G. BED SLAT
H. BED LEG
01 of 05
MOD - 6275
x 1
x 2
x 1
x 3
x 2
x 26
x 4
B. FOOTBOARD x 1 G
D
E
F
A
B
C
H
BED SLAT CENTER FITTER
7 26 PCS
WOOD SCREW M3.5 x 16mm 8 PCS
BED SLAT CENTER FITTER
813 PCS
M5 ALLEN KEY (BALL SHAPE)
91 PC
2. Owing to the size and weight of the bed, we recommend that it is assembled by two adults, on a carpeted or
padded area, in the room that it is intended for. Approximate assembly time: 35 minutes.
STEP 1
02 of 05
STEP 2
2.1 Fasten Center Rail Leg (E) to Center Rail (D) attach by screwing the protruding nut
into the corresponding holes.
A
B
D
E
2. WOOD SCREW M4 x 25mm x 12pcs
MOD - 6275
H
5649
2
STEP 1.1
STEP 1.2
4. JCBB BOLT M8 x 30mm x 4pcs 5. M8 FLAT WASHER x 4pcs
6. M8 SPRING WASHER x 4pcs 9. M5 ALLEN KEY (BALL SHAPE) x 1pcs
Screw Driver
1.1 Insert and secure the Bed Leg (H) to the Headboard (A) and Footboard (B) using hardware
parts Wood Screw (2), Bolt (4), Flat Washer (5), Spring Washer (6) and Allen Key (9).
STEP 3
03 of 05
STEP 4
A
C
4.1 Attach the Side Rails (C) to the Headboard (A) & Footboard (B) using hardware part
Allen Key (9).
3.1 Loosen the pre-inserted bolt on the Headboard (A) & Footboard (B) using hardware part
Allen Key (9).
9
A
B
CA
B
MOD - 6275
9
9. M5 ALLEN KEY (BALL SHAPE) x 1pcs
STEP 5
STEP 6
04 of 05
3. WOOD SCREW M3.5 x 16mm x 8pcs
1. WOOD SCREW M4 x 20mm x 2pcs
D
A
F
C
3
x 2
D
A
x 2
1
6.1 Locate Center Rail (D) into the corresponding brackets inside of Headboard (A) and
footboard (B) using hardware parts Wood Screw (1) .
5.1 Locate Center Rail (D) into the corresponding brackets inside of Headboard (A) and
Footboard (B).
5.2 Insert and secure the Center Rail Support (F) to the Center Rail (D) & Side Rail (C) using
hardware parts Wood Screw (3).
A
Screw Driver
Screw Driver
A
B
F
D
C
B
D
MOD - 6275
05 of 05
STEP 7
Assembly is complete. The bed is ready to use now!
NOTE: Hardware may loosen over time. Periodically check that all connections are tight.
STEP 8
8.1 Carefully position the assembled bed to the desired location by four adults.
7.1 Insert the Slats (G) into the end slat cap (7) & (8) and fix it to the corresponding holes
on the Side Rail (C) .
7. BED SLAT SIDE FITTER x 26pcs 8. BED SLAT CENTER FITTER x 13pcs
Palm
Palm
G
7
G
G
8
STEP 7.2
STEP7.1
87
G
7
G
MOD - 6275

This manual suits for next models

1

Other modway Indoor Furnishing manuals
modway EEI-3147 User manual

modway

modway EEI-3147 User manual

modway EEI-2714 User manual

modway

modway EEI-2714 User manual

modway EEI-3916 User manual

modway

modway EEI-3916 User manual

modway MOD-6225 User manual

modway

modway MOD-6225 User manual

modway SUNBED EEI-2250 User manual

modway

modway SUNBED EEI-2250 User manual

modway EEI-3424-NAT User manual

modway

modway EEI-3424-NAT User manual

modway EEI-5011 User manual

modway

modway EEI-5011 User manual

modway EEI-2786 User manual

modway

modway EEI-2786 User manual

modway RENDER MOD-7071 User manual

modway

modway RENDER MOD-7071 User manual

modway EEI-4904 User manual

modway

modway EEI-4904 User manual

modway EEI-6045 User manual

modway

modway EEI-6045 User manual

modway EEI-3572 User manual

modway

modway EEI-3572 User manual

modway EEI -2776 User manual

modway

modway EEI -2776 User manual

modway EEI-2936 User manual

modway

modway EEI-2936 User manual

modway EEI-1517 User manual

modway

modway EEI-1517 User manual

modway EEI-5087 User manual

modway

modway EEI-5087 User manual

modway MOD-5534 User manual

modway

modway MOD-5534 User manual

modway MOD-6203 User manual

modway

modway MOD-6203 User manual

modway EEI-4411 User manual

modway

modway EEI-4411 User manual

modway EEI-6039 User manual

modway

modway EEI-6039 User manual

modway EEI-2257 User manual

modway

modway EEI-2257 User manual

modway MOD-6197 User manual

modway

modway MOD-6197 User manual

modway MOD-6189 User manual

modway

modway MOD-6189 User manual

modway EEI-6353 User manual

modway

modway EEI-6353 User manual

Popular Indoor Furnishing manuals by other brands

Crate&Barrel Lafayette quick start guide

Crate&Barrel

Crate&Barrel Lafayette quick start guide

Costway KC54473 user manual

Costway

Costway KC54473 user manual

Comfort Products COUBLO 60-COUB2028 Operation manual

Comfort Products

Comfort Products COUBLO 60-COUB2028 Operation manual

Finori MAN/137 Assembly instructions

Finori

Finori MAN/137 Assembly instructions

BAND WOOD BW19-02T Assembly instructions

BAND WOOD

BAND WOOD BW19-02T Assembly instructions

Livarno Living 114815 Assembly instruction

Livarno Living

Livarno Living 114815 Assembly instruction

Northbeam MPG-TBS01-CH manual

Northbeam

Northbeam MPG-TBS01-CH manual

Inside Weather JORN SIDE TABLE manual

Inside Weather

Inside Weather JORN SIDE TABLE manual

Livarno Living 114817 Assembly instruction

Livarno Living

Livarno Living 114817 Assembly instruction

JWA DUNLAP 73023 Assembly instruction

JWA

JWA DUNLAP 73023 Assembly instruction

Boraam COLORADO 36736 Assembly instructions

Boraam

Boraam COLORADO 36736 Assembly instructions

TRINITY Pro TBFLNA-1408 owner's manual

TRINITY Pro

TRINITY Pro TBFLNA-1408 owner's manual

American Standard WILLIAMSBURG 2808.222.099 Specification sheet

American Standard

American Standard WILLIAMSBURG 2808.222.099 Specification sheet

Baxton Studio Queen Bed 0038 Assembly instructions

Baxton Studio

Baxton Studio Queen Bed 0038 Assembly instructions

DURAVIT LM 7870 Mounting instructions

DURAVIT

DURAVIT LM 7870 Mounting instructions

Royalcraft VERMONT FOLDING ADIRONDACK CHAIR instruction manual

Royalcraft

Royalcraft VERMONT FOLDING ADIRONDACK CHAIR instruction manual

Amart Furniture 67933 Assembly instruction

Amart Furniture

Amart Furniture 67933 Assembly instruction

Itatiaia Titanium BALC2-2PT manual

Itatiaia

Itatiaia Titanium BALC2-2PT manual

manuals.online logo
manuals.online logoBrands
  • About & Mission
  • Contact us
  • Privacy Policy
  • Terms and Conditions

Copyright 2025 Manuals.Online. All Rights Reserved.