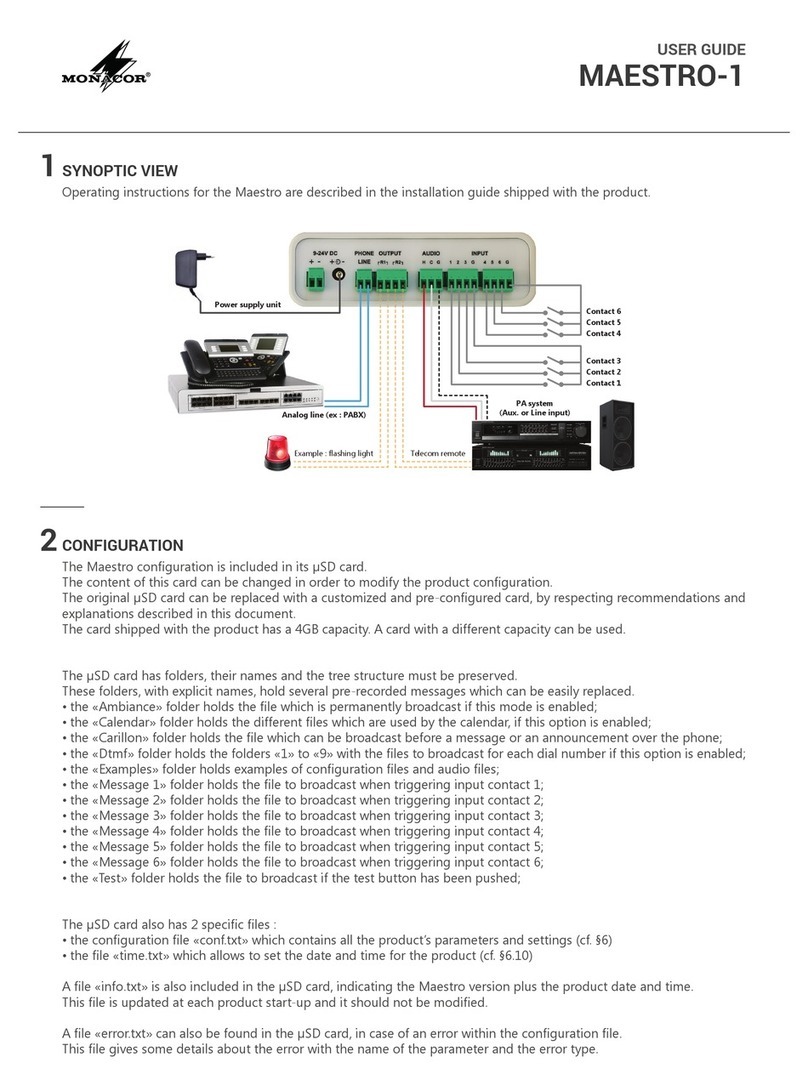
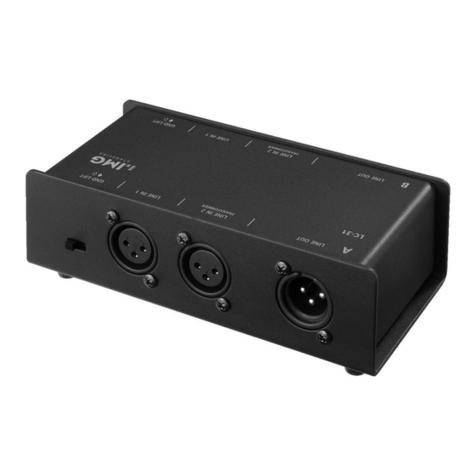
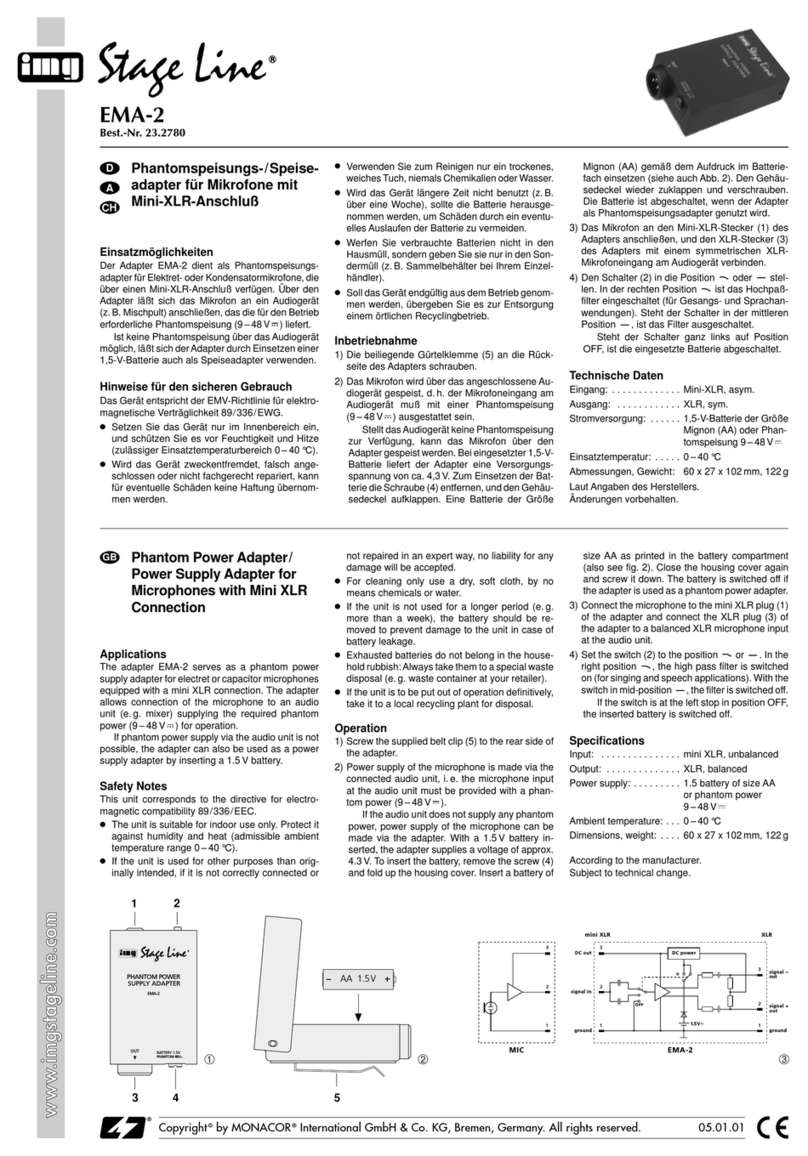
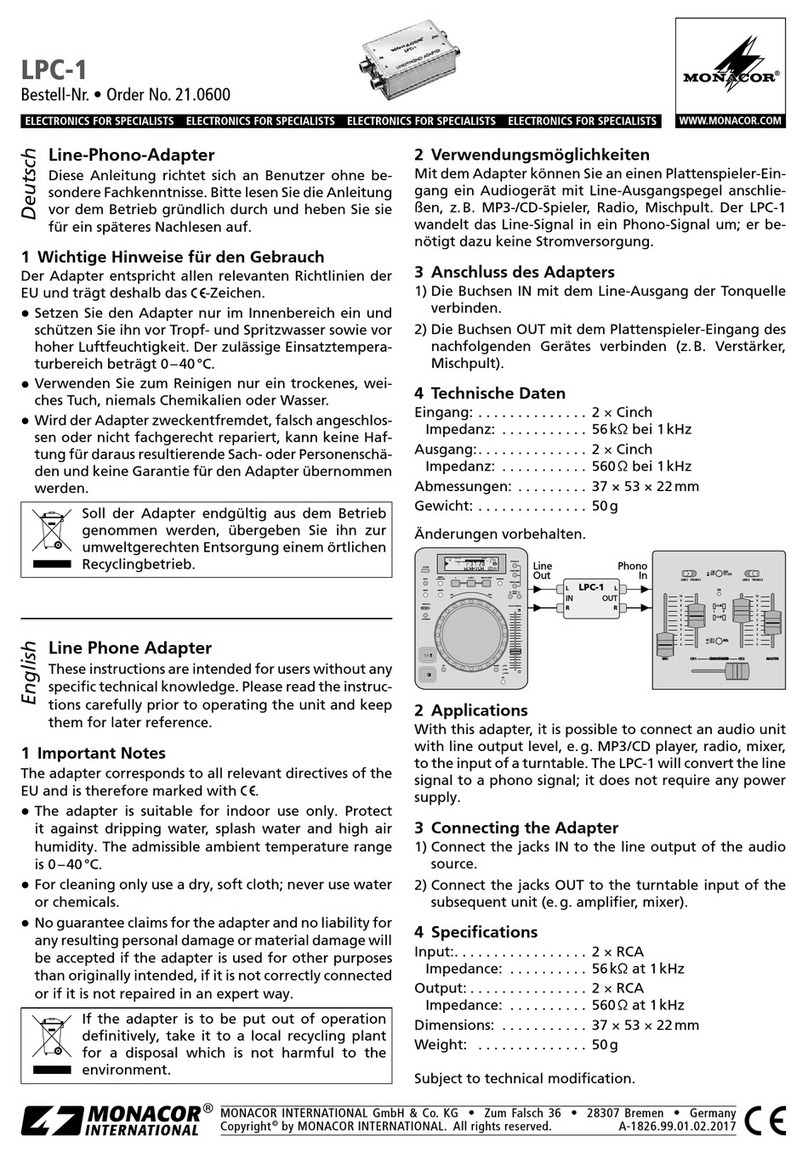
manuals.online logo
Brands
  1. Home
  2. •
  3. Brands
  4. •
  5. Monacor
  6. •
  7. Adapter
  8. •
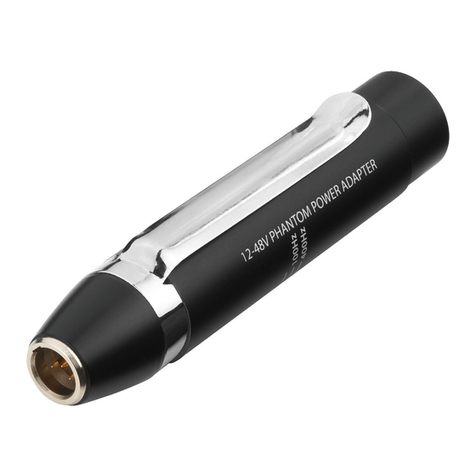
  9. Monacor IMG STAGELINE EMA-1 User manual

Monacor IMG STAGELINE EMA-1 User manual

Speiseadapter für Mikrofone
mit Mini-XLR-Anschluss
Bitte lesen Sie diese Bedienungsanleitung vor dem
Betrieb gründlich durch und heben Sie sie für ein
späteres Nachlesen auf.
1 Einsatzmöglichkeiten
Der Adapter EMA-1 dient als Speiseadapter für
Elektret-Mikrofone, die über einen Mini-XLR-An-
schluss verfügen (z. B. HSE-110). Über den Adap-
ter lässt sich das Mikrofon an ein Audiogerät (z. B.
Mischpult) anschließen, das die für den Betrieb
erforderliche Phantomspeisung (48 V ) liefert.
Ist keine Phantomspeisung über das Audiogerät
möglich, lässt sich derAdapter durch Einsetzen einer
1,5-V-Batterie auch als Speiseadapter verwenden.
2 Hinweise für den sicheren Gebrauch
Der Adapter entspricht allen relevanten Richtlinien
der EU und ist deshalb mit gekennzeichnet.
GSetzen Sie den Adapter nur im Innenbereich ein
und schützen Sie ihn vor Tropf- und Spritzwas-
ser, hoher Luftfeuchtigkeit und Hitze (zulässiger
Einsatztemperaturbereich 0 – 40 °C).
GVerwenden Sie zum Reinigen nur ein trockenes,
weiches Tuch, niemals Chemikalien oder Wasser.
GWird der Adapter zweckentfremdet, falsch ange-
schlossen oder nicht fachgerecht repariert, kann
keine Haftung für daraus resultierende Sach-
oder Personenschäden und keine Garantie für
den Adapter übernommen werden.
3 Inbetriebnahme
1) Ist der Mikrofoneingang des Audiogerätes, an
den das Elektretmikrofon über den Speise-
adapter angeschlossen werden soll, mit einer
Phantomspeisung (48 V ) ausgestattet, kann
das Mikrofon hierüber versorgt werden.
Wenn nicht, wird eine 1,5-V-Batterie der
Größe Mignon (AA) benötigt. Zum Einsetzen
der Batterie das Adaptergehäuse öffnen. Die
Schraubkappe (3) durch Drehen gegen den Uhr-
zeigersinn abschrauben. Die Batterie gemäß
dem Aufdruck im Batteriefach einsetzen und die
Schraubkappe wieder aufschrauben.
Wird das Gerät längere Zeit nicht benutzt,
sollte die Batterie herausgenommen werden, um
Soll der Adapter endgültig aus dem Betrieb
genommen werden, übergeben Sie ihn zur
umweltgerechten Entsorgung einem örtli-
chen Recyclingbetrieb.
Werfen Sie verbrauchte Batterien nicht in den
Hausmüll, sondern geben Sie sie nur in den Son-
dermüll (z. B. Sammelbehälter bei Ihrem Elektro-
fachhändler).
Schäden durch ein eventuelles Auslaufen der
Batterie zu vermeiden.
2) Das Mikrofon an den Mini-XLR-Stecker (4) des
Adapters anschließen und den XLR-Stecker (1)
des Adapters mit einem symmetrischen XLR-
Mikrofoneingang am Audiogerät verbinden.
3) Wird das Mikrofon über die Batterie im Adapter
versorgt, zum Betrieb den Schalter (2) am Adap-
ter in die Position ON schieben. (Ist keine Batte-
rie eingesetzt und erfolgt die Stromversorgung
über die Phantomspeisung des Audiogerätes,
hat der Schiebeschalter keine Funktion.)
Nach dem Gebrauch nicht vergessen, den
Adapter auszuschalten (Position OFF), sonst
wird die Batterie unnötig verbraucht.
4 Technische Daten
Eingang: . . . . . . . . . . . . . Mini-XLR, asym.
Ausgang: . . . . . . . . . . . . XLR, sym.
Stromversorgung: . . . . . . 1,5-V-Batterie der Größe
Mignon (AA) oder Phan-
tomspeisung 48 V
Einsatztemperatur: . . . . . 0 – 40 °C
Abmessungen: . . . . . . . . ∅22 mm × 170 mm
Gewicht: . . . . . . . . . . . . . 75 g
Änderungen vorbehalten.
Power Supply Adapter for
Microphones with
Mini XLR Connection
Please read these operating instructions carefully
prior to operation and keep them for later use.
1 Applications
The adapter EMA-1 serves as a power supply
adapter for electret microphones equipped with a
mini XLR connection (e. g. HSE-110). The adapter
allows connection of the microphone to an audio
unit (e. g. mixer) supplying the required phantom
power (48 V ) for operation.
If phantom power supply via the audio unit is not
possible, the adapter can also be used as a power
supply adapter by inserting a 1.5 V battery.
2 Safety Notes
The adapter corresponds to all relevant directives of
the EU and is therefore marked with .
GThe adapter is suitable for indoor use only. Pro-
tect it against dripping water and splash water,
high air humidity and heat (admissible ambient
temperature range 0 – 40 °C).
GFor cleaning only use a dry, soft cloth, never use
chemicals or water.
GNo guarantee claims for the adapter and no lia-
bility for any resulting personal damage or mate-
rial damage will be accepted if it is used for other
purposes than originally intended, if it is not cor-
rectly connected or not repaired in an expert way.
3 Operation
1) If the microphone input of the audio unit to which
the electret microphone is to be connected via
the power supply adapter is equipped with a
phantom power (48 V ), the microphone can be
supplied via this input.
If not, a 1.5 V battery of size AA is required.
To insert the battery, open the microphone hous-
ing. Screw off the screw cap (3) by turning it
counterclockwise. Insert the battery according to
the imprint in the battery compartment and screw
on the screw cap of the housing again.
If the unit is not used for a longer period, the
battery should be removed to prevent damage to
the unit in case of battery leakage.
2) Connect the microphone to the mini XLR plug (4)
of the adapter and connect the XLR plug (1) of
If the adapter is to be put out of operation
definitively, take it to a local recycling plant
for a disposal which is not harmful to the
environment.
Do not throw exhausted batteries into the house-
hold rubbish but take them to the special waste
disposal (e. g. collective container at your electri-
cal supply shop).
the adapter to a balanced XLR microphone input
at the audio unit.
3) If the microphone is supplied via the battery in the
adapter, slide the switch (2) on the adapter to
position ON for operation. (If no battery has been
inserted and the power supply is made via the
phantom power of the audio unit, the sliding
switch has no function.)
After use remember to switch off the adapter
(position OFF), so that there will be no unneces-
sary consumption of the battery.
4 Specifications
Input: . . . . . . . . . . . . . . . mini XLR, unbalanced
Output: . . . . . . . . . . . . . . XLR, balanced
Power supply: . . . . . . . . . 1.5 battery of size AA
or
phantom power 48 V
Ambient temperature: . . . 0 – 40 °C
Dimensions: . . . . . . . . . . ∅22 mm × 170 mm
Weight: . . . . . . . . . . . . . . 75 g
Subject to technical modification.
GB
EMA-1
Bestellnummer 23.2120
www.imgstageline.com
D
A
CH
®
MONACOR INTERNATIONAL GmbH & Co. KG
•
Zum Falsch 36
•
28307 Bremen
•
Germany
Copyright
©
by MONACOR INTERNATIONAL. All rights reserved. A-0995.99.02.03.2012
D
A
CH
EMA-1
12
3
ON
OFF
1
2
3
1234
Signal
Mikrofon
Microphone
Signal
-
Signal+ Signal +
Adaptateur dʼalimentation
pour microphones avec
connexion mini XLR
Veuillez lire la présente notice avec attention avant
le fonctionnement et conservez-la pour pouvoir
vous y reporter ultérieurement.
1 Possibilités dʼutilisation
Lʼadaptateur EMA-1 sert dʼadaptateur dʼalimenta-
tion pour des microphones électret disposant dʼune
connexion mini XLR (p. ex. HSE-110). Via lʼadapta-
teur, il est possible de brancher le micro à un appa-
reil audio (par exemple table de mixage) qui délivre
une alimentation fantôme de 48 V nécessaire
pour le fonctionnement.
Si aucune alimentation fantôme nʼest possible
via lʼappareil audio, lʼadaptateur peut être égale-
ment utilisé comme adaptateur dʼalimentation en
insérant une batterie 1,5 V.
2 Conseils de sécurité
Lʼadaptateur répond à toutes les directives néces-
saires de lʼUnion Européenne et porte donc le sym-
bole .
GLʼadaptateur nʼest conçu que pour une utilisation
en intérieur. Protégez-le de tout type de projec-
tions dʼeau, des éclaboussures, dʼune humidité
élevée et de la chaleur (plage de température de
fonctionnement autorisée : 0 – 40 °C).
GPour le nettoyer, utilisez un chiffon doux et sec,
en aucun cas de produits chimiques ou dʼeau.
GNous déclinons toute responsabilité en cas de
dommages matériels ou corporels résultants si
lʼadaptateur est utilisé dans un but autre que
celui pour lequel il a été conçu, sʼil nʼest pas cor-
rectement branché ou sʼil nʼest pas réparé par
une personne habilitée ; en outre, la garantie
deviendrait caduque.
3 Fonctionnement
1) Si lʼentrée micro de lʼappareil audio auquel le
micro électret doit être relié via lʼadaptateur dʼali-
mentation, est dotée dʼune alimentation fantôme
(48 V ), le microphone peut être alimenté via
cette entrée.
Si ce nʼest pas le cas, une batterie 1,5 V de
type R6 est nécessaire. Pour insérer la batterie,
ouvrez le corps dʼadaptateur. Dévissez le cou-
vercle fileté (3) en le tournant dans le sens
inverse des aiguilles dʼune montre. Insérez la
Lorsque lʼadaptateur est définitivement
retiré du service, vous devez le déposer
dans une usine de recyclage adaptée pour
contribuer à son élimination non polluante.
Ne jetez pas directement les batteries usagées
dans la poubelle domestique, ramenez-les à un
container spécifique (p. ex. un collecteur chez
votre revendeur).
batterie avec les connexions plus et moins
comme imprimé dans le compartiment batterie.
Revissez le couvercle fileté du boîtier.
En cas de non-utilisation prolongée, veillez à
retirer la batterie ; elle pourrait couler et endom-
mager lʼappareil.
2) Reliez le micro à la fiche mini XLR (4) de lʼadap-
tateur, reliez la fiche XLR (1) de lʼadaptateur à une
entrée micro symétrique XLR sur lʼappareil audio.
3) Si le microphone est alimenté par la batterie dans
lʼadaptateur, mettez sur lʼadaptateur, lʼinterrup-
teur (2) sur la position ON pour le fonctionnement.
(Si aucune batterie nʼest insérée, et si lʼalimenta-
tion sʼeffectue via lʼalimentation fantôme de lʼap-
pareil audio, lʼinterrupteur nʼa aucune fonction).
Après utilisation, éteignez lʼadaptateur (posi-
tion OFF) sinon la batterie est utilisée inutilement.
4 Caractéristiques techniques
Entrée : . . . . . . . . . . . . . . mini XLR asymétrique
Sortie : . . . . . . . . . . . . . . XLR symétrique
Alimentation : . . . . . . . . . batterie 1,5 V de type
R6 ou alimentation
fantôme 48 V
Température dʼutilisation : 0 – 40 °C
Dimensions : . . . . . . . . . . ∅22 mm × 170 mm
Poids : . . . . . . . . . . . . . . 75 g
Tout droit de modification réservé.
Adattatore di alimentazione
per microfoni con connes-
sione mini XLR
Vi preghiamo di leggere attentamente le presenti
istruzioni prima della messa in funzione e di con-
servarle per un uso futuro.
1 Possibilità dʼimpiego
Lʼadattatore EMA-1 serve per lʼalimentazione di
microfoni allʼelettrete equipaggiati con un contatto
mini XLR (p. es. HSE-110). Grazie allʼadattatore, il
microfono può essere collegato con un apparecchio
audio (p. es. mixer) che fornisce la necessaria ali-
mentazione phantom (48 V ).
Se lʼalimentazione phantom non è possibile
attraverso lʼapparecchio audio, con una batteria
1,5 V inserita, lʼadattatore può essere utilizzato
anche come adattatore di alimentazione.
2 Avvertenze di sicurezza
Lʼadattatore è conforme a tutte le direttive rilevanti
dellʼUE e pertanto porta la sigla .
GUsare lʼadattatore solo allʼinterno di locali e pro-
teggerlo dallʼacqua gocciolante e dagli spruzzi
dʼacqua, da alta umidità dellʼaria e dal calore
(temperatura dʼimpiego ammessa fra 0 e 40 °C).
GPer la pulizia usare solo un panno morbido,
asciutto; non impiegare in nessun caso prodotti
chimici o acqua.
GNel caso dʼuso improprio, di collegamenti sbagliati
o di riparazione non a regola dʼarte dellʼ adattatore,
non si assume nessuna responsabilità per even-
tuali danni consequenziali a persone o a cose e
non si assume nessuna garanzia per lʼadattatore.
3 Messa in funzione
1) Se lʼingresso microfono dellʼapparecchio audio, al
quale si deve collegare il microfono a elettrete per
mezzo dellʼadattatore di alimentazione, è equi-
paggiato con alimentazione phantom (48 V ), il
microfono può essere alimentato attraverso que-
sto ingresso.
Altrimenti è richiesta una batteria di 1,5 V, tipo
stilo (AA). Per inserire le batteria aprire il corpo
adattatore svitando il cappuccio a vite (3) in
senso antiorario. Inserire le batteria con la pola-
rità come indicata nel vano batteria e riavvitare il
cappuccio a vite del adattatore.
Se lʼapparecchio non viene usato per un
tempo prolungato conviene togliere le batterie
per evitare che perdendo danneggino lʼadatta-
tore.
Se si desidera eliminare lʼadattatore defi-
nitivamente, consegnarlo per lo smalti-
mento ad unʼistituzione locale per il rici-
claggio.
Non gettare le batterie scariche nei rifiuti di casa
bensì negli appositi raccoglitori.
I
EMA-1
Bestellnummer 23.2120
www.imgstageline.com
F
B
CH
®
MONACOR INTERNATIONAL GmbH & Co. KG
•
Zum Falsch 36
•
28307 Bremen
•
Germany
Copyright
©
by MONACOR INTERNATIONAL. All rights reserved. A-0995.99.02.03.2012
2) Collegare il microfono con la spina mini XLR (4)
dellʼadattatore e collegare il connettore XLR (1)
dellʼadattatore con un ingresso simmetrico XLR
per microfono dellʼapparecchio audio.
3) Se il microfono viene alimentato attraverso la
batteria inserita nellʼadattatore, per usarlo oc-
corre spostare lʼinterruttore (2) sullʼadattatore in
posizione ON. (Se non è inserita nessuna batte-
ria e se è in funzione lʼalimentazione phantom,
tale interruttore è privo di importanza.)
Non dimenticare di spegnere lʼadattatore
dopo lʼuso (posizione OFF), per non consumare
la batteria inutilmente.
4 Dati tecnici
Ingresso: . . . . . . . . . . . . . mini-XLR, asimmetrico
Uscita: . . . . . . . . . . . . . . XLR, simmetrico
Alimentazione: . . . . . . . . batteria 1,5 V mignon
(AA) opp. alimentazione
phantom 48 V
Temperatura dʼimpiego: . 0 – 40 °C
Dimensioni: . . . . . . . . . . . ∅22 mm × 170 mm
Peso: . . . . . . . . . . . . . . . 75 g
Con riserva di modifiche tecniche.
EMA-1
12
3
ON
OFF
1
2
3
1234
Signal
Microphone
Microfono
Signal
-
Signal+ Signal +

This manual suits for next models

1

Other Monacor Adapter manuals

Monacor JTS MA-500 User manual

Monacor

Monacor JTS MA-500 User manual

Monacor img Stage Line EMA-2 User manual

Monacor

Monacor img Stage Line EMA-2 User manual

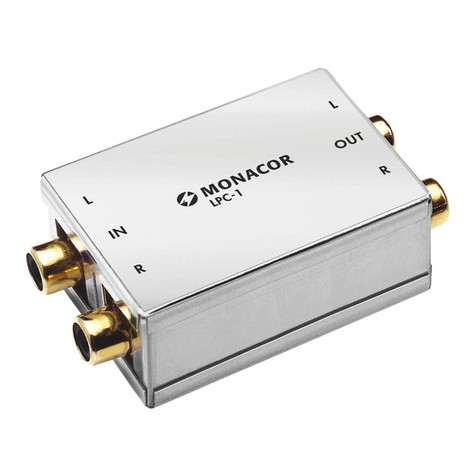
Monacor LPC-1 User manual

Monacor

Monacor LPC-1 User manual

Monacor IMG STAGELINE LC-31 User manual

Monacor

Monacor IMG STAGELINE LC-31 User manual

Monacor 21.0600 User manual

Monacor

Monacor 21.0600 User manual

Monacor img Stage Line EMA-40 User manual

Monacor

Monacor img Stage Line EMA-40 User manual

Monacor IMG Stageline MC-31 User manual

Monacor

Monacor IMG Stageline MC-31 User manual

Monacor IMG STAGELINE LC-31 User manual

Monacor

Monacor IMG STAGELINE LC-31 User manual

Monacor PATEL-1 User manual

Monacor

Monacor PATEL-1 User manual

Monacor JTS MA-500 User manual

Monacor

Monacor JTS MA-500 User manual

Monacor img Stage Line MC-31 User manual

Monacor

Monacor img Stage Line MC-31 User manual

Monacor RMA-1600 User manual

Monacor

Monacor RMA-1600 User manual

Monacor MAESTRO-1 User manual

Monacor

Monacor MAESTRO-1 User manual

Monacor IMG STAGELINE DMA-1USB User manual

Monacor

Monacor IMG STAGELINE DMA-1USB User manual

Monacor IMG STAGELINE EMA-1 User manual

Monacor

Monacor IMG STAGELINE EMA-1 User manual

Monacor VGA-01 User manual

Monacor

Monacor VGA-01 User manual

Popular Adapter manuals by other brands

NETGEAR PA101 installation guide

NETGEAR

NETGEAR PA101 installation guide

StarTech.com DKT30CHVAUSP quick start guide

StarTech.com

StarTech.com DKT30CHVAUSP quick start guide

Kensington K33982WW quick start guide

Kensington

Kensington K33982WW quick start guide

Aztech HomePlug AV user manual

Aztech

Aztech HomePlug AV user manual

Tieline Mic Adapter Getting started

Tieline

Tieline Mic Adapter Getting started

OHD 1 quick start guide

OHD

OHD 1 quick start guide

Fluke 174x instructions

Fluke

Fluke 174x instructions

Magic Control Technology USB 2.0 VGA Adapter user manual

Magic Control Technology

Magic Control Technology USB 2.0 VGA Adapter user manual

Shure RMCE-TW2 manual

Shure

Shure RMCE-TW2 manual

EVA Logik ZW36 installation manual

EVA Logik

EVA Logik ZW36 installation manual

Verbatim WTEU-01 quick start guide

Verbatim

Verbatim WTEU-01 quick start guide

Albrecht DR 56 installation guide

Albrecht

Albrecht DR 56 installation guide

BeachTek High Definition Adapter DXA-6HD operating instructions

BeachTek

BeachTek High Definition Adapter DXA-6HD operating instructions

TRENDnet TU-PS2 Quick installation guide

TRENDnet

TRENDnet TU-PS2 Quick installation guide

IDT InnoMedia XT XT 6328-2R Getting started guide

IDT

IDT InnoMedia XT XT 6328-2R Getting started guide

VidaBox VidaCharger Ultra VB VCHR U 48V ADPT installation guide

VidaBox

VidaBox VidaCharger Ultra VB VCHR U 48V ADPT installation guide

PMR Blue Manager quick start guide

PMR

PMR Blue Manager quick start guide

Panasonic DMW-USBC1 operating instructions

Panasonic

Panasonic DMW-USBC1 operating instructions

manuals.online logo
manuals.online logoBrands
  • About & Mission
  • Contact us
  • Privacy Policy
  • Terms and Conditions

Copyright 2025 Manuals.Online. All Rights Reserved.