manuals.online logo
Brands
  1. Home
  2. •
  3. Brands
  4. •
  5. Monacor
  6. •
  7. Adapter
  8. •
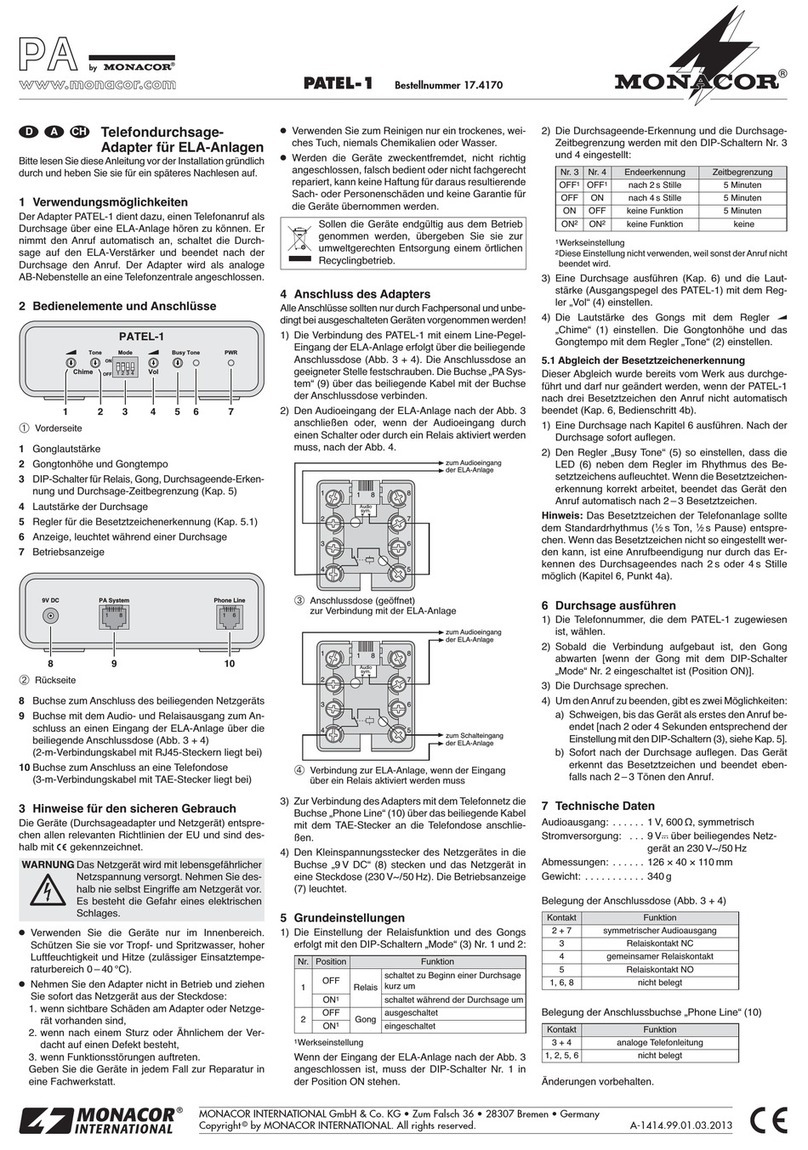
  9. Monacor IMG STAGELINE DMA-1USB User manual

Monacor IMG STAGELINE DMA-1USB User manual

Copyright©by MONACO INTE NATIONAL GmbH & Co. KG, Bremen, Germany. All rights reserved. A-0921.99.01.12.2008
®
DM A-1USB
Best.-Nr. 23.5680
wwwwww..iimmggssttaaggeelliinnee..ccoomm
12 3 4 5 6 7 8 9 10 11
USB-Audioadapter
Bitte lesen Sie diese Bedienungsanleitung vor dem
Betrieb gründlich durch und heben Sie sie für ein
späteres Nachlesen auf.
1 Einsatzmöglichkeiten
Der Audioadapter D A-1USB eignet sich optimal für
Tonaufnahmen oder Spracheingabe sowie Sprach-
und usikwiedergabe am Computer. An ihn lassen
sich ein ikrofon über eine XLR-Buchse und ein Ste-
reokopfhörer über eine 3,5-mm-Klinken buchse an-
schließen. Auf die ikrofonbuchse kann eine 48-V-
Phantomspeisung geschaltet werden. Der Adapter
wird direkt an einen Computer mit USB 1.1- oder
USB 2.0-Schnittstelle angeschlossen und ist durch
die Verwendung betriebssystemeigener Standard-
treiber für Audiogeräte sofort einsatzbereit.
2 ichtige Hinweise für den Gebrauch
Der Audioadapter entspricht allen erforderlichen
Richtlinien der EU und ist deshalb mit gekenn-
zeichnet.
GSetzen Sie den Audioadapter nur im Innenbereich
ein. Schützen Sie ihn vor Tropf- und Spritzwas-
ser, hoher Luftfeuchtigkeit und Hitze (zulässiger
Einsatztemperaturbereich 0 – 40 °C).
GVerwenden Sie zum Reinigen nur ein trockenes,
weiches Tuch, niemals Chemikalien oder Wasser.
GWird der Audioadapter zweckentfremdet, falsch
angeschlossen oder nicht fachgerecht repariert,
kann keine Haftung für daraus resultierende
Sach- oder Personenschäden und keine Garantie
für den Audioadapter übernommen werden.
3 Inbetriebnahme
1) Den ini-USB-Stecker (10) in die Buchse (9) ste-
cken, den USB-Stecker (11) mit dem USB-An-
schluss eines Computers verbinden; der Ring (3)
leuchtet als Betriebsanzeige rot. Der ikrofon-
eingang und der Kopfhörerausgang werden da-
raufhin vom Betriebssystem als zwei USB-Au-
diogeräte (Toneingabe und -ausgabe) erkannt.
Bei Bedarf die vom Betriebssystem geforder-
ten Gerätetreiber nachinstallieren und den Com-
puter neu starten.
2) Einen Stereokopfhörer an die Buchse (7) an-
schließen (empfohlene Impedanz ≥ 32 Ω). it der
Taste UP (5) oder DOWN (6) kann über das Be-
triebssystem des Computers die Lautstärke er-
höht oder verringert werden.
VORSICHT: Stellen Sie die Kopf-
hörerlautstärke nie sehr hoch ein.
Hohe Lautstärken können auf Dauer
das Gehör schädigen!
Soll der Audioadapter endgültig aus dem
Betrieb genommen werden, übergeben
Sie ihn zur umweltgerechten Entsorgung
einem örtlichen Recyclingbetrieb.
3) Ein ikrofon an die Buchse (1) anschließen. Zum
späteren Trennen die Entriegelung (2) drücken.
Wird für das ikrofon eine 48-V-Phantom -
speisung benötigt, diese mit der Taste 48V (8)
einschalten: Der Ring (3) leuchtet jetzt blau. Zum
Ausschalten der Phantomspeisung die Taste er-
neut drücken. Die ikrofonlautstärke mit dem
Regler (4) einstellen.
4 Technische Daten
Frequenzbereich: . . . . . . . . 20 – 20 000 Hz
Mikrofonversorgung: . . . . . . Phantomspeisung 48 V,
schaltbar
Empfohlene Lastimpedanz: ≥ 32 Ω
Digitale Auflösung: . . . . . . . 16 Bit bei 44,1 kHz oder 48 kHz
Abtastrate
Anschlussnorm: . . . . . . . . . USB 2.0
Stecker, Kabel: . . . . . . . . . . USB Typ A – 5-pol. Mini-B, 90 cm
Geeignete Betriebssysteme:
Windows ME, Windows 2000,
Windows XP, Windows Vista,
Mac OS X
Abmessungen, Gewicht: . . . ∅28 mm ×102 mm, 100 g
Änderungen vorbehalten.
Windows ist ein registriertes Warenzeichen der Microsoft Corporation in
den USA und anderen Ländern.
Mac OS ist ein registriertes Warenzeichen von Apple Computer, Inc. in
den USA und anderen Ländern.
USB Audio Adapter
Please read these operating instructions carefully
prior to operation and keep them for later reference.
1 Applications
The audio adapter D A-1USB is ideally suited for
audio recordings or speech input and reproduction
of music and speech on the computer. It allows con-
nection of a microphone via an XLR jack and of
stereo headphones via a 3.5 mm jack. A 48 V phan-
tom power can be activated for the microphone jack.
The adapter is directly connected to a computer with
USB 1.1 or USB 2.0 interface; it is immediately
ready for operation due to the use of standard driv-
ers of the operating system for audio units.
2 Important Notes
This audio adapter corresponds to all required di-
rectives of the EU and is therefore marked with .
GThe audio adapter is suitable for indoor use only.
Protect it against dripping water and splash water,
high air humidity, and heat (admissible ambient
temperature range 0 – 40 °C).
GFor cleaning only use a dry, soft cloth; never use
water or chemicals.
GNo guarantee claims for the audio adapter and no
liability for any resulting personal damage or ma-
terial damage will be accepted if the audio
adapter is used for other purposes than originally
intended, if it is not correctly connected or not re-
paired in an expert way.
3 Operation
1) Connect the mini USB plug (10) to the jack (9),
connect the USB plug (11) to the USB port of a
computer; the ring (3) will show red to indicate
operation. The microphone input and the head-
phone output will then be recognized by the op-
erating system as two USB audio units (audio
input and output).
If necessary, install the drivers for the units re-
quired by the operating system and restart the
computer.
2) Connect stereo headphones to the jack (7)
[recommended impedance ≥ 32 Ω]. Use the but-
ton UP (5) or DOWN (6) to increase or decrease
the volume via the operating system of the com-
puter.
CAUTION: Never adjust the head-
phones to a very high volume. Per-
manent high volumes may damage
your hearing!
If the audio adapter is to be put out of op-
eration definitively, take it to a local recy-
cling plant for a disposal which is not
harmful to the environment.
3) Connect a microphone to the jack (1). For dis-
connecting it later, press the latch (2) to unlock. If
a 48 V phantom power is required for the micro-
phone, press the button 48V (8) to activate it: The
ring (3) will show blue. To deactivate the phantom
power, press the button once again. Adjust the mi-
crophone volume with the control (4).
4 Specifications
Frequency range: . . . . . . . . 20 – 20 000 Hz
Microphone power supply: . phantom power 48 V, switchable
ecommended load
impedance: . . . . . . . . . . . . . ≥ 32 Ω
Digital resolution: . . . . . . . . 16 bits at 44.1 kHz or 48 kHz
sampling rate
Connection standard: . . . . . USB 2.0
Plug, cable: . . . . . . . . . . . . . USB type A – 5-pole mini-B, 90 cm
Suitable operating systems:
Windows ME, Windows 2000,
Windows XP, Windows Vista,
Mac OS X
Dimensions, weight: . . . . . . ∅28 mm ×102 mm, 100 g
Subject to technical modification.
Windows is a registered trademark of Microsoft Corporation in the USA
and other countries.
Mac OS is a registered trademark of Apple Computer, Inc. in the USA and
other countries.
D A CH
GB
Copyright©by MONACO INTE NATIONAL GmbH & Co. KG, Bremen, Germany. All rights reserved. A-0921.99.01.12.2008
®
DM A-1USB
Best.-Nr. 23.5680
wwwwww..iimmggssttaaggeelliinnee..ccoomm
Adaptateur USB audio
Veuillez lire la présente notice avec attention avant
le fonctionnement et conservez-la pour pouvoir vous
y reporter ultérieurement.
1 Possibilités dʼutilisation
Lʼadaptateur audio D A-1USB est idéal pour des
enregistrements sonores ou de prise de parole, des
restitutions de discours et musique sur un ordina-
teur. On peut y relier un microphone via une prise
XLR femelle et un casque stéréo via une prise jack
3,5. Une alimentation fantôme 48 V peut être bran-
chée à la prise micro. Lʼadaptateur se branche di-
rectement sur un ordinateur avec interface USB 1.1
ou USB 2.0 et est prêt à fonctionner via lʼutilisation
de drivers standard du système dʼexploitation pour
des appareils audio.
2 Conseils importants dʼutilisation
Lʼadaptateur audio répond à toutes les directives
nécessaires de lʼUnion européenne et porte donc le
symbole .
G
Lʼadaptateur audio nʼest conçu que pour une utili-
sation en intérieur. Protégez-le de tout type de pro-
jections dʼeau, des éclaboussures, dʼune humidité
élevée de lʼair et de la chaleur (plage de tempéra-
ture de fonctionnement autorisée : 0 – 40 °C).
GPour le nettoyage, utilisez uniquement un chiffon
sec et doux, en aucun cas de produits chimiques
ou dʼeau.
GNous déclinons toute responsabilité en cas de
dommages matériels ou corporels résultants si
lʼadaptateur audio est utilisé dans un but autre
que celui pour lequel il a été conçu, sʼil nʼest pas
correctement branché ou sʼil nʼest pas réparé par
une personne habilité ; en outre, la garantie de-
viendrait caduque.
3 Utilisation
1) Reliez la fiche mini USB mâle (10) à la prise (9),
reliez la fiche USB mâle (11) au port USB dʼun
lʼordinateur : lʼanneau (3) brille en rouge et sert
de témoin de fonctionnement. Lʼentrée micro et
la sortie casque sont reconnues par le système
dʼexploitation comme deux appareils audio USB
(entrée et sortie de son).
Si besoin, installez les drivers pour les appa-
reils exigés par le système dʼexploitation puis re-
démarrez lʼordinateur.
2) Reliez un casque stéréo à la prise (7) (impé-
dance recommandée ≥ 32 Ω). Le volume peut
être augmenté ou diminué avec la touche UP (5)
ou DOWN (6) via le système dʼexploitation de
lʼordinateur.
ATTENTION : Ne réglez pas le vo-
lume du casque trop fort, des vo-
lumes élevés peuvent à la longue en-
dommager lʼaudition!
Lorsque l’adaptateur audio est définitivement retiré
du service, vous devez le déposer dans une usine
de recyclage adaptée pour contribuer à son élimi-
nation non polluante.
3) Reliez un microphone à la prise (1). Pour le dé-
connecter ultérieurement, appuyez sur la lan-
guette de verrouillage (2). Si une alimentation
fantôme 48 V est nécessaire pour le microphone,
allumez-la avec la touche 48V (8) : lʼanneau (3)
brille en bleu maintenant. Pour éteindre lʼalimen-
tation fantôme, appuyez une nouvelle fois sur la
touche. Réglez le volume du microphone avec le
réglage (4).
4 Caractéristiques techniques
Bande passante : . . . . . . . . 20 – 20 000 Hz
Alimentation microphone : . alimentation fantôme 48 V,
commutable
Impédance de charge
recommandée : . . . . . . . . . .≥ 32 Ω
ésolution numérique : . . . . 16 bits à un taux échantillonnage
de 44,1 kHz ou 48 kHz
Norme de branchement : . . USB 2.0
Fiche, cordon : . . . . . . . . . .
USB type A – mini B 5 pôles, 90cm
Systèmes d’exploitation
adaptés : . . . . . . . . . . . . . . .
Windows ME, Windows 2000,
Windows XP, Windows Vista,
Mac OS X
Dimensions, poids : . . . . . . ∅28 mm ×102 mm, 100 g
Tout droit de modification réservé.
Windows est une marque déposée de Microsoft Corporation aux Etats-
Unis et dans les autres pays.
Mac OS est une marque déposée de Apple Computer, Inc. aux Etats-
Unis et dans les autres pays.
12 3 4 5 6 7 8 9 10 11
Adattatore audio USB
Vi preghiamo di leggere attentamente le presenti
istruzioni prima della messa in funzione e di con-
servarle per un uso futuro.
1 Possibilità dʼimpiego
Lʼadattatore audio D A-1USB è indicato in modo
ottimale per registrazioni audio o input a voce e per
la riproduzione di lingua parlata e di musica sul com-
puter. Si possono collegare un microfono per mezzo
di una presa XLR nonché una cuffia stereo con presa
jack 3,5 mm. E`possibile attivare unʼalimentazione
phantom 48 V per la presa del microfono. Lʼadatta-
tore viene collegato direttamente con un computer
equipaggiato con porta USB 1.1 o USB 2.0,
e utiliz-
zando i driver standard del sistema operativo è su-
bito pronto per gli apparecchi audio.
2 Avvertenze importanti per lʼuso
Lʼadattatore audio è conforme a tutte le direttive ri-
chieste dellʼUE e pertanto porta la sigla .
GUsare adattatore solo allʼinterno di locali. Proteg-
gerlo dallʼacqua gocciolante e dagli spruzzi dʼac-
qua, da alta umidità dellʼaria e dal calore (tempe-
ratura dʼimpiego ammessa fra 0 e 40 °C).
GPer la pulizia usare solo un panno morbido,
asciutto; non impiegare in nessun caso prodotti
chimici o acqua.
GNel caso dʼuso improprio, di collegamenti sbagliati
o di riparazione non a regola dʼarte dellʼadatta-
tore, non si assume nessuna responsabilità per
eventuali danni consequenziali a persone o a
cose e non si assume nessuna garanzia per
lʼadattatore.
3 Messa in funzione
1) Inserire il connettore mini USB (10) nella presa
(9) e collegare il connettore USB (11) con la porta
USB di un computer; lʼanello (3) si accende di
color rosso come spia di funzionamento. A questo
punto, lʼingresso microfono e lʼuscita cuffia ven-
gono riconosciuti dal sistema operativo come due
dispositivi audio USB (IN e OUT audio).
Se necessario, installare i driver richiesti dal
sistema operativo e riavviare il computer.
2) Collegare una cuffia stereo con la presa (7)
(impedenza consigliata ≥ 32 Ω). Con il tasto UP
(5) o DOWN (6) è possibile aumentare o ridurre
il volume servendosi del sistema operativo del
computer.
ATTENZIONE: ai tenere molto alto
il volume delle cuffie. A lungo andare,
il volume eccessivo può procurare
danni allʼudito!
Se si desidera eliminare lʼadattatore defi-
nitivamente, consegnarlo per lo smalti-
mento ad unʼistituzione locale per il rici-
claggio.
3) Collegare un microfono con la presa (1). Per
staccarlo successivamente, premere lo sblocco
(2). Se il microfono richiede unʼalimentazione
phantom 48 V, attivarla con il tasto 48V (8):
lʼanello (3) si accende ora di color blu. Per disat-
tivare lʼalimentazione phantom premere nuova-
mente il tasto. Impostare il volume del microfono
con il regolatore (4).
4 Dati tecnici
Banda passante : . . . . . . . . . 20 – 20 000 Hz
Alimentazione del microfono: alimentazione phantom 48 V,
attivabile
Impedenza di carico
consigliata: . . . . . . . . . . . . . . ≥ 32 Ω
isoluzione digitale: . . . . . . . 16 bit con 44,1 kHz o campiona-
mento 48 kHz
Standard di connessione . . . USB 2.0
Connettore, cavo: . . . . . . . . . USB tipo A – mini-B a 5 poli;
90 cm
Sistemi operativi adatti: . . . .
Windows ME, Windows 2000,
Windows XP, Windows Vista,
Mac OS X
Dimensioni, peso: . . . . . . . . . ∅28 mm ×102 mm, 100 g
Con riserva di modifiche tecniche.
Windows è un marchio registrato della Microsoft Corporation negli USA e
in altri paesi.
Mac OS è un marchio registrato della Apple Computer, Inc. negli USA e
in altri paesi.
I
F B CH
This manual suits for next models

1

Other Monacor Adapter manuals

Monacor IMG STAGELINE EMA-1 User manual

Monacor

Monacor IMG STAGELINE EMA-1 User manual

Monacor 21.0600 User manual

Monacor

Monacor 21.0600 User manual

Monacor IMG STAGELINE LC-31 User manual

Monacor

Monacor IMG STAGELINE LC-31 User manual

Monacor img Stage Line EMA-2 User manual

Monacor

Monacor img Stage Line EMA-2 User manual

Monacor img Stage Line MC-31 User manual

Monacor

Monacor img Stage Line MC-31 User manual

Monacor JTS MA-500 User manual

Monacor

Monacor JTS MA-500 User manual

Monacor LPC-1 User manual

Monacor

Monacor LPC-1 User manual

Monacor img Stage Line EMA-40 User manual

Monacor

Monacor img Stage Line EMA-40 User manual

Monacor VGA-01 User manual

Monacor

Monacor VGA-01 User manual

Monacor RMA-1600 User manual

Monacor

Monacor RMA-1600 User manual

Monacor JTS MA-500 User manual

Monacor

Monacor JTS MA-500 User manual

Monacor MAESTRO-1 User manual

Monacor

Monacor MAESTRO-1 User manual

Monacor IMG STAGELINE EMA-1 User manual

Monacor

Monacor IMG STAGELINE EMA-1 User manual

Monacor IMG Stageline MC-31 User manual

Monacor

Monacor IMG Stageline MC-31 User manual

Monacor PATEL-1 User manual

Monacor

Monacor PATEL-1 User manual

Monacor IMG STAGELINE LC-31 User manual

Monacor

Monacor IMG STAGELINE LC-31 User manual

Popular Adapter manuals by other brands

National Instruments 5762R USER GUIDE AND SPECIFICATIONS

National Instruments

National Instruments 5762R USER GUIDE AND SPECIFICATIONS

ADEMCO 5216 installation instructions

ADEMCO

ADEMCO 5216 installation instructions

AudioCodes MewdiaPack MP-202 quick start guide

AudioCodes

AudioCodes MewdiaPack MP-202 quick start guide

StarTech.com DKT30CDVPD instruction manual

StarTech.com

StarTech.com DKT30CDVPD instruction manual

FaxLogic HT-503 quick start guide

FaxLogic

FaxLogic HT-503 quick start guide

Maxwell 25521B user manual

Maxwell

Maxwell 25521B user manual

Allnet ALL0234Nano user manual

Allnet

Allnet ALL0234Nano user manual

TRENDnet TEW-647GA Quick installation guide

TRENDnet

TRENDnet TEW-647GA Quick installation guide

Mecc Alte USB to Serial adapter Technical guide

Mecc Alte

Mecc Alte USB to Serial adapter Technical guide

Eminent EM8030 Quick install guide

Eminent

Eminent EM8030 Quick install guide

TP-Link TL-WN7200ND user guide

TP-Link

TP-Link TL-WN7200ND user guide

D-Link Rangebooster G WNA-2330 Quick install guide

D-Link

D-Link Rangebooster G WNA-2330 Quick install guide

TDK HHM Series HHM2241SA1 Specifications

TDK

TDK HHM Series HHM2241SA1 Specifications

TP-Link TL-PA7027P Quick installation guide

TP-Link

TP-Link TL-PA7027P Quick installation guide

S2Konnect N-2020SX user manual

S2Konnect

S2Konnect N-2020SX user manual

Westermo ED-10 TCP installation manual

Westermo

Westermo ED-10 TCP installation manual

on networks PL500 user manual

on networks

on networks PL500 user manual

Eminent EM8025 manual

Eminent

Eminent EM8025 manual

manuals.online logo
manuals.online logoBrands
  • About & Mission
  • Contact us
  • Privacy Policy
  • Terms and Conditions

Copyright 2025 Manuals.Online. All Rights Reserved.