manuals.online logo
Brands
  1. Home
  2. •
  3. Brands
  4. •
  5. Monacor
  6. •
  7. Speakers System
  8. •
  9. Monacor ESP-360/WS User manual

Monacor ESP-360/WS User manual

ELA-Wandlautsprecher
Bitte lesen Sie diese Bedienungsanleitung vor der
Installation gründlich durch und heben Sie sie für
ein späteres Nachlesen auf.
1 Verwendungsmöglichkeiten
Dieser ELA-Lautsprecher für die Wandmontage ist
speziell für den Einsatz in ELA-Anlagen konzipiert, die
mit 100-V-Technik arbeiten. Die Leistungsanpassung
(3 WRMS oder 6 WRMS) erfolgt über die Auswahl der
Anschlussklemmen.
2 Wichtige Hinweise für den Gebrauch
Der Lautsprecher entspricht allen erforderlichen Richt-
linien der EU und ist deshalb mit gekennzeichnet.
GDer Lautsprecher ist nur zur Verwendung im Innen-
bereich geeignet. Schützen Sie ihn vor Tropf- und
Spritzwasser, hoher Luftfeuchtigkeit und Hitze (zu-
lässiger Einsatztemperaturbereich 0 – 40 °C).
GVerwenden Sie zum Reinigen nur ein trockenes, wei-
ches Tuch, niemals Chemikalien oder Wasser.
GWird der Lautsprecher zweckentfremdet, nicht fach-
gerecht installiert oder überlastet, kann keine Haf-
tung für daraus resultierende Sach- oder Personen-
schäden und keine Garantie für den Lautsprecher
übernommen werden.
3 Installation
WARNUNG
Im Betrieb liegt berührungsgefährliche
Spannung bis 100 V an den Anschluss-
klemmen an. Die Installation darf nur
durch Fachpersonal erfolgen!
Achten Sie auf die richtige Leistungsanpassung.
Eine falsche Anpassung führt zur Zerstörung des
ELA-Verstärkers! Die Summe der Leistungen aller
angeschlossenen Lautsprecher darf die Verstärker-
leistung nicht überschreiten.
Soll der Lautsprecher endgültig aus dem
Betrieb genommen werden, übergeben
Sie ihn zur umweltgerechten Entsorgung
einem örtlichen Recyclingbetrieb.
1) Falls die ELA-Anlage eingeschaltet ist, diese zuerst
komplett ausschalten!
2) Den Lautsprecher über zwei der rückseitigen An-
schlussklemmen an die 100-V-Audioleitung des
ELA-Verstärkers anschließen: Die schwarze Klem-
me „COM“ (Minuspol) und je nach gewünschter
Nennleistung entweder die rote Klemme „3 W“ oder
die weiße Klemme „6 W“ verwenden.
Beim Anschluss von mehreren Lautsprechern
darauf achten, dass die Lautsprecher alle gleich
gepolt werden und dass der ELA-Verstärker nicht
überlastet wird.
3) Den Lautsprecher über die Bohrung unterhalb der
Anschlussklemmen sicher an der Wand montieren.
4 Technische Daten
Frequenzbereich: . . . . . . . . 130 – 15 000 Hz
Nennbelastbarkeit: . . . . . . . 3 WRMS oder 6 WRMS
Abmessungen . . . . . . . . . . 185 × 255 × 123 mm
Gewicht: . . . . . . . . . . . . . . . 1,1 kg
Änderungen vorbehalten.
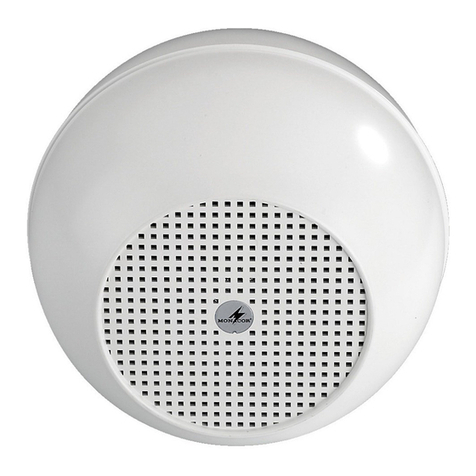
PA Wall Speaker
Please read these operating instructions carefully prior
to installing the speaker and keep them for later use.
1 Applications
This PA speaker for wall mounting is specially de-
signed for application in PA systems operating with a
100 V technique. The power (3 WRMS or 6 WRMS) is
matched via selection of the terminals.
2 Important Notes
The speaker corresponds to all required directives of
the EU and is therefore marked with .
GThe speaker is suitable for indoor use only. Protect
it against dripping water and splash water, high air
humidity, and heat (admissible ambient temperature
range 0 – 40 °C).
GFor cleaning only use a dry, soft cloth; never use
chemicals or water.
GNo guarantee claims for the speaker and no liability
for any resulting personal damage or material dam-
age will be accepted if the speaker is used for other
purposes than originally intended, if it is not expertly
installed, or if it is overloaded.
3 Installation
1) If the PA system is switched on, switch it off com-
pletely first!
WARNING
During operation, there is a hazard of
contact with a voltage of up to 100 V at
the terminals. The installation must al-
ways be carried out by skilled person-
nel only!
Observe the correct power matching. An incorrect
matching will damage the PAamplifier! The total pow-
er of all speakers connected must not exceed the
amplifier power.
If the speaker is to be put out of operation
definitively, take it to a local recycling plant
for a disposal which is not harmful to the
environment.
2) Connect the speaker via two of the rear terminals to
the 100 V audio cable of the PA amplifier: Use the
black terminal “COM” (negative pole) and, accord-
ing to the desired power rating, either the red ter-
minal “3 W” or the white terminal “6 W”.
When connecting several speakers, make sure
that all speakers have the same polarity and that
the PA amplifier is not overloaded.
3) Safely mount the speaker to the wall via the drill
hole below the terminals.
4 Specifications
Frequency range: . . . . . . . . 130 – 15 000 Hz
Power rating: . . . . . . . . . . . 3 WRMS or 6 WRMS
Dimensions . . . . . . . . . . . . . 185 × 255 × 123 mm
Weight: . . . . . . . . . . . . . . . . 1.1 kg
Subject to technical modification.
ESP-360/WS Best.-Nr. 16.1900
Haut-parleur mural
Public Adress
Veuillez lire la présente notice avec attention avant
lʼinstallation et conservez-la pour pouvoir vous y re-
porter ultérieurement.
1 Possibilités dʼutilisation
Ce haut-parleur Public Adress pour montage mural est
spécialement conçu pour une utilisation dans des ins-
tallations Public Adress fonctionnant en ligne 100 V.
Lʼadaptation de puissance (3 WRMS ou 6 WRMS) sʼef-
fectue via la sélection des bornes.
2 Conseils importants dʼutilisation
Le haut-parleur répond à toutes les directives néces-
saires de lʼUnion Européenne et porte donc le sym-
bole .
GLe haut-parleur nʼest conçu que pour une utilisation
en intérieur. Protégez-le de tout type de projections
dʼeau, des éclaboussures, dʼune humidité dʼair éle-
vée et de la chaleur (plage de température de fonc-
tionnement autorisée : 0 – 40 °C).
GPour le nettoyage, utilisez uniquement un chiffon
sec et doux, en aucun cas de produits chimiques ou
dʼeau.
GNous déclinons toute responsabilité en cas de dom-
mages matériels ou corporels résultants si le haut-
parleur est utilisé dans un but autre que celui pour
lequel il a été conçu, sʼil nʼest pas correctement ins-
tallé ou sʼil y a surcharge ; en outre, la garantie de-
viendrait caduque.
3 Installation
AVERTISSEMENT
Pendant le fonctionnement, une
tension de contact dangereuse
jusquʼà 100 V est présente aux
bornes. Seul un personnel qua-
lifié peut effectuer lʼinstallation.
Veillez à adapter la puissance correctement. Une
puissance erronée endommagera lʼamplificateur Pu-
blic Adress ! La somme des puissances de tous les
haut-parleurs reliés ne doit pas dépasser la puis-
sance de lʼamplificateur.
Lorsque le haut-parleur est définitivement
retiré du service, vous devez le déposer
dans une usine de recyclage adaptée pour
contribuer à son élimination non polluante.
1) Si lʼinstallation Public Adress est allumée, veillez à
la débrancher totalement !
2) Reliez le haut-parleur via deux des bornes sur la
face arrière au câble audio 100 V de lʼamplificateur
Public Adress : branchez la borne noire “COM”
(pôle moins) et selon la puissance nominale sou-
haitée soit la borne rouge “3 W” soit la borne blan-
che “6 W”.
Si plusieurs haut-parleurs sont branchés, veil-
lez à ce que les haut-parleurs aient tous la même
polarité et que lʼamplificateur Public Adress ne soit
pas en surcharge.
3) Fixer solidement le haut-parleur sur le mur via le
perçage situé sous les bornes de branchement.
4 Caractéristiques techniques
Bande passante : . . . . . . . . 130 – 15 000 Hz
Puissance nominale : . . . . . 3 WRMS ou 6 WRMS
Dimensions : . . . . . . . . . . . . 185 × 255 × 123 mm
Poids : . . . . . . . . . . . . . . . . 1,1 kg
Tout droit de modification réservé.
D A CH
GB
F B CH
MONACOR INTERNATIONAL GmbH & Co. KG • Zum Falsch 36 • 28307 Bremen • Germany
Copyright ©by MONACOR INTERNATIONAL. All rights reserved. A-0550.99.02.08.2011
®

Altoparlante PA da parete
Vi preghiamo di leggere attentamente le presenti istru-
zioni prima della messa in funzione e di conservarle
per un uso futuro.
1 Possibilità dʼimpiego
Questo altoparlante PA per il montaggio a parete è
stato realizzato in modo particolare per lʼimpiego in im-
pianti PA che lavorano con uscita audio a 100 V. Lʼa-
dattamento alla potenza (3 WRMS o 6 WRMS) avviene
tramite la scelta dei morsetti di connessione.
2 Avvertenze importante per lʼuso
Lʼaltoparlante è conforme a tutte le direttive richieste
dellʼUE e pertanto porta la sigla .
GLʼaltoparlante è previsto solo per lʼuso allʼinterno di
locali. Proteggerlo dallʼacqua gocciolante e dagli
spruzzi dʼacqua, da alta umidità dellʼaria e dal calore
(temperatura dʼimpiego ammessa fra 0 e 40 °C).
GPer la pulizia usare solo un panno morbido, asciutto;
non impiegare in nessun caso prodotti chimici o ac-
qua.
GNel caso dʼuso improprio, di installazione non a re-
gola dʼarte o di sovraccarico dellʼaltoparlante, non si
assume nessuna responsabilità per eventuali danni
consequenziali a persone o a cose e non si assume
nessuna garanzia per lʼaltoparlante.
3 Installazione
AVVERTIMENTO
Durante il funzionamento, i mor-
setti di collegamento presentano
una tensione pericolosa fino a
100 V. Lʼinstallazione deve essere
fatta da personale qualificato.
Fare attenzione al corretto adattamento della po-
tenza. Lʼadattamento errato può provocare la distru-
zione dellʼamplificatore PA! La somma delle potenze
di tutti gli altoparlanti collegati non deve superare la
potenza dellʼamplificatore.
Se si desidera eliminare lʼaltoparlante
definitivamente, consegnarlo per lo smal-
timento ad unʼistituzione locale per il
riciclaggio.
1) Se lʼimpianto PA è acceso, spegnerlo prima com-
pletamente!
2) Collegare lʼaltoparlante con lʼuscita audio 100 V
dellʼamplificatore PA tramite due fra i morsetti di
connessione poste sul retro: usare il morsetto nero
“COM” (polo negativo) e, a seconda della potenza
nominale desiderata, il morsetto rosso “3 W” o
quello bianco “6 W”.
Nel caso di collegamento di più altoparlanti fare
attenzione alla medesima polarità di tutti gli alto-
parlanti e di non sovraccaricare lʼamplificatore PA.
3) Montare lʼaltoparlante saldamente alla parete,
sfruttando il foro al di sotto dei morsetti.
4 Dati tecnici
Banda passante: . . . . . . . . 130 – 15 000 Hz
Potenza nominale: . . . . . . . 3 WRMS o 6 WRMS
Dimensioni: . . . . . . . . . . . . . 185 × 255 × 123 mm
Peso: . . . . . . . . . . . . . . . . . 1,1 kg
Con riserva di modifiche tecniche.
Altavoz de pared para megafonía
Por favor lea estas instrucciones atentamente antes de
instalar el altavoz y guárdelas para usos posteriores.
1 Usos
Este altavoz para megafonía para ser montado en pa-
red ha sido especialmente diseñado para su uso en
sistemas de megafonía que funcionan con una téc-
nica de 100 V. La potencia (3 WRMS o 6 WRMS) se ade-
cua mediante la selección de los terminales.
2 Notas importantes
El altavoz corresponde a todas las Directivas requeri-
das de la UE y por ello está marcado con .
GEl altavoz sólo está indicado para su uso en interior.
Protéjalo de las salpicaduras y las proyecciones de
agua, la humedad elevada del aire, y el calor (rango
de temperatura ambiente admisible 0 – 40 °C).
GPara su limpieza use sólo un paño suave y seco, no
use nunca productos químicos o agua.
GNo se aceptará ninguna garantía para el altavoz ni
se asumirá responsabilidad alguna en caso de
daños personales o patrimoniales si el altavoz se
usa para otros fines distintos a aquel para el que fue
originalmente concebido, si no se instala de manera
experta o si se sobrecarga.
3 Instalación
ADVERTENCIA
Durante el funcionamiento, existe
un riesgo de contacto con un vol-
taje de hasta 100 V en los termina-
les. ¡La instalación siempre debe
ser hecha sólo por personal espe-
cializado!
Observe que la potencia sea la adecuada. ¡Una
adaptación incorrecta puede dañar el amplificador de
megafonía! La potencia total de todos los altavoces
conectados no debe exceder la potencia del amplifi-
cador.
Si el altavoz debe ser retirado del funcio-
namiento definitivamente, llévelo a una
planta de reciclaje para su disposición no
dañina para el medio ambiente.
1) ¡Si el sistema de megafonía está encendido, apá-
guelo completamente primero!
2) Conecte el altavoz mediante dos de los terminales
traseros al cable audio de 100 V del amplificador de
megafonía: Use el terminal negro “COM” (polo ne-
gativo) y, de acuerdo con el índice de potencia de-
seado, cualquiera de los dos terminales, el rojo de
“3 W” o el blanco de “6 W”.
Cuando conecte varios altavoces, asegúrese
de que todos los altavoces tienen la misma polari-
dad y de que el amplificador no está sobrecar-
gado.
3) Monte el altavoz de manera segura a la pared me-
diante el agujero perforado bajo los terminales.
4 Características técnicas
Rango de frecuencia: . . . . 130 – 15 000 Hz
Índice de potencia: . . . . . . . 3 WRMS o 6 WRMS
Dimensiones: . . . . . . . . . . . 185 × 255 × 123 mm
Peso: . . . . . . . . . . . . . . . . . 1,1 kg
Sujeto a modificaciones técnicas.
ESP-360/WS Best.-Nr. 16.1900
Głośnik ścienny PA
Prosimy o uważne przeczytanie poniższej instrukcji
przed użyciem urządzenia, oraz o zachowanie tekstu
do wglądu.
1Zastosowanie
Głośnik ścienny ESP-360/WS jest przeznaczony do
zastosowania w systemach radiowęzłowych, pracu-
jących na liniach 100 V. Moc znamionową (3 WRMS lub
6W
RMS) można dobrać wybierając zacisk o odpo-
wiednim kolorze.
2Bezpieczeństwo użytkowania
Ponieważ urządzenie spełnia wymogi norm obowią-
zujących w Unii Europejskiej, jest oznaczone symbo-
lem .
GUrządzenie jest przeznaczone do użytku jedynie
wewnątrz pomieszczeń. Należy chronić je przed
bezpośrednim kontaktem z wodą, przed działaniem
wilgoci oraz wysokiej temperatury (dopuszczalna
temperatura otoczenia pracy to 0 – 40 ºC).
GDo czyszczenia urządzenia należy używać suchej,
miękkiej tkaniny; nie wolno stosować wody ani
środków czyszczących.
GProducent ani dostawca nie ponoszą odpowie-
dzialności za wynikłe szkody (uszkodzenie sprzętu
lub obrażenia użytkownika), jeśli urządzenie jest
używane niezgodnie z przeznaczeniem, lub jeśli
zostało nieprawidłowo zainstalowane bądź na-
stąpiło jego przeciążenie.
3Montaż głośnika
UWAGA
Podczas pracy urządzenia na przyłączu
linii występuje napięcie osiągające do
100 V, które stanowi potencjalne zagro-
żenie dla zdrowia lub życia. Podłączenie
urządzenia należy zlecić specjaliście!
Należy zwrócić uwagę na odpowiedni dobór mocy
głośników do mocy wzmacniacza. Nieodpowiedni
dobór mocy głośników może spowodować uszko-
dzenie wzmacniacza PA! Całkowita moc wszystkich
podłączonych głośników nie może przekraczać
mocy wzmacniacza.
Jeśli urządzenie ma zostać ostatecznie
wycofane z użycia, należy przekazać je
do punktu utylizacji odpadów, aby uni-
knąć zanieczyszczenia środowiska.
1) Jeśli system PA jest włączony, należy go wyłączyć
przed rozpoczęciem podłączania głośnika!
2) Głośnik należy podłączyć do kabla audio 100 V
wzmacniacza PA za pomocą dwóch zacisków, zna-
jdujących się z tyłu głośnika. Należy podłączyć
czarny zacisk “COM” (biegun ujemny) oraz termi-
nal o kolorze odpowiadającym żądanej mocy zna-
mionowej głośnika: czerwony “3 W” lub biały “6 W”.
Przy podłączaniu kilku głośników należy się
upewnić, czy wszystkie głośniki mają odpowied-
nią biegunowość i czy wzmacniacz nie został
przeciążony.
3) Należy przymocować głośnik do ściany używając
otworu wierconego, znajdującego się pod zacis-
kami.
4Dane techniczne
Pasmo przenoszenia: . . . . 130 – 15 000 Hz
Moc znamionowa: . . . . . . . 3 WRMS lub 6 WRMS
Wymiary: . . . . . . . . . . . . . . . 185 ×255 ×123 mm
Waga: . . . . . . . . . . . . . . . . . 1,1 kg
Z zastrzeżeniem możliwości zmian.
I
E
PL
MONACOR INTERNATIONAL GmbH & Co. KG • Zum Falsch 36 • 28307 Bremen • Germany
Copyright ©by MONACOR INTERNATIONAL. All rights reserved. A-0550.99.02.08.2011
®

This manual suits for next models

1

Other Monacor Speakers System manuals

Monacor TXA-620CD User manual

Monacor

Monacor TXA-620CD User manual

Monacor EDL-11 User manual

Monacor

Monacor EDL-11 User manual

Monacor EUL-10 User manual

Monacor

Monacor EUL-10 User manual

Monacor EX-1W User manual

Monacor

Monacor EX-1W User manual

Monacor EDL-170-AL User manual

Monacor

Monacor EDL-170-AL User manual

Monacor MKS-26/SW User manual

Monacor

Monacor MKS-26/SW User manual

Monacor PA-1200M User manual

Monacor

Monacor PA-1200M User manual

Monacor ESP-80/WS User manual

Monacor

Monacor ESP-80/WS User manual

Monacor PAB-82WP/WS User manual

Monacor

Monacor PAB-82WP/WS User manual

Monacor EDL-10TW User manual

Monacor

Monacor EDL-10TW User manual

Monacor EDL-222/ WS User manual

Monacor

Monacor EDL-222/ WS User manual

Monacor img Stage Line PSUB-600 User manual

Monacor

Monacor img Stage Line PSUB-600 User manual

Monacor DSM-26LAN User manual

Monacor

Monacor DSM-26LAN User manual

Monacor CARPOWER CRB-130SET User manual

Monacor

Monacor CARPOWER CRB-130SET User manual

Monacor EDL-180/SI User manual

Monacor

Monacor EDL-180/SI User manual

Monacor ESP-415-WS User manual

Monacor

Monacor ESP-415-WS User manual

Monacor ETS-215/WS User manual

Monacor

Monacor ETS-215/WS User manual

Monacor DNL-660 User manual

Monacor

Monacor DNL-660 User manual

Monacor img Stage Line PROTON-15MK2 User manual

Monacor

Monacor img Stage Line PROTON-15MK2 User manual

Monacor ETS-422TW/WS User manual

Monacor

Monacor ETS-422TW/WS User manual

Monacor ETS-530TW/SW User manual

Monacor

Monacor ETS-530TW/SW User manual

Monacor EDL-112/WS User manual

Monacor

Monacor EDL-112/WS User manual

Monacor EDL-435/WS User manual

Monacor

Monacor EDL-435/WS User manual

Monacor EDL-606 User manual

Monacor

Monacor EDL-606 User manual

Popular Speakers System manuals by other brands

Canton DIGITAL MOVIE DM 90 Owners & installation manual

Canton

Canton DIGITAL MOVIE DM 90 Owners & installation manual

JVC Compact Component System CA-DXJ20 instructions

JVC

JVC Compact Component System CA-DXJ20 instructions

MSE Audio CI150 manual

MSE Audio

MSE Audio CI150 manual

Electro-Voice FRI2082WHT manual

Electro-Voice

Electro-Voice FRI2082WHT manual

Krüger & Matz KM0511 owner's manual

Krüger & Matz

Krüger & Matz KM0511 owner's manual

DreamGEAR iSound 2X Plus instruction manual

DreamGEAR

DreamGEAR iSound 2X Plus instruction manual

Naxa NHS-5002 manual

Naxa

Naxa NHS-5002 manual

Electro-Voice Series II Brochure & specs

Electro-Voice

Electro-Voice Series II Brochure & specs

Mach M72I Specifications

Mach

Mach M72I Specifications

Manta GAMMA MMS001 user manual

Manta

Manta GAMMA MMS001 user manual

Sony SRS-BT100IK quick start guide

Sony

Sony SRS-BT100IK quick start guide

LEM T5A owner's manual

LEM

LEM T5A owner's manual

Sven SPS-700 Operation manual

Sven

Sven SPS-700 Operation manual

Bauhn ASBWS-0321-B user manual

Bauhn

Bauhn ASBWS-0321-B user manual

Sharp HT-E300 Operation manual

Sharp

Sharp HT-E300 Operation manual

Iluv I189 quick start guide

Iluv

Iluv I189 quick start guide

Samson Live L1215 owner's manual

Samson

Samson Live L1215 owner's manual

Dell EMC VxBlock Systems 350 Administration guide

Dell EMC

Dell EMC VxBlock Systems 350 Administration guide

manuals.online logo
manuals.online logoBrands
  • About & Mission
  • Contact us
  • Privacy Policy
  • Terms and Conditions

Copyright 2025 Manuals.Online. All Rights Reserved.