manuals.online logo
Brands
  1. Home
  2. •
  3. Brands
  4. •
  5. Monacor
  6. •
  7. Speakers System
  8. •
  9. Monacor SP-2/SW User manual

Monacor SP-2/SW User manual

Aktives Mini-Stereo-
Lautsprechersystem
Bitte lesen Sie diese Anleitung vor dem Betrieb gründ-
lich durch und heben Sie sie für ein späteres Nach-
lesen auf.
1 Einsatzmöglichkeiten
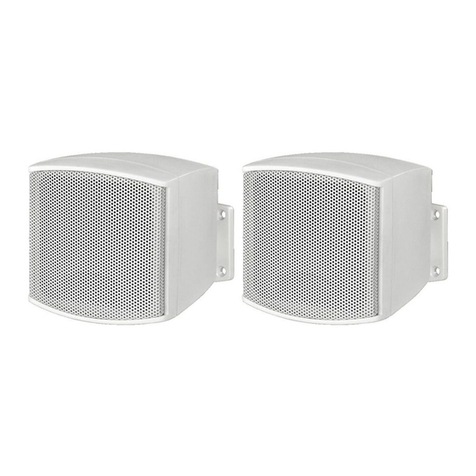
Dieses praktische Lautsprechersystem mit einer Aus-
gangsleistung von 2 × 1,7 Watt besteht aus zwei
Mini-Lautsprechern zur Stereowiedergabe, einem inte-
grierten Verstärker und einem Li-Ionen-Akkumulator zur
Stromversorgung, der über einen USB-Anschluss auf-
geladen werden kann. Das Gerät lässt sich über einen
3,5-mm-Klinkenstecker an verschiedene Audioquellen
anschließen (Notebooks, MP3-Player, Handys etc.).
2 Wichtige Hinweise für den Gebrauch
Das Lautsprechersystem entspricht allen erforderli-
chen Richtlinien der EU und ist deshalb mit gekenn-
zeichnet.
GSetzen Sie das Lautsprechersystem nur im Innen-
bereich ein. Schützen Sie es vor Tropf- und Spritz-
wasser, hoher Luftfeuchtigkeit und Hitze (zulässige
Einsatztemperatur 0 – 40 °C).
GVerwenden Sie zum Reinigen nur ein trockenes,
weiches Tuch, niemals Chemikalien oder Wasser.
GWird das Lautsprechersystem zweckentfremdet,
falsch bedient oder nicht fachgerecht repariert, kann
keine Haftung für daraus resultierende Sach- oder
Personenschäden und keine Garantie für das Laut-
sprechersystem übernommen werden.
3 Inbetriebnahme
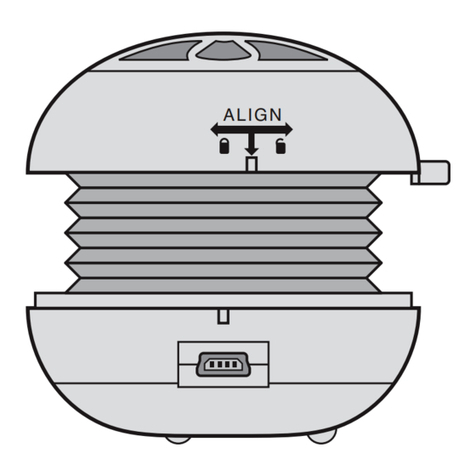
1) Die beiden Lautsprecher werden magnetisch zu-
sammengehalten (Abb. 1). Zum Betrieb die Laut-
sprecher voneinander trennen.
2) Jeweils das Oberteil der Lautsprecher gegen den
Uhrzeigersinn drehen (Abb. 2), sodass die An-
schlüsse und Bedienelemente zugängig werden
(Abb. 3 und 4).
3) Vor dem ersten Betrieb den Akku aufladen. Dazu
einen der Mini-USB-Stecker des beiliegenden USB-
Anschlusskabels in die Buchse (1) des Laut-
sprechers mit dem Ein- und Ausschalter (3) stecken
und den Standard-USB-Stecker in den USB-An-
schluss eines PCs oder eines anderen Geräts mit
einem USB-Anschluss stecken. Die LED (2) leuch-
tet während des Ladens rot. Leuchtet sie blau, ist
der Akku aufgeladen (nach ca. 2 – 3 Stunden).
4) Den 2. Mini-USB-Stecker des Anschlusskabels in
die Buchse (4) des 2. Lautsprechers stecken und
die beiden Lautsprecher möglichst weit auseinander
aufstellen, damit sich eine breite Stereobasis ergibt.
Soll das Lautsprechersystem endgültig aus
dem Betrieb genommen werden, übergeben
Sie es zur umweltgerechten Entsorgung
einem örtlichen Recyclingbetrieb.
SP-2/SW Best.-Nr. 25.2410
Copyright©by MONACOR INTERNATIONAL GmbH & Co. KG, Bremen, Germany. All rights reserved. A-1052.99.01.11.2009
5) Die Buchse LINE IN (5) des 2. Lautsprechers über
das Kabel mit den zwei 3,5-mm-Klinkensteckern mit
dem Line-Ausgang einer Audioquelle verbinden.
6) Das Lautsprechersystem mit dem Ein- und Aus-
schalter (3) einschalten. Die LED leuchtet blau.
7) Die gewünschte Lautstärke mit dem Regler (6)
einstellen.
8) Nach dem Betrieb das Lautsprechersystem mit
dem Schalter (3) ausschalten. Zum Transport alle
Verbindungen trennen, die Lautsprecher wieder
verschließen und zusammensetzen.
4 Technische Daten
Ausgangsleistung: . . . 2 × 1,7 W
Frequenzbereich: . . . . 280 – 16 000 Hz
Audioeingang
Empfindlichkeit: . . . . 380 mV (Line-Pegel)
Anschluss: . . . . . . . 3,5-mm-Klinke
Störabstand: . . . . . . . . > 80 dB
Stromversorgung: . . . . über eingebauten Li-Ionen-
Akku, aufladbar über USB-
Anschluss (5 V )
Abmessungen
eines Lautsprechers: . ∅56 mm × 39/51 mm
Gewicht: . . . . . . . . . . . 115 g
Änderungen vorbehalten.
6) Switch on the speaker system with the on/off switch
(3). The LED shows blue.
7) Adjust the desired volume with the control (6).
8) After operation, switch off the speaker system with
the switch (3). For transporting, separate all con-
nections, close the speakers and put them together
again.
4 Specifications
Output power: . . . . . . . 2 × 1.7 W
Frequency range: . . . . 280 – 16 000 Hz
Audio input
Sensitivity: . . . . . . . . 380 mV (line level)
Connection: . . . . . . . 3.5 mm jack
S/N ratio: . . . . . . . . . . . > 80 dB
Power supply: . . . . . . . via integrated li-ion rech.batt.
to be recharged via USB
connection (5 V )
Dimensions
of a speaker: . . . . . . . . ∅56 mm × 39/51 mm
Weight: . . . . . . . . . . . . 115 g
Subject to technical modification.
Active Miniature Stereo
Speaker System
Please read these operating instructions carefully
prior to operating the unit and keep them for later ref-
erence.
1 Applications
This practical speaker system with an output power of
2 × 1.7 W consists of two miniature speakers for stereo
reproduction, an integrated amplifier and a li-ion re-
chargeable battery for power supply which can be
recharged via a USB connection. The unit can be con-
nected to various audio sources (notebooks, MP3
players, mobile phones, etc.) via a 3.5 mm plug.
2 Important Notes
The speaker system corresponds to all required direc-
tives of the EU and is therefore marked with .
GThe speaker system is suitable for indoor use only.
Protect it against dripping water and splash water,
high air humidity, and heat (admissible ambient tem-
perature range 0 – 40 °C).
GFor cleaning only use a dry, soft cloth, never use
chemicals or water.
GNo guarantee claims for the speaker system and no
liability for any resulting personal damage or material
damage will be accepted if the unit is used for other
purposes than originally intended, if it is not correctly
operated or not repaired in an expert way.
3 Operation
1) The two speakers are held together magnetically
(fig. 1). For operation, separate the speakers from
each other.
2) In each case, turn the upper part of the speakers
counter-clockwise (fig. 2) so that the connections
and operating elements will be accessible (figs. 3
and 4).
3) Prior to the first operation recharge the battery. For
this purpose connect one of the miniature USB
plugs of the supplied USB cable to the jack (1)
of the speaker with the on/off switch (3) and connect
the standard USB plug to the USB connection of a
PC or another unit with a USB connection. The LED
(2) shows red during charging. When it shows blue,
the battery is recharged (after approx. 2 to 3 hours).
4) Connect the second miniature USB plug of the
cable to the jack (4) of the second speaker and
place the two speakers as far apart as possible so
that there will be a wide stereo base.
5) Connect the jack LINE IN (5) of the second speaker
to the line output of an audio source via the cable
with the two 3.5 mm plugs.
If the speaker system is to be put out of oper-
ation definitively, take it to a local recycling
plant for a disposal which is not harmful to the
environment.
®
OPEN
®
OPEN
®
OPEN
®
OPEN
OFF/ON
OPEN
1.
2.
LINE IN
D A CH
®
123456

GB
Mini système de
haut-parleurs actif stéréo
Veuillez lire la présente notice avec attention avant le
fonctionnement et conservez-la pour pouvoir vous y
reporter ultérieurement.
1 Possibilités dʼutilisation
Ce système de haut-parleurs pratiques avec une puis-
sance de sortie de 2 × 1,7 W se compose de deux
mini-haut-parleurs pour la lecture stéréo, dʼun amplifi-
cateur intégré et dʼun accumulateur LI-Ion pour lʼali-
mentation, pouvant être chargé via un port USB. Il
peut être relié via une fiche jack 3,5 à différentes
sources audio (agendas électroniques, lecteurs MP3,
téléphones portables ...).
2 Conseils importants dʼutilisation
Le système de haut-parleurs répond à toutes les direc-
tives nécessaires de lʼUnion européenne et porte donc
le symbole .
GLe système de haut-parleurs nʼest conçu que pour
une utilisation en intérieur. Protégez-le des écla-
boussures, de tout type de projections dʼeau, dʼune
humidité élevée de lʼair et de la chaleur (tempéra-
ture ambiante admissible 0 – 40 °C).
G
Pour le nettoyage, utilisez uniquement un chiffon sec
et doux, en aucun cas de produits chimiques ou dʼeau.
G
Nous déclinons toute responsabilité en cas de dom-
mages matériels ou corporels résultants si le système
haut-parleurs est utilisé dans un but autre que celui
pour lequel il a été conçu, sʼil nʼest pas correctement
utilisé ou sʼil nʼest pas réparé par une personne habi-
litée ; en outre, la garantie deviendrait caduque.
3 Utilisation
1) Les deux haut-parleurs sont maintenus ensemble
par leur système magnétique (schéma 1). Pour les
faire fonctionner, séparez-les.
2) Tournez respectivement la partie supérieure des
haut-parleurs dans le sens inverse des aiguilles
dʼune montre (schéma 2) pour que les branche-
ments et éléments de commande soient accessi-
bles (schémas 3 et 4).
3)
Avant toute première utilisation, chargez lʼaccumula-
teur. Pour ce faire, reliez une des mini fiches USB du
cordon USB livré à la prise (1) du haut-parleur
avec lʼinterrupteur marche/arrêt (3) et reliez la fiche
USB standard au port USB dʼun PC ou dʼun autre
appareil avec port USB. La LED (2) brille en rouge
pendant la charge. Lorsquʼelle brille en bleu, lʼaccu-
mulateur est chargé (après 2 à 3 heures environ).
4) Reliez la seconde mini fiche USB du cordon à la
prise (4) du second haut-parleur et positionnez
Lorsque le système de haut-parleurs est défini-
tivement retiré du service, vous devez le dépo-
ser dans une usine de recyclage adaptée pour
contribuer à son élimination non polluante.
SP-2/SW Best.-Nr. 25.2410
Copyright©by MONACOR INTERNATIONAL GmbH & Co. KG, Bremen, Germany. All rights reserved. A-1052.99.01.11.2009
les deux haut-parleurs le plus loin possible lʼun de
lʼautre afin dʼobtenir une base stéréo large.
5) Reliez la prise LINE IN (5) du second haut-parleur
via le cordon avec les deux fiches jack 3,5 à la sor-
tie ligne dʼune source audio.
6) Allumez le système de haut-parleurs avec lʼinter-
rupteur marche/arrêt (3). La LED brille en bleu.
7) Réglez le volume souhaité avec le réglage (6).
8) Après le fonctionnement, éteignez le système de
haut-parleurs avec lʼinterrupteur (3). Pour le trans-
porter, défaites tous les branchements, fermez les
haut-parleurs et remettez-les ensemble.
4 Caractéristiques techniques
Puissance de sortie :
. . 2 × 1,7 W
Bande passante : . . . . 280 – 16 000 Hz
Entrée audio
Sensibilité : . . . . . . . 380 mV (niveau ligne)
Branchement : . . . . jack 3,5
Rapport signal
sur bruit : . . . . . . . . . . . > 80 dB
Alimentation : . . . . . . .
via accu Li-Ion intégré, char-
geable via le port USB (5 V )
Dimensions
dʼun haut-parleur : . . . . ∅56 mm × 39/51 mm
Poids . . . . . . . . . . . . . . 115 g
Tout droit de modification réservé.
5) Collegare la presa LINE IN (5) del secondo alto-
parlante con lʼuscita Line di una sorgente audio ser-
vendosi del cavo con i due jack 3,5 mm.
6) Accendere il sistema con lʼinterruttore on/off (3). Il
LED si accende di color blu.
7) Regolare il volume desiderato con il regolatore
(6).
8) Dopo lʼuso, spegnere il sistema con lʼinterruttore
(3). Per il trasporto staccare tutti i collegamenti,
chiudere nuovamente gli altoparlanti e unirli.
4 Dati tecnici
Potenza dʼuscita: . . . . 2 × 1,7 W
Gamma di frequenze: . 280 – 16 000 Hz
Ingresso audio
Sensibilità : . . . . . . . 380 mV (livello Line)
Contatto: . . . . . . . . . jack 3,5 mm
Rapporto S/R: . . . . . . . > 80 dB
Alimentazione: . . . . . . tramite batteria ricaricabile
integrata agli ioni di litio,
caricabile tramite la porta
USB (5 V )
Dimensioni
di un altoparlante: . . . . ∅56 mm × 39/51 mm
Peso: . . . . . . . . . . . . . . 115 g
Con riserva di modifiche tecniche.
Sistema attivo di altoparlanti
mini stereo
Vi preghiamo di leggere attentamente le presenti istru-
zioni prima della messa in funzione e di conservarle
per un uso futuro.
1 Possibilità dʼimpiego
Questo sistema pratico di altoparlanti con una potenza
dʼuscita di 2 × 1,7 Watt consiste di due altoparlanti mini
per la riproduzione stereo, di un amplificatore inte-
grato e di una batteria ricaricabile agli ioni di litio per
lʼalimentazione che può essere caricata tramite la
porta USB. Per mezzo di un jack 3,5 mm, lʼapparec-
chio può essere collegato con varie sorgenti audio
(notebook, lettori MP3, cellulari ecc.).
2 Avvertenze importanti per lʼuso
Il sistema di altoparlanti è conforme a tutte le direttive
richieste dellʼUE e pertanto porta la sigla .
GUsare il sistema di altoparlanti solo allʼinterno di lo-
cali. Proteggerlo dallʼacqua gocciolante e dagli
spruzzi dʼacqua, da alta umidità dellʼaria e dal calore
(temperatura dʼimpiego ammessa fra 0 e 40 °C).
GPer la pulizia usare solo un panno morbido, asciutto;
non impiegare in nessun caso prodotti chimici o
acqua.
GNel caso dʼuso improprio, dʼimpiego scorretto o di ri-
parazione non a regola dʼarte del sistema dʼaltopar-
lanti, non si assume nessuna responsabilità per
eventuali danni consequenziali a persone o a cose e
non si assume nessuna garanzia per il sistema.
3 Messa in funzione
1) I due altoparlanti stanno attaccati per via di un
sistema magnetico (fig. 1). Per il funzionamento
occorre separarli.
2) In ognuno caso, girare la parte superiore di alto-
parlanti in senso antiorario (fig. 2), in modo da ren-
dere accessibili i contatti e gli elementi di comando
(figg. 3 e 4).
3) Prima del primo funzionamento caricare la batteria.
Per fare ciò inserire uno dei connettori mini-USB
del cavo USB in dotazione nella presa (1) del-
lʼaltoparlante con lʼinterruttore on/off (3), e il con-
nettore USB standard nella porta USB di un PC o di
un altro apparecchio con porta USB. Durante il cari-
camento, il LED (2) è rosso. Se diventa blu, signi-
fica che la batteria è carica (dopo 2 – 3 ore circa).
4) Inserire il secondo connettore mini-USB del cavo di
collegamento nella presa (4) del secondo alto-
parlante e collocare i due altoparlanti possibilmente
distanziati fra loro per creare una larga base per la
riproduzione stereo.
Se si desidera eliminare il sistema definitiva-
mente, consegnarlo per lo smaltimento ad
unʼistituzione locale per il riciclaggio.
®
OPEN
®
OPEN
®
OPEN
®
OPEN
OFF/ON
OPEN
1.
2.
LINE IN
®
123456

F B CH
I
Recinto activo miniatura estéreo
Lea atentamente estas instrucciones de funciona-
miento antes de utilizar el aparato y guárdelas para
usos posteriores.
1 Aplicaciones
Este práctico recinto con una salida de potencia de 2 ×
1,7 W consiste en dos altavoces miniatura para repro-
ducciones estéreo, un amplificador integrado y una
batería Li-Ion recargable para la alimentación que
puede cargarse mediante una conexión USB. El apa-
rato puede conectarse a varias fuentes de audio (por-
tátiles, lectores MP3, teléfonos móviles, etc.) me-
diante un jack 3,5 mm.
2 Notas Importantes
El recinto cumple con todas las directivas requeridas
por la UE y por lo tanto está marcado con el símbolo
.
GEl recinto está adecuado para utilizarlo sólo en inte-
riores. Protéjalo de goteos y salpicaduras, elevada
humedad del aire y calor (temperatura ambiente ad-
misible: 0 – 40 ºC).
GUtilice sólo un paño suave y seco para la limpieza,
no utilice nunca ni productos químicos ni agua.
GNo podrá reclamarse garantía por el recinto o res-
ponsabilidad alguna por cualquier daño personal o
material resultante si el aparato se utiliza para otros
fines diferentes a los originalmente concebidos, si
no se utiliza adecuadamente o no se repara por ex-
pertos.
3 Funcionamiento
1) Los dos altavoces se sujetan entre sí magnética-
mente (fig. 1). Para el funcionamiento, separe los
altavoces.
2) En cada caso, gire la parte superior de los alta-
voces en sentido contrario a las agujas del reloj
(fig. 2) de modo que pueda acceder a las conexio-
nes y los elementos de funcionamiento (figs.3 y 4).
3) Recargue la batería antes de la primera utilización.
Para ello, conecte una de las tomas miniatura USB
del cable USB entregado a la toma (1) del
altavoz con el interruptor ON/OFF (3) y conecte la
toma USB estándar a la conexión USB de un PC u
otro aparato con conexión USB. El LED (2) se ilu-
mina en rojo durante la carga. Cuando se pone
azul, la batería se ha cargado (después de unas
2 – 3 horas).
4) Conecte la segunda toma USB miniatura del cable
a la toma (4) del segundo altavoz y coloque los
dos altavoces tan lejos como sea posible para que
haya una amplia base estéreo.
Si va a poner el recinto fuera de servicio defi-
nitivamente, llévelo a la planta de reciclaje
más cercana para que su eliminación no sea
perjudicial para el medioambiente.
SP-2/SW Best.-Nr. 25.2410
Copyright©by MONACOR INTERNATIONAL GmbH & Co. KG, Bremen, Germany. All rights reserved. A-1052.99.01.11.2009
5) Conecte la toma LINE IN (5) del segundo altavoz a
la salida de línea de una fuente de audio mediante
el cable con los dos jacks 3,5 mm.
6) Conecte el recinto con el interruptor ON/OFF (3). El
LED se ilumina en azul.
7) Ajuste el nivel de volumen deseado con el control
(6).
8) Desconecte el recinto con el interruptor (3) des-
pués de utilizarlo. Para el transporte, separe todas
las conexiones, cierre los altavoces y póngalos jun-
tos de nuevo.
4 Especificaciones
Potencia de salida: . . . 2 × 1,7 W
Banda pasante: . . . . . . 280 – 16 000 Hz
Entrada de audio
Sensibilidad: . . . . . . 380 mV (nivel de línea)
Conexión: . . . . . . . . Jack 3,5 mm
Relación sonido/ruido: > 80 dB
Alimentación: . . . . . . . Mediante batería recargable
Li-Ion para cargarse me-
diante conexión USB (5 V )
Dimensiones
de un altavoz: . . . . . . . ∅56 mm × 39/51 mm
Peso: . . . . . . . . . . . . . . 115 g
Sujeto a modificaciones técnicas.
5) Połączyć gniazdo LINE IN (5) drugiego głośnika do
wyjścia liniowego urządzenia audio, za pomocą
kabla z wtykami 3,5 mm.
6) Włączyć system przełącznikiem on/off (3). Dioda
zapali się na niebiesko.
7) Ustawić żądaną głośność regulatorem (6).
8) Po zakończeniu pracy, wyłączyć system przełącz-
nikiem (3). Na czas transportowania, rozłączyć
wszystkie połączenia, zakręcić obudowy i połączyć
oba głośniki.
4 Specyfikacja
Moc wyjściowa: . . . . . . 2 × 1,7 W
Pasmo przenoszenia: . 280 – 16 000 Hz
Wejście audio
Czułość: . . . . . . . . . 380 mV (poziom liniowy)
Złącze: . . . . . . . . . . gniazdo 3,5 mm
Stosunek S/N: . . . . . . . > 80 dB
Zasilanie: . . . . . . . . . . . z wbudowanego akumula-
tora litowo-jonowego, łado-
wanego przez USB (5 V )
Wymiary głośnika: . . . . ∅56 mm × 39/51 mm
Waga: . . . . . . . . . . . . . 115 g
Z zastrzeżeniem możliwości zmian.
Miniaturowy aktywny system
głośników stereo
Przed rozpoczęciem pracy z urządzeniami, prosimy
zapoznać się z instrukcją obsługi, a następnie zacho-
wać ją do wglądu.
1 Zastosowanie
Ten praktyczny zestaw, dysponujący mocą 2 × 1,7 W,
składa się z dwóch miniaturowych głośników do repro-
dukcji stereo, zintegrowanego wzmacniacza oraz
litowo-jonowego akumulatora, który może być łado-
wany poprzez złącze USB. Zestaw może być podłą-
czany do różnych źródeł audio (notebooków, odtwa-
rzaczy MP3, telefonów komórkowych, itp.) poprzez
wtyk 3,5 mm.
2 Środki bezpieczeństwa
Zestaw spełnia wszystkie wymagania norm UE, dzięki
temu został oznaczony symbolem .
GUrządzenie jest przeznaczone tylko do użytku we-
wnątrz pomieszczeń. Należy chronić je przed dzia-
łaniem wody, wilgoci oraz wysokiej temperatury (do-
puszczalny zakres 0 – 40 °C).
GDo czyszczenia używać suchej, miękkiej ściereczki.
Nie używać wody ani środków chemicznych.
GProducent ani dostawca nie ponoszą odpowiedzial-
ności za wynikłe uszkodzenia sprzętu lub obrażenia
użytkownika w przypadku, gdy urządzenie jest wy-
korzystywane w innych celach niż to się przewiduje
lub jeśli jest nieodpowiednio zainstalowane, użytko-
wane lub naprawiane.
3 Obsługa
1) Oba głośniki połączone są magnetycznie (rys. 1).
Przed rozpoczęciem podłączania należy je roz-
dzielić.
2) Aby uzyskać dostęp do elementów operacyjnych i
połączeniowych głośnika (rys. 3 i 4), należy prze-
kręcić górną część obudowy przeciwnie do ruchu
wskazówek zegara (rys. 2).
3) Przed pierwszym użyciem należy naładować aku-
mulator. W tym celu, podłączyć wtyk mini USB
dołączonego kabla USB do gniazda (1) na
głośniku z włącznikiem on/off (3), a standardowy
wtyk USB do gniazda USB komputera PC lub
innego urządzenia. Podczas ładowania, dioda (2)
świeci na czerwono. Naładowanie akumulatora
sygnalizowane jest zapaleniem się diody na niebie-
sko (po około 2 do 3 godzin).
4) Podłączyć drugi wtyk mini USB kabla do gniazda
(4) drugiego głośnika, i rozsunąć głośniki możliwie
daleko od siebie, aby efekt stereo był słyszalny
optymalnie.
Aby nie zaśmiecać środowiska, po całkowi-
tym zakończeniu eksploatacji urządzenia
należy je oddać do punktu recyklingu.
®
®
OPEN
®
OPEN
®
OPEN
®
OPEN
OFF/ON
OPEN
1.
2.
LINE IN
123456

PL
E

This manual suits for next models

1

Other Monacor Speakers System manuals

Monacor EDL-22/WS User manual

Monacor

Monacor EDL-22/WS User manual

Monacor ESP-15/WS User manual

Monacor

Monacor ESP-15/WS User manual

Monacor EDL-165AB-WS User manual

Monacor

Monacor EDL-165AB-WS User manual

Monacor DN-4 User manual

Monacor

Monacor DN-4 User manual

Monacor ETS-515TW/SW User manual

Monacor

Monacor ETS-515TW/SW User manual

Monacor ESP-215/WS User manual

Monacor

Monacor ESP-215/WS User manual

Monacor EUL-30/SW User manual

Monacor

Monacor EUL-30/SW User manual

Monacor PAB-6WP-WS User manual

Monacor

Monacor PAB-6WP-WS User manual

Monacor PA TXA-730CD User manual

Monacor

Monacor PA TXA-730CD User manual

Monacor EX-40/4 User manual

Monacor

Monacor EX-40/4 User manual

Monacor IMG Stageline MCX-10 User manual

Monacor

Monacor IMG Stageline MCX-10 User manual

Monacor CARPOWER PRESET-1 User manual

Monacor

Monacor CARPOWER PRESET-1 User manual

Monacor ESP-232/SW User manual

Monacor

Monacor ESP-232/SW User manual

Monacor DNL-660 User manual

Monacor

Monacor DNL-660 User manual

Monacor PAB-82WP/WS User manual

Monacor

Monacor PAB-82WP/WS User manual

Monacor ESP-62AB-WS User manual

Monacor

Monacor ESP-62AB-WS User manual

Monacor ETS-410TW/WS User manual

Monacor

Monacor ETS-410TW/WS User manual

Monacor img Stage Line PROTON-15MK2 User manual

Monacor

Monacor img Stage Line PROTON-15MK2 User manual

Monacor EDL-170-AL User manual

Monacor

Monacor EDL-170-AL User manual

Monacor EDL-224AB User manual

Monacor

Monacor EDL-224AB User manual

Monacor IMG STAGELINE PAK-308M/SW User manual

Monacor

Monacor IMG STAGELINE PAK-308M/SW User manual

Monacor EDL-300L User manual

Monacor

Monacor EDL-300L User manual

Monacor IMG Stage Line Triton 800 User manual

Monacor

Monacor IMG Stage Line Triton 800 User manual

Monacor ESP-5HQ User manual

Monacor

Monacor ESP-5HQ User manual

Popular Speakers System manuals by other brands

Kicker KMT6 owner's manual

Kicker

Kicker KMT6 owner's manual

Onkyo D-N10BX instruction manual

Onkyo

Onkyo D-N10BX instruction manual

Samsung HW-B53C Full manual

Samsung

Samsung HW-B53C Full manual

KYE Systems Corp. Genius SW-5 1 1500 Service guide

KYE Systems Corp.

KYE Systems Corp. Genius SW-5 1 1500 Service guide

AVX AVX-BTA-3000 instruction manual

AVX

AVX AVX-BTA-3000 instruction manual

Electro-Voice SX Series SX500PI+ Brochure & specs

Electro-Voice

Electro-Voice SX Series SX500PI+ Brochure & specs

Pro Armor A51040 Operator's guide

Pro Armor

Pro Armor A51040 Operator's guide

Mirage NANOSAT owner's manual

Mirage

Mirage NANOSAT owner's manual

Altec Lansing VS2320 Connection guide

Altec Lansing

Altec Lansing VS2320 Connection guide

Kenwood CRW-NV701 Service manual

Kenwood

Kenwood CRW-NV701 Service manual

JVC MX-KA3 - Mini Shelf System instructions

JVC

JVC MX-KA3 - Mini Shelf System instructions

Bose Acoustimass 16 Series II owner's guide

Bose

Bose Acoustimass 16 Series II owner's guide

Samsung Harman/Kardon HW-Q90R Full manual

Samsung

Samsung Harman/Kardon HW-Q90R Full manual

JVC MX-SK1 Schematic diagrams

JVC

JVC MX-SK1 Schematic diagrams

Yamaha NS-555 owner's manual

Yamaha

Yamaha NS-555 owner's manual

Logitech X-230 Setup

Logitech

Logitech X-230 Setup

Fbt MaxX 2a operating manual

Fbt

Fbt MaxX 2a operating manual

EAW AS490e Specifications

EAW

EAW AS490e Specifications

manuals.online logo
manuals.online logoBrands
  • About & Mission
  • Contact us
  • Privacy Policy
  • Terms and Conditions

Copyright 2025 Manuals.Online. All Rights Reserved.