manuals.online logo
Brands
  1. Home
  2. •
  3. Brands
  4. •
  5. Mosmatic
  6. •
  7. Cleaning Equipment
  8. •
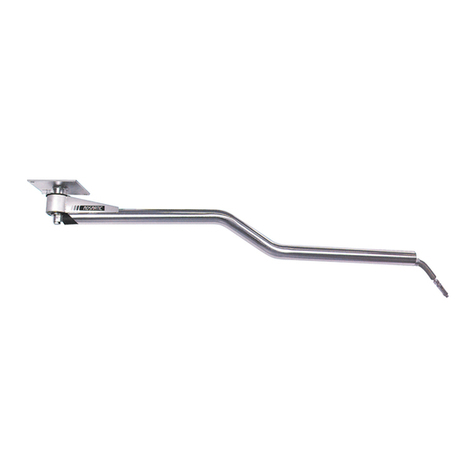
  9. Mosmatic FL-PH 520 User manual

Mosmatic FL-PH 520 User manual

T
D
-
80
7
5
4
D
/
E
©
M
O
S
M
A
T
A
A
I
C
A
G
30
.
09
.
2
0
11
Ä
n
d
e
r
u
n
g
e
n
v
o
r
be
h
a
l
t
e
n
/
S
ub
j
b
e
c
t
t
o
c
h
a
n
g
e
w
i
w
w
t
h
t
t
o
u
t
n
o
t
i
ce
FL-PH 520
No. 80.754
M
o
n
t
a
g
e
an
l
e
i
t
u
n
g
F
lächenreini
g
er Professional
Professional Surface Cleane
r
1. Slide the upper fork (a) over the lower fork (b). Secure the two
forks with the bolt (c) and the safety nut (d).
Note: the handle (e) and the ring (f) point in the same direction.
2. Connect the HP-gun (g) with the preinstalled adaptor (h) to the
quick connect (i).
3. Install the assembled fork (a+b) with the two bolts (k) and the
two safety nuts (l) onto the fork holder (j). Works best if handle
is in vertical position.
4. Connect the HP hose (m) with the quick connect (n) to the
swivel (o).
5. Install the wand holder (p) by using the pipe clamp (q) onto the
lower fork (b).
Note: Adjust the bolts (r) of the wheel suspension (s) up or
down for the ideal cleaning distance with the provided
hexagon socket wrench (t).
For your own safety
- Read all instructions before the initial operation. Check their
proper condition and that they operate safely.
- Always use protection gear when using products connected to
high pressure.
- Before any maintenance or nozzle-change, turn off the high
pressure water supply, e.g.: turn off and secure the
power switch.
- After turning off the system, allow all self propelled equipment
to come to a complete stop before handling.
- Safety regulations and guidelines (Accident Prevention Rules)
from the manufacturer of your high pressure cleaner are
applicable.
- Nozzle installation according to nozzle manufacturer.
- Do not move the unit over objects or uneven surfaces.
- Do not lift up the unit while operating.
- Do not run the unit if spray-arm is out of balance or bent,
damage to the swivel will result.
- No modifications to the unit are permitted.
- The equipment may be installed and used only by particularly
trained technical personnel.
1. Die obere Gabel (a) auf die untere Gabel (b) stecken, mit der
Schraube (c) und der Sicherungsmutter (d) fixieren.
Hinweis: Handgriff (e) und Ring (f) müssen in die gleiche
Richtung zeigen!
2. Die HD-Pistole (g) mittels der vormontierten Verschraubung (h) an
die Quick-Verschraubung (i) anschliessen.
3. Die zusammengebaute Gabel (a+b) senkrecht in die Schlitze der
Gabelhalter (j) einführen und mit den Schrauben (k) und den
Sicherheitsmuttern (l) befestigen.
4. Den HD-Schlauch (m) mit der Verschraubung (n) am
Drehgelenk (o) anschliessen.
5. Das Lanzen-Aufnahmerohr (p) mit der Rohrbride (q) an die untere
Gabel (b) befestigen.
Hinweis: Durch Drehen der Einstellschrauben (r) an der Radaufhän-
gung (s) mit einem Sechskant-Stiftschlüssel (t), lässt sich ein
optimaler Reinigungsabstand einstellen.
Für Ihre Sicherheit
- Alle Anleitungen sind vor erster Inbetriebnahme zu lesen.
Das Gerät ist auf ordnungsgemässen Zustand und Betriebssicherheit
zu prüfen.
- Alle Produkte die mit Hochdruck betrieben werden, dürfen nicht
ungeschützt verwendet werden.
- Bei Düsenwechsel sowie vor Wartungs- und Instandsetzungsarbeiten
die Wasserzufuhr absperren, das System abschalten und gegen
unbeabsichtigtes Einschalten sichern
- Nach dem Abschalten des Systems läuft der Kreiselarm für kurze Zeit
nach. Beim Anfassen des Kreiselarmes besteht Verletzungsgefahr.
- Es gelten die Sicherheitsrichtlinien (Unfallverhütungsvorschriften) des
Herstellers von Hochdruckgeräten.
- Die Düsenbefestigung erfolgt laut Angaben des Düsen-Herstellers.
- Das Gerät nicht über Gegenstände oder unebene Flächen führen.
- Das Gerät während der Benutzung nicht anheben.
- Bei einer Unwucht oder Krümmung des Kreiselarmes darf das Gerät
nicht benutzt werden, da dadurch das Drehgelenk beschädigt wird.
- An den Geräten dürfen keine Veränderungen vorgenommen werden.
- Das Gerät darf nur von speziell ausgebildetem Fachpersonal installiert
und bedient werden.
A
s
s
s
s
em
b
l
y
l
i
n
i
i
s
t
r
t
t
u
r
r
c
t
i
tt
ons
i
i
(Diese Anleitung gilt für das Basismodel sowie für
daraus entstehende Versionen)
(This instruction is valid for the base model as well as for
the resulting versions)
p
q
r
s
t
g
e
h
i
a
cd
m
o
n
b
l
j
k
f
FL-PH 520
No. 80.754
-
80
7
5
4
D
/
E
©
M
O
S
M
A
T
A
A
I
C
A
G
30
.
09
.
2
0
11
Ä
n
de
r
u
n
g
e
n
v
o
r
b
e
h
a
l
t
e
n
/
S
ub
j
b
ec
t
t
o
c
h
an
g
e
w
i
w
w
t
h
t
t
o
u
t
n
o
t
i
c
e
Flächenreini
g
er Professiona
l
P
rofessional Surface Cleane
r
Ersatztei
ll
iste
S
pare parts Lis
t
Pos. Art. Nr. Bezeichnung
1 55.253 Drehgelenk DYC
2 36.905 Hartmetall-Dichtsatz
3 50.155 Quick-Verschraubung M22-F - G1/4"F
4 902.113 Rohrbride
5 902.116 Lanzen-Aufnahmerohr ø60 x 560
6 26.994 HD-Lanze
7 18.15060 HD-Düse 1506
8 51.275 Verschraubung M22-M - G1/4"M
9 29.053 HD-Pistole 250 bar
10 50.903 Quick-Verschraubung M22-F - G1/4"M
11 901.953 Schlauch G1/4"M - G1/4"M
12 902.647 Gabelstütze
13 80.956 INOX-Lenkrolle
14 900.436 Bürstenring
15 82.942 Turbo-Kreisel-Arm ø470
16 18.15030 HD-Düse 1503
17 901.950 Sechskant-Stiftschlüssel 6mm
Pos. Part No. Description
1 55.253 Swivel DYC
2 36.905 Carbide seal-kit
3 50.155 Quick-connect M22-F - G1/4"F
4 902.113 Pipe clamp
5 902.116 Lance holder ø60 x 560
6 26.994 HP-lance
7 18.15060 HP-nozzle 1506
8 51.275 Adaptor M22-M - G1/4"M
9 29.053 HP-gun 250 bar
10 50.903 Quick-connect M22-F - G1/4"M
11 901.953 HP-hose G1/4"M - G1/4"M
12 902.647 Support
13 80.956 Stainless steel castor
14 900.436 Brush ring
15 82.942 Turbo-rotor-arm ø470
16 18.15030 HP-nozzle 1503
17 901.950 Hexagon socket wrench 6mm
16
10
9
8
3
11
12
13
14
2
1
15
17
4
5
6
7

This manual suits for next models

1

Other Mosmatic Cleaning Equipment manuals

Mosmatic DR 520 User manual

Mosmatic

Mosmatic DR 520 User manual

Mosmatic DR 520 User manual

Mosmatic

Mosmatic DR 520 User manual

Mosmatic Ceiling Boom-Z User manual

Mosmatic

Mosmatic Ceiling Boom-Z User manual

Mosmatic FL-CRY 520 User manual

Mosmatic

Mosmatic FL-CRY 520 User manual

Mosmatic TD-80611 A User manual

Mosmatic

Mosmatic TD-80611 A User manual

Popular Cleaning Equipment manuals by other brands

IMC POT BOY 6 Series Installation, operating and maintenance manual

IMC

IMC POT BOY 6 Series Installation, operating and maintenance manual

Kärcher FC 7 Cordless quick start guide

Kärcher

Kärcher FC 7 Cordless quick start guide

Doheny's Spa Vacuum User manual/instructions

Doheny's

Doheny's Spa Vacuum User manual/instructions

Pyure Odorox boss owner's manual

Pyure

Pyure Odorox boss owner's manual

lefant LT1 user manual

lefant

lefant LT1 user manual

RIDGID K-400 Operator's manual

RIDGID

RIDGID K-400 Operator's manual

Ivation IVASNSCP user guide

Ivation

Ivation IVASNSCP user guide

Duracable DM12S manual

Duracable

Duracable DM12S manual

Ecolab Hybrid-P Directions for use

Ecolab

Ecolab Hybrid-P Directions for use

US Steam SteamHERO manual

US Steam

US Steam SteamHERO manual

Hayward TCELL940 manual

Hayward

Hayward TCELL940 manual

Vermop Equipemove operating instructions

Vermop

Vermop Equipemove operating instructions

jbc CL0301 instruction manual

jbc

jbc CL0301 instruction manual

Bissell READYCLEAN 3192 Series instructions

Bissell

Bissell READYCLEAN 3192 Series instructions

RugDoctor Mighty PRO X3 user guide

RugDoctor

RugDoctor Mighty PRO X3 user guide

Propel Trampolines P1106-0010 instruction manual

Propel Trampolines

Propel Trampolines P1106-0010 instruction manual

AWH Tanko RT Operating & installation instructions

AWH

AWH Tanko RT Operating & installation instructions

Neumo AWH TANKO EX-R64T Operating & installation instructions

Neumo

Neumo AWH TANKO EX-R64T Operating & installation instructions

manuals.online logo
manuals.online logoBrands
  • About & Mission
  • Contact us
  • Privacy Policy
  • Terms and Conditions

Copyright 2025 Manuals.Online. All Rights Reserved.