Instructions for Ranch Series Gravity Feeder Kit
Thank you for your purchase of a Moultrie Ranch Series Gravity Feeder Kit. Please read this sheet before
operating the unit. If you should have any questions about this product or any other Moultrie product, please
contact us using the information on the back of this sheet. Allow us to better serve you by activating your
1-year warranty online at http://www.moultriefeeders.com/warranty .
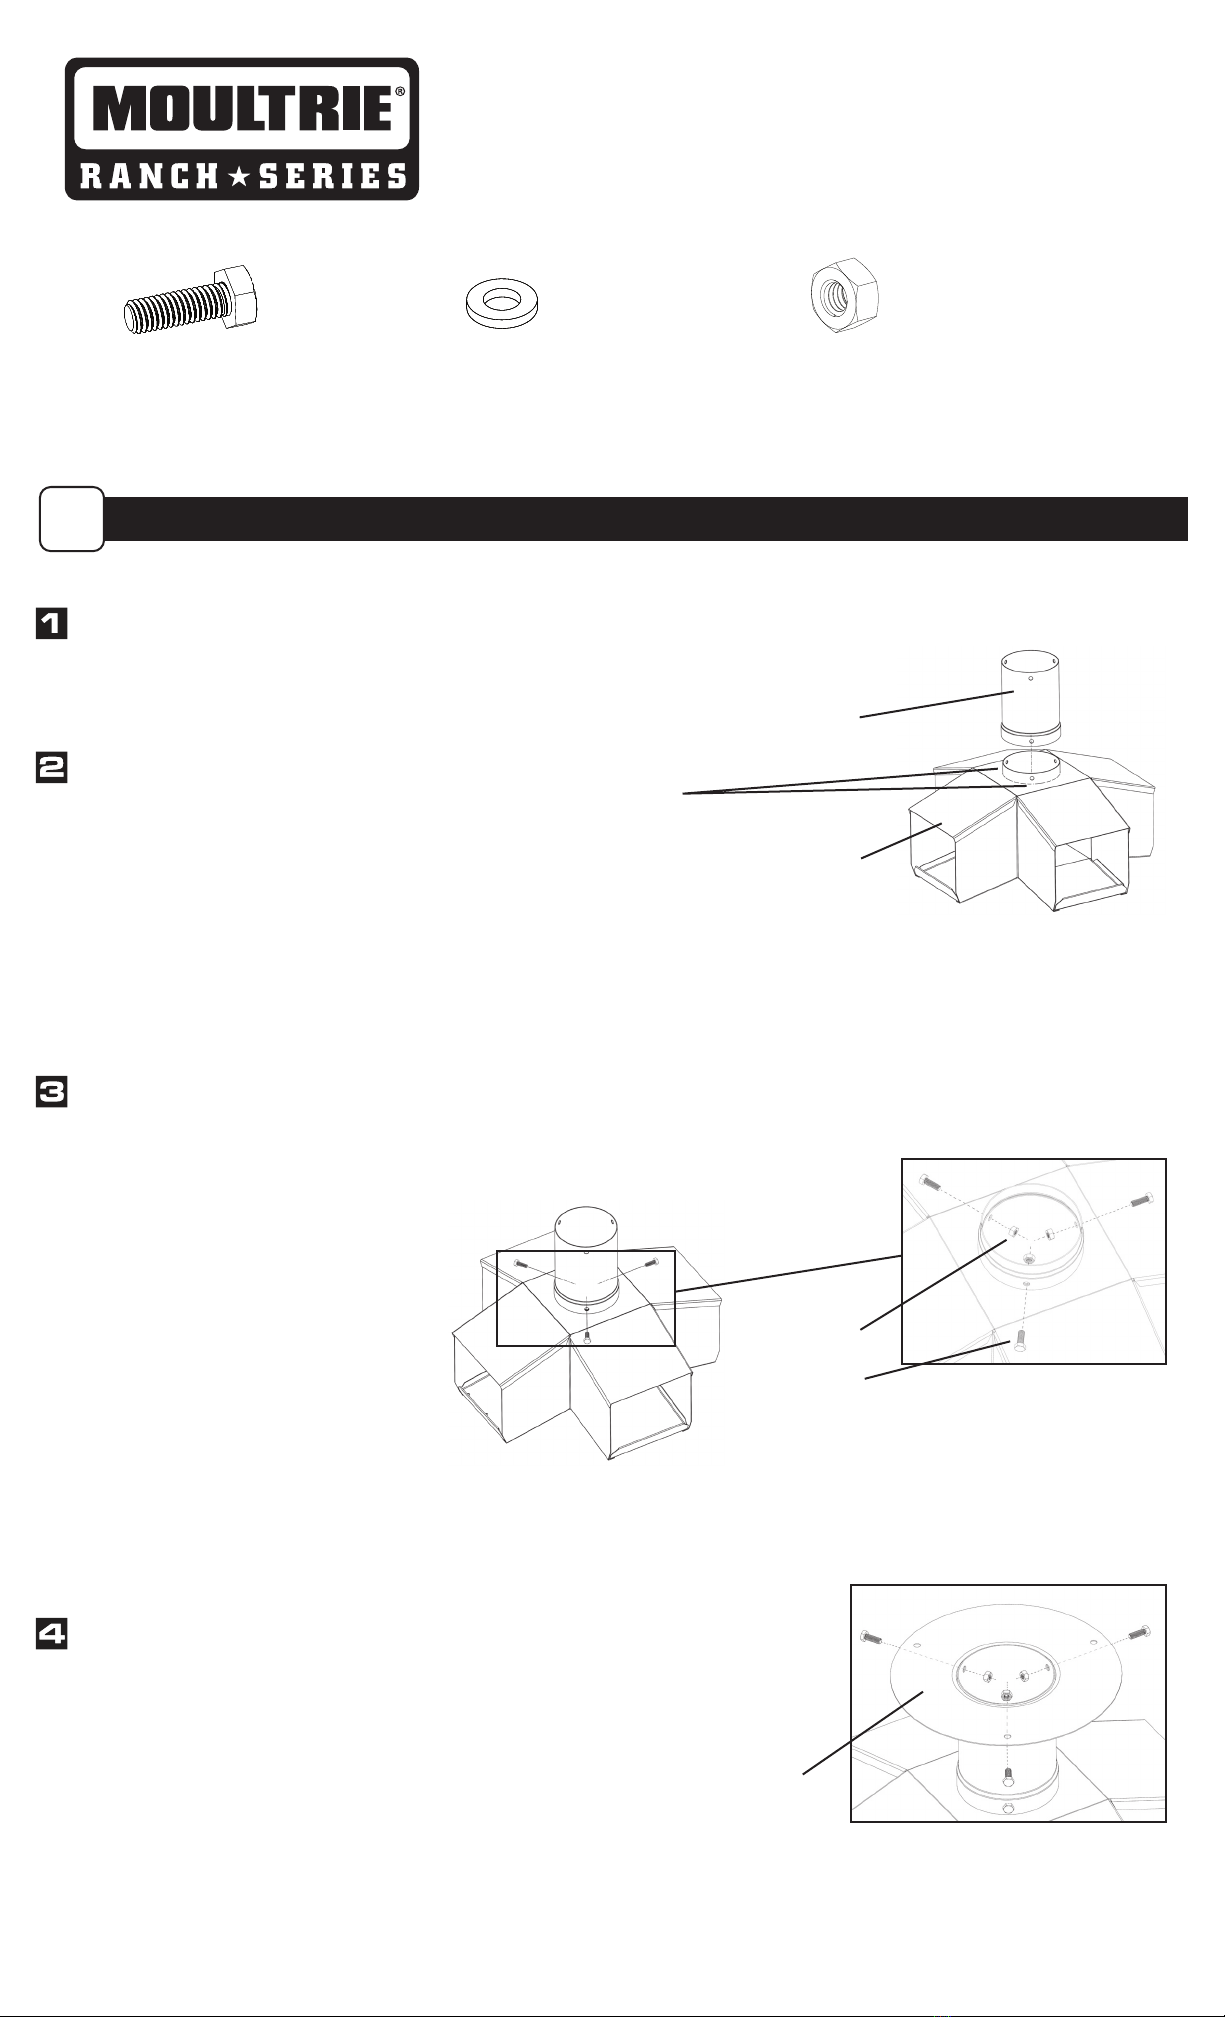
ASSEMBLE FEEDER KIT
A
Remove all hardware from packaging.Remove all hardware from packaging.
Hex Bolt
M6 x 1 x 18
Qty. 9
Flat Washer
M6
Qty. 6*
* 3 only required if mounting to a hopper
other than Moultrie Ranch Series
From the outside of the extension tube, Insert the (3) M6 bolts through the holes from Step 3. Secure with the supplied hex nuts on the inside
of the tube. Once all three bolts are in place and hex nuts are nger tight, fully tighten with 10mm wrench.
ONLY TIGHTEN AFTER ALL 3 BOLTS ARE INSTALLED (10mm wrench)
Fit the Extension Tube to the top of the gravity head,
aligning the 3 bolt holes.
NOTE: Extension Tube can be left o if a higher
feeding elevation is desired.
Following the same procedure from Step 3, attach the Mounting Plate
(ribs facing downward) to the top of the Extension Tube.
ONLY TIGHTEN AFTER ALL 3 BOLTS ARE INSTALLED (10mm wrench)
Gravity Head
Extension Tube
Mounting
Plate
Bolt Holes
M6 Nut
M6 Bolt
Hex Nut
M6 x 1
Qty. 9**
** 3 only required if mounting to a hopper
other than Moultrie Ranch Series