• Este capota no brinda protección contra las emanaciones de los
gases de combustión, colisión, rodadas u otros accidentes.
• Lea los manuales del capota y del vehículo y sepa cómo
hacer uso de los mismos antes de colocarlo.
• Asegúrese de tener una ventilación adecuada al utilizar el
tractor y el capota en áreas confi nadas.
• El capota limitará su campo visual en algunas direcciones.
Sea muy cuidadoso al operar su tractor con el agregado del
• Observe la presencia de ramas de árboles bajas u
otros obstáculos por sobre su cabeza que puedan no
necesariamente haber interferido con el funcionamiento del
tractor. La altura adicional del capota puede hacer que estos
objetos se conviertan en obstáculos.
• Con sumo cuidado, verifi que el área de operación antes de
Este símbolo indica precauciones importantes de
seguridad. Signifi ca — ¡atención! ¡Esté atento!
Su seguridad está en riesgo
la capacidad de frenar el vehículo
y su estabilidad pueden quedar afectadas al
agregar un accesorio o elemento adicional. Tenga
en cuenta el cambio de condiciones en el caso
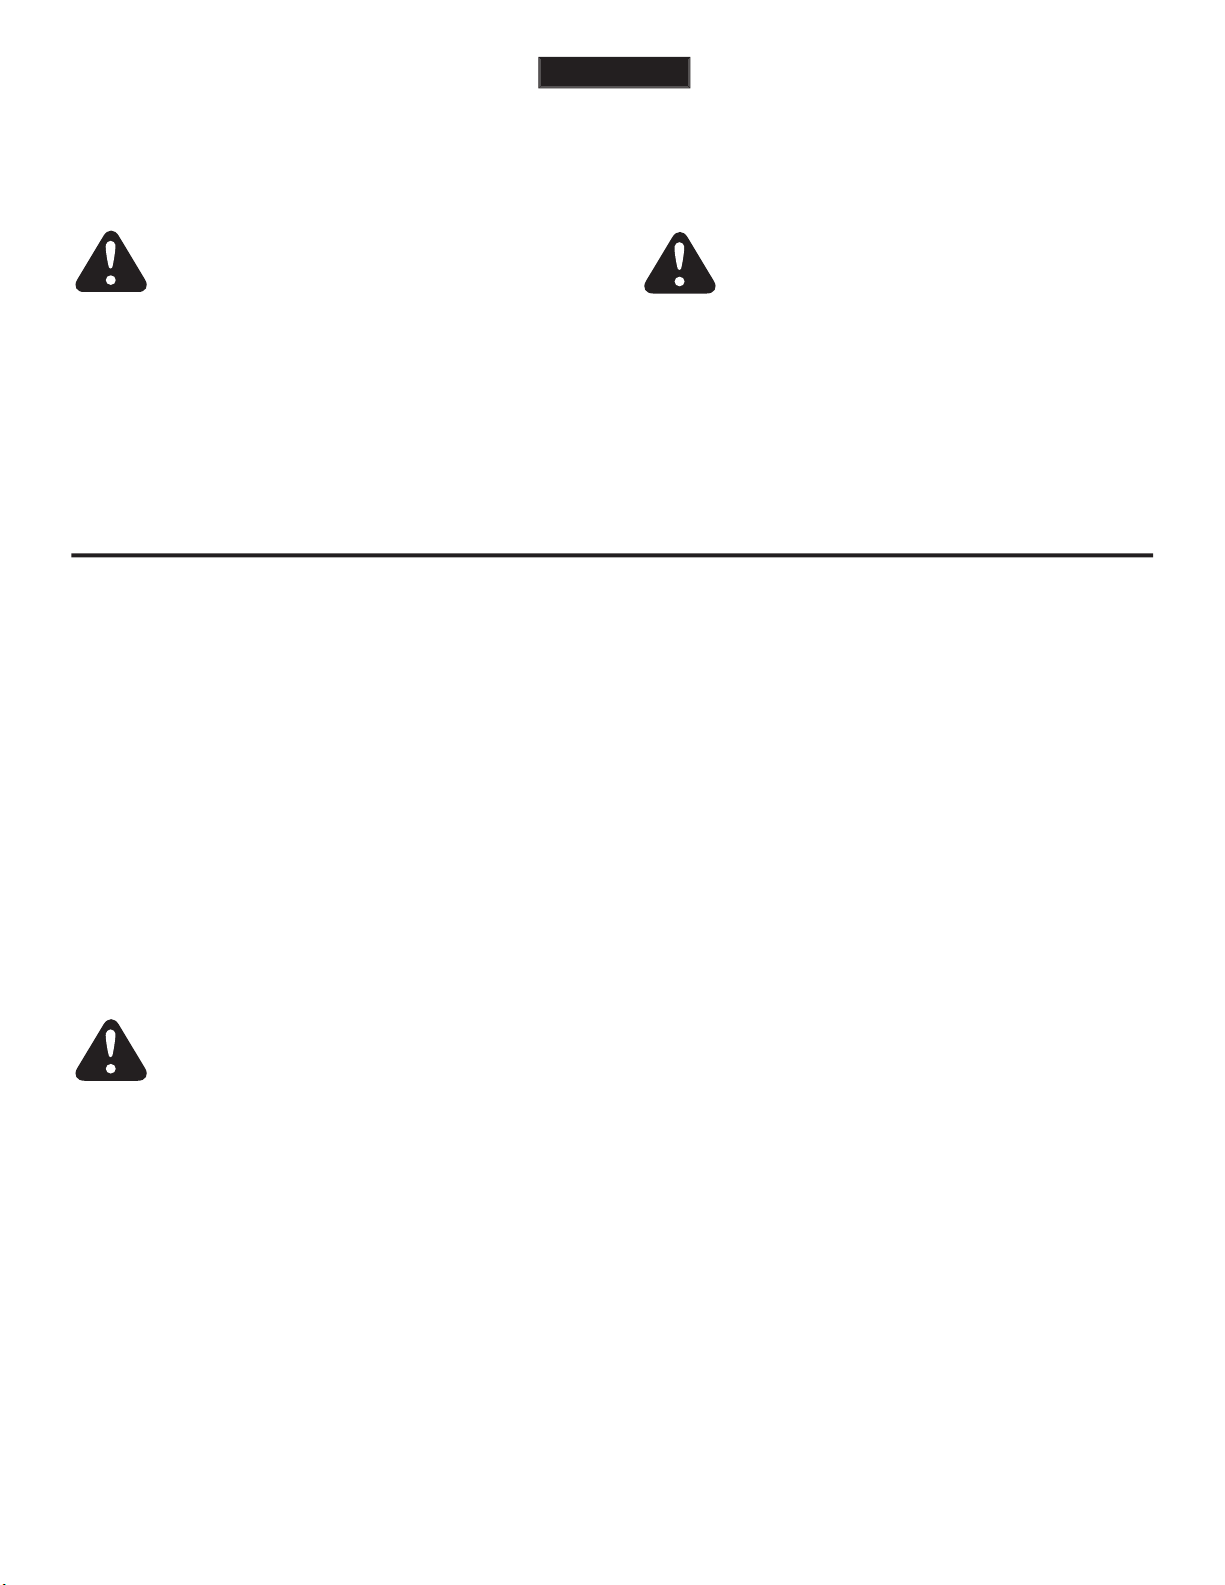
Para evitar cortocircuitos,
desconecte el terminal negativo de la batería o
remueva la batería del tractor antes de instalar la
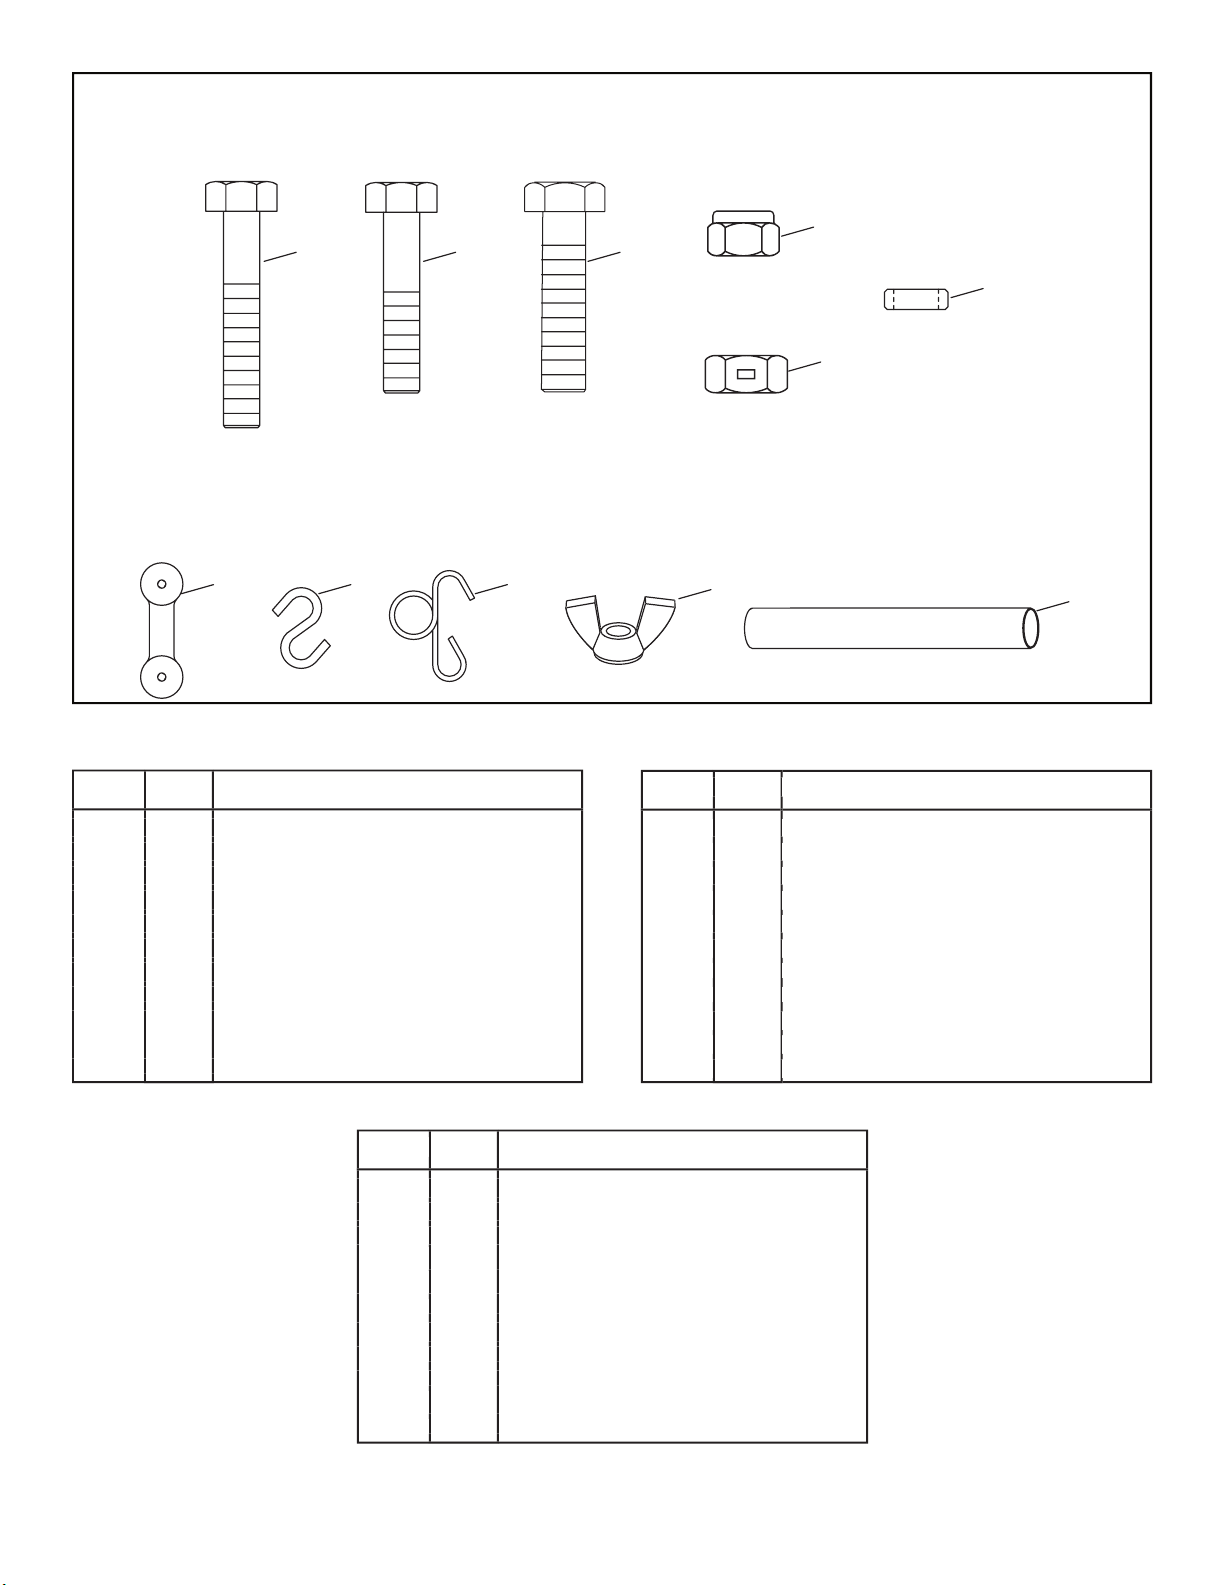
HERRAMIENTAS NECESARIAS PARA EL ARMADO
(1) Cinta métrica o regla
Si encuentra difi cultad en la instalación de la
capota en su tractor, busque la ayuda de un taller califi cado en la
reparación de tractores de corte de césped.
el Interruptor de Control de Presencia del Operador en el asiento
no está funcionando apropiadamente.
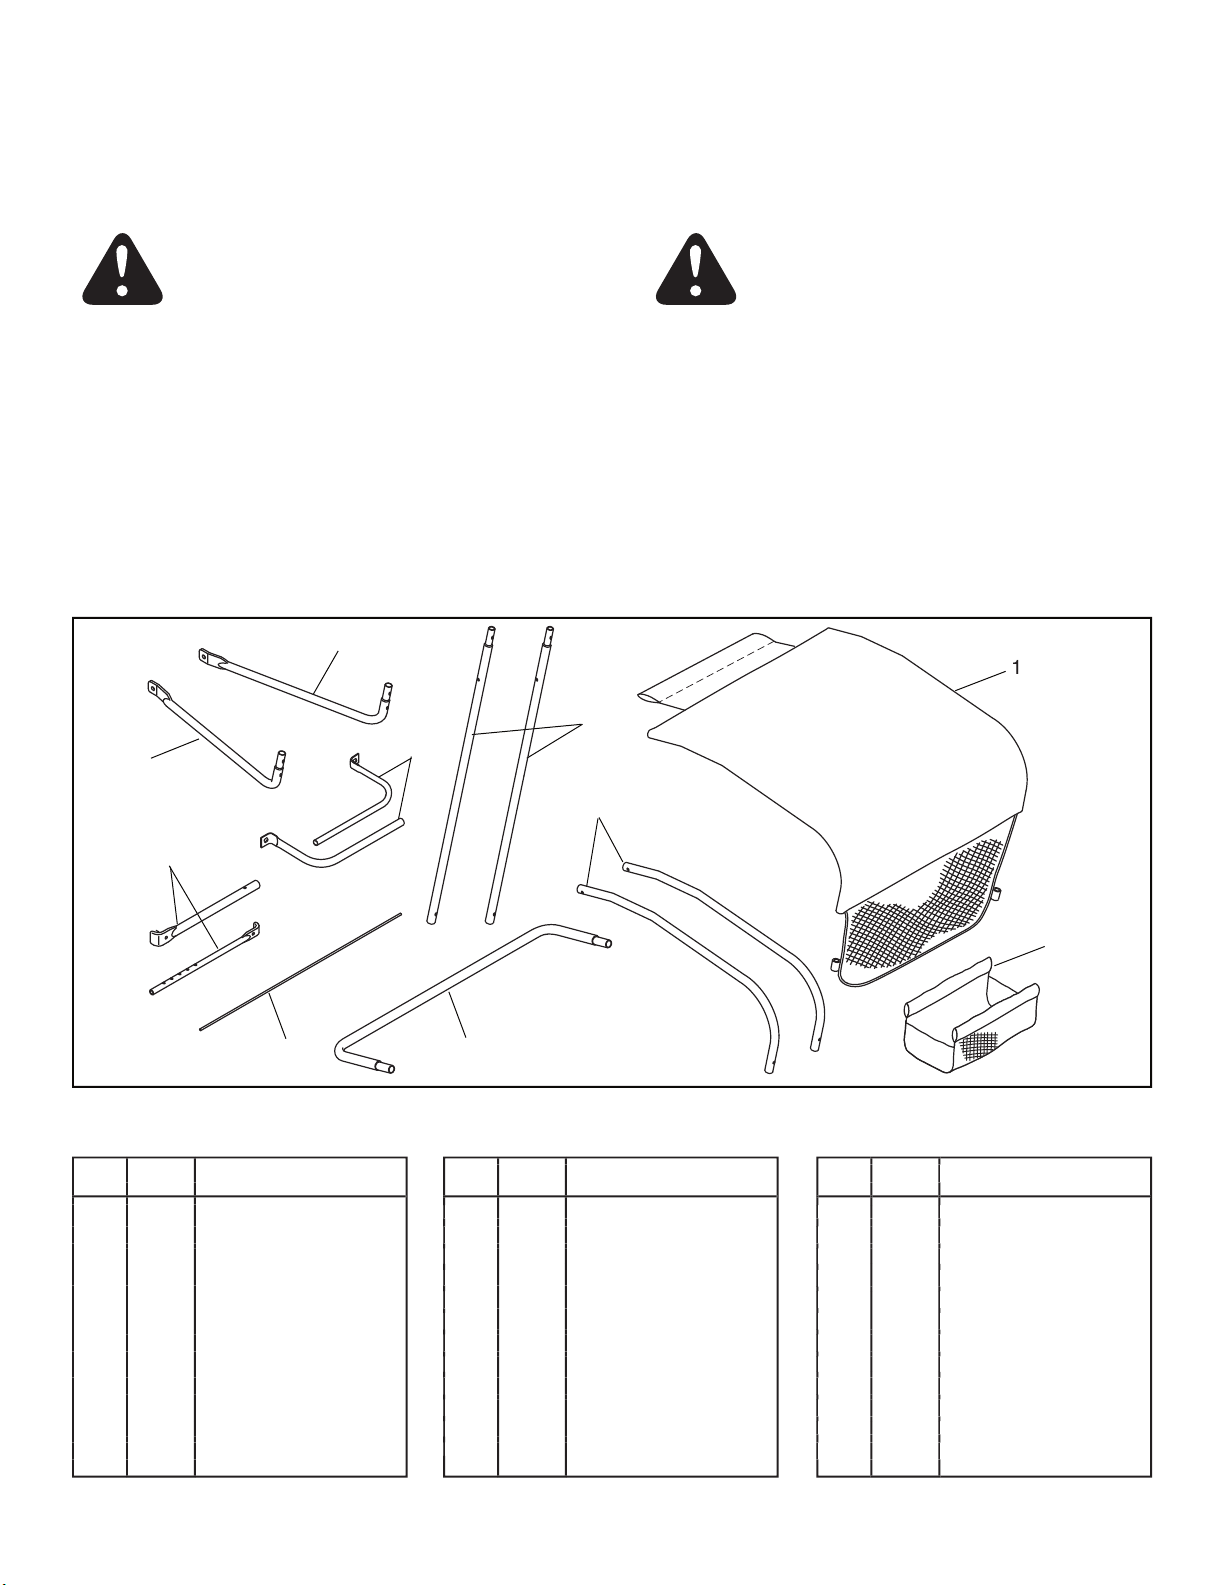
REMOCIÓN DE LAS PIEZAS DEL CARTÓN
Retire todas las piezas y el paquete de hardware de la caja.
Identifi que todas las piezas y el hardware consultando las páginas
Do not tighten the bolts and nuts completely until instructed
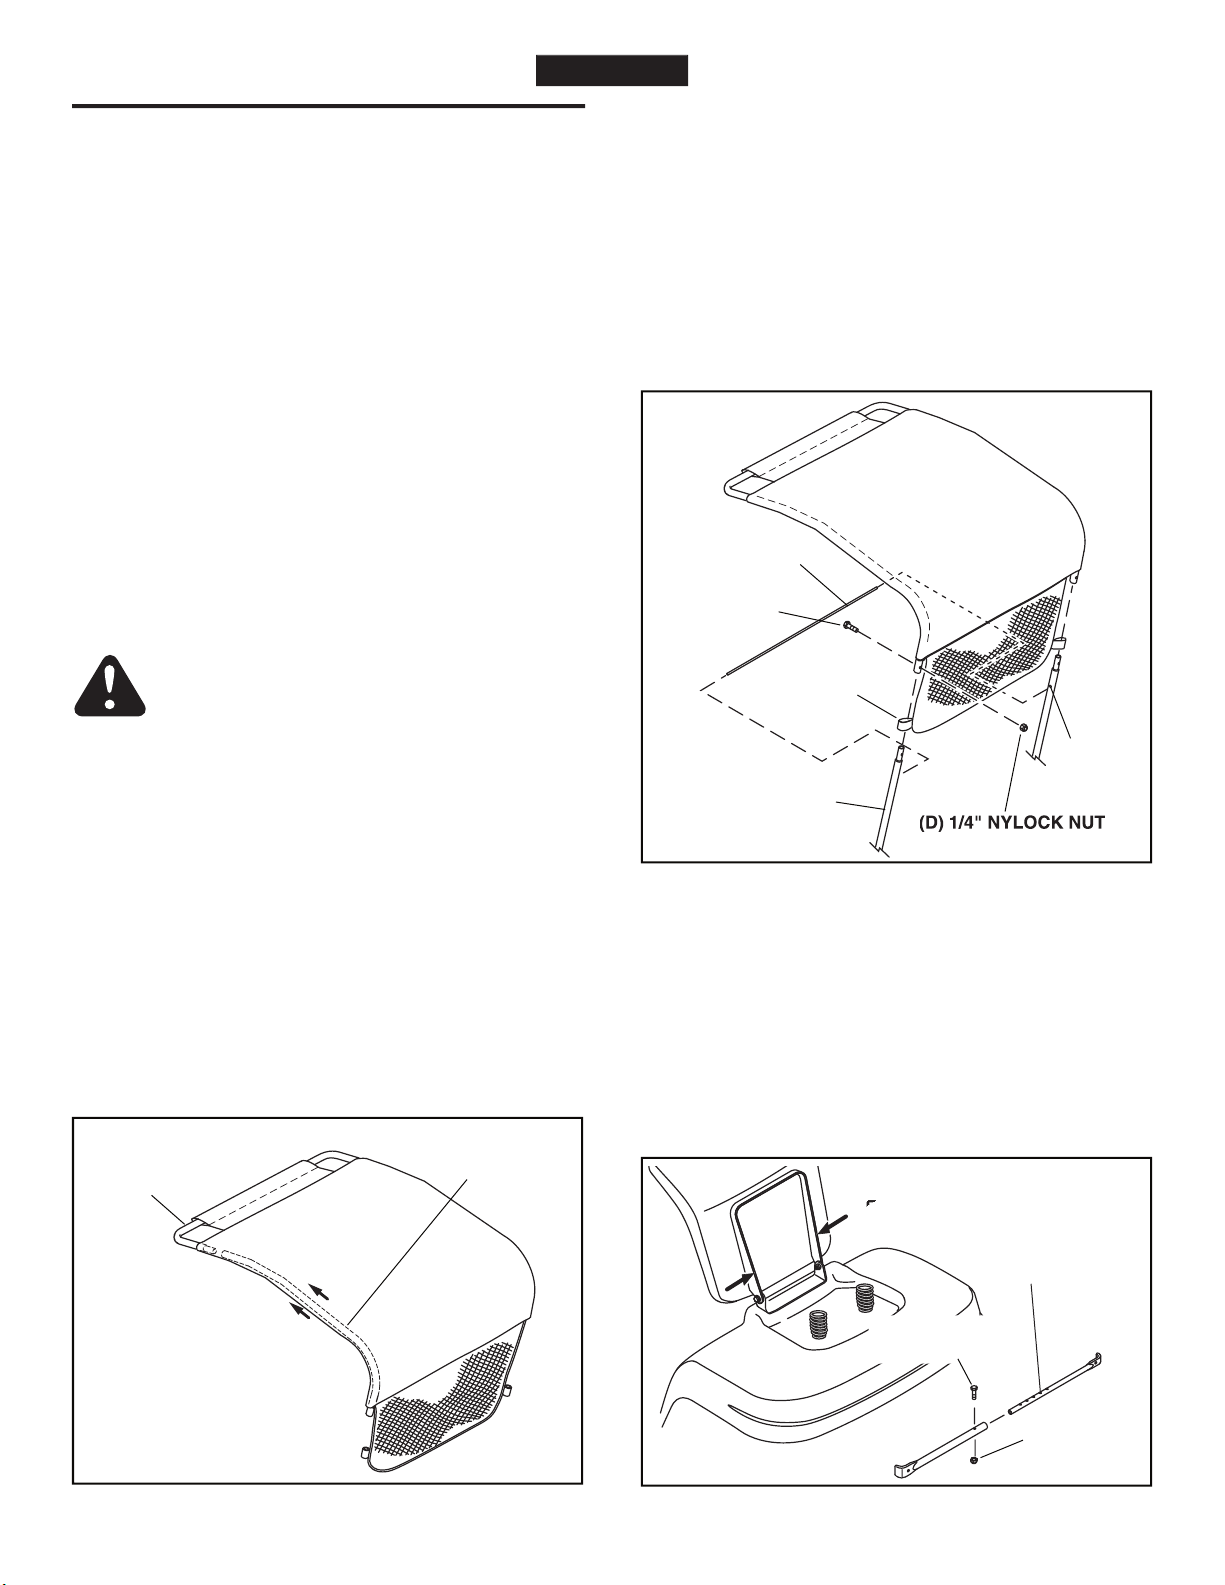
1. Insert the front tube into the stitched sleeve on the front fl ap
of the canopy. Insert one end of the front tube into the stitched
sleeve on one side of the canopy. Slide it into the sleeve far
enough that the other end of the tube can be inserted into
the stitched sleeve on the other side of the canopy. Center
the tube in the canopy. See fi gure 1.
2. From the rear of the canopy, slide the top tubes into the
stitched sleeves on the sides of the canopy. Fit the ends of the
top tubes onto the ends of the front tube inside the stitched
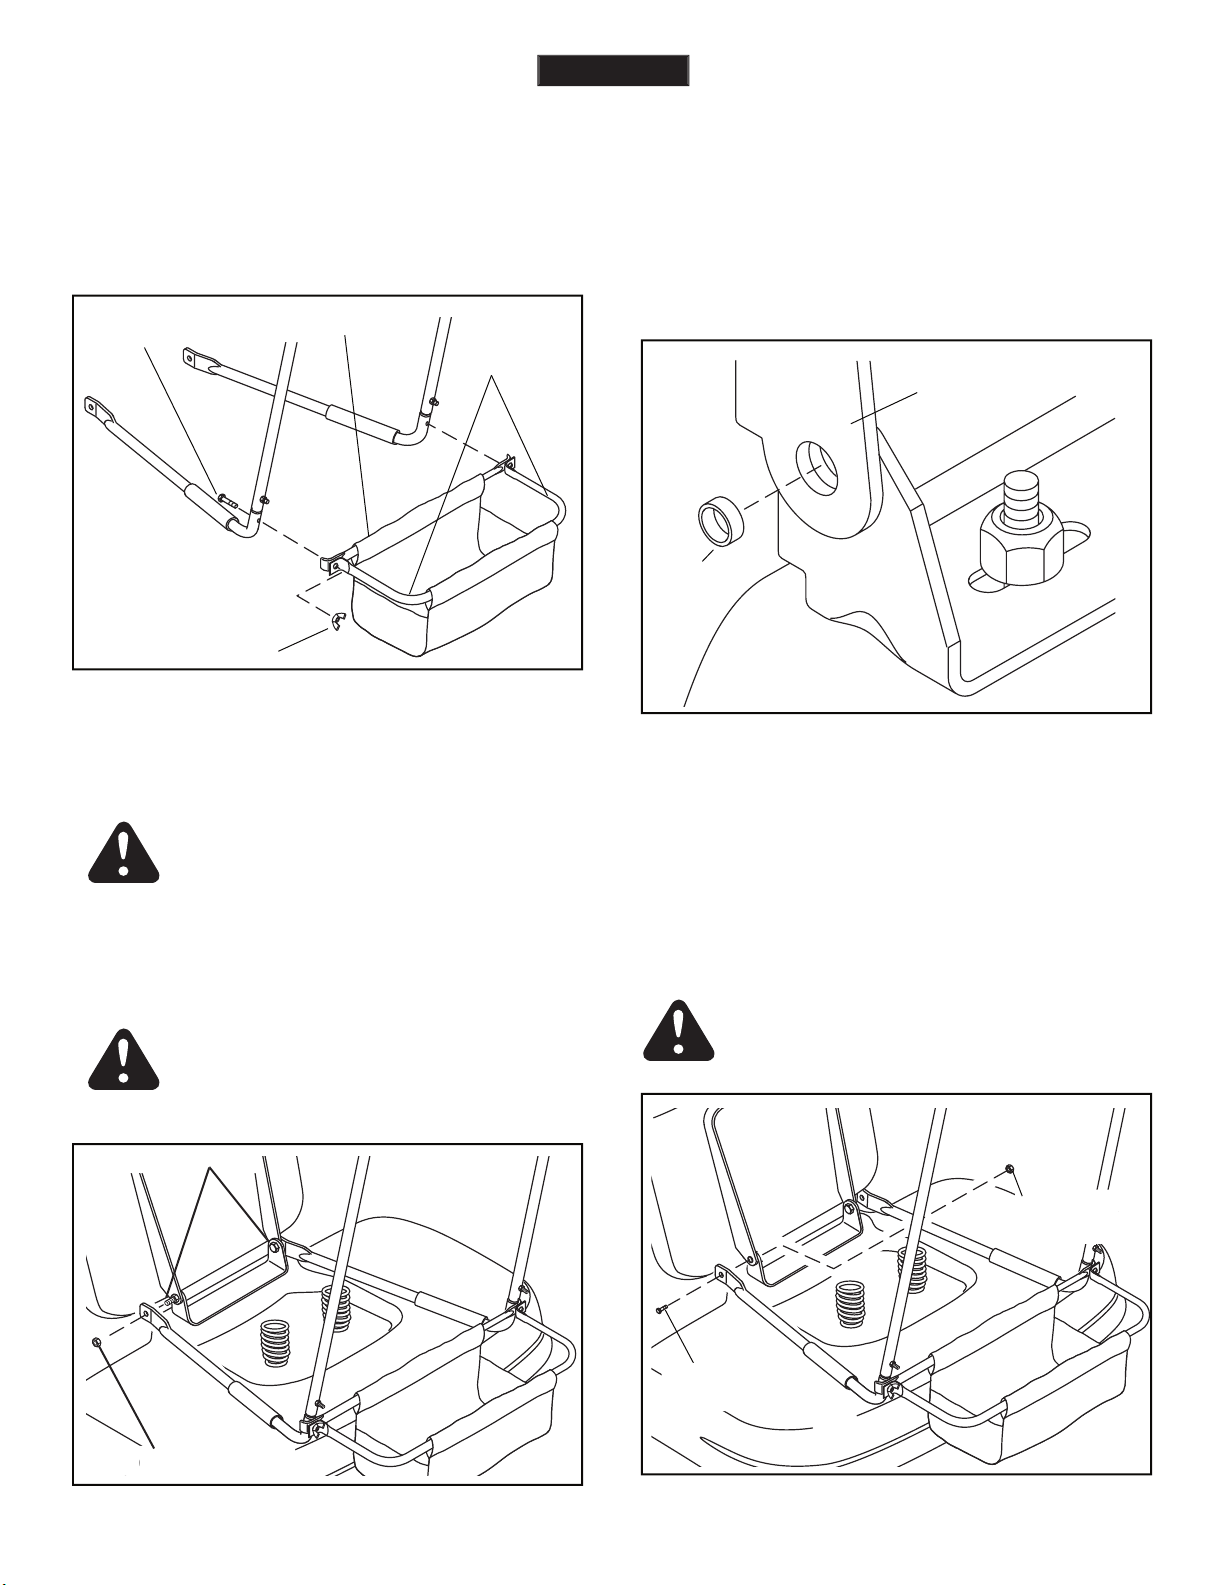
3. Introduzca los pequeños extremos de los tubos verticales a
través de los lazos de la tela del toldo y luego introdúzcalos
en los tubos superiores. Las pequeñas perforaciones que se
encuentran en ambos tubos verticales que se muestran en
la Figura 2 deben quedar mirando hacia adentro.
4. Ajuste los tubos delanteros a los tubos verticales con dos
pernos hexagonales de 1/4" x 1-1/4" (B) y dos tuercas de
cierre de nilón (nylock) de 1/4" (D). Ver Figura 2.
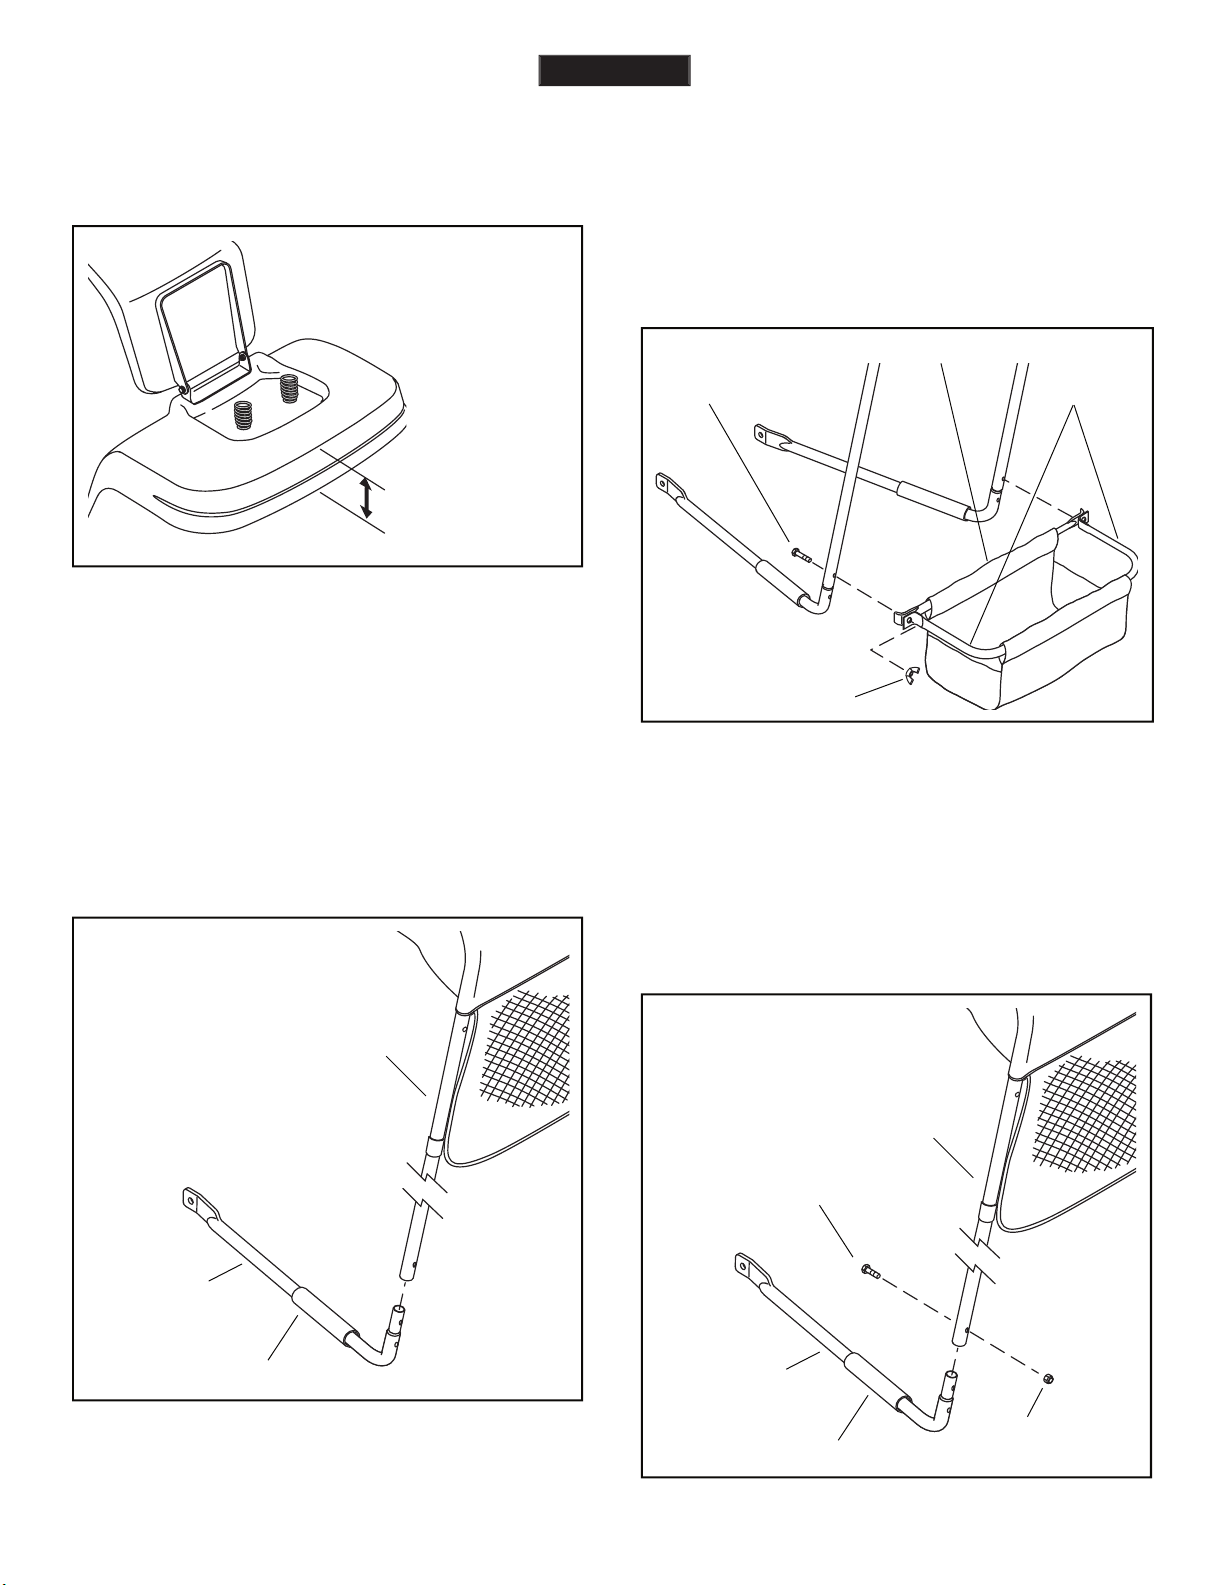
5. Introduzca un extremo de la varilla soporte dentro de la
pequeña perforación que se encuentra en uno de los tubos
verticales. Introduzca el otro extremo de la varilla soporte
dentro de la pequeña perforación que se encuentra en el
otro tubo vertical. Flexione levemente la varilla para poder
introducirla en la segunda perforación. Ver Figura 10.
6. Levante el asiento y mida el ancho del soporte. La mayoría
de los soportes tienen de 8"-11" (de 20 a 28 cm) de ancho.
7. Introduzca el tubo transversal interno dentro del tubo
transversal externo. Si el soporte del asiento tiene de 8" a 11"
(de 20 a 28 cm) de ancho, alinee la cuarta perforación del tubo
transversal interno con la perforación que se encuentra en el
tubo transversal externo. Ajuste los tubos entre sí utilizando
un perno de 1/4" x 1-1/4" (B) y una tuerca de cierre de nilón
(Nylock) de 1/4" (D). En el caso de contar con soportes de
asiento de mayor o menor ancho, usted podrá necesitar alinear
las diferentes perforaciones de los tubos transversales cuando
coloque el capota Sun Shade a su tractor. Ver Figura 3.
8. Mida la distancia desde la parte superior del guardabarro
posterior hasta la base de la brida posterior del guardabarro
según se muestra en la Figura 4. Si la distancia es de 2-1/2"
(6,3 cm) o menos, continúe con el paso 9. Si la distancia es
superior a 2-1/2" (6,3 cm) vaya directamente al paso 14.
BRIDAS DE GUARDABARRO DE 2-1/2" (6,3 CM) O MENOS
9. Haga deslizar las mangas de gomaespuma (K) sobre el
extremo doblado de los tubos de la base. Ver Figura 5.
10. Introduzca los tubos base derecho e izquierdo en los tubos
verticales. Ver Figura 5.
11. Introduzca los tubos transversales en la manga cosida del cesto
de tela. Introduzca los tubos externos del bastidor del cesto
en la otra manga cosida del cesto de tela. Ver Figura 6.
12. Alinee los extremos de los tubos transversales y los tubos del
bastidor del cesto. Fije el cesto a los tubos verticales y los tubos
base ya armados utilizando dos pernos hexagonales de 1/4"
x 1-1/2" (A) y tuercas mariposa de nilón (J). Ver Figura 6.
13. Vaya directamente al paso 18.
ESPAÑOL
Todo equipo mecanizado puede causar daños si se maneja inadecuadamente o si el usuario no conoce el funcionamiento
del equipo. Manténgase atento y cauteloso siempre que opere el equipo.