manuals.online logo
Brands
  1. Home
  2. •
  3. Brands
  4. •
  5. MyBinding
  6. •
  7. Binding Machine
  8. •
  9. MyBinding Renz WBS 360 User manual

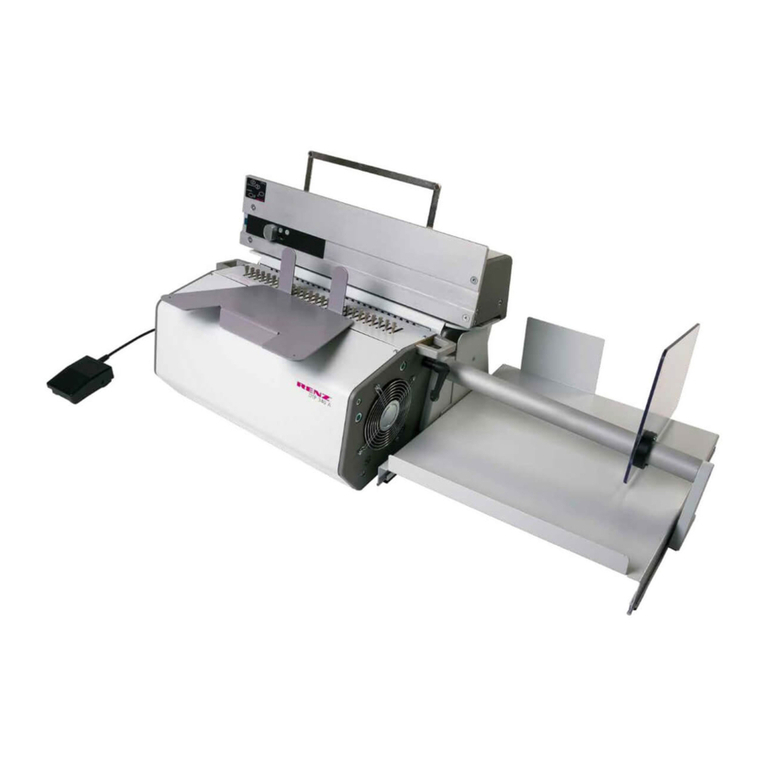
MyBinding Renz WBS 360 User manual

Other MyBinding Binding Machine manuals

MyBinding MINICOMB Quick start guide

MyBinding

MyBinding MINICOMB Quick start guide

MyBinding TitanCoil User manual

MyBinding

MyBinding TitanCoil User manual

MyBinding Plockmatic BM 200 User manual

MyBinding

MyBinding Plockmatic BM 200 User manual

MyBinding AKILES RUBICOIL User manual

MyBinding

MyBinding AKILES RUBICOIL User manual

MyBinding Powis Parker Fastback 20 User manual

MyBinding

MyBinding Powis Parker Fastback 20 User manual

MyBinding Powis Fastback 25 User manual

MyBinding

MyBinding Powis Fastback 25 User manual

MyBinding Akiles WBM-532 User manual

MyBinding

MyBinding Akiles WBM-532 User manual

MyBinding Akiles Comb User manual

MyBinding

MyBinding Akiles Comb User manual

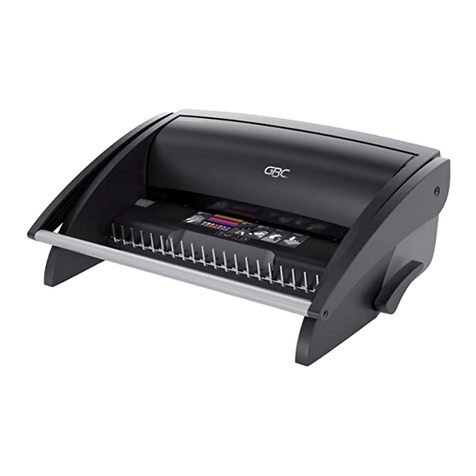
MyBinding CombBind 110 User manual

MyBinding

MyBinding CombBind 110 User manual

MyBinding TB220 User manual

MyBinding

MyBinding TB220 User manual

MyBinding DFG EC1000 User manual

MyBinding

MyBinding DFG EC1000 User manual

MyBinding WireMac-E User manual

MyBinding

MyBinding WireMac-E User manual

Popular Binding Machine manuals by other brands

Tamerica OPTICOMBO-341 quick start guide

Tamerica

Tamerica OPTICOMBO-341 quick start guide

GBC CombBind A20 instruction manual

GBC

GBC CombBind A20 instruction manual

GBC CombBind C800pro instruction manual

GBC

GBC CombBind C800pro instruction manual

JBI Alpha-Doc MKIII instruction manual

JBI

JBI Alpha-Doc MKIII instruction manual

GBC DocuBind P100 operating instructions

GBC

GBC DocuBind P100 operating instructions

Rexel CB345E Service and parts manual

Rexel

Rexel CB345E Service and parts manual

Morgana DigiBook 450 Technical manual

Morgana

Morgana DigiBook 450 Technical manual

GBC C210 instruction manual

GBC

GBC C210 instruction manual

Fellowes Orion-E 500 manual

Fellowes

Fellowes Orion-E 500 manual

Fellowes Pulsar E 300 instructions

Fellowes

Fellowes Pulsar E 300 instructions

GBC Modular MP2500iX operating instructions

GBC

GBC Modular MP2500iX operating instructions

Qupa M600 Manual instruction

Qupa

Qupa M600 Manual instruction

Rollabind PBS 2000 operating instructions

Rollabind

Rollabind PBS 2000 operating instructions

GBC SureBind 500 instruction manual

GBC

GBC SureBind 500 instruction manual

ibico ibiMaster 250 instruction manual

ibico

ibico ibiMaster 250 instruction manual

Peach Starbinder Pro PB200-30 operating instructions

Peach

Peach Starbinder Pro PB200-30 operating instructions

Fellowes Starlet 90 instruction manual

Fellowes

Fellowes Starlet 90 instruction manual

Peach PB200-70 operating instructions

Peach

Peach PB200-70 operating instructions

manuals.online logo
manuals.online logoBrands
  • About & Mission
  • Contact us
  • Privacy Policy
  • Terms and Conditions

Copyright 2025 Manuals.Online. All Rights Reserved.

Renz WBS 360 Modular
Manual Wire Closer
Instruction Manual
BEDIENUNGSANLEITUNG \ OPERATION MANUAL \ MANUAL DE INSTRUCCIONES \ INSTRUCTIONS \ NÁVOD K POUŽITÍ \
GEBRUIKSAANWIJZING \ NÁVOD NA POUŽITIE \ ИНСТРУКЦИЯ ПО ЭКСПЛУАТАЦИИ
D
E
ESP
F
CZ
NL
SK
RUS
Manuelle Handbindemaschine für RENZ RING WIRE® Drahtkammbindung
Manual binding machine for RENZ RING WIRE® binding
Máquina encuadernadora manual para alambre doble cero RENZ RING WIRE®
Relieuse manuelle pour la reliure intégrale RENZ RING WIRE®
Vazačs ručním uzavíráním pro drátěnou vazbu
Manuele sluit machine voor draadkambinding
Viazačs ručným uzatváraním pre drôtenú väzbu
Модуль для зажима пружины
Bindehebel
Binding lever
Palanca de encuadernación
Levier de serrage
Vázací páka
Inbindhendel
Viazacia páka
Ручка зажима пружины
Klemmschraube für Maßstab
Attachment screw for adjusting slider
Tornillo de sujeción de la escala
Vis de serrage pour réglage du diamètre
Upínací šroub pro měřítko
Klemschroef voor maat
Upínacia skrutka pre meradlo
Шкала настройки
Haltevorrichtung für Bindeelemente
Holding fixture for binding elements
Dispositivo de sujeción de tramos cortados
Peigne de maintien de la reliure métallique
Upínací zařízení pro vázací prvky
Houder voor bindelementen
Upínacie zariadenie pre viazacie chrbty
Планка фиксатор пружины
Schließbalken mit abnehmbarer Schließleiste
Closing bar with reversible closing rail
Barra de cierre con regleta desmontable
Barre de fermeture avec protection amovible
Uzavíratelný nosník s odnímatelnou uzavírací lištou
Pers balk met afneembare sluitrail
Uzavierateľný nosník s odnímateľnou uzavieracou lištou
Прижимная панель
www.renz.com
Bestell Nr. / Order Nr. 971000002 06/2013
Danke, dass Sie sich für ein RENZ-Produkt entschieden haben.
Thank you for choosing a RENZ product.
Gracias por haber escogido un producto RENZ.
Merci d‘avoir choisi un produit RENZ.
Děkujeme Vám, že jste se rozhodli pro výrobek značky RENZ
Dank u wel, dat u voor een Renz product gekozen heeft.
Ďakujeme, že ste sa rozhodli pre výrobok spoločnosti RENZ.
Спасибо, что выбрали этот продукт RENZ.
WBS 360
EINSATZ \ APPLICATION \ UTILIZACIÓN \ UTILISATION \ POUŽITÍ \ GEBRUIK \ POUŽITIE \
ИСПОЛЬЗОВАНИЕ
D
Einsatzgebiet:
Handbindemaschine zum Schließen von RENZ RING WIRE® Drahtkamm-
Bindeelemente in allen Teilungen von ø 3/16“ - 1 1/2“ (5,5 - 38 mm).
Max. Bindedicke 34 mm (ca. 340 Blatt 70-80 g/m).
Empfindliche Möbeloberflächen schützen.
Das Gerät steht auf weichen Kunststofffüßen.
Manche Oberflächen können sich auf Dauer verfärben.
E
Field of application:
Manual binding machine for closing of RENZ RING WIRE® binding elements
in all pitches from ø 3/16“ - 1 1/2“ (5,5 - 38 mm).
Max. binding thickness 34 mm (appr. 340 pages 70/80 g/m²-20 # stock).
Protect sensitive furniture surface.
The machine stands on plastic feet.
Some surface may become discoloured after time.
ESP
Áreas de utilización:
Máquina encuadernadora manual para cerrar tramos de alambre doble cero
RENZ RING WIRE® en todos los pasos ø 3/16“ - 1 1/2“ (5,5 - 38 mm).
Grosor máximo de encuadernación 34 mm. Aprox. 340 hojas de 70-80 g/m.
Proteger las superficies delicades.
Algunas superficies pueden perder color con el tiempo.
F
Domaine d’utilisation:
Relieuse manuelle pour fermer les éléments RENZ RING WIRE® dans tous
les pas de ø 3/16“ - 1 1/2“ (5,5 - 38).
Epaisseur maximum du document :
34 mm soit env. 340 feuilles de 70-80 g/m².
Protéger les supports de meuble fragiles.
L‘appareil se trouve sur des pieds en matière synthétique.
Certains supports peuvent se décolorer avec le temps.
CZ
Použití:
Ruční vázací stroj pro uzavírání drátěnou vazbou Renz ®
Drátěné hřebeny - vázací prvky ve všech rozděleních
od ø 3/16 „- 1 1/2“ (5,5 - 38 mm).
Max. vázací šířka 34 mm( cca. 340 listů70 - 80 g/m).
Doporučená ochrana nábytkových ploch.
Přístroj stojí na měkkých plastových nohách, mnohé plochy mohou být po
čase zbarveny.
NL
Gebruik:
Handbindmachine voor het sluiten van RENZ RING WIRE®
Draadkm- bindelementen in alle delingen van
ø 3/16“ - 1 1/2“ (5,5 - 38 mm)max.
Binddikte 34 mm ca. 340 vel 70-80 g/m.
Gevoelige meubeloppervlakken beschermen.
Het apparaat staat op zachte kunststofvoeten.
Enkele oppervlakken kunnen op lange termijn verkleuren.
SK
Použitie:
Ručné viazacie stroj pre uzatváranie drôtenú väzbou Renz ®
Drôtené hrebene - viazacie prvky vo všetkých rozdeleniach
od ø 3/16 „- 1 1/2“ (5,5 - 38 mm).
Max. viazacie šírka 34 mm cca. 340 listov 70 - 80 g / m2.
Odporúčaná ochrana nábytkových plôch.
Prístroj stojí na mäkkých plastových nohách, mnohé plochy môžu byťpo
čase sfarbené.
RUS
Ручная переплетная машина предназначена для зажима металлических
пружин диаметром 3/16 „- 1 1/2“ (5,5 - 38 мм).
Максимальный размер переплетаемого блока
34 мм (340 страниц плотностью 70-80 г/м²).
Защитите от стирания поверхность мебели.
Машина стоит на пластмассовых ножках.
Поверхность мебели может приобрести потертости через
некоторое время.
1AUFSTELLEN \ SETUP \ COLOCACIÓN \ MISE EN PLACE \ SESTAVENÍ \ PLAATSEN \
ZOSTAVENIE \ УСТАНОВKA
WBS360 DTP340M
D
Wird das Modul als Einzelgerät verwendet , ist die Modulhalterung
notwendig. Gerät dann wie oben gezeigt in die Halterung einsetzen.
Bei Einsatz mit der Stanzmaschine DTP 340 M,
Gerät direkt an die Stanzmaschine anbauen.
Anwendung DTP 340 M, siehe separate
Gebrauchsanleitung.
E
If the module is used as a single unit the holding device is nescessary.
Insert unit on to holding device as shown above.
If the module is used together with the punch
machine DTP 340 M, install the unit directly
at the punch machine. For application on
DTP 340 M, see separate operation manual.
ESP
Si se utiliza la cerradora como máquina individual es necesario acoplarla a un soporte
para módulos MBS como se muestra en la ilustración superior.
Si se utiliza la cerradora junto con la perforadora
DTP 340 M, debe acoplar esta cerradora
a la DTP 340M como se muestra en la ilustración
anterior.Para el funcionamiento de la DTP 340 M,
véase el manual del usuario de esta máquina.
F
Si le module est utilisé comme unité de travail indépendante, il faudra fixer l’appareil
sur un support de module. Dans ce cas, posez l’appareil sur le support selon
l’illustration ci-dessous.
S’il est utilisé avec la perforeuse DTP 340 M,
disposez le module directement sur la machine.
Pour l’utilisation de la DTP 340 M, veuillez vous
référer au mode d’emploi de la machine spécifique.
CZ
V případě, že modul se používá jako jediné zařízení, je nutný modulový držák.
Pak přístroj, jak je uvedeno výše, nasaďte do držáku.
V případě, že modul se používá ve spojení
s DTP 340 M, spojení obou zařízení dohromady.
Chcete-li pracovat s DTP 340 M naleznete
v samostatném manuálu.
NL
Word de module als separate machine gebruikt, is de module houder noodzakelijk.
De machine dan als boven in de houder plaatsen.
Als de module wordt gebruikt samen met de
ponsmachine DTP 340 M, installeer het apparaat
rechtstreeks op de ponsmachine. Voor toepassing
op DTP 340 M, zie aparte handleiding.
SK
V prípade, že modul sa používa ako jediné zariadenie, je nutný modulový držiak.
Potom prístroj, ako je uvedené vyššie, nasaďte do držiaka.
V prípade, že modul sa používa v spojení
s DTP 340 M, spojenie oboch zariadení dohromady.
Ak chcete pracovaťs DTP 340 M nájdete
v samostatnom manuáli.
RUS
При отдельном использовании модуля вставьте удерживающий блок как
показано выше.
Если модуль используется вместе с
перфорирующей машиной DTP 340 М, соедините
два устройства вместе. Для работы с340 МDTP
см. отдельное руководство по эксплуатации.
Halter für MBS Module
Holding device for MBS moduls
Fixation pour module MBS
Soporte para módulos MBS
Držak pro moduly
Houder voor MBS module
Držiak pre moduly
Устройство для присоединения MBS модуля
WBS 360
л
я
WBS
360
2EINSTELLEN \ ADJUST \ RÉGLER \ AJUSTE \ NASTAVENÍ \ INSTELLEN \ NASTAVENIE \
УСТАНОВKA
D
Schließleiste aufsetzen oder
abnehmen:
Druckknöpfe an beiden Seiten
drücken und Schließleiste nach
vorne aufsetzen oder abziehen.
Aufdruck auf der Schließeinheit beachten!
1. Position der Schließleiste für ø 5,5 - 25,4 mm (ø 3/16“ - 1“).
2. Position der Schließleiste für ø 28,5 - 38 mm (ø 1 1/8“ - 1 1/2“).
Für ø 28,5 - 38 mm
(ø 1 1/8“ - 1 1/2“),
Schließleiste um 180° drehen.
E
Removal or installation of the
closing rail:
Push buttons on both sides and pull
rail or push back.
Please note the position of the closing bar on your machine:
1. Position the closing bar for ø 5,5 - 25,4 mm (ø 3/16“ - 1“).
2. Position the closing bar for ø 28,5 - 38 mm (ø 1 1/8“ - 1 1/2“).
For ø 28.5 to 38 mm
(Ø 1 1/8 "- 1 1/2"),
Rotate the closing bar 180 °.
ESP
Superponga o retire la regleta de
cierre:
Apretar los bottones en ambos lados
y retire o superponga la regleta de
cierre.
Observe impreso en la unidad de cierre!
1. Posición de la regleta de cierre para ø 5,5 a 25,4 mm (ø 3/16 "- 1").
2. Posición de la regleta de cierre para ø 28,5 a 38 mm (Ø 1 1/8 "- 1 1/2").
Pour ø 28,5 à 38 mm
(O 1 1/8 "- 1 1/2"),
faire pivoter la barre de fermeture
de 180 °.
F
Mettre ou ôter la barre de
fermeture:
Presser les boutons de pression sur
les deux côtés et mettre ou ôter la
barre de fermeture.
Observer imprimé sur l'unité de fermeture!
1. Position de la barre de fermeture pour ø 5,5 à 25,4 mm (ø 3/16 "- 1").
2. Position de la barre de fermeture pour ø 28,5 à 38 mm (Ø 1 1/8 "- 1 1/2").
Para ø 28,5 a 38 mm
(O 1 1/8 "- 1 1/2"),
barra de cierre gira 180 °.
CZ
Nasazení nebo odejmutí uzavírací
lišty:
Zmáčkněte oběma rukama tlačítka,
lištu pak lze nasadit nebo odejmout.
Dodržujte pokyny dle potisku na vázací liště!
1. Pozice vázací lišty pro ø 5,5 - 25,4 mm (ø 3/16“ - 1“).
2. Pozice vázací lišty pro ø 28,5 - 38 mm (ø 1 1/8“ - 1 1/2“).
Pro průměr Ø 28,5 – 38 mm
(ø 1 1/8“ - 1 1/2“)
vázací lištu otočit o 180°.
NL
Verwijderen of installeren van de
sluitbalk:
Druk op knoppen aan beide kanten
in en trek balk naar u toe of duw
deze van u af.
Let op de afbeeldingen op de sluitbalk!
1. Positie van de sluitbalk voor ø 5,5 - 25,4 mm (ø 3/16“ - 1“).
2. Positie van de sluitbalk voor ø 28,5 - 38 mm (ø 1 1/8“ - 1 1/2“).
Voor ø 28,5 - 38 mm
(ø 1 1/8“ - 1 1/2“),
Sluitbalk 180° draaien.
SK
Nasadenie alebo odobratie
uzavieracej lišty:
Stlačte tlačidlá na oboch stranách,
lišta sa dá potom nasadiťalebo
odňať.
Dodržujte pokyny podľa potlače na viazacie lište!
1. Pozície viazacie lišty pre ø 5,5 - 25,4 mm (ø 3/16 "- 1").
2. Pozície viazacie lišty pre ø 28,5 - 38 mm (ø 1 1/8 "- 1 1/2").
Pre priemer Ø 28,5 - 38 mm
(ø 1 1/8 "- 1 1/2"),viazacie lištu
otočiťo 180 °.
RUS
Смена зажимной планки:
Для удаления или установки
зажимной планки необходимо
нажать кнопки на обеих сторонах.
Обратите внимание на рисунок на наклейке.
1. Положение зажимной планки для D 5,5 мм-25,4 мм ( D 3/16’-1’)
2. Положение зажимной планки для D 28,5 мм-38 мм ( D 1 1/8’-1 1/2’)
Для зажима пружины большего
диаметра: ø 28,5 - 38 mm
(ø 1 1/8“ - 1 1/2“)
необходимо перевернуть
зажимную планку на 180°.
1
2
2EINSTELLEN \ ADJUST \ RÉGLER \ AJUSTE \ NASTAVENÍ \ INSTELLEN \ NASTAVENIE \
УСТАНОВKA
D
Papieranschlag auf entsprechendes Format einstellen.
Feststellschraube an der Rückseite lösen, Anschlag verschieben,
Feststellschraube anziehen.
E
Adjusting paper guide to the corresponding paper size.
Release attachment screw on the rear, adjust paper guide and fasten
attachment screw.
ESP
Ajustar el tope del papel al tamaño correspondiente.
Afloje el tornillo de sujeción, ajuste el tope de papel y aprete el tornillo.
F
Ajustage de la butée du papier selon le format du papier.
Desserrer la vis de serrage à l‘arrière, mettre la buttée du papier et resserrer la
vis de serrage.
CZ
Doraz nastavte podle formátu.
Stavěcí šroub povolte, nastavte podle potřeby a opět utáhněte.
NL
Papieraanleg op corresponderende formaat instellen. Schroef aan
achterkant losmaken, aanleg verschuiven, schroef vastmaken.
SK
Zarážku nastavte podľa formátu.
Skrutku povoľte, nastavte podľa potreby a opäťutiahnite.
RUS
Настройка формата бумаги.
Установите ограничитель бумаги на делении шкалы соответствующему
формату переплетаемого блока. Закрепите ограничитель бумаги вэтом
положении.
3VORBEREITEN \ PREPARE \ PREPARACIÓN \ PRÉPARATION \ PŘÍPRAVA \ VOORBEREIDEN \
PRÍPRAVA \ ПОДГОТОВКА
D
Verschluß der Drahtkammbindung
soll innen liegen. Kammverschluß
muß innen liegen.
Buchblock aufstellen.
Heftrücken nach oben. Rückseite
nach vorn klappen. Deckblatt und
Rückseite liegen jetzt hintereinander.
Block aufstoßen. Buchblock drehen. Deckblatt
und Rückseite liegen unten.
Seiten von oben abnehmen.
E
The seam of the closed binding
element should be inside the book,
not outside the covers.
Set the book upright, binding
side to the top, place the back cover
in front.The front cover should be
behind the back cover.
Jog the block. Turn the book over, covers
are underneath.
Take pages from the top.
ESP
El cierre de la encuadenación debe
quedar dentro de las cubiertas del
cuaderno y no fuera de ellas.
Coloque el cuaderno con el lado a
perforar hacia arriba. Gire la tapa
trasera hacia adelante como se
muestra en la ilustración superior. La
portada debe estar ahora detrás de
la controportada.
Nivele el cuaderno en posición
horizontal y vertical de manera que
todas las hojas queden parejas.
Coloque el cuaderno con las
cubiertas hacia abajo. Tome las hojas
por arriba.
F
La finition de la fermeture de la
reliure doit se trouver à l’intérieur du
document.
Redresser le document sur le côté.
Constituer le dossier à relier.
Rabattre le dos de couverture vers
l’avant. Couverture et dos de
couverture se trouvent maintenant
l’un derrière l’autre.
Taquer le dossier. Retourner le dossier non relié.
Couverture et dos de couverture se
trouvent en dessous.
Retirer les feuilles par le haut.
CZ
Uzavřený hřbet by měl být schovaný
uvnitřsvazku.
Stoh setřeste, urovnejte, zadní desku
překlopte směrem vpřed.
Blok setřeste. Následněstoh položte, přední fólie a
zadní deska leží dole. Listy odebírejte
ze shora.
NL
De sluiting van het gesloten
bindelement dient binnen het boek te
liggen, niet buiten de omslagen.
Zet het boek rechtop, bindkant aan
de bovenkant, achterkaft naar voren
klappen. De voorkaft en achterkaft
liggen op elkaar.
Blok gelijkstoten. Draai het boek, voorkaft en achterkaft
liggen onder, vellen van boven
afnemen.
SK
Uzáver viazacieho hrebeňa by mal
byťskovaný vo vnútri zväzku.
Stoh papiera postavte, urovnajte,
zadnú dosku preklopte smerom
dopredu.
Blok straste. Následne stoh položte, predná fólia
a zadná doska ležia dolu za sebou.
Listy odoberajte zhora.
RUS
Шов закрытой пружины должен
быть внутри переплетаемого
блока, ане снаружи.
Установите переплетаемый блок
вертикально, перфорируемой
стороной вверх, задней обложкой
спереди. Передняя обложка
должна быть за задней.
Подровняйте блок.Переверните переплетаемый блок
обложками вниз.
4EINKÄMMEN \ INSERT \ INSERCIÓN \ INTRODUCTION \ NAVLEČENÍ \ INVOEREN \ VLOŽENIE \
ПЕРЕПЛЕТ
D
Bindeelement in die Haltevorrichtung schieben.
Haltevorrichtung hält das Bindeelement fest, wenn
gestanztes Papier eingekämmt wird.
Gestanztes Papier in kleineren Stapeln beidhändig in das Bindeelement einkämmen.
E
Push binding element in the holding fixture. Holding
fixture holds binding element during insertion of the
punched paper.
Insert paper onto the binding element in smaller sections.
ESP
Cuelgue el tramo cortado de alambre doble cero en el
dispositivo de sujeción. Este dispositivo retiene el tramo
cortado para que podamos introducir paulatinamente el
cuaderno perforado.
Introduzca el papel perforado en el tramo cortado que cuelga del dispositivo de sujeción.
F
Placer la reliure métallique sur le peigne de maintien. Le
peigne permet de maintenir la reliure métallique lors de
l’introduction du papier perforé.
Introduire ensuite dans la reliure métallique.
CZ
Vložte hřbet do pomocného hřebene na přední straně
stroje, ten usnadňuje vkládání vyděrovaných papírů.
Vyděrovaný papír obouručněvložte do připraveného hřbetu.
NL
Bindelement in de houder schuiven. De houder houdt het
bindelement vast tijdens invoer van het geponste papier.
Geponst papier direct in het bindelement invoeren.
SK
Vložte viazací chrbát do pomocného hrebeňa na prednej
strane stroja, tenchrbát upevní pri vkladaní vydierovaných
papierov.
Vydierovaný papier obojručne vložte do pripraveného viazacieho chrbta.
RUS
Закрепите пружину под планкой-фиксатором зубцами
вверх. Планка-фиксатор будет держать пружину во
время вставки отперфорированного блока.
Вставьте листы вертикально вметаллическую пружину. Начните спервой страницы блока.
5ANLEGEN \ ADJUST \ COLOCACIÓN \ MISE EN PLACE \ UZAVÍRÁNÍ \ VASTMAKEN \
UZAVIERANIE \ РАЗМЕЩЕНИЕ
D
Bindeelement von der Halteleiste
herausheben, mit Buchblock
entnehmen Papier so anfassen,
daß es nicht aus dem Bindeelement
rutscht.
Bindeelement unter den
Schließbalken schieben.
Bindeelement muß senkrecht an
der Rückwand des Schließbalkens
stehen. Öffnung des Bindeelements
zeigt zur Rückwand.
Bindehebel bis zum Anschlag nach
vorn drücken und wieder
zurückführen. Bei größerem
Bindedurchmesser mehr Kraft
einsetzen.
E
After the paper has been
placed on the binding element,
remove the paper with the element
from the holding fixture. Hold the
paper so that the binding element
does not fall out.
Put binding element under the
closing bar.
Binding element must stand vertically
at the back of the closing bar with
opening of the binding element to
the back.
Press the binding lever forward until
it stops and back again. For bigger
diameters use more force.
ESP
Extraiga el tramo cortado del
dispositivo de sujeción sacando el
cuaderno junto con él. Coja el
cuaderno de tal modo que el papel
no se salga fuera del tramo cortado.
Coloque el tramo cortado debajo de
la barra de cierre.
El tramo cortado debe colocarse de
forma perpendicular a la barra de
cierre con la apertura mirando hacia
la máquina.
Accione la palanca de
encuadernación hacia adelante hasta
el tope y devuélvala hacia atrás.
Cuanto mayor sea el diámetro de
encuadernación, más fuerza tendrá
que ejercer para completar el
proceso.
F
Soulever la reliure métallique avec
le papier. Prendre le bloc de papier
de telle manière à ne pas perdre la
reliure métallique.
Pousser l’élément de reliure sous la
barre de fermeture.
L’élément de reliure doit se trouver
verticalement contre la paroi arrière
de la barre de fermeture. L’ouverture
de l’élément de reliure est dirigé vers
la paroi arrière.
Appuyer sur le levier de reliure
jusqu’à ce qu’il butte et le
ramener. Pour les gros diamètres
de reliure, recourir à plusieurs
opérations.
CZ
Opatrněvyjměte z pomocného
hřebene hřbet s navlečenými
vyděrovanými listy.
Vložte do uzavíracího mechanismu. Hřbet musí být opřen o zadní stěnu
uzavíracího prostoru(otevřená strana
hřbetu musí směřovat k zadní stěně).
Vázací páku stlačte dopředu až k
dorazu a potom zcela vraťte dozadní
polohy. Při větším průměru hřbetu je
potřeba vynaložit více síly.
NL
Til het boek uit de houder. Houd het
papier zo vast dat het niet uit het
bindelement glijdt.
Bindelement in de sluitbalk schuiven. Bindelement moet loodrecht tegen
de rugwand van de sluitbalk staan
met de opening van het bindelement
naar onderen.
Druk de inbindhendel naar voren
en weer terug. Bij grotere diameters
meer kracht gebruiken.
SK
Opatrne vyberte z pomocného
hrebeňachrbát s navlečenými
vydierovanými listami.
Chrbát vložte pod uzavierací nosník. Chrbát musí byťopretý o zadnú
stenu uzavieracieho priestoru
(otvorená strana chrbta musí
smerovaťk zadnej stene).
Viazaciu páku stlačte dopredu až
k dorazu a potom úplne vráťte do
zadnej polohy. Pri väčšom priemere
chrbta je potrebné vynaložiťviac sily.
RUS
После того, как весь
отперфорированный блок был
вставлен впружину, аккуратно
извлеките его вместе спружиной
из планки-фиксатора.
Поместите сформированный блок
впространство под прижимной
панелью.
Зубцы металлической пружины
должны быть плотно прижаты к
прижимной планке.
Придерживая пальцами пружину
опустите ручку прижима,
затем верните ее висходное
положение. При зажатии пружины
больших диаметров необходимо
прикладывать немного больше
усилий.
6SCHLIESSEN \ CLOSE \ CIERRE \ FERMETURE \ DOKONČENÍ \ SLUITEN \ DOKONČENIE \
ЗАЖИМ ПРУЖИНЫ
D
Bindung richtig! Bindung zu offen:
Schließbalken etwas tiefer
einstellen. Klemmschraube lösen
und etwas nach links schieben.
Klemmschraube festziehen.
Bindehebel noch einmal drücken.
Bindung zu eng:
Schließbalken etwas höher
einstellen. Klemmschraube lösen
und etwas nach rechts schieben,
Klemmschraube festziehen.
Nächstes Exemplar richtig
schließen.
Rückseite nach hinten klappen.
Fertig.
E
Correct bind! Binding under closed:
Adjust closing bar a little lower.
Release attachment screw and move
it slightly to the left. Fix attachment
screw. Press binding lever again.
Binding over closed:
Adjust closing bar a little higher.
Release attachment screw and
move it slightly to the right. Fix
attachment screw. Close next book.
Turn back cover over.
Ready.
ESP
Encuadernación correcta! Encuadernación demasiado
abierta:
Ajuste la barra de cierre un poco
hacia abajo. Afloje el tornillo de
ajuste, desplácelo un poco a la
izquierda y apriételo nuevamente.
Accione de nuevo la palanca de en-
cuadernación para repetir el proceso
de cierre.
Encuadernación demasiado
apretada:
Ajuste la barra de cierre un poco
hacia arriba. Afloje el tornillo de
ajuste, desplácelo un poco a la
derecha y apriételo nuevamente.
Accione de nuevo la palanca de
encuadernación para repetir el
proceso de cierre.
Gire hacia atrás lla tapa trasera y ya
habrá culminado correctamente el
proceso de encuadernación.
F
Reliure correcte ! Reliure trop ouverte:
Régler la barre de fermeture un peu
plus profond. Desserrer la vis de
serrage et pousser un peu vers la
gauche. Serrer la vis de serrage
appuyer à nouveau sur le levier
de reliure.
Reliure trop serrée:
Régler la barre de fermeture un peu
plus haut. Desserrer la vis de serra-
ge et pousser un peu vers la droite.
Serrer la vis de serrage. L’exemplaire
suivant fermera
convenablement.
Rabattre le dos vers l´arriére.
Terminé.
CZ
Správná vazba! Vazba je otevřená:
uzavírací lištu nastavte hlouběji
(upevňovací šroub povolte a posuňte
kousek vlevo, uzavření proveďte
ještějednou).
Vazba je úzká:
Uzavírací lištu nastavte výše
(upevňovací šroub povolte a posuňte
kousek vpravo).
Otočte zadní strana dozadu. Hotovo..
NL
Juist gebonden! Binding te open:
Sluitbalken iets dieper instellen.
Klemschroeven losser en iets naar
links schuiven. Klemschroef weer
vastmaken. Inbindhendel nogmaals
drukken.
Binding te nauw:
Sluitbalken iets hoger instellen.
Klemschroef losser en iets naar
rechts schuiven. Klemschroef vast-
maken. Volgende exemplaar correct
sluiten.
Draai de achterzijde aan de
achterzijde.
Gedaan.
SK
Správna väzba! Väzba je otvorená.
uzavieraciu lištu nastavte hlbšie
(upevňovaciu skrutku povoľte a
posuňte kúsok vľavo, uzavretie
preveďte ešte raz).
Väzba je úzka:
Uzavieraciu lištu nastavte vyššie
(upevňovaciu skrutku povoľte a
posuňte kúsok vpravo).
Otočte zadná strana dozadu.
Hotovo.
RUS
Проверьте шов пружины:Пружина не плотно зажата:
Попробуйте пружину ещё
чуть-чуть. Переместите фиксатор
положения пружины немного
влево. Затяните фиксатор
положения пружины. Попробуйте
зажать пружину снова.
Шов пружины пережат:
Пробуйте зажимать пружину чуть
слабее. Переместите фиксатор
положения пружины немного
вправо. Затяните фиксатор
положения пружины. Попробуйте
зажать новую пружину.
Поверните заднюю сторону втыл.
Готово.