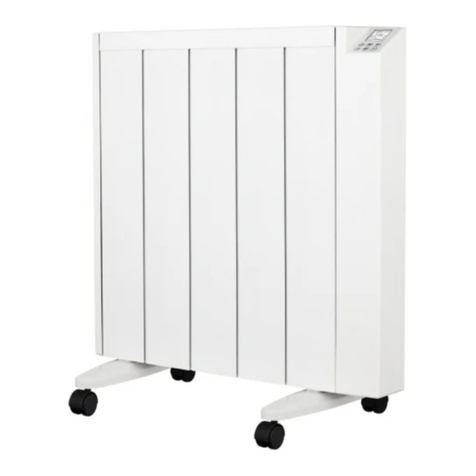
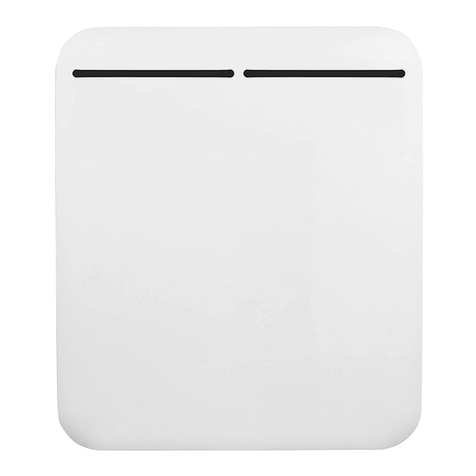
Mylek MYBH1000 User manual

www.hsdonline.co.uk
1
LCD Heater
INSTRUCTION MANUAL FOR MODELS
MYBH1000/MYBH1500
Please Note: This product is only suitable for well-insulated
spaces or occasional use.
1000W / 1500W Electric Radiator

www.hsdonline.co.uk
2
IMPORTANT
Installer and Users please note: These instructions should be read carefully before use and this
document constitutes part of the product which should be kept safely by the user alongside
the product.
General Information:
Please read the entire instruction manual before using the product and then save it for future
reference. We reserve the right for any errors in text or images and any necessary changes
made to technical data. If you have any questions concerning technical problems please
contact our Customer Services on 0800 091 3171 quoting the model number found on the unit
rating label.
BEFORE USE
You must inspect the appliance including its cable and plug for any signs of damage. If the
product is damaged, DO NOT use it, and contact your supplier immediately.
PAT TESTING
When used in a workplace, this product must be safety-tested annually by a qualified
electrician (PAT test) in order to comply with the Electricity at Work regulations. We
recommend that it is PAT tested regularly when used in a domestic environment.
PRODUCT SAFETY
•Children shall not play with the appliance.
•Children of less than 3 years should be kept away unless continuously supervised
•Children aged from 3 years and less than 8 years shall only switch on/off the appliance
provided that it has been placed or installed in its intended normal operating position and
they have been given supervision or instruction concerning use of the appliance in a safe
way and understand the hazards involved.
•Children aged from 3 years and less than 8 years shall not plug in, regulate, and clean the
appliance or perform user maintenance.
•This appliance can be used by children aged from 8 years and above and persons with
reduced physical, sensory or mental capabilities or lack of experience and knowledge if
they have been given supervision or instruction concerning use of the appliance in a safe
way and understand the hazards involved.
•Cleaning and user maintenance shall not be made by children without supervision.

www.hsdonline.co.uk
3
•Do not cover. This symbol shown on the casing of the heater means that
the heater should not be covered.
•For indoor use only.
•Do not use in bathrooms, wet rooms or other damp locations.
•Do not use this product with an extension lead
•The use of this product in boats, caravans, mobile homes or other similar locations is
forbidden
•There must be a minimum 50 mm safe area around the sides of this product that is clear
of obstructions and flammable materials
•There must be a minimum 1200mm safe area above the top of this product that is clear of
obstructions and flammable materials
•Do not place the mains lead beneath a carpet or rug.
•This heater must not be positioned below a socket outlet.
•Do not use this appliance in locations where paint, petrol or other flammable liquids are
used or stored.
•Please ensure the appliance is switched off and unplugged when not in use.
•Do not use the appliance for other than its intended use.
•Do no insert any object into the appliance through the grilles. This may damage the
product or result in overheating or electric shock.
•Check the product before use for damage. If any damage is detected stop using it
immediately and consult your supplier.
•Only use this product on a flat, stable surface.
•Do not leave this product unattended when in use.
•There are no user serviceable parts in this product
•Allow to cool down before moving or cleaning.
•Caution: Some parts of this appliance can become very hot and cause burns. Particular
attention should be given when children or vulnerable people are present.
•Do not use under curtains or close to soft furnishings.
•This product must only be used in an upright position.
GENERAL SAFETY REQUIREMENTS
Domestic wiring must be tested periodically by a qualified electrician at least once every 10
years or at every change of occupancy. For office and retail premises (and buildings such as
village halls) the wiring must be inspected at least once every 5 years. It is recommended that
all buildings be fitted with smoke alarms (it is mandatory for new buildings).

www.hsdonline.co.uk
4
UNIT LAYOUT
LCD SCREEN
1. Screen Lock Button
2. Timer Button
3. Setting Button
4. Up Button
5. Down Button
6. Screen Power Button
7. Lock, Timer, Power Indicator
8. Temperature/Timer Display
9. Power Level Indicator
LCD SCREEN
AIR OUT
AIR IN
POWER SWITCH
1
2
3
7
5
1
4
6
1
8
9

www.hsdonline.co.uk
5
OPERATION
SETTING UP
1. Plug the mains lead into a 13A mains socket.
2. Move the power switch to “on” position.
HEATING
1. Press the Setting Button [3] once to enter power adjustment mode, the unit will
bleep and Power Level Indicator [9] will flash to display the current power level.
2. Use the Up [4] and Down [5] buttons to cycle through the power settings.
3. When the desired power level is displayed, do not press any buttons on the display
until the Power Level Indicator [9] stops flashing. The power level is now set.
4. The Temperature Display [8] shows the set temperature.
Press Up [4] or Down [5] once, the display will begin to flash and show the target
temperature. Press Up [4] or Down [5] to adjust the target temperature by 1°C
(range: 5°C –45°C). Press and hold these buttons to quickly adjust the temperature.
Once the desired target temperature is flashing, do not press any buttons on the
display until the display stops flashing. The target (set) temperature is now set.
5. If the set temperature is below the room temperature, the radiator will not produce
heat.
If the set temperature is above the room temperature, the radiator will switch on
and the Power Indicator [7] will be illuminated.
TIMER SETTING
The radiator can be set to start-up or shut-down after a timed interval. To set the shut-down
time:
1. During normal operation press the Timer Button [2] to enter timer set up (press
again at any time to cancel the timer set up) and the Timer Display [8] will flash

www.hsdonline.co.uk
6
showing 00hr.
2. Use Up [4] and Down [5] to set the desired time (01hr –24hr).
3. Once the desired time is displayed, do not press any buttons on the display until the
display stops flashing with the Timer Indicator [7] illuminated above it. The timer is
now set.
4. Once the timer has been set, the Temperature/Timer Display [8] will show the
current set temperature and the time remaining until shut down.
5. To cancel the timer, press the Timer Button [2].
To set the start-up time: follow steps 1-3 as above, but during step 1 press the Timer Button [2]
twice instead of once during normal operation to enter the start-up time setup. The panel will
now display the time until start-up.
SCREEN LOCK
1. To lock the buttons on the LCD screen, press the Screen Lock Button [1] once. The
Screen Lock Indicator [7] will flash momentarily, before being solidly displayed. All
buttons on the panel have now been locked.
2. To unlock the panel, press the Screen Lock Button [1] once more.
SCREEN POWER
1. Press the Screen Power Button [6] to reduce the power (brightness) of the screen.
Press again to restore brightness.

www.hsdonline.co.uk
7
Technical Specification
Details
MYBH1000
MYBH1500
Voltage
220-240V~
220-240V~
Frequency
50/60Hz
50/60Hz
Wattage (Low /Medium /
High)
300 / 700 / 1500 W
500 / 1000 / 1500 W
Model Number
MYBH1000 / MYBH1500
Item
Symbol
Value
Unit
Heat Output
Nominal Heat Output
Pnom
1,0 / 1,5
kW
Minimum Heat Output
(Indicitive)
Pmin
0,3 / 0,5
kW
Maximum Continuous
Heat Output
Pmax,c
1,0 / 1,5
kW
Auxiliary electricity Consumption
At nominal heat output
elmax
1,0 / 1,5
kW
At minimum heat
output
elmin
1,0 / 1,5
kW
At standby mode
elSB
0.0005
kW
Type of heat input, for electric storage local space heaters only (single select)
manual heat charge control, with integrated thermostat
No
manual heat charge control with room and/or outdoor
temperature feedback
No
electronic heat charge control with room and/or outdoor
temperature feedback
No

www.hsdonline.co.uk
8
fan assisted heat output
No
Type of heat output/room temperature control (single select)
single stage heat output and no room temperature control
No
Two or more manual stages, no room temperature control
No
with mechanic thermostat room temperature control
No
with electronic room temperature control
No
electronic room temperature control plus day timer
Yes
electronic room temperature control plus week timer
No
Other control options (multiple selections possible)
room temperature control, with presence detection
No
room temperature control, with open window detection
No
with distance control option
No
with adaptive start control
No
with working time limitation
No
with black bulb sensor
No
Contact Details
Prem-i-Air Appliances Ltd, Lancots Lane, St Helens,
WA9 3EX

www.hsdonline.co.uk
9
FAULT-FINDING
The heater has an overheat protection switch, which disconnects the power if the element
gets too hot. The usual reason for this is because the air-flow has been obstructed. If the
heater ceases to operate, leave it for 20 minutes to cool down, then check that the grilles are
not being obstructed. Switch back on, and check that the unit is operating normally. If not,
contact an authorised service agent for repair.
The importer retains his right to make changes in appearance and completeness of the item
without preliminary notification to the customer.
The item is for indoor use only.
The manufacturer does not assume any liability for any damage caused directly or indirectly by
not following this instruction manual, general safety rules, or interference in the construction of
the product.

www.hsdonline.co.uk
10
This marking indicates that this product should not be disposed with other household
wastes throughout the EU. To prevent possible harm to the environment or human
health from uncontrolled waste disposal, recycle it responsibly to promote the
sustainable reuse of material resources. To return your used device, please use the
return and collection systems or contact the retailer where the product was
purchased. They can take this product for environmental safe recycling.
SERVICE WARRANTY
Hygiene Supplies Direct guarantees the product free from defects in materials and
workmanship for a period of 1 year from date of purchase. Should this unit be operated under
conditions other than those recommended, at voltages other than the voltage indicated on the
unit, or any attempts made to service or modify the unit, then the warranty will be rendered
void. The product you buy may sometimes differ slightly from illustrations. This warranty is in
addition to, and does not affect, your statutory rights. If you have any problems with this
product, please call our Help Desk on 0800 091 3171 or email:
sales@hygienesuppliesdirect.com
PREMIAIR APPLIANCES LTD, St Helens, WA9 3EX declares that the Mylek Electric Heater is exclusively
manufactured and imported for Hygiene Supplies Direct Ltd.
Made in China
This manual suits for next models
1
Table of contents
Other Mylek Heater manuals

Mylek
Mylek MHPH05-10E User manual

Mylek
Mylek MYHH0406C User manual

Mylek
Mylek MYOD606WH User manual

Mylek
Mylek MYTH01C Instruction manual

Mylek
Mylek MYSH0406E User manual

Mylek
Mylek SPH05-05R User manual

Mylek
Mylek MYTH01D User manual

Mylek
Mylek MYRA600W User manual
Mylek
Mylek MY0210R User manual
Mylek
Mylek MYC01-10A User manual