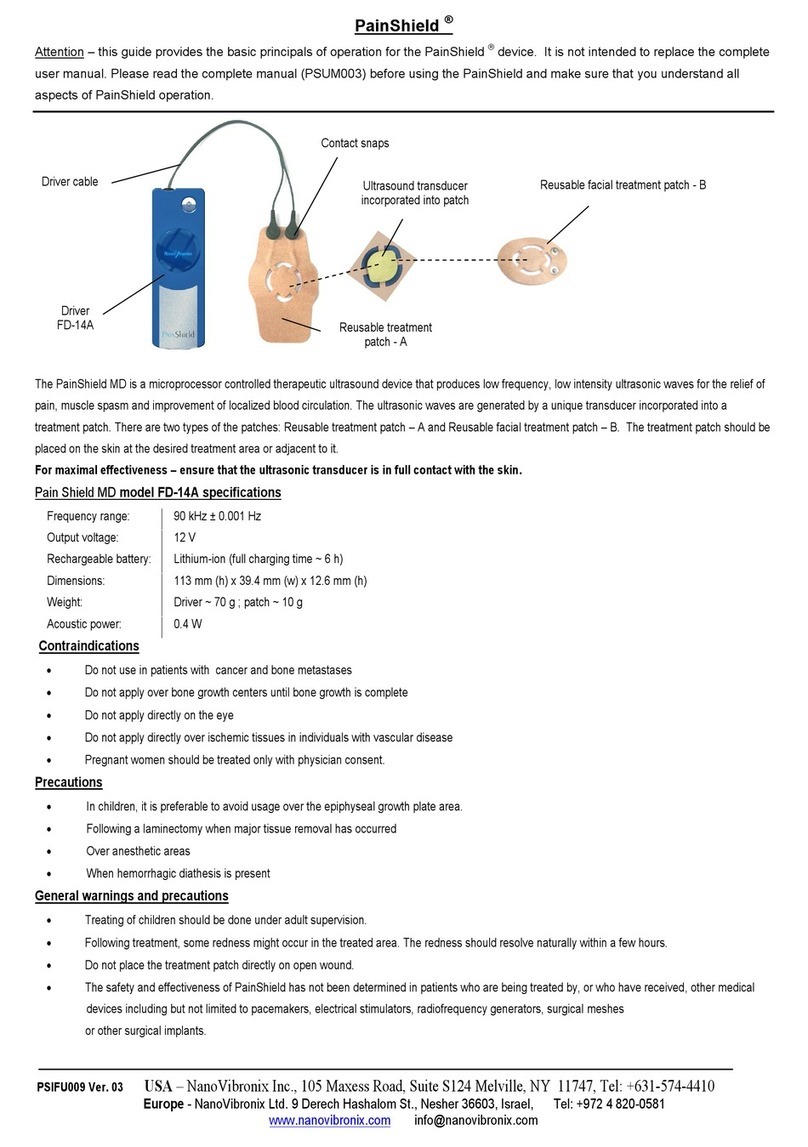
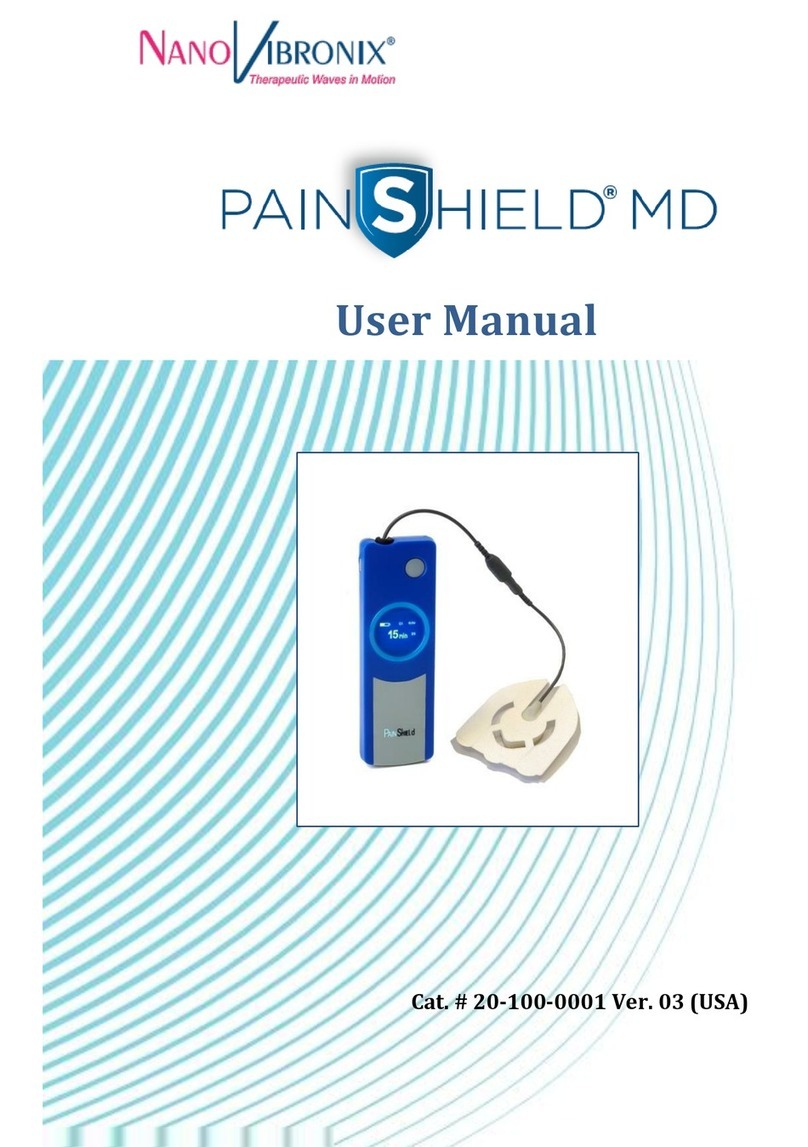
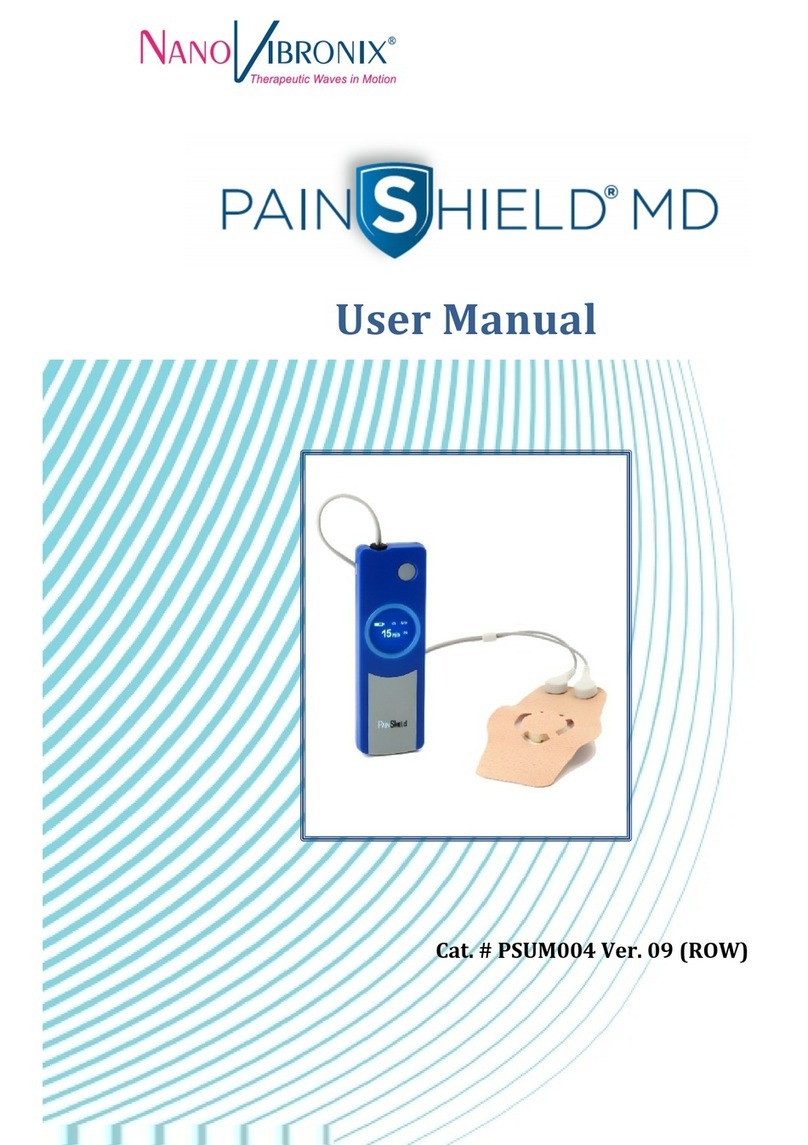
NanoVibronix PAINSHIELD MD User manual

UserManual
Cat. # 20-100-0005 Ver. 06 (ROW)

PainShield® MD User Manual
2
Without prior notice and without obligation, the contents of this manual may be revised
to incorporate changes and improvements.
Every effort is made to ensure that the information is complete and accurate at the time
of publication. Nevertheless, NanoVibronix cannot be held responsible for errors or
omissions.
Trademarks, patents, and copyrights apply.
NanoVibronix Inc.,
525 Executive Boulevard,
Elmsford, N.Y. 10523, USA
Tel.: 1 (914) 233-3004
Fax: 1 (914) 376-6111
Email: info@nanovibronix.com
Website: www.nanovibronix.com
Manufactured by:
NanoVibronix Ltd,
9 Derech Hashalom St,
Nesher 36651, Israel.
Tel: +972–4-8200581
Fax: +972-4-8202794
E-mail: info@nanovibronix.com
Web site: www.nanovibronix.com
Authorized representative in the European Community:
CEpartner4U BV
Esdoornlaan 13,
3951 DB Maarn,
The Netherlands
Tel.: +31.343.442.524
Mobile: +31.6.516.536.26
Fax: +31.343.442.162
Email: office@CEpartner4U.com

PainShield® MD User Manual
3
Table of Contents
1. Introduction ...................................................................................................... 4
1.1. General Safety............................................................................ 4
2. Indications for Use ............................................................................................ 5
3. Safety……….…………………………………………………………………………………………………...6
3.1. Contraindications....................................................................... 6
3.2. Warnings.................................................................................... 7
3.3. Precautions ................................................................................ 9
4. Product Features............................................................................................. 10
4.1. Preset Treatment..................................................................... 10
4.2. Battery Operation .................................................................... 10
4.3. PainShield® MD Adhesive Patches........................................... 10
5. Product Components ...................................................................................... 11
5.1. The PainShield® MD Treatment Actuator ................................ 11
5.2. The PainShield® MD Driver ...................................................... 12
6. Operation ……………………………………………………………………………………………………13
6.1. Charging the Driver.................................................................. 13
6.2. Preparing the Treatment Area................................................. 14
6.3. Preparing the Actuator for Use................................................ 14
6.4. Preparation for Trigeminal Neuralgia Treatment..................... 16
6.5. Applying Therapy ..................................................................... 17
6.6. Monitoring PainShield®MD...................................................... 18
6.7. Removing the Actuator Patch .................................................. 20
6.8. Replacing the Actuator ............................................................ 21
7. Frequently Asked Questions ........................................................................... 22
8. Product Care ................................................................................................... 23
Appendix A: Electromagnetic Compliance ......................................................... 24
Appendix B: Specifications ................................................................................. 27
Appendix C: Labels............................................................................................. 28
Appendix D: Symbols.......................................................................................... 29
Appendix E: Warranty........................................................................................ 30
Appendix F: Troubleshooting............................................................................. 31
PainShield® MD User Manual
4
1. Introduction
Thank you for choosing the PainShield® MD. This manual contains precautions
and general instructions for the operation, application and care of PainShield®
MD. In order to obtain maximum lifetime and efficiency from PainShield® MD
and to ensure it is properly operated, please read and understand this manual
thoroughly. PainShield® MD is to be used only as directed in this manual.
PainShield® MD uses ultrasound therapy for the relief of acute or chronic pain
and muscle spasms.
PainShield® MD was developed as a next generation wearable ultrasound
system which transforms conventional therapeutic ultrasound technology into
a small and portable ultrasound therapy unit. It is designed to work along with
the human body and maximize the safe and effective delivery of a long-
duration therapeutic effect.
PainShield® MD is simple to administer, and operates on a broad range of body
areas, allowing the delivery of ultrasound treatment for up to 6.5 hours, at a
preset frequency of 90 kHz. Treatment is delivered via an ultrasound actuator,
which is applied and secured to the surface of the body using single-use
adhesive patches.
1.1. General Safety
Please thoroughly read and understand the precautionary and operating
instructions before attempting to operate PainShield® MD. Know the
limitations and hazards associated with using any ultrasound device. Observe
the precautionary and operational labels on the product. Periodically review
the operation procedures and safety precautions outlined in this manual.

PainShield® MD User Manual
5
2. Indications for Use
PainShield® MD is intended to apply ultrasonic energy to generate deep heat
within body tissues for the treatment of selected medical conditions. The low
intensity and low frequency ultrasound energy is effective within a diameter of
20 cm and a depth of approximately 3 cm. The PainShield® MD can therefore
be effective in treating a wound without direct contact with it.
Selected medical conditions for treatment include:
Pain (including Trigeminal Neuralgia)
Muscle spasms
Joint contractures/injury
Provides improvement in local blood circulation
Assists in soft tissue healing including post-surgery
Assists in healing chronic (such as diabetic) wounds
Improves penetration of topical ointment or gel

PainShield® MD User Manual
6
3. Safety
3.1. Contraindications
PainShield® MD is prohibited for use in the following cases:
Patients with cancer and bone metastases under treatment area
Directly on the eye
Directly over an open wound
Directly over ischemic tissues in individuals with vascular disease
Over the uterus in pregnant patients
Over bone growth centers until bone growth is complete

PainShield® MD User Manual
7
3.2. Warnings
W A R N I N G
Do not use PainShield® MD in the presence of
flammable materials and liquids. PainShield® MD
is classified as an internally-powered,
intermittently-operated, ordinary equipment with
a disposable type BF applied part.
Do not immerse any part of PainShield® MD in
water or any other liquid.
Use PainShield® MD only as instructed in this
manual.
Do not use any part of PainShield® MD that
appears damaged.
Do not modify PainShield® MD in any way.
Do not replace any part of PainShield® MD with
components or parts other than those supplied by
NanoVibronix.
Do not connect PainShield® MD to any device or
system other than the parts supplied with it.
Use of this equipment adjacent to or stacked with
other equipment should be avoided because it
could result in improper operation. If such use is
necessary, this equipment and the other
equipment should be observed to verify that they
are operating normally.
Use of accessories, transducers and cables other
than those specified or provided by the
manufacturer of this equipment could result in
increased electromagnetic emissions or
decreased electromagnetic immunity of this
equipment and result in improper operation.

PainShield® MD User Manual
8
WARNING
Portable RF communications equipment (including
peripherals such as antenna cables and external
antennas) should be used no closer than 30 cm (12
inches) to any part of the PainShield® MD,
including cables specified by the manufacturer.
Otherwise, degradation of the performance of this
equipment could result.
PainShield® MD needs special precautions
regarding EMC and needs to be installed and put
into service according to the specific instructions
for maintaining basic safety and essential
performance with regard to electromagnetic
disturbances for the expected service life provided
in Appendix A of this manual.
The PainShield® is not MRI compatible and
therefore, should be removed before entering the
MRI suite.
C A U T I O N
PainShield MD is intended for use in Professional
healthcare facility with attending medical staff and
Home healthcare as defined in collateral standard
IEC 60601-1-11, as dwelling places where patients
live or are present (excluding professional
healthcare facilities mentioned above). Here
equipment will be used by non-specialist users and
equipment must also be tolerant of poor electrical
supplies.
Charge PainShield® MD only using the supplied
charger.
Do not attempt to open or remove the cover of
PainShield® MD.
The lithium ion rechargeable battery in PainShield®
MD must not be disassembled, heated above 100
degrees Celsius, incinerated, or exposed to water.
Be aware of the actuator cable winding around the
neck that may lead to injury and strangulation.

PainShield® MD User Manual
9
3.3. Precautions
Use PainShield® MD with caution in the following areas:
-Following a laminectomy involving major tissue removal
-In patients susceptible to bleeds
-Over anesthetized areas of impaired skin
Treatment of children should be performed under adult supervision.
In children, avoid use over the epiphyseal growth plate area.
Use caution when removing the actuator patch from the skin after
use.
The safety and effectiveness of PainShield® MD has not been
established in patients who are or have been treated by other
medical devices including but not limited to:
-Pacemakers
-Electrical stimulators
-Radiofrequency generators
-Surgical meshes
-Intra-Uterine devices (IUDs)
-Other surgical implants.
When the actuator is warn in a location you are lying on you may
experience slight redness of the skin, which will resolve in a few
hours.

PainShield® MD User Manual
10
4. Product Features
4.1. Preset Treatment
PainShield® MD is preconfigured to provide intermittent ultrasonic output at a
preset frequency of 90 kHz and low intensity, neither of which can be modified
by the user.
When in ON mode, PainShield® MD alternates automatically between 2
phases:
Active phase—PainShield® MD delivers 30 minutes of ultrasound
therapy.
Idle phase—PainShield® MD is idle for 30 minutes.
1 active phase + 1 idle phase = 1 cycle.
PainShield® MD automatically switches to OFF mode after 6.5 hours, at which
point, the battery should be recharged.
4.2. Battery Operation
Powered by a rechargeable lithium-ion battery, PainShield® MD can provide
6.5 hours of continuous therapy on a single battery charge. After 6.5 hours,
PainShield® MD automatically switches off, and the battery must be recharged.
You can switch PainShield® MD to OFF mode, manually, at any point of time.
4.3. PainShield®MD Adhesive Patches
The adhesive patches secure the actuator to the affected area. The actuator
converts energy to ultrasonic therapeutic waves.

PainShield® MD User Manual
11
5. Product Components
PainShield® MD has two main components: a treatment actuator and a driver.
A charger is included in every kit.
5.1. The PainShield®MD Treatment Actuator
The treatment actuator incorporates an ultrasonic transducer and connects to
the driver with a cable.
The transducer is the active element that converts electric signals to
ultrasound waves.
For effective treatment the transducer must be in full contact with the skin.

PainShield® MD User Manual
12
5.2. The PainShield®MD Driver
The driver that supplies electrical signals to the transducer in the actuator has
the following parts:
Built-in rechargeable battery
Charging port
Actuator port
ON/OFF button
Operation screen display

PainShield® MD User Manual
13
6. Operation
6.1. Charging the Driver
When the battery is fully charged, the driver has an operating life of 6.5 hours.
Charge the driver in accordance with the following guidelines:
Charge the driver only with the supplied charger.
Therapy is not available while the driver is being charged.
Before first use, remove the driver from its packaging and verify that
it is fully charged.
To charge the driver:
1. Connect the mini USB plug of the supplied charger to the driver’s
charging port.
2. Plug the charger into a wall outlet.
When the driver begins to charge, the screen lights up brightly and
displays the battery icon:
After approximately 1 minute, the screen dims. To refresh the
display, briefly press the ON/OFF button.
During charging the battery icon fills gradually.

PainShield® MD User Manual
14
Charging takes about 2 hours. When the battery is fully charged, the battery
icon appears full.
6.2. Preparing the Treatment Area
1. Remove excess hair from the treatment area.
2. Clean the treatment area thoroughly with soap and water or an
alcohol prep pad.
3. Dry the treatment area.
6.3. Preparing the Actuator for Use
1. Remove the actuator from its packaging and connect the actuator
plug into the driver socket, making sure to orient the plug correctly in
relation to the socket, and make sure the plug is fully inserted and
secured.

PainShield® MD User Manual
15
2. Remove the center protective layer from the adhesive leaving the
outer strips attached to insure easy placement.
3. Place the actuator on the exposed adhesive at the center of the
patch, with the metal transducer facing up and the wire aligned with
the open notch in the patch.
4. Remove the 2 outer protective liners from the adhesive.

PainShield® MD User Manual
16
5. Attach the actuator patch to the skin, with the adhesive side down
over the area where the pain is most intense.
6. If the skin is broken or if the pain is located near a joint, attach the
actuator on flat healthy skin area adjacent to the source of pain. Be
sure to place the actuator within 10cm (4 inches) of the effective
area to ensure the pain source within the treatment area.
6.4. Preparation for Trigeminal Neuralgia Treatment
PainShield® MD has been found highly effective in relieving Trigeminal Neuralgia
(TN) pain. In rare cases some patients may feel an initial pain increase before
experiencing the benefit of the treatment. It is therefore recommended that you
proceed gradually, applying treatment first for 2-3 hours then gradually
increasing up to 6.5 hours as tolerated. Apply the first and second treatments
while you are awake. You can subsequently apply treatment during sleep. If you
use PainShield® MD overnight, remove it on waking up.

PainShield® MD User Manual
17
1. Follow 6.3 preparation steps 1-4 above, using the small patch.
2. Place the actuator patch next to the cheekbone when the pain is in
the maxillary nerve (V2) or next to the lower jaw bone when the pain
is in the mandibular nerve (V3).
If local sensitivity makes patch application painful, apply the patch to
the forehead on the pain-free side.
3. Make sure that the transducer is in full contact with the skin.
6.5. Applying Therapy
Use the ON/OFF button to switch the driver ON and OFF.
To switch the driver ON:
Press the ON/OFF button until you hear a beep and the NanoVibronix
logo appears on the screen.
To switch the driver OFF:
Press the ON/OFF button until you hear the shut-off beep.
Note: Briefly pressing the ON/OFF button refreshes the information screen.
The screen saver is replaced by the information screen.

PainShield® MD User Manual
18
6.6. Monitoring PainShield®MD
The driver screen displays information in respect of the functioning of
PainShield®MD. The table below explains the symbols and text that may be
displayed on the screen at various times.
Symbols/Text Displayed
Explanation
Manufacturer name
(displayed briefly when you switch ON
the driver)
Product name
Software version number
(displayed briefly in the interval before
the information display appears)
Working mode information
(ACTIVE phase)
1. Battery indicator
2. Treatment cycle number (C1 to C6)
3. Output power
4. Time elapsed since the beginning of
the current ACTIVE phase.
①
②
③
④

PainShield® MD User Manual
19
Symbols/Text Displayed
Explanation
Working mode information
(IDLE phase)
1. Battery indicator
2. Treatment cycle number
3. Output power
4. PainShield® MD is in IDLE phase.
Screensaver during working mode
(automatically replaces the information
screen after 3 minutes)
PainShield® MD is ON.
To refresh the display of information,
briefly press the ON/OFF button.
The battery is discharged and requires
recharging.
Charging mode information
The battery icon fills gradually to show
charging progress.
①
②
③
④

PainShield® MD User Manual
20
Symbols/Text Displayed
Explanation
Screensaver in Charging Mode
The display is dimmed and keeps scrolling
vertically.
To refresh the display of information
press the ON/OFF button briefly (that is,
for less than 2 seconds).
The actuator is damaged or not
connected to the driver.
The driver is switching OFF
Switching off takes 3 seconds. The
number indicates how many seconds to
complete shut off.
6.7. Removing the Actuator Patch
1. Use caution when gently removing the actuator patch from the skin.
2. Gently remove the patch from the actuator using caution and
avoiding applying tension to the wire.
I M P O R T A N T
Do not use the patch more than once, so as not to
jeopardize actuator performance.
Other manuals for PAINSHIELD MD
2
Table of contents
Other NanoVibronix Medical Equipment manuals

NanoVibronix
NanoVibronix UROSHIELD User manual

NanoVibronix
NanoVibronix UROSHIELD User manual

NanoVibronix
NanoVibronix UROSHIELD User manual

NanoVibronix
NanoVibronix PainShield User manual

NanoVibronix
NanoVibronix PainShield FD-14A User manual

NanoVibronix
NanoVibronix PAINSHIELD MD User manual

NanoVibronix
NanoVibronix PainShield User manual

NanoVibronix
NanoVibronix URO SHIELD User manual

NanoVibronix
NanoVibronix Wound Shield User manual