Nasco Lifeform LF01087U User manual

Central Venous
Cannulation Simulator
LF01087U
Instruction Manual
Products by Nasco
WARNING: Products may
contain dry natural rubber.
NP155_86_LF01087_CentVenoCannulation.indd 1 9/14/15 9:02 AM

NP155_86_LF01087_CentVenoCannulation.indd 2 9/14/15 9:02 AM

3
Project Consultant
The design and assembly of this
simulator would
not have been possible
without the cooperation
and expertise furnished to us by:
•Forrest M. Gridley, M.A., P.A.-C.
•Division of Urology, Department of Surgery
•Physician Assistant Program
•Emergency Medical Services Program
•University of Wisconsin-Madison
About the Simulator
The Life/form®Central Venous Cannulation
Simulator is anatomically and functionally correct;
it is designed to instruct medical personnel in the
practice of central venous cannulation. The sim-
ulator incorporates superficial anatomical detail
and functional accuracy to simulate the clinical
experience.
List of Components
A. Torso Base
B. Muscle Bone Insert
C. Skin Overlay
D. 2 Fluid Bags, 1,500 ml
E. 22-gauge Needle
F. Baby Powder
G. 1 qt. Life/form® Venous Blood
H. 6 Subclavian Tubes (20")
I. 6 Internal Jugular Veins (20")
J. 6 External Jugular Veins (34")
K. 1 Carotid Pulse Tubing
L. 1 “Y” Connector
M. 12 Strapping Ties
N. Instruction Manual (Not Pictured)
O. Hard Carry Case
P. 4 Small White Towelettes
A.
D.
E.
C.
I.
F.
B.
K.
L.
M.
G.
H.
J.
O.
P.
NP155_86_LF01087_CentVenoCannulation.indd 3 9/14/15 9:02 AM

4
General Information About the Simulator
Procedures Which May Be Performed
A. Subclavian Vein Approaches
1. Infraclavicular
2. Supraclavicular
B. Internal Jugular Vein Approaches
1. Anterior
2. Central
3. Posterior
C. External Jugular Approach
The external jugular vein portion of the simu-
lator can be set up alone in the simulator or
in conjunction with the other vein systems if
desired.
In addition, the Central Venous Cannulation
Simulator offers other features that extend the
application of this instructional aid to include
demonstration of anatomical landmarks for:
1. Pericardiocentesis
2. Thoracentesis
D. Replicate Bilateral Carotid Pulse (Manual)
Preparing the Simulator for Use
Inspect the contents to be certain all
necessary components are includ-
ed (see “List of Components”).
Generously powder the torso base
of the simulator if desired for a less
sticky surface to ease tubing into
simulator. Following this, powder
the muscle bone insert if desired.
(See figures 1 & 2.)
Figure 1
Figure 2
NP155_86_LF01087_CentVenoCannulation.indd 4 9/14/15 9:02 AM

5
With the muscle bone insert lying upside down (ster-
num touching table), locate the subclavian vein tubing
(letter H in list of components and components image).
This is the largest diameter tube supplied. It is knotted
at the end. Place into the simulator with the knotted end
inside the muscle bone insert. (See figure 3.)
Finally, position the external jugular vein, starting with
the knotted end at the lower edge. Run the vein along
the outside edge and through the hole to the front side
of the muscle bone insert. Continue following the vein
channel on the front side. (See figure 5.)
Next, position the internal jugular vein tubing (letter I in
the list of components). This tube is short and small in
diameter. Insert tubing over the top of the subclavian
vein tubing, keeping the knot inside the muscle bone
insert. Both the subclavian and internal jugular fit into
“grooves” or “channels.” (See figure 4.)
Figure 3
Figure 4
Figure 5
NP155_86_LF01087_CentVenoCannulation.indd 5 9/14/15 9:02 AM

6
Making sure all tubes are
properly positioned and held
in place, “invert” the muscle
bone insert and position in
the torso base. Place the
open end of the external
jugular vein through the hole
in the jaw of the torso base.
(See figure 6.)
Position the carotid pulse
tubing into
the channel
on the outside of the
muscle bone insert.
(See figure 7.)
Applying
tape (not included) to the
carotid pulse tubing will
help hold the tubing in
place on the torso base.
(See figure 7 insert.)
Figure 6
Figure 7
Figure 7 insert
NP155_86_LF01087_CentVenoCannulation.indd 6 9/14/15 9:02 AM

7
Apply the skin overlay
to the torso, beginning
at the neck. At this
point, feed the external
jugular vein through the
hole in the top of the
skin overlay. Disconnect
the pulse bulb on the
carotid pulse tubing.
Pull the ends of all three
tubes through the open-
ing in the skin located
on the simulator’s left
shoulder. (See figure 8.)
Be sure all tubing is still in the channels, and reconnect the pulse bulb. (See figure 9.)
Figure 8
Figure 9
NP155_86_LF01087_CentVenoCannulation.indd 7 9/14/15 9:02 AM

Now attach the subclavian
and internal jugular veins
from the shoulder to the top
of the “Y” connector. After
attaching the subclavian and
the internal jugular to the “Y”
connector, apply the strap-
ping ties to ensure a tight seal
of the tubing to the connector.
Attach the fluid bag with the
open tube to the bottom of
the “Y” connector. These ties
will remain in position until the
tubing is changed. To remove
them, simply cut them off.
(See figure 10.)
The external jugular vein is
set up with its own fluid bag.
Connect the fluid bag with
the straight connector to the
external jugular vein. Do not
use strapping ties to perma-
nently attach the vein to the
connector, as it will be dis-
connected after each use for
easier installation later. (See
figure 11.)
Mix the blood solution
according to the instructions
on the bottle. Close the slide
clamps on both fluid bags.
Pour contents into the bag,
seal the top of the fluid bag,
and hang on an IV stand.
(sold separately.) The bottom
of the fluid bag should not be
more than 12" to 14" above
the simulator. (See figure
11.)
8
Figure 10
Figure 11
NP155_86_LF01087_CentVenoCannulation.indd 8 9/14/15 9:03 AM

The simulator is almost ready to use. All that remains is to charge the veins with blood. To do this, remove
the skin from the right shoulder areas — enough to reveal the “knotted ends” of the subclavian and inter-
nal jugular. Insert the 22-gauge needle into the tubing of the subclavian, very close to the knot. (See
figure 12.)
Open the slide clamps on the fluid bag. When the air is released completely, simulated blood will flow
from the top of the needle. (See figure 13.) Remove the needle at this point and repeat the procedure
at the knotted end of the internal jugular. Replace the skin. (See figure 13 inset.)
9
Figure 12
Figure 13
Figure 13 insert
NP155_86_LF01087_CentVenoCannulation.indd 9 9/14/15 9:03 AM

Use of the Simulator
This booklet does not propose to outline a particular procedure to be followed. Rather, it is recom-
mended that a procedural manual and the instructor’s directions be followed. This will eliminate confu-
sion and best serve the individual instructor and curriculum.
Care of the Simulator
1.
Cleaning is recommended after each
use. The torso and muscle bone section may be washed in
luke
warm water and mild soap. Use Nasco
Cleaner (LF09919U) to remove stubborn stains from the
simulator. Simply spray soiled area and wipe
clean with a soft cloth or paper towel.
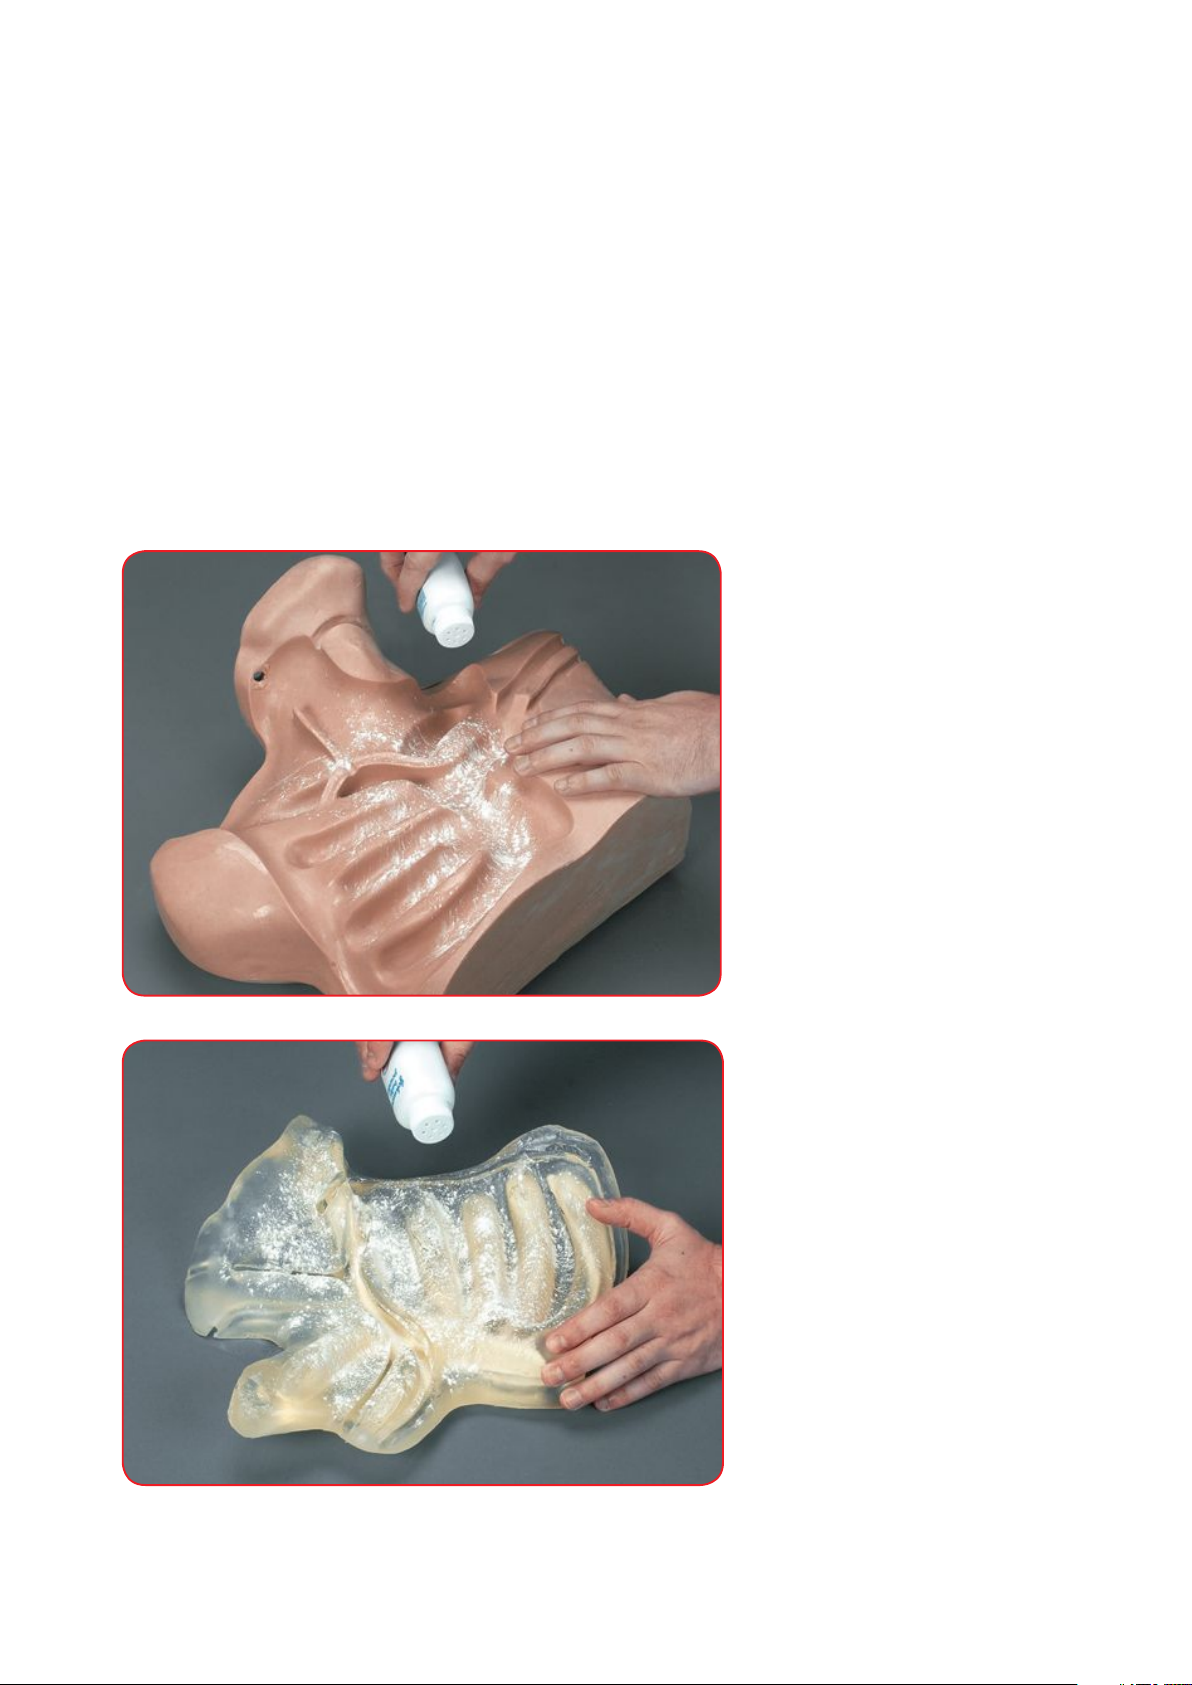
2. Dust the torso base and muscle bone insert with baby powder before each use as desired.
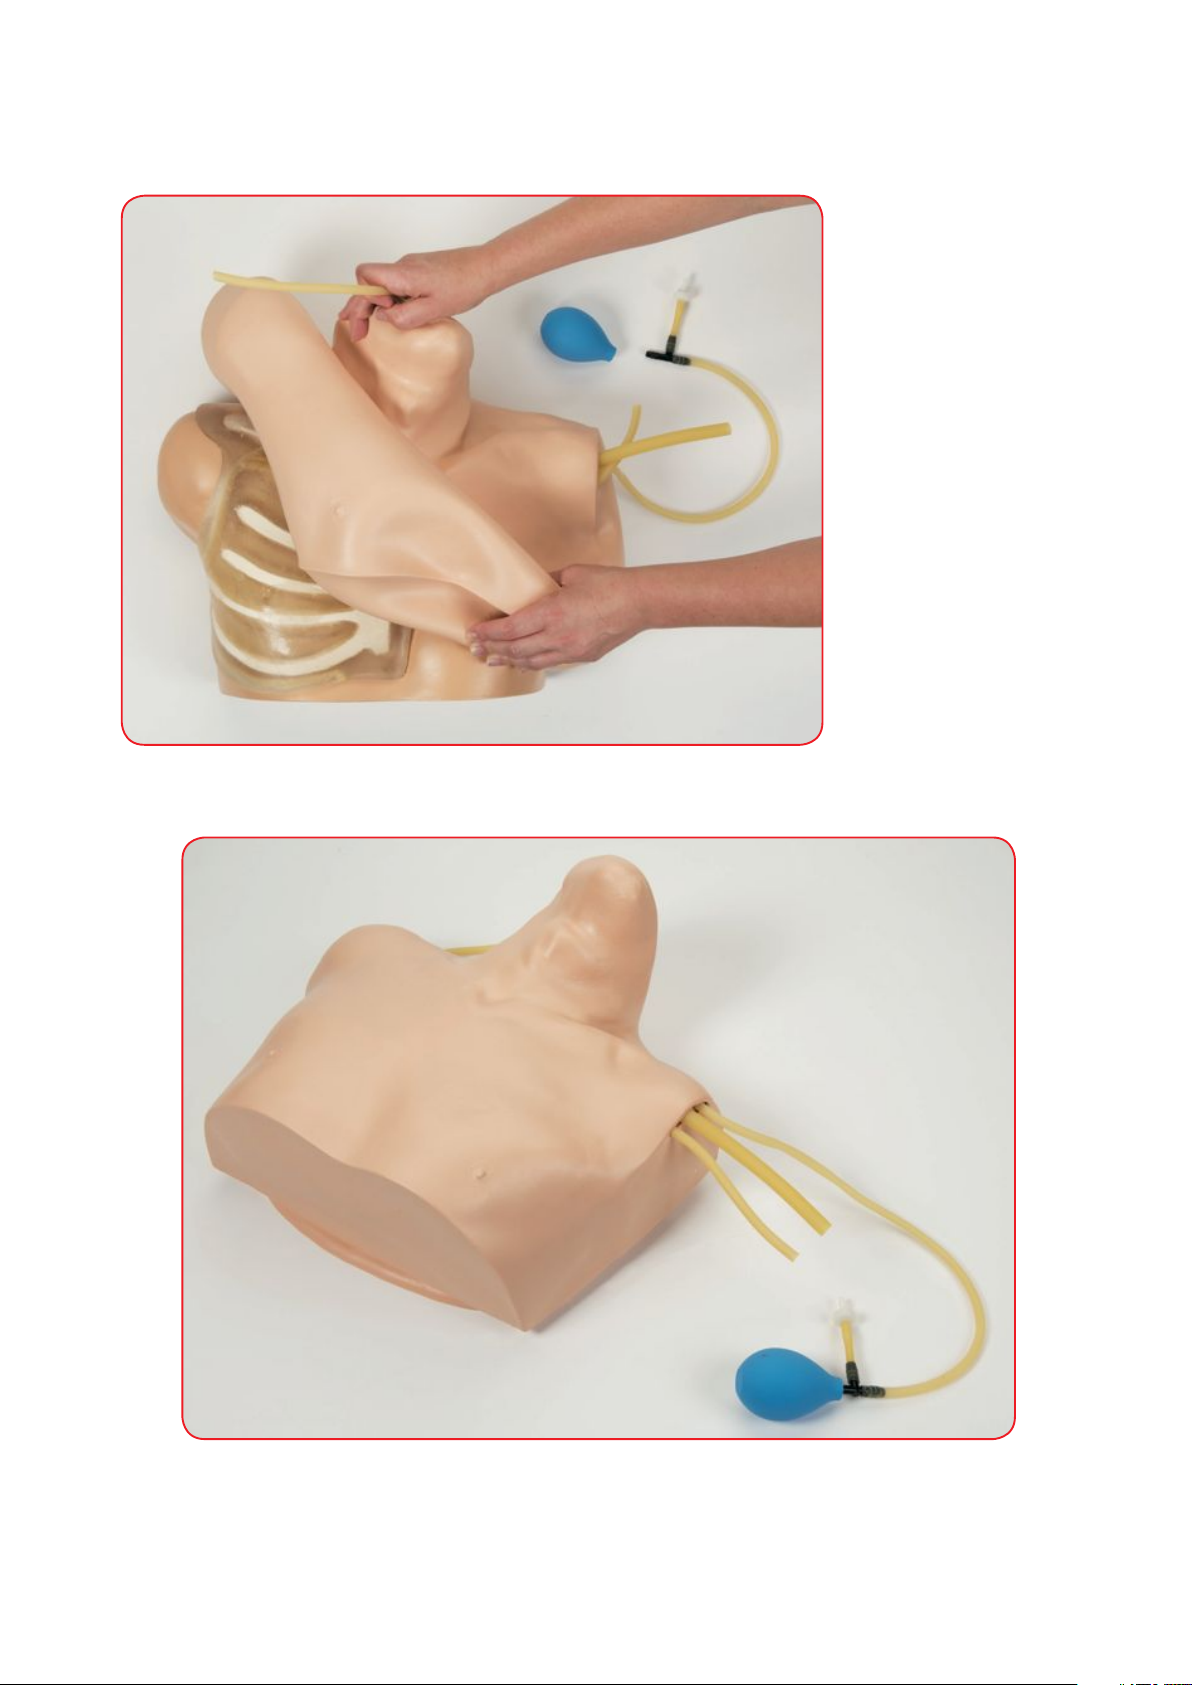
3. When replacing veins and carotid pulse tubing, keep the squeeze bulb adapters and connectors
from old tubing.
Cautions
1.
DO NOT leave the tubes in the simulator
for storage purposes. Keep tubing away from the simulator
torso, skin, and muscle bone insert.
Failure to comply with this warning
will result in damage, which
will not be covered
under warranty.
2. DO NOT allow any newsprint or plastic to come into contact with the simulator. Ink of any type will
cause indelible stains.
3. DO NOT mark on the simulator in any way.
4. Solvents or corrosive materials will damage the simulator.
5. Maintain the slide clamps in the open position when simulator is not in use to prevent kinking in
the tubing.
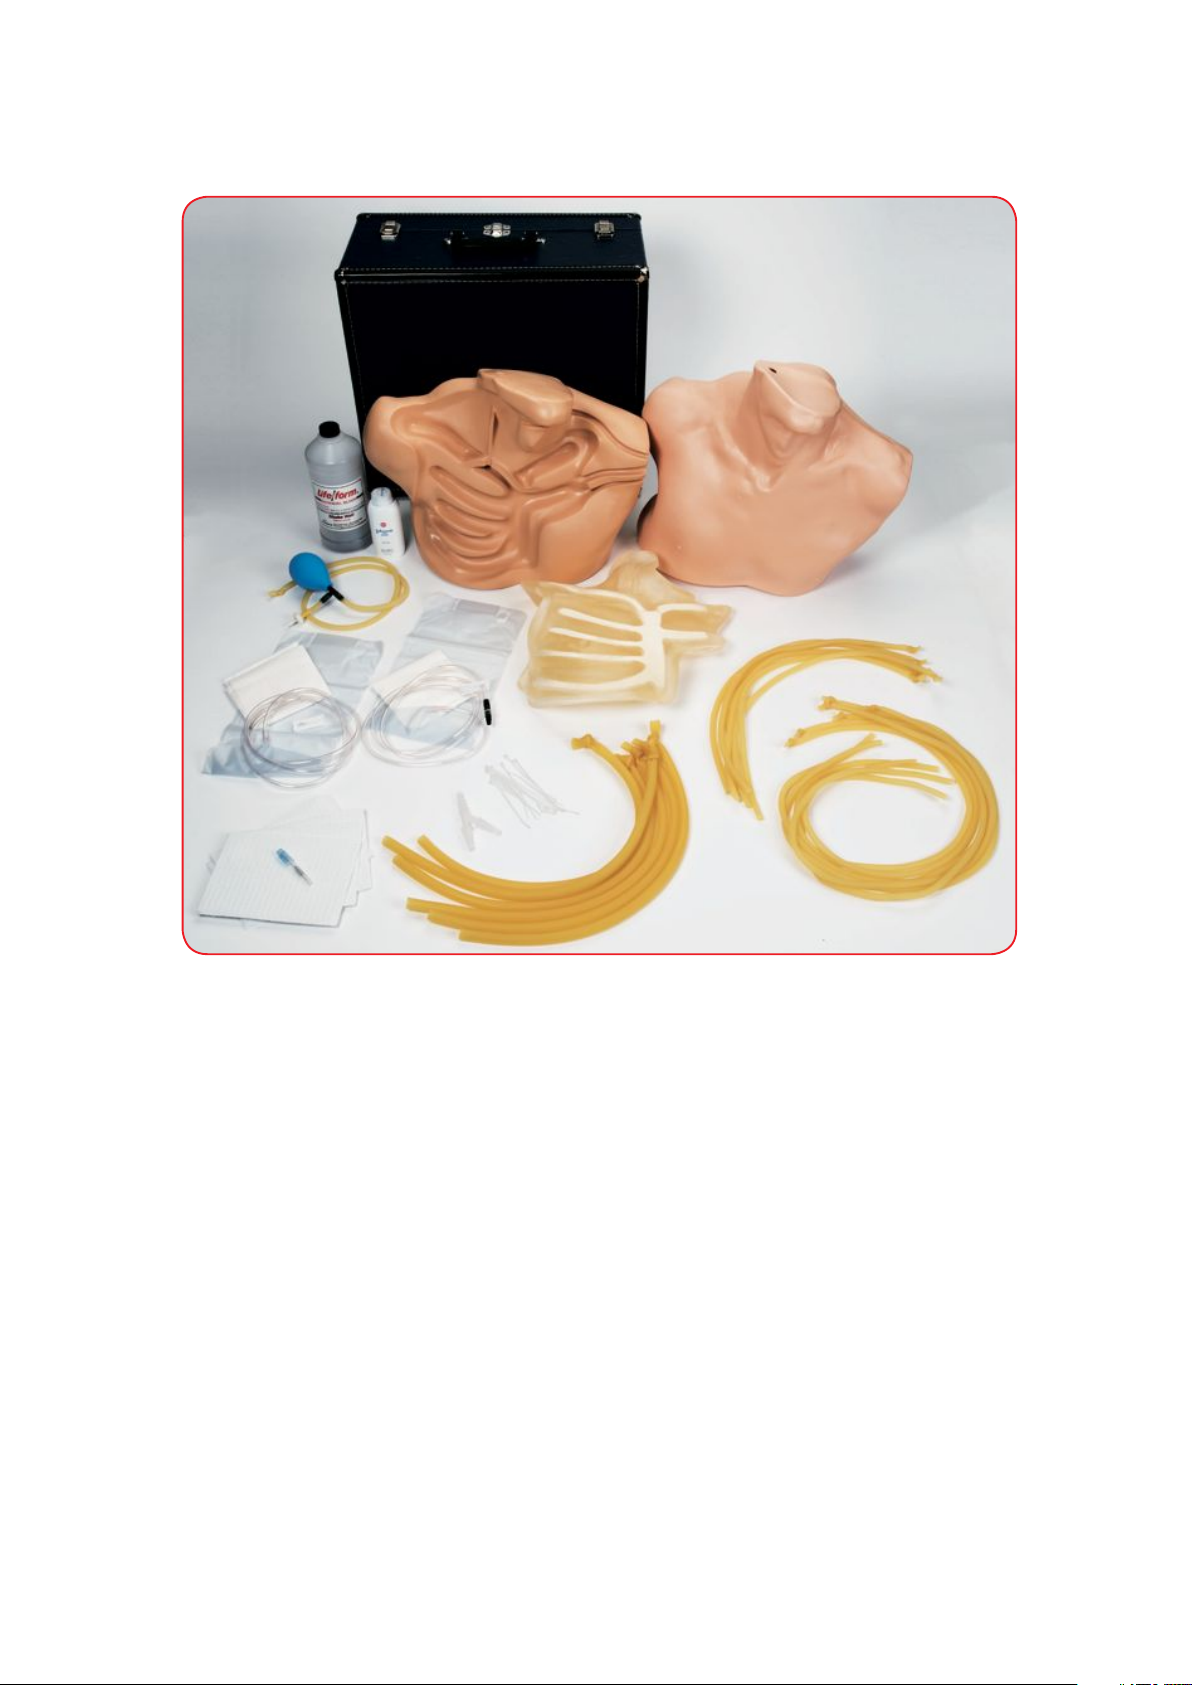
Supplies/Replacement Parts
LF00845U Quart of Life/form®Venous Blood
LF00846U Gallon of Life/form®Venous Blood
LF01022U Fluid Supply Stand
LF01078U Replacement Kit: 6 Subclavian Veins, 6 Internal Jugular Veins, 6 External Jugular
Veins, 1 Carotid Pulse Tubing, 12 Strapping Ties, and 1 Skin Replacement
LF01079U CVC Skin Replacement
LF01093U CVC Muscle Bone Replacement
LF01098U Fluid Administration Set: 1500 ml Fluid Bag with Fitting
*LF01099U Vein Tubing Sealant
*LF01112U Skin Repair Kit
LF01113U Replacement Tubing Kit (6 Sets): Subclavian Vein, Internal Jugular Vein, External
Jugular Vein, 12 Strapping Ties, and “Y” Connector
LF09919U Nasco Cleaner
*Not for sale outside the U.S.A.
Actual product may vary slightly from photo. Nasco reserves the right to change product color, materials,
supplies, or function as needed.
10
NP155_86_LF01087_CentVenoCannulation.indd 10 9/14/15 9:03 AM

NP155_86_LF01087_CentVenoCannulation.indd 11 9/14/15 9:03 AM

COPYRIGHT © NASCO 2015 PRINTED IN U.S.A. NP 115-86/RV 9-15
Other Available Simulators
LF00698U Adult Injectable Arm (Light)
LF00958U PediatricInjectableArm
LF00961U IntramuscularInjection
LF00995U ArterialPunctureArm
LF00999U PediatricInjectableHead
LF01012U HeartCatheterization(TPN)
LF01027U PeritonealDialysis
LF01036U SpinalInjection
LF01037U HemodialysisPracticeArm
LF01042U SutureKit
LF01095U BloodPressureArm
LF01108U InfantIntraosseousInfusion
LF01121U AdvancedIVArm
LF01131U VenipunctureandInjectionArm
LF01139U AdvancedIVHand
LF01142U AuscultaionTrainer
LF03000U CPARLENE
®
Series
LF03601U Adult Airway Management Trainer with
Stand
LF03602U AdultAirwayManagementTrainer
LF03609U Child Airway Management Trainer with
Stand
LF03616U ChildCRiSis™ Manikin
LF03617U DeluxeChildCRiSis™ Manikin
LF03620U PALSUpdateKit
LF03623U InfantAirwayManagementTrainerwith
Stand
LF03632U Child Intraosseous Infusion/Femoral
Access Leg on a Stand
LF03633U Child Airway Management Trainer
Torso
LF03693U
Basic Buddy®
CPR Manikin
LF03699U “Airway Larry” AIrway Management
Trainer
LF03709U InfantCRiSis™ Manikin
LF03720U
Baby Buddy®
Infant CPR Manikin
LF03750U BariatricCPRManikin
LF03770U ChestTube
LF03953U CRiSis™ Manikin, Complete
LF03955U DeluxeCRiSis™ Manikin
LF03956U AdultCRiSis™ Auscultation Manikin
LF03966U AdultCRiSis™ Auscultation Manikin
with ECG Simulator
LF01036U
Fort Atkinson
901 Janesville Avenue, P.O. Box 901
Fort Atkinson, Wisconsin 53538-0901
1.800.558.9595
LF01012U
LF01036U
Access Leg on a Stand
Fort Atkinson
LF01012U
LF00995U
NP155_86_LF01087_CentVenoCannulation.indd 12 9/14/15 9:03 AM
Other Nasco Educational Equipment manuals
Popular Educational Equipment manuals by other brands

Enabling Devices
Enabling Devices Talkable II user guide

VATA
VATA 2365 user manual

Prestan
Prestan PP-IM-100M Use and Care Instructional Sheet

PASCO
PASCO EcoZone instruction sheet

Next Level Racing
Next Level Racing FLIGHT SIMULATOR BOEING MILITARY EDITION instruction manual

Copernicus
Copernicus Royal RC005 Assembly guide

MadLab
MadLab Funky Guitar quick start guide

laerdal
laerdal Pediatric Multi-Venous IV Directions for use

BOXLIGHT
BOXLIGHT frontrow ezRoom Installation & setup guide

Nasco Healthcare
Nasco Healthcare CPR+ PROMPT user guide

Boogie Board
Boogie Board VersaNotes WT20225 quick start guide

TruCorp
TruCorp AirSim Series user manual