Care and Maintenance
Replacing the spinal tubing:
Tubing and skin pads will eventually need to be
replaced. Using the smallest needle gauge possi-
ble will extend the life of the tubing and skin pads.
Dull, burred, or large gauge needles will cause
leakage and premature wear. Rotating the spinal
tubing and turning it end-for-end will also give you
added puncture sites.
1. Disconnect Bag A and drain all fluids from the
trainer by opening Stopcocks A and B.
2. Disconnect Stopcock B from the exit tubing.
3. Disconnect the up-tube from the Luer barb
fitting on Stopcock A.
4. Remove the spine/block assembly from the
Pediatric Caudal Injection Simulator.
5. Remove and discard up-tube, spinal tub-
ing, and exit tube. Save Bag A and clamp,
Stopcock A with tubing assembly, and Bag B
with Stopcock B.
Cleaning and storage:
1. Always drain all fluids before storing the unit.
2. The tissue block and skin pads may be
washed with warm soapy water to remove dirt
and oils. Printed material, inks, markers, and
some antiseptic solutions may permanently
stain the plastic.
3. The body may be cleaned with mild soap
detergent and a damp cloth, or with Nasco
Cleaner (LF09919U).
4. Do not submerge the body in water.
5. Never store the latex spinal tubing in contact
with any soft plastic components. Remove it
from the body and store separately in a plastic
bag.
Available Supplies and Replacement Parts
LF01006AU Replacement Kit: 1 clear skin pad,
1 opaque skin pad, and 1 spinal tubing
assembly
LF01022U Fluid Supply Stand
LF09919U Nasco Cleaner
Actual product may vary slightly from photo.
Nasco reserves the right to change product color,
materials, supplies, or function as needed.
Actual product may vary slightly from photo.
Nasco reserves the right to change product color,
materials, supplies, or function as needed.
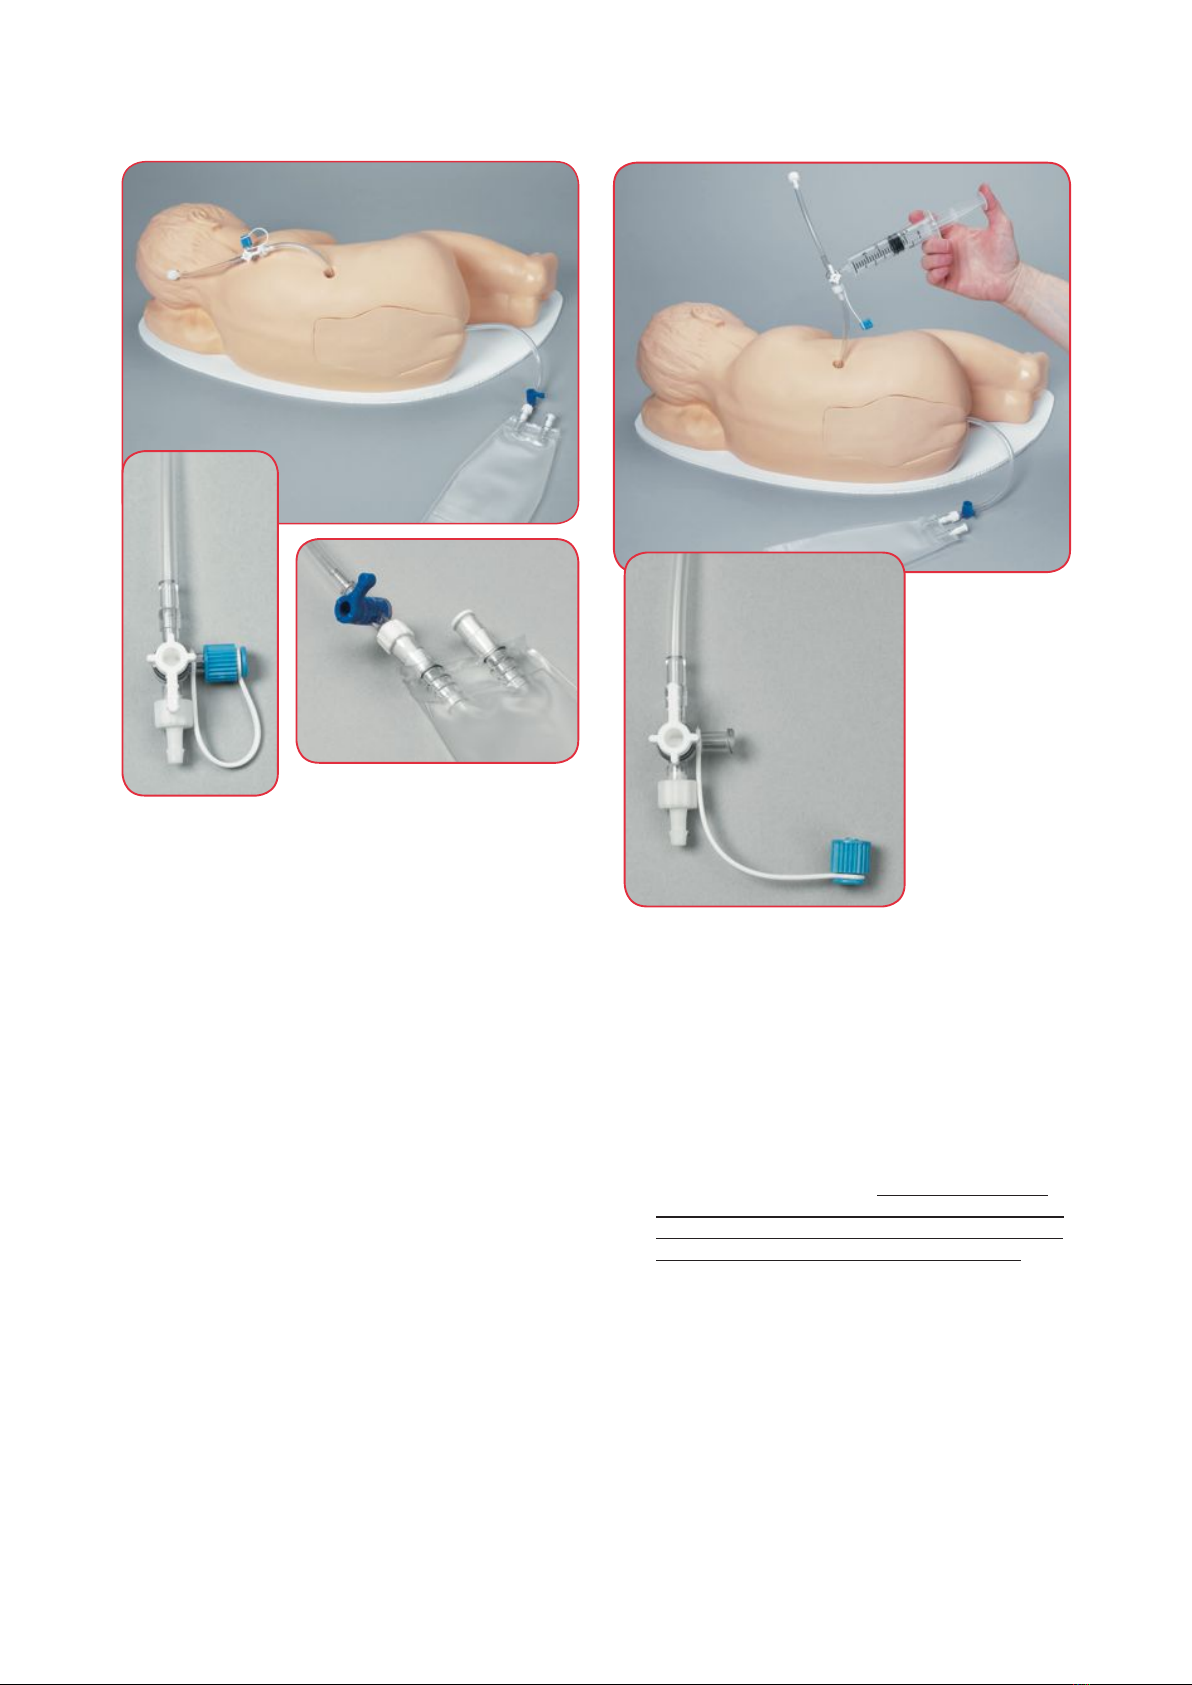
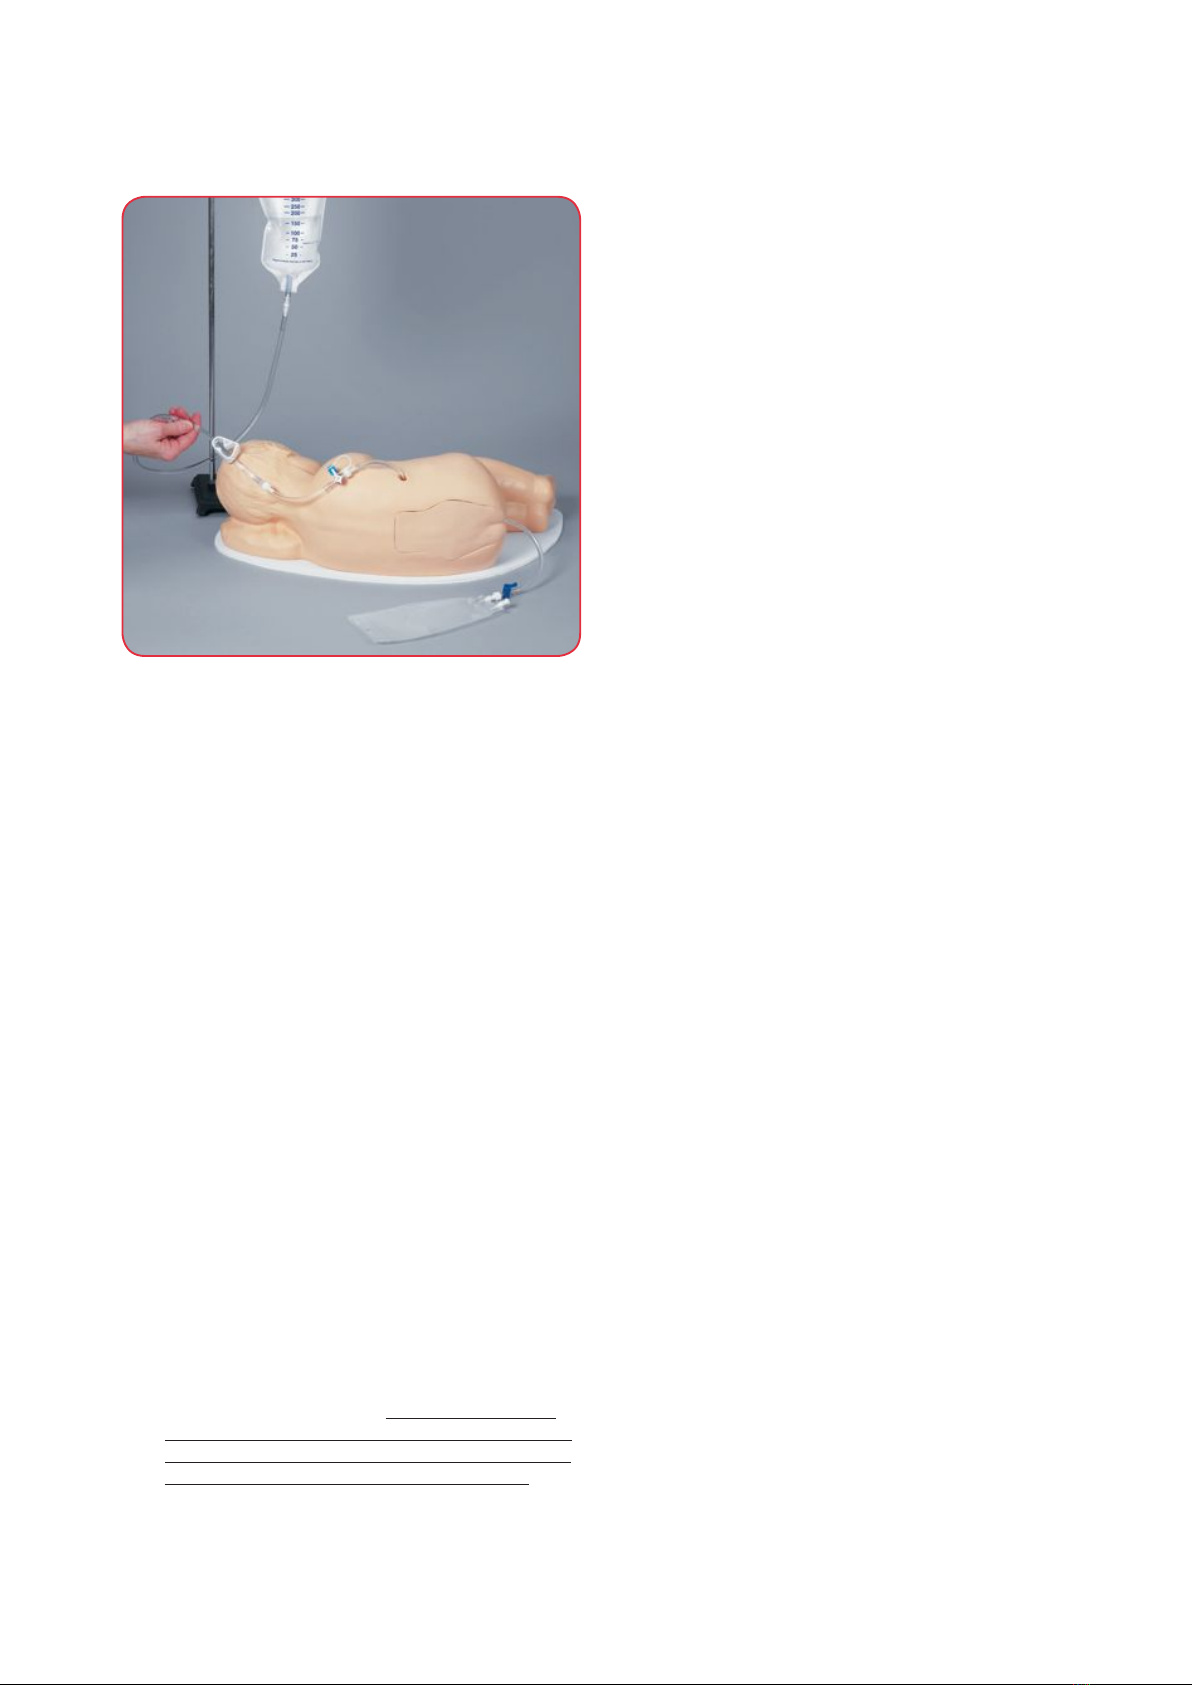
To perform a lumbar puncture:
1. Connect the 500 ml Fluid Supply Bag (Bag A)
to the tubing section of Stopcock A. Close the
tubing clamp on the 500 ml Fluid Supply Bag.
2. Cap the side port AND close the side port of
Stopcock A.
3. Close Stopcock B.
4. Fill Bag A with approximately 225 ml of
water and hang it 16" from the work surface.
(Hanging height will determine fluid pressure
in the spinal tubing, and may be adjusted
as required.) Fluid supply stand (LF01022U)
sold separately.
5. Open the Bag A clamp and Stopcock A.
6. Briefly open Stopcock B to allow water to
displace the air in the tubing. The spinal
column is charged when water fills the exit
tubing.
7. Close Stopcock B; the clamp on Bag A
remains open. (See figure 10.)
8. Perform the lumbar puncture procedure in
the L3-L4 or L4-L5 space.
9. When finished training, drain all bags and
tubing; allow to air dry. Remove spine and
tissue block from body. To avoid damage,
do not allow latex spinal tubing to remain in
contact with any soft plastic components of
the trainer for extended periods of time.
Figure 10 Figure 10
NP061_14_LF01006_CaudalInjectindd.indd 6 4/30/14 3:00 PM