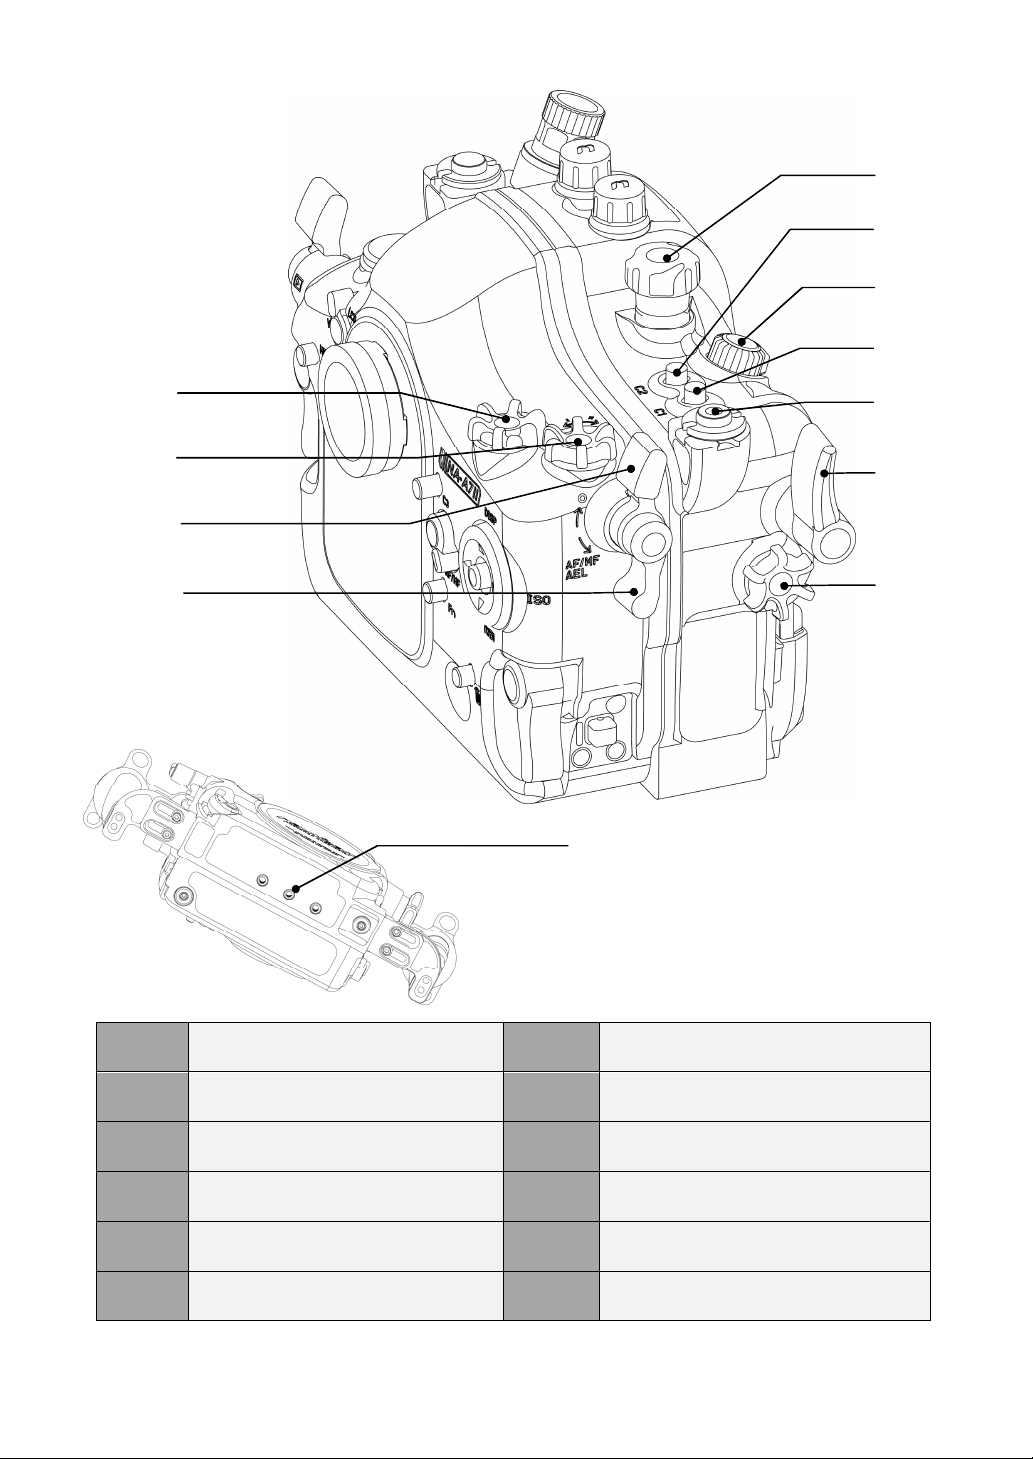
Nauticam NA-A7II User manual
Other Nauticam Camera Accessories manuals

Nauticam
Nauticam SFE1635-Z User manual

Nauticam
Nauticam NA-GH5SV User manual

Nauticam
Nauticam TTL Flash Trigger User manual

Nauticam
Nauticam Mounting Ball 17958 User manual

Nauticam
Nauticam 45 Viewfinder User manual

Nauticam
Nauticam 17960 User manual

Nauticam
Nauticam NA-OM-1 User manual

Nauticam
Nauticam 17954 User manual

Nauticam
Nauticam 19575 User manual

Nauticam
Nauticam 17229 User manual

Nauticam
Nauticam NA-Z7 User manual

Nauticam
Nauticam 87518 User manual

Nauticam
Nauticam CR2470-Z User manual

Nauticam
Nauticam NZ2450-Z User manual

Nauticam
Nauticam 21230 User manual

Nauticam
Nauticam PS24105-Z User manual

Nauticam
Nauticam 26302 User manual

Nauticam
Nauticam 26306 User manual

Nauticam
Nauticam NA - D780 User manual

Nauticam
Nauticam PL1635-Z User manual


Popular Camera Accessories manuals by other brands

Viltrox
Viltrox EF-NEX Mount instructions

Calumet
Calumet 7100 Series CK7114 operating instructions

Ropox
Ropox 4Single Series User manual and installation instructions

Cambo
Cambo Wide DS Digital Series Main operating instructions

Samsung
Samsung SHG-120 Specification sheet

Ryobi
Ryobi BPL-1820 Owner's operating manual