NEC P/N 0893416 User manual

Empowered by Innovation
Conference Bridge
User Guide
P/N 0893416
Rev 1, September 2006
Printed in U.S.A.
5.99
Technical Support Web Site:
http://ws1.necii.com (registration is required)

This manual has been developed by NEC Unified Solutions, Inc. It is intended for the use of its customers and
service personnel, and should be read in its entirety before attempting to install or program the system. Any
comments or suggestions for improving this manual would be appreciated. Forward your remarks to:
NEC Unified Solutions, Inc.
4 Forest Parkway
Shelton, CT 06484
necunifiedsolutions.com
Nothing contained in this manual shall be deemed to be, and this manual does not constitute, a warranty of, or
representation with respect to, any of the equipment covered. This manual is subject to change without notice and
NEC Unified Solutions, Inc. has no obligation to provide any updates or corrections to this manual. Further, NEC
Unified Solutions, Inc. also reserves the right, without prior notice, to make changes in equipment design or
components as it deems appropriate. No representation is made that this manual is complete or accurate in all
respects and NEC Unified Solutions, Inc. shall not be liable for any errors or omissions. In no event shall NEC Unified
Solutions, Inc. be liable for any incidental or consequential damages in connection with the use of this manual. This
document contains proprietary information that is protected by copyright. All rights are reserved. No part of this
document may be photocopied or reproduced without prior written consent of NEC Unified Solutions, Inc.
©2006 by NEC Unified Solutions, Inc. All Rights Reserved.
Printed in U.S.A.
Microsoft and Windows are registered trademarks of Microsoft Corporation.

Table of Contents
Aspire Conference Bridge User Guide
◆
Table of Contents- 1
Introduction . . . . . . . . . . . . . . . . . . . . . . . . . . . . . . . . . . . . . . . . . . . . . . . . . . . . . . . . . . . . .1
Chapter 1 . . . . . . . . . . . . . . . . . . . . . . . . . . . . . . . . . . . . . . . . . . . . . . . . . . . . . . . 3
Accessing the Aspire Conference Bridge . . . . . . . . . . . . . . . . . . . . . . . . . . . . . . . . . . . . . 3
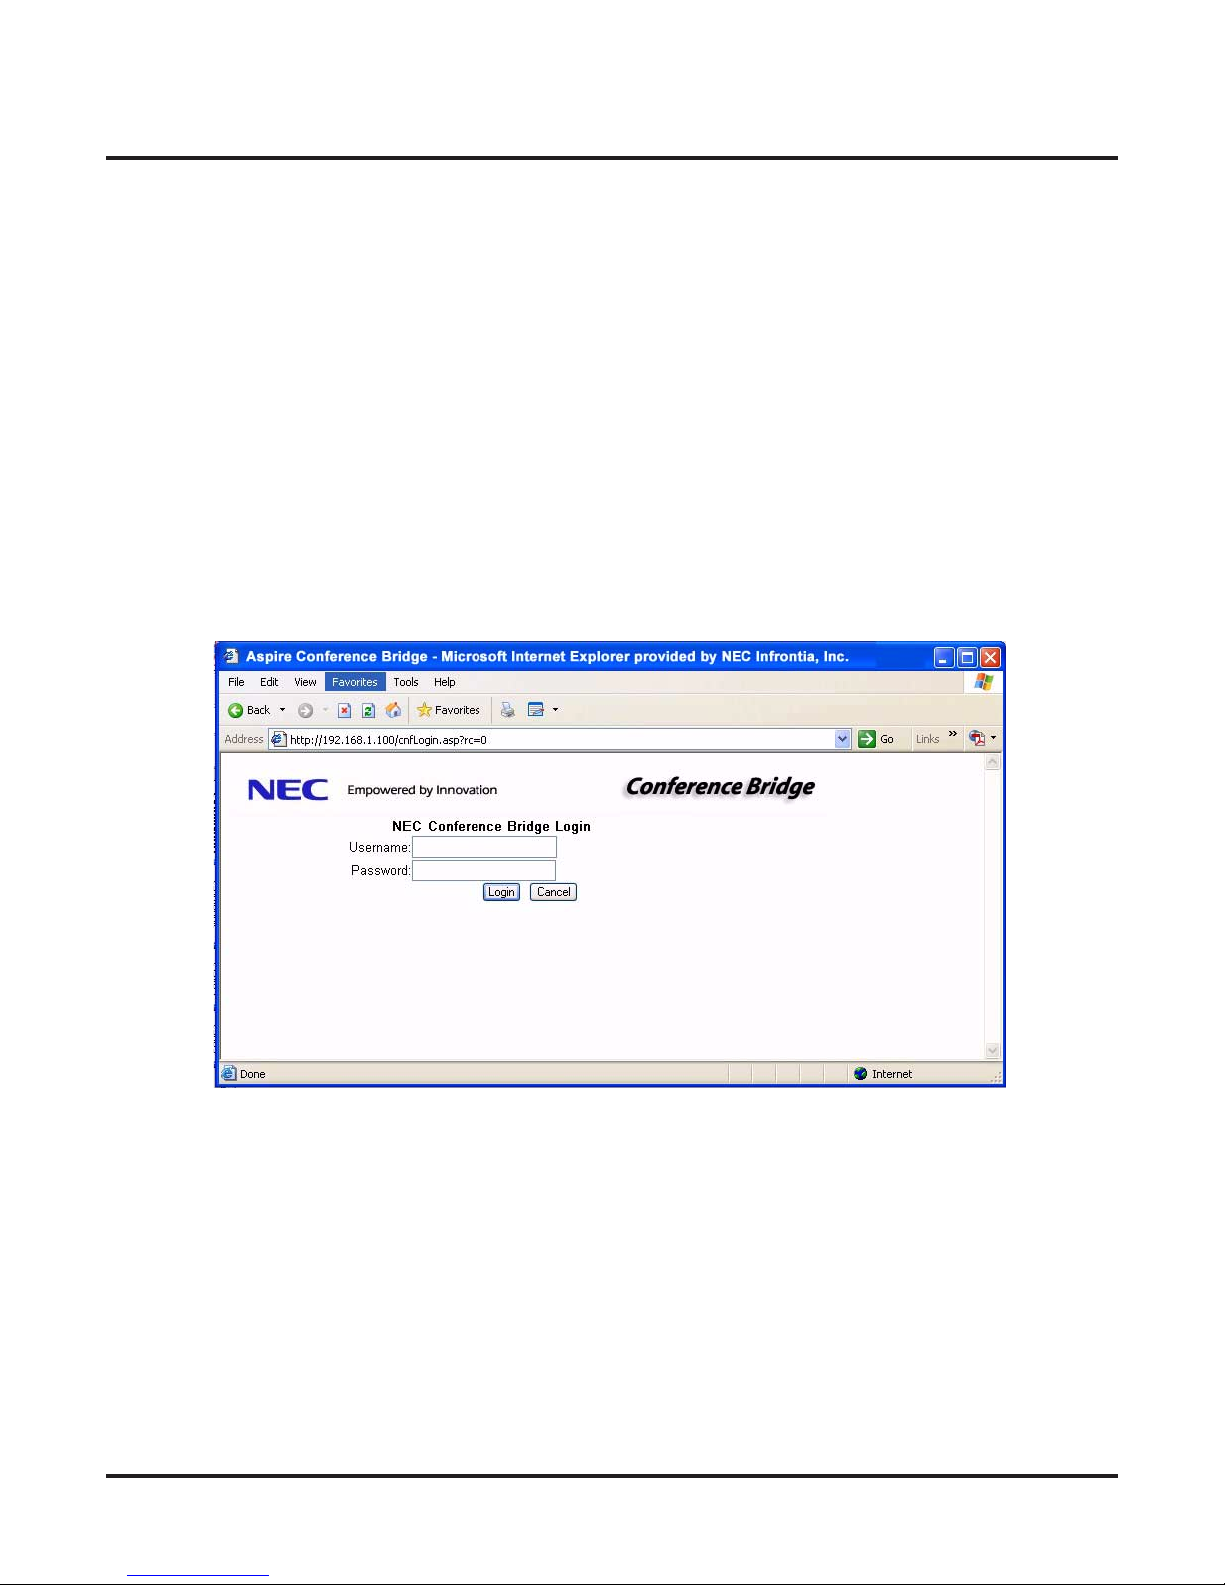
LOGGING INTO ASPIRE CONFERENCE BRIDGE PCB . . . . . . . . . . . . . . . . . . . . . . . . . . . . . . . . . . . 3
Access Levels 4
MAIN PAGE . . . . . . . . . . . . . . . . . . . . . . . . . . . . . . . . . . . . . . . . . . . . . . . . . . . . . . . . . . . . . . . . . . . . . 5
Navigation Side Bar . . . . . . . . . . . . . . . . . . . . . . . . . . . . . . . . . . . . . . . . . . . . . . . . . . . 5
Status Window . . . . . . . . . . . . . . . . . . . . . . . . . . . . . . . . . . . . . . . . . . . . . . . . . . . . . . . 5
Operations Window . . . . . . . . . . . . . . . . . . . . . . . . . . . . . . . . . . . . . . . . . . . . . . . . . . . 5
Chapter 2 . . . . . . . . . . . . . . . . . . . . . . . . . . . . . . . . . . . . . . . . . . . . . . . . . . . . . . . 7
Administration Setup. . . . . . . . . . . . . . . . . . . . . . . . . . . . . . . . . . . . . . . . . . . . . . . . . . . . . .7
ADMINISTRATION . . . . . . . . . . . . . . . . . . . . . . . . . . . . . . . . . . . . . . . . . . . . . . . . . . . . . . . . . . . . . . . . 7
Edit Bridge Configuration . . . . . . . . . . . . . . . . . . . . . . . . . . . . . . . . . . . . . . . . . . . . . . 9
User Accounts . . . . . . . . . . . . . . . . . . . . . . . . . . . . . . . . . . . . . . . . . . . . . . . . . . . . . . 11
Add Account . . . . . . . . . . . . . . . . . . . . . . . . . . . . . . . . . . . . . . . . . . . . . . . . . . . . 12
Edit Account . . . . . . . . . . . . . . . . . . . . . . . . . . . . . . . . . . . . . . . . . . . . . . . . . . . . . 13
Delete Account . . . . . . . . . . . . . . . . . . . . . . . . . . . . . . . . . . . . . . . . . . . . . . . . . . . 14
Gain Configuration . . . . . . . . . . . . . . . . . . . . . . . . . . . . . . . . . . . . . . . . . . . . . . . . . . . 15
CONFIGURATION . . . . . . . . . . . . . . . . . . . . . . . . . . . . . . . . . . . . . . . . . . . . . . . . . . . . . . . . . . . . . . . . 16
Email Configuration . . . . . . . . . . . . . . . . . . . . . . . . . . . . . . . . . . . . . . . . . . . . . . . . . . 17
Chapter 3 . . . . . . . . . . . . . . . . . . . . . . . . . . . . . . . . . . . . . . . . . . . . . . . . . . . . . . 19
Scheduling a Conference Call . . . . . . . . . . . . . . . . . . . . . . . . . . . . . . . . . . . . . . . . . . . . .19
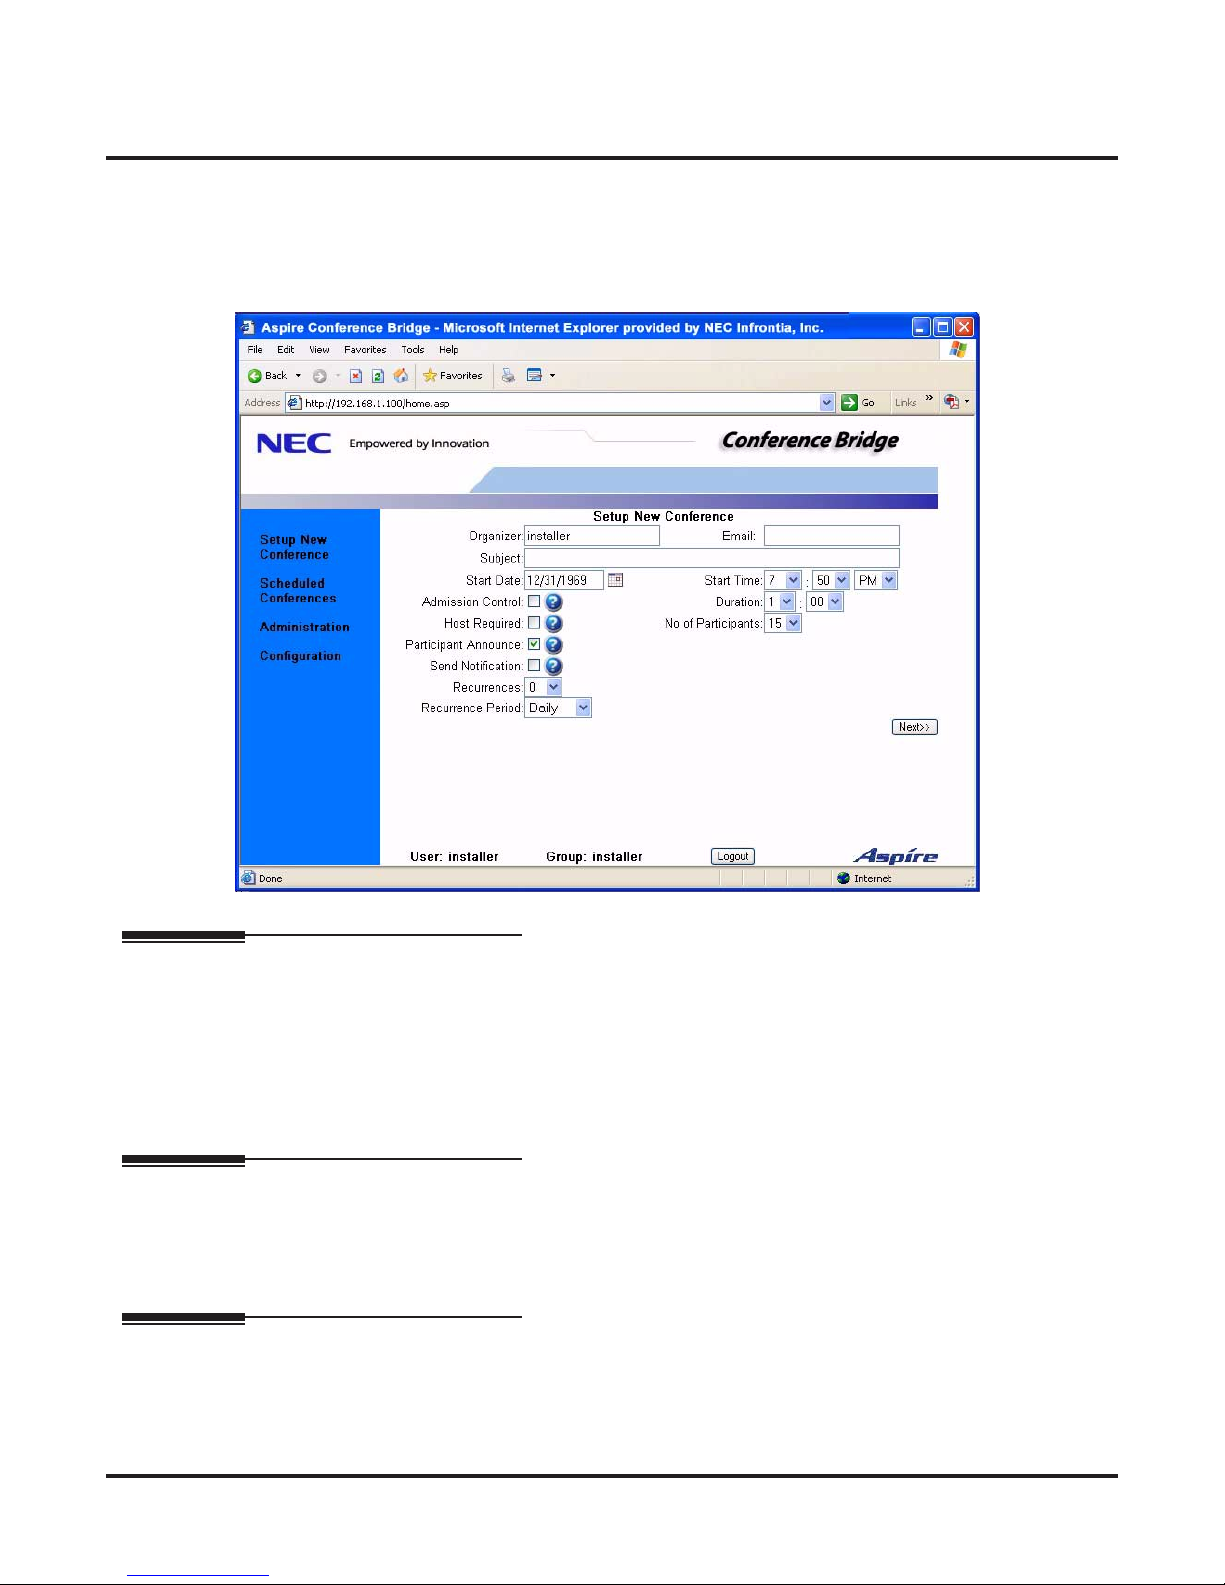
SET UP A NEW CONFERENCE . . . . . . . . . . . . . . . . . . . . . . . . . . . . . . . . . . . . . . . . . . . . . . . . . . . . 19
Simple Conference . . . . . . . . . . . . . . . . . . . . . . . . . . . . . . . . . . . . . . . . . . . . . . . . . . . . . . . . . . . . . . . 24
Edit Simple Conference . . . . . . . . . . . . . . . . . . . . . . . . . . . . . . . . . . . . . . . . . . . . . . . 26
Chapter 4 . . . . . . . . . . . . . . . . . . . . . . . . . . . . . . . . . . . . . . . . . . . . . . . . . . . . . . 27
Managing Scheduled Conferences . . . . . . . . . . . . . . . . . . . . . . . . . . . . . . . . . . . . . . . . .27
CONFERENCE MANAGER . . . . . . . . . . . . . . . . . . . . . . . . . . . . . . . . . . . . . . . . . . . . . . . . . . . . . . . . . 27
Conference Details . . . . . . . . . . . . . . . . . . . . . . . . . . . . . . . . . . . . . . . . . . . . . . . . . . . 28
Edit Conference . . . . . . . . . . . . . . . . . . . . . . . . . . . . . . . . . . . . . . . . . . . . . . . . . . . . . 29
Delete Conference . . . . . . . . . . . . . . . . . . . . . . . . . . . . . . . . . . . . . . . . . . . . . . . . . . . 30

Table of Contents
Table of Contents - 2
◆
Aspire Conference Bridge User Guide
Chapter 5 . . . . . . . . . . . . . . . . . . . . . . . . . . . . . . . . . . . . . . . . . . . . . . . . . . . . . . 31
Calling Into A Conference Bridge Call. . . . . . . . . . . . . . . . . . . . . . . . . . . . . . . . . . . . . . .31
Calling Into A Conference Bridge Call . . . . . . . . . . . . . . . . . . . . . . . . . . . . . . . . . . . . . . . . . . . . . . . 31
Conference Access Codes . . . . . . . . . . . . . . . . . . . . . . . . . . . . . . . . . . . . . . . . . . . . . . . . . . . . . . . . 32

Introduction
Aspire Conference Bridge User Guide
◆
1
Introduction
Introduction
The Aspire Conference Bridge feature is designed for the Aspire M/L/XL system. The PCB is installed in the tele-
phone system and allows up to 16 parties to take part in a conference call. The participants dial a pre-assigned phone
number at the determined time, optionally enter a password, and are prompted to speak their name which will be
announced to the other conference participants. The functionalities include:
●
Password protection is provided for each conference.
●
Applicable voice messages and announcements (e.g., entry, password request, exit) are available.
●
EMail notiÞcation, when enabled, requires the organizer to enter the EMail address of each
participant to be sent notiÞcation of a pending conference. This option is selectable when setting up new
conferences.
The Aspire Conference Bridge EMail conÞguration supports SMTP mail server ONLY.
●
Host Required, when enabled, requires the host/organizer to be logged into the conference before any
other participant can enter. This option is selectable when setting up new conferences.
●
Admission Control, when enabled, requires the organizer to dial a digit allowing each participant to
enter the conference. This option is a predeÞned access code.
●
One customer greeting can be recorded for each Aspire Conference Bridge PCB. A predeÞned password
is necessary to record personal greetings.
●
Password protection option for each conference.
●
Remote conference programming with conference scheduler (via a Web User Interface).
●
Programmable gain adjustments.
●
Support for DTMF detection for manual setup options (Telephone User Interface).
●
HTTP Interface for conference schedule management and conference PCB administration.

Introduction
2
◆
Aspire Conference Bridge User Guide
- For Your Notes -

Chapter 1
Accessing the Aspire Conference Bridge
Aspire Conference Bridge User Guide
◆
3
Chapter 1
Accessing the Aspire Conference Bridge
Chapter 1
LOGGING INTO ASPIRE CONFERENCE BRIDGE PCB
Communication to the
Aspire Conference Bridge
is made using a straight ethernet cable, crossover cable, and/or
a small hub and Microsoft’s Internet Explorer web browser. To ensure proper communication between the PC
and the
Aspire Conference Bridge
, they must be attached to the same network.
The Aspire Conference Bridge is conÞgured using an Internet Browser. Microsoft Internet Explorer 6.0 or higher
is recommended. The Login page allows a user to enter their user name and password for network access.
Log in as follows:
1. Start your Internet Explorer from a PC connected to the same network as the Aspire Conference Bridge
PCB.
2. Enter the IP Address for the Aspire Conference Bridge in the address link of your browser.
Your System Administrator can provide the Conference Bridge IP address. By default,
the IP address is: 192.168.1.100.
3. When the Login screen is displayed, enter your Login ID and the password.
Your System Administrator can provide your login and password information.
4. After entering the user name and password, click on
Login
.

Chapter 1
Accessing the Aspire Conference Bridge
4
◆
Aspire Conference Bridge User Guide
Access Levels
●
User Group (Black color - user code)
The user group is the most restricted group of the three levels. A member of the user group may create
conferences only under their user name and view conferences that are created by them.
●
Admin Group (Green color - user code)
A member of the admin group may create, view, edit and delete conferences for any user. The member
may also edit the conference application settings and create new admin and user members.
●
Installer Group (Red color - user code)
A member of the installer group has the same privileges as an admin user, plus the ability to view and
modify the PCB conÞguration options. The installer may also upload new Þrmware to the PCB and reset
the PCB from the web interface.

Chapter 1
Accessing the Aspire Conference Bridge
Aspire Conference Bridge User Guide
◆
5
MAIN PAGE
After logging into the Conference Bridge web manager, the main page is displayed. The main page is split into
three regions: the navigation side bar, the status window near the bottom of the screen and the operations win-
dow in the center of the screen.
Navigation Side Bar
The side bar allows you to navigate to the different areas of the web interface. When logged in as a member of
the user group, only the
Setup New Conference
and
Scheduled Conferences
links are available. When
logged in as a member of the admin group, the
Administration
and
Configuration
links are also available -
though the information in the
Configuration
link is displayed, only the
EMail Configuration
can be edited.
When logged in as a member of the installer group, the previously mentioned links plus all the
Configuration
options can be edited. The side bar is always visible from the main page.
Status Window
The status window is always located at the bottom of the browser window. The status window displays the user
name and administration level of the current user. A
Logout
button is provided that is clicked to log you out of
the web interface and return you to the login screen.
Operations Window
The operations window provides access to the operation that is currently selected. When a user clicks on a side
bar link, the target page is displayed in this window. When you Þrst log in, the
Setup New Conference
window
is displayed by default.

Chapter 1
Accessing the Aspire Conference Bridge
6
◆
Aspire Conference Bridge User Guide
- For Your Notes -

Chapter 2
Administration Setup
Aspire Conference Bridge User Guide
◆
7
Chapter 2
Administration Setup
Chapter 2
ADMINISTRATION
To access the Conference Bridge status and conÞguration pages, click on the
Administration
link on the side
bar. This link is available only to members for the Admin and Installer level groups. The Þrst page displayed is
the
Conference Bridge Status
information.
This option is displayed only for Admin and Installer password levels.

Chapter 2
Administration Setup
8
◆
Aspire Conference Bridge User Guide
The screen displays the following conÞgured information for the Aspire Conference Bridge:
●
System Time
The current date and time being used by the Aspire Conference Bridge (16CNFU) PCB.
●
Bridge Mode
The mode of operation for the Aspire Conference Bridge (Simple and Advanced Mode).
Only the Advanced mode is available with the Aspire.
●
No. of Channels
The number of channels available on the Aspire Conference Bridge PCB.
●
Max. Conf. Duration
The maximum conference duration.
●
End Tone Alert Time
The alert message is played to all participants at the speciÞed time before the end of the conference. A
time of two minutes speciÞes that the end message be played two minutes before the conference ends.
●
No. of Simple Conferences
The number of conferences conÞgured in simple mode conÞguration.
Not available with the Aspire system.
●
No. of Existing Conf.
The number of currently scheduled conferences.
This screen also allow access to deÞne some of the Conference Bridge settings:
●
Edit Bridge Configuration
(page 9)
:
Maximum Participants Per Conference
Maximum Conference Duration
End Tone Alert Time
Use Custom Greeting
●
User Accounts
(page 11)
●
Edit Gain Configuration
(page 15)

Chapter 2
Administration Setup
Aspire Conference Bridge User Guide
◆
9
Edit Bridge Configuration
Clicking on the
Edit Bridge Configuration
link takes you to the
Conference Bridge Configuration
page.

Chapter 2
Administration Setup
10
◆
Aspire Conference Bridge User Guide
●
Max Participants Per Conf.
ConÞgures the maximum participants including the organizer in a conference. (Default = 16)
●
Max Conf. Duration
ConÞgures the maximum duration of a conference. (Default = 240 minutes)
●
End Tone Alert Time
ConÞgures the time that the end alert message is played. (Default = 6 minutes)
●
Use Custom Greeting
When enabled (by selecting the check box) the Conference Bridge will play the recorded personalized
greeting. When disabled (unchecking the box), Conference Bridge PCB restores the factory default
greeting.
●
Recording Personalized Greeting:
1. Dial into the Conference Bridge PCB and enter the set code for recording a Personalized
greeting.
PASSWORD: 243939#
2. Listen to the series of prompts played to guide you through recording your personalized
greeting.
The customized greeting is automatically enabled after you accept the newly
recorded greeting.
Clicking on Submit sends the changes to the conference application. The conÞguration is saved to non-volatile
memory so it is retained after a reset. Clicking on the Cancel button returns you to the Administration page.

Chapter 2
Administration Setup
Aspire Conference Bridge User Guide ◆11
User Accounts
Clicking on the User Accounts link brings up the User Accounts Management page. Using this page, User
Accounts may be added, edited, or deleted.

Chapter 2
Administration Setup
12 ◆Aspire Conference Bridge User Guide
Add Account
The Add Account page allows an administrator or installer to create new accounts to access the Aspire
Conference Bridge PCB.
●Username
Enter a user name for a new account. The name must contain only alphanumeric characters and/or a -.
●Group
DeÞne the group with which the new account should be associated. When the current user is a member
of the admin group, they may only add members of the admin group or user group. When the current
user is a member of the installer group, they may add accounts to any of the three groups. User groups
status can be identiÞed by the following color designations:
●Installer - Red
●Admin - Green
●User - Black
●Password, ConÞrm Password
DeÞne the password for the new user. The password must contain only alphanumeric characters and/or a -.

Chapter 2
Administration Setup
Aspire Conference Bridge User Guide ◆13
Edit Account
The Edit Account page allows you to modify any user password.

Chapter 2
Administration Setup
14 ◆Aspire Conference Bridge User Guide
Delete Account
The Delete Account page allows you to delete previously added user account(s).
The “installer” account cannot be deleted.

Chapter 2
Administration Setup
Aspire Conference Bridge User Guide ◆15
Gain Configuration
These Þelds are useful for attenuation applied to obtain adequate voice levels for the end users. It is recom-
mended not to alter this value unless solving an issue related to voice levels. (Default = 0)
●Transmit/Receive Gain
This is the base gain value that is applied to all calls (internal or external).
●Transmit/Receive Internal or External Bias
This option sets the Transmit/Receive levels for external and internal calls.
Setting this option to a positive (+) setting increases the volume level. Entering a
negative (-) number decreases the volume level.
Example: When the following settings are applied:
Transmit Gain = 2, Transmit Internal Bias = 2
Transmit Gain set for the channel of a call on an internal line would equal a total of 4.
●AGC ConÞguration
These Þelds are useful when controlling the gain of the system in order to maintain consistent audio lev-
els during a conference.
The default values are suggested baseline settings for the Aspire Conference Bridge
PCB. The values may need to be adjusted for optimal performance on your system.

Chapter 2
Administration Setup
16 ◆Aspire Conference Bridge User Guide
CONFIGURATION
To access the system conÞguration page, click on the Configuration link. This page is only accessible to mem-
bers of the admin and installer groups. However, the admin group will only be able to access the “Email ConÞg-
uration” window. The Þrst page that is displayed contains the current system status information. Below the
system information are the links to the pages that allow you to modify the system conÞguration.
This page is displayed for Admin and Installer password levels, however, with the Admin pass-
word, only the EMail ConÞguration can be edited (the other entries can only be edited with the
Installer password). For details on the ConÞguration items programmable by the Installer password
level, refer to the Aspire Conference Bridge Manual, P/N 0893215.
This screen displays the following settings pertaining to the Aspire Conference Bridge:
●System Time (Time used by the Aspire Conference Bridge)
●Kernel Version
●RFS Version (Firmware)
●MAC Address
●IP Address (To access the Aspire Conference Bridge)
●Netmask Address (Subnet mask address)
●Gateway Address
●Host Name
●Domain Name
●Nameserver Address
●DHCP
This manual suits for next models
1
Table of contents
Other NEC Network Hardware manuals

NEC
NEC N8804-007 User manual

NEC
NEC SVP SERVER - User manual

NEC
NEC NEAX 2400 IPX User manual

NEC
NEC N8146-28 User manual

NEC
NEC IP8800/S2400 Series User manual

NEC
NEC QB-V850ESFJ3 User manual

NEC
NEC 78K/0 Series User manual

NEC
NEC 200 User manual

NEC
NEC NRS Expanded Series User manual

NEC
NEC Flash Memory Programmer PG-FP3 User manual
Popular Network Hardware manuals by other brands

ADTRAN
ADTRAN NetVanta Serial Dial Backup Interface Module (DIM)... quick start guide

NETGEAR
NETGEAR ANT24BDC - Power Injector For The 500 mW... installation guide

D-Link
D-Link DNR-F4432-16P Getting started guide

Cimetrics
Cimetrics B3060 quick start

Lenovo
Lenovo Iomega ix2 Specifications

Huawei
Huawei EchoLife HG8247H Quick start quide