manuals.online logo
Brands
  1. Home
  2. •
  3. Brands
  4. •
  5. NEC
  6. •
  7. Network Hardware
  8. •
  9. NEC A201NE User manual

NEC A201NE User manual

A201NE
Quick Start
Thank you for purchasing "A201NE".
● Before using A201NE, read "Quick Start" (this guide), " お願いとご注意 (Safety Precautions)" (Japanese), and "User
Guide" to ensure proper handling.
● Check User Guide on SoftBank Website at
(https://www.softbank.jp/biz/services/mobile/lineup/data/a201ne/)
It can be accessed using a PC or a smartphone.
● When Wi-Fi router is under a corporate subscription, Wi-Fi router functionality can be regulated by administrators.
Depending on how functions are regulated, settings or operations as described herein may not be available.
Precautions
• Reproduction of the contents of this guide in part or in whole is prohibited.
• The content of this guide is subject to change without notice.
• Every effort has been made in preparation of this guide. Should you notice any unclear points, omissions, etc., feel free
to contact us (see "Customer Service").
NWA-A15489-001-00
Package Contents
The following items are included in the package. Please confirm package contents
before use. Contact Customer Service for missing items.
■A201NE (Wi-Fi router)
■USB Cable (sample)
■Quick Start (this guide)
■ お願いとご注意 (Japanese)
■クイックスタート (Japanese)
■SSID Sticker
• Keep accessories in a safe place.
• AC Charger is not supplied. Purchase an optional AC Charger. Always use an AC Charger
specified by SoftBank (for USB PD-PPS, USB Type-C® Quick Charge AC Charger [ZSDBAV]
(SB-AC22-TCPD)).
Parts & Functions
❸
❶
❷
❹
❺
❻
❼
❶ Display
❷ External Device Port
Connect the USB Cable (sample), AC Charger (sold
separately), and Cradle (sold separately).
❸ (Power/Enter) Key
Use to turn the Wi-Fi router power on / off, to turn the
Display on / off, and to enter or recover from Sleep mode.
Apply selected menus / items, and move to the next screen
or item to input.
❹ ( △) Key
Move to menus / items displayed above.
❺ ( ▽) Key
Move to menus / items displayed below.
❻ USIM Cover
Open the USIM Cover to access the USIM Card Slot.
Keep it closed during normal use.
❼ USIM Card Slot
Insert a USIM Card.
■Examples of Key Operations
• Opening the "Information" Screen
Home Screen Information ScreenHome Screen (Menu Display)
/
• Opening the "Quick Menu" Screen
Home Screen Quick Menu ScreenHome Screen (Menu Display)
/
• Can change selected items each time / is pressed.
What A201NE Can Do
The Wi-Fi® (wireless LAN) router connects various WLAN devices wirelessly to use the
Internet.
Internet Connection WLAN Connection
• Connect with
PC
(USB connection
available)
• Connect
smartphones
etc.
• 5G/4G/LTE/3G
Connect the Wi-Fi
router to the Internet via
5G/4G/LTE/3G.
• Wi-Fi
Connect the Wi-Fi router
to the Internet via WLAN
router at office or SoftBank
Wi-Fi Spot.
• The Wi-Fi router supports IEEE 802.11 a/b/g/n/ac/ax standards.
• IEEE 802.11 b/g/n WLAN devices and Bluetooth devices use the same 2.4 GHz band. If a
WLAN device or Bluetooth device is used near the Wi-Fi router, the communication speed
may be slower due to reception interference.
• Communication speed may decrease depending on the number of WLAN devices
connected.
Power On/Off
■Power On
1 Long-press for about 6 seconds (until "Pocket WiFi 5G" appears on the Display)
If the setting wizard screen appears, confirm the message and select "OK".
Home Screen appears.
• The Wi-Fi router searches for a network to connect to the Internet automatically after powered on.
It is ready for use when mobile network status shows (if recovering from Sleep mode, wait about
15 seconds after the Wi-Fi router powers on).
■Power Off
1 Long-press for about 3 seconds (until the "Power Option" screen appears on
the Display)
2 "Power" (Power OFF)
• "Power Option" screen → "Back" to go back to the Home Screen.
Network Name (SSID) and Password (Encryption Key)
Confirm network name (SSID) and password (Encryption Key: WPA Key) from Wi-Fi
Information screen.
1 In the Home Screen, or → "Information" →
"Info" → "Wi-Fi"
2 In the "Wi-Fi Information" screen, confirm the "SSID"
and "Password"
• You can confirm the SSID Sticker in the packaging
for the default network name (SSID) and password
(Encryption Key).
Installing USIM Card
The IC card that is loaned to you from SoftBank is called a USIM Card, and information,
such as your phone number, etc., is saved on it. Install the USIM Card to use the Wi-Fi
router. For handling the USIM Card, see the following SoftBank Website (Japanese).
https://www.softbank.jp/mobile/support/protect/usim/
• Be sure to power off the Wi-Fi router before doing this.
1 Open the USIM Cover on the side of
the Wi-Fi router
Hook your fingernail or something similar in the
groove, and open it in the direction of the arrow.
Be careful not to hurt your fingernail.
USIM Cover
2 Install the USIM Card
Face the IC chip of the USIM Card upward, insert
the USIM Card straight into the USIM Card Slot,
and press it in with your fingertip or something
similar until it clicks.
Notch
IC (Metal Surface) Chip USIM Card Slot
3 Close the USIM Cover
Use your finger to press on the USIM Cover, to fit it to the Wi-Fi router.
• Do not touch or scratch the IC chip when installing/removing the USIM Card.
Charging the Battery
The built-in battery is not fully charged at time of purchase. Be sure to charge the
battery before the first use.
■Connect to PC Using USB Cable
(Sample)
■Charging with AC Charger
(Sold Separately)
Insert USB Type-C plug of USB Cable
(sample) into the External Device Port of
the Wi-Fi router, and then insert the USB
plug to a USB port on a PC.
Insert USB Type-C plug of AC Charger (sold
separately) into the External Device Port
of the Wi-Fi router, and then insert the
power plug into an AC outlet.
• Use only a compatible AC Charger (sold separately) or the supplied USB Cable (sample) to
charge the Wi-Fi router.
• For compatible charging devices (sold separately), see the SoftBank Website
(https://www.softbank.jp/mobile/products/).
• Also, see the AC Charger (sold separately) user guide.
• Charging is stopped by the battery protection function if charging continues for a long
time.
In this case, disconnect the cable and recharge after a while.
Home Screen
■Layout
Home Screen (Menu Display)
Message
❶ ❷ ❸ ❺ ❼
❹ ❻ ❽ ❾ 󱢳
■Status Indicators
❶ Reception level
(Strong) (Weak) (No signal)
: Data roaming
❷ Network operator
: Connected network operator name
❸ Network type
/ / / : Connected network name
: When connected to the Cradle (sold
separately) and AP/Bridge mode is set
❹ Mobile network connection status
: Connected to mobile network
*: Mobile network not connected
*: Appears also when the Wi-Fi router is set to
Wi-Fi Spot or connected to the Internet using
the Cradle (sold separately) with the LAN
Cable.
❺ Reception level when Wi-Fi Spot
activated
(Strong) (Weak)
❻ Software Update notification
: When software needs to be updated by a
new software release
Automatic updates are executed if specified
conditions are met. See User Guide regarding
specified conditions.
❼ Notification received display
: When notifications are received and unread
  Data speed restriction display
(when subscribed as an individual)
: When low speed-ized communication is
approaching
: Start of low speed-ized communication
: End of low speed-ized communication
❽ State of wired connection
: When connected to PC by USB
: When using Cradle (sold separately)
connected by LAN cable
❾ Wi-Fi®(wireless LAN) band
*: Set to 2.4 GHz (lower right digit is
number of units connected)
: Set to 5 GHz (W56) (lower right digit is
number of units connected)
: Set to 5 GHz (W52) (lower right digit is
number of units connected)
*: Set to 2.4 GHz/5 GHz (W56) (lower right
digit is number of units connected)
*: Set to 2.4 GHz/5 GHz (W52) (lower right
digit is number of units connected)
*: Icon is green when Guest SSID is activated.
Guest SSID cannot be set if the owner SSID's
Wi-Fi Frequency Settings are set to 5 GHz.
󱢳 Battery level
(Full) (Low) : Charging
: Battery power level very low (charge needed)
: When Long Life Charge is set to "ON" (Use)
: When power supply setting is set to "ON"
(Use)
• For details on the displayed menu, see User Guide.
Customer Service
For application or service information, call SoftBank Technical Support Center.
■SoftBank Customer Support
From a SoftBank handset, dial toll free at 157
From a landline/IP phone, dial toll free at 0800-919-0157
Business hours : Call 10:00 am - 7:00 pm / Chat 9:00 am - 8:00 pm
■SoftBank Technical Support Center
From a SoftBank handset, dial toll free at
*
5525
From a landline/IP phone, dial toll free at 0088-21-5525
Business hours : Weekdays 9:00 am - 7:00 pm / Sat., Sun. and holidays 9:00 am - 5:00 pm
Using Web UI
Use Web UI to change settings for the Wi-Fi router, from a computer or mobile device
connected via a WLAN.
1 Activate a computer or WLAN device and connect it to the Wi-Fi router via WLAN
2 Activate web browser and enter "http://web.setting/" in the address bar
3 On the login screen of Web UI, enter the initial login password (admin) in
"Password" → Click or tap "Login"
To confirm the initial login password:
In the Home Screen, or → "Information" → "Info" → "Web UI"
4 Select the Web UI settings menu → Do the various settings
• For details on Web UI settings, see User Guide.
• Web UI can also be used by connecting a PC and the Wi-Fi router with the USB Cable
(sample). Operate from step 2.
• While operating the Wi-Fi router, login to Web UI is not available.
■Main Operations
Item Description
Status Indicators Check reception level, network operator, type of network, Wi-Fi Spot Status,
Connectivity Status, Battery Power Remaining, etc.
Device
Information,
Traffic Counter
Check software version, cradle connection status, Connection Time, Traffic Counter,
number of connected units of Owner SSID, and number of connected units of Guest
SSID.
Network Settings Set Network Basic Settings, Profile Settings, Traffic Counter, etc.
Wi-Fi Spot Set Wi-Fi Spot and SoftBank Wi-Fi Spot settings.
Wi-Fi Settings Set Owner SSID/Guest SSID Common Settings, Owner SSID settings, Guest SSID
settings, MAC Address Filter, and WPS Settings.
ECO Settings Set Battery Power Remaining, Longlife Charging settings, Automatic Energy Saving
Setting, etc.
Security Settings Set Screen Lock Passcode.
Advanced
Settings
Set LAN Settings, IPv4 Packet Filter Settings, IPv6 Packet Filter Settings, Port Mapping
Settings, Domain Filter Settings, and other settings.
Maintenance Change Login Password of Web UI, Saving and Restoration of Settings, Initialization,
Update Software, PIN Code Management, Restart, etc.
Information Check Current Info, Connection History, UPnP Info, Message, Manual, etc.
MAC Address in the Wi-Fi Router
In the Home Screen, or → Select "Information" → "Info" → "MAC" to view
the MAC Address (managed MAC), MAC Address (USB), and MAC Address (Wi-Fi spot).
For details, see User Guide.
Activating WLAN Function
Power on to connect to the Internet automatically and enable WLAN. Confirm that
is shown in the Display of the Wi-Fi router.
■Sleep Mode
• When 5 minutes elapse after no WLAN devices are connected, the Wi-Fi router goes
into Sleep mode (default setting).
• When in Sleep mode, WLAN is OFF.
• To cancel Sleep mode and turn on WLAN to reconnect WLAN devices, long-press
for about 3 seconds (until "Pocket WiFi 5G" appears on the Display).
• You can also cancel Sleep mode by using the Bluetooth function on a smartphone
or tablet to specify a device name (remote wake-up) in the Bluetooth Information
screen of the Wi-Fi router. For details, see User Guide.
• Sleep mode does not occur while charging, while a USB Cable (sample) is connected,
or while in the Cradle (sold separately).
Connecting Windows PC (Windows 11)
This section describes connection operations with screenshots and steps in "Network
Name(SSID(Owner))" at "WPA3/WPA2" security setting for Wi-Fi setting as an example.
1 Activate the PC WLAN function
2 Click on in the task tray
3 Click on to the right of the Wi-Fi icon
4 Select the Wi-Fi router's network name
(A201NE_XXXXXX) → Select "Connect"
5 Enter the Wi-Fi router password
(Encryption Key) → Select "Next"
When connection is successful, the WLAN
connection counter number on the Status
Indicator of the Wi-Fi router increases by one.
Connecting Mac (macOS 12)
This section describes connection operations with screenshots and steps in "Network
Name(SSID(Owner))" at "WPA3/WPA2" security setting for Wi-Fi setting as an example.
1 In Apple menu, select "System
Preferences..." → "Network"
2 Select "Wi-Fi" → "Turn Wi-Fi On"
3 In "Network Name" pulldown list,
select the Wi-Fi router's network name
(A201NE_XXXXXX)
4 Enter the Wi-Fi router password
(Encryption Key) → Checkmark
"Remember this network" → Select
"Join"
When connection is successful, the WLAN
connection counter number on the Status
Indicator of the Wi-Fi router increases by one.
• When the message "Find and join a Wi-Fi
network." appears, uncheck "Ask to join
new networks" in the "Network" screen.
Connecting AndroidTM Device (AndroidTM 12)
Connect an AndroidTM device to the Wi-Fi router to connect to the Internet. This
section describes connection operations with screenshots and steps in "Network
Name(SSID(Owner))" at "WPA3/WPA2" security setting for Wi-Fi setting as an example.
Some operations and screenshots vary by security method.
1 Activate AndroidTM device → In menu,
select "Settings"
2 Turn on Wi-Fi
3 Select the Wi-Fi router's network name
(A201NE_XXXXXX)
4 Enter the Wi-Fi router password
(Encryption Key) → Select "CONNECT"
When connection is successful, the WLAN
connection counter number on the Status
Indicator of the Wi-Fi router increases by one.
• Operation steps for connection vary by
AndroidTM device. For details, refer to the
AndroidTM device user guide.
Connecting iPhone (iOS 15)
This section describes connection operations with screenshots and steps in "Network
Name(SSID(Owner))" at "WPA3/WPA2" security setting for Wi-Fi setting as an example.
• For connecting iPad, see User Guide.
1 Activate iPhone → In the Home Screen
select "Settings" → "Wi-Fi"
2 Turn on Wi-Fi
3 In the "NETWORKS" list, select
the Wi-Fi router's network name
(A201NE_XXXXXX)
4 Enter the Wi-Fi router password
(Encryption Key) → Select "Join" or
"join"
When connection is successful, the WLAN
connection counter number on the Status
Indicator of the Wi-Fi router increases by one.
• Apple, the Apple logo, iPad, iPhone, Mac, Macintosh, and Safari are trademarks of Apple Inc. registered in
the United States and other countries. The trademark "iPhone" is used with a license from Aiphone K.K.
App Store is a service mark of Apple Inc. TM and © 2022 Apple Inc. All rights reserved.
Connecting Using QR Code
Connect to the Wi-Fi router automatically by scanning a QR code shown on the Wi-Fi
router using a camera application.
1 In the Home Screen, or →
"Information" → "Info" → "Wi-Fi" →
"Wi-Fi Information" screen → →
View "QR Code(Owner)"
2 Use the camera
application
of your
smartphone
to read the QR
Code (Owner)
shown on the
Display of the Wi-Fi router
Tap the top or bottom of the camera view screen,
follow the instructions to connect by using the
scanned information.
3 Check that the Wi-Fi signal icon is on
the smartphone screen
• Depending on the version and type of
smartphone you are using, you may not
be able to connect to Wi-Fi by using the
QR code in camera view.
Sample
Connecting to SoftBank Wi-Fi Spot
To use SoftBank Wi-Fi Spot, a four-digit security code set at subscription is required.
Follow these steps to enter.
1 In the Home Screen, or →
"Quick Menu" → "Wi-Fi Spot" → "Wi-Fi
Spot" → "ON"
2 In the Home Screen, or →
"Quick Menu" → "Wi-Fi Spot" → "SB
Spot" → "ON"
3 "Please set login password." screen →
"OK"
4 Input a four-
digit login
password →
"Enter"
• When Wi-Fi Spot is set to "ON" (Use), the
following two functions cannot be used.
• Guest SSID
• Wi-Fi frequency settings "2g5g"
(2.4GHz/5GHz)
Changing Initial Password
To ensure security, change the initial password (login password for Web UI and
Encryption Key) that were set at time of purchase.
1 Log in to Web UI
2 Enter your current login password in
the "Initial Password" field, then enter
your new login password* in the "New
Password" and "Re-Enter" fields, and
then select " 変更 (Set)"
*: Enter from 5 to 64 single-byte characters, -
(hyphens), or _ (underscores).
3 Enter the Encryption Key (password),
and then select " 変更 (Set)"
Enter 8 to 63 digits in alphanumerics (0 to 9,
a to z, A to Z, and symbols), or 64 digits in
hexadecimal (0 to 9, a to f, or A to F).
• Make a note of your login password and
Encryption Key (password) so you do not
forget them.
How to Initialize
Use the following steps to initialize the Wi-Fi router if it does not operate smoothly
or if you want to return it to the default settings. (Any settings you have made will be
deleted.)
1 In the Home Screen, or → "Quick Menu" → "Setting" → "Mainte" → "Init"
* If the screen has locked, you can also display a screen to confirm initialization by long-pressing
and simultaneously for about 10 seconds.
2 Confirm the message → "YES"
3 After restarting, initialization is complete
• Any version updates you have done are not changed by doing an initialization.
Check Here First
See the following items if you have any problems, such as not being able to connect to
the Internet, even after referring to "Quick Start" (this guide) and doing the settings.
Symptom Cause and correction
Cannot connect to the
Internet
•Confirm that you are in a service area.
•The incoming signal strength may be poor. Connect again in a location where
the incoming signal strength is good.
Transmissions are
suddenly cut off
•The incoming signal strength may be poor. Check the reception level, and move
someplace where the incoming signal strength is good.
•Check the Wi-Fi router’s battery level. If the battery level is low, charge it and
then try to connect again.
•Confirm whether the Wi-Fi router and computer, etc. are correctly connected by
Wi-Fi or the USB Cable (sample).
•If the Wi-Fi router and computer, etc. are connected by Wi-Fi, restart the Wi-Fi
router.
•If there are multiple access points set up in the area, or there is signal
interference from other networks, then changing the "Channels" of the Wi-Fi
router may help. (See User Guide.)
Transmission speeds
feel slow
•The condition of the network may be poor. Wait a while, and then try again.
August 2022, First Edition
SoftBank Corp.
Visit SoftBank Shop for assistance.
Model: A201NE
Manufacturer: NEC Platforms, Ltd.
Other manuals for A201NE

1

Other NEC Network Hardware manuals

NEC 78K/0 Series User manual

NEC

NEC 78K/0 Series User manual

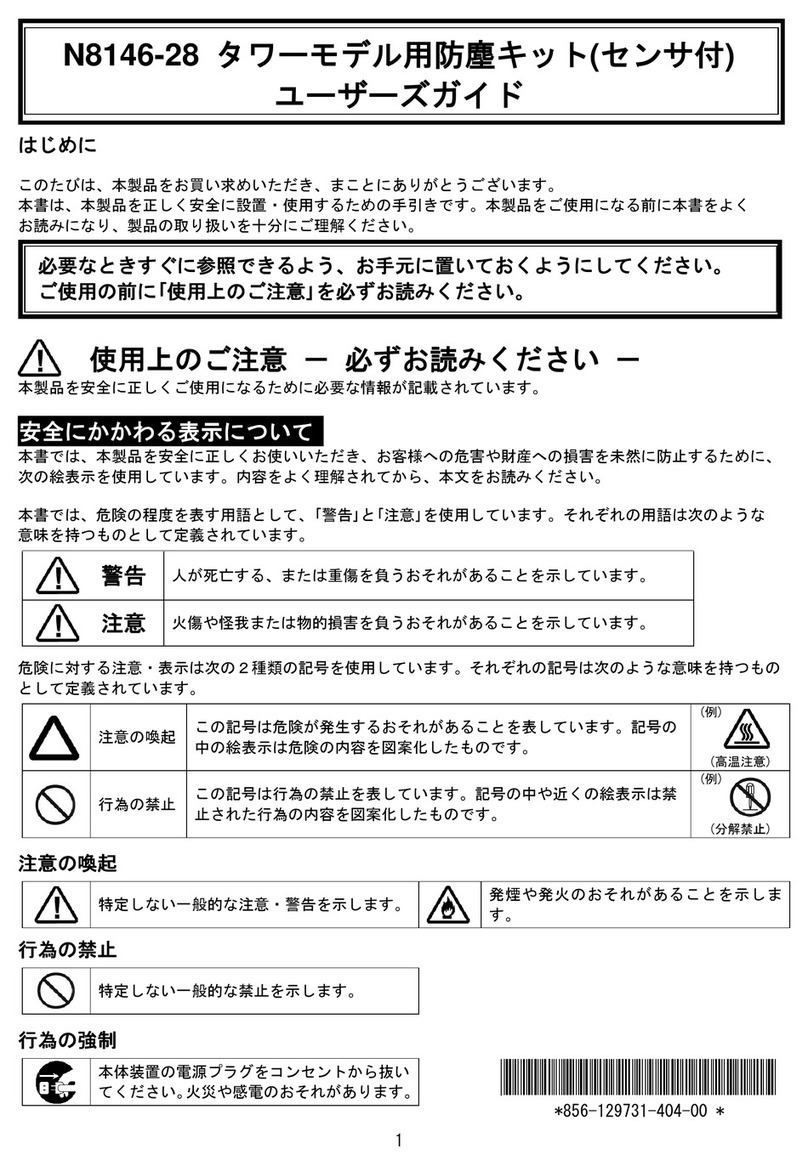
NEC N8146-28 User manual

NEC

NEC N8146-28 User manual

NEC N8151-50 User manual

NEC

NEC N8151-50 User manual

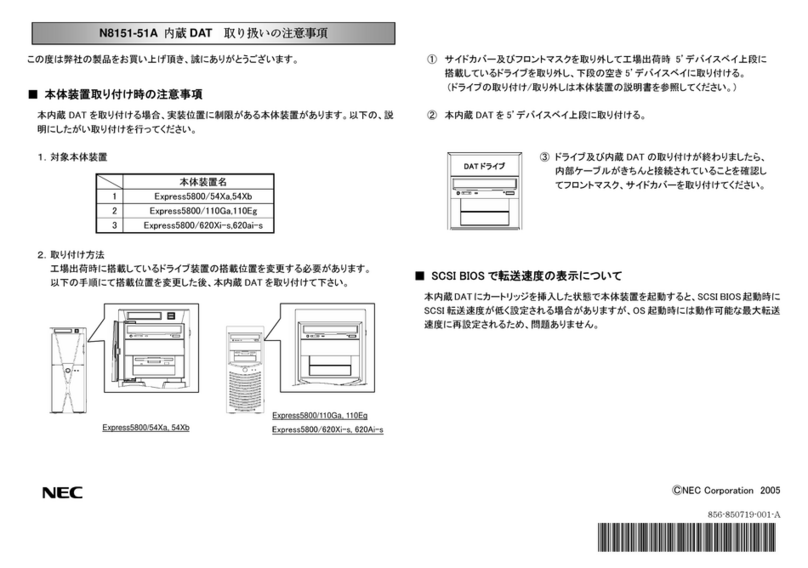
NEC N8151-51A Quick start guide

NEC

NEC N8151-51A Quick start guide

NEC SIGMABLADE N8406-019 User manual

NEC

NEC SIGMABLADE N8406-019 User manual

NEC HS3-40 User manual

NEC

NEC HS3-40 User manual

NEC Aspire Series User manual

NEC

NEC Aspire Series User manual

NEC N8804-007 User manual

NEC

NEC N8804-007 User manual

NEC DSX-160 User manual

NEC

NEC DSX-160 User manual

NEC NRS Expanded Series User manual

NEC

NEC NRS Expanded Series User manual

NEC 200 User manual

NEC

NEC 200 User manual

NEC N8151-46 User manual

NEC

NEC N8151-46 User manual

NEC NVM Series User manual

NEC

NEC NVM Series User manual

NEC Flash Memory Programmer PG-FP3 User manual

NEC

NEC Flash Memory Programmer PG-FP3 User manual

NEC NEAX 2400 IPX User manual

NEC

NEC NEAX 2400 IPX User manual

NEC ipasolink 400 User manual

NEC

NEC ipasolink 400 User manual

NEC NP01LM Series User manual

NEC

NEC NP01LM Series User manual

NEC N8141-41 User guide

NEC

NEC N8141-41 User guide

NEC NEAX 2400 IMX User manual

NEC

NEC NEAX 2400 IMX User manual

NEC UX5000 User manual

NEC

NEC UX5000 User manual

NEC NE3203-153 User manual

NEC

NEC NE3203-153 User manual

NEC P/N 0893416 User manual

NEC

NEC P/N 0893416 User manual

NEC QB-V850ESFJ3 User manual

NEC

NEC QB-V850ESFJ3 User manual

NEC ZB78K0/KF1+CC User manual

NEC

NEC ZB78K0/KF1+CC User manual

Popular Network Hardware manuals by other brands

eks DL-485 Series manual

eks

eks DL-485 Series manual

3xLogic V250-16 quick start guide

3xLogic

3xLogic V250-16 quick start guide

Renesas M38000T2-CPE user manual

Renesas

Renesas M38000T2-CPE user manual

Altronix NetWay8GL installation guide

Altronix

Altronix NetWay8GL installation guide

Net Optics RGN-50SR-IL8 Technical specifications

Net Optics

Net Optics RGN-50SR-IL8 Technical specifications

Ruijie RG-WS6512-L Hardware  installation and reference guide

Ruijie

Ruijie RG-WS6512-L Hardware installation and reference guide

AOR ARL2300 user manual

AOR

AOR ARL2300 user manual

Eneo PNR-5416 user manual

Eneo

Eneo PNR-5416 user manual

Siemens SCALANCE W788-1PRO operating instructions

Siemens

Siemens SCALANCE W788-1PRO operating instructions

3Com 3CRWEASYG73 - 11g Wireless LAN Outdoor user guide

3Com

3Com 3CRWEASYG73 - 11g Wireless LAN Outdoor user guide

MaxComm MJ-200 manual

MaxComm

MaxComm MJ-200 manual

GE MDS TransNET quick start guide

GE

GE MDS TransNET quick start guide

Nortel Passport 8000 Series Installing and maintaining

Nortel

Nortel Passport 8000 Series Installing and maintaining

Moxa Technologies NPort 5200 Series user manual

Moxa Technologies

Moxa Technologies NPort 5200 Series user manual

Draytek VigorSwitch G1240 quick start guide

Draytek

Draytek VigorSwitch G1240 quick start guide

Swann M7285201015E instruction manual

Swann

Swann M7285201015E instruction manual

Synology DiskStation DS1517 Hardware installation guide

Synology

Synology DiskStation DS1517 Hardware installation guide

ADC Double Pair/Line Power G.SHDSL WorldDSL G.S Specification sheet

ADC

ADC Double Pair/Line Power G.SHDSL WorldDSL G.S Specification sheet

manuals.online logo
manuals.online logoBrands
  • About & Mission
  • Contact us
  • Privacy Policy
  • Terms and Conditions

Copyright 2025 Manuals.Online. All Rights Reserved.