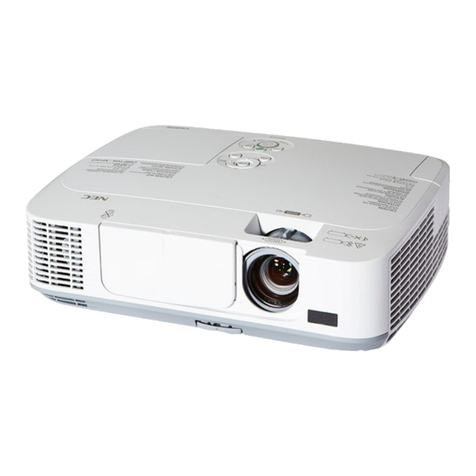
NEC NP-PX700W User manual

Projector
PX750U/PX700W/PX800X
User’s Manual
Model No.
NP-PX750U, NP-PX750UG, NP-PX700W, NP-PX700WG, NP-
PX800X, NP-PX800XG
• Theprojector’sModelNo.indicatedontheprojector’slabelisNP-
PX750U, NP-PX750UG, NP-PX700W, NP-PX700WG, NP-PX800X,
andNP-PX800XGrespectively.
EachmodelisreferredtoasPX750U,PX700W,andPX800Xre-
spectivelyunlessotherwisespecied.

Ver.4/05/12
• DLPandBrilliantColoraretrademarksofTexasInstruments.
• Macintosh,MacOSXandPowerBookaretrademarksofAppleInc.registeredintheU.S.andothercountries.
• Microsoft,Windows,WindowsVista,InternetExplorer,.NETFrameworkandPowerPointareeitheraregistered
trademarkortrademarkofMicrosoftCorporationintheUnitedStatesand/orothercountries.
• MicroSaverisaregisteredtrademarkofKensingtonComputerProductsGroup,adivisionofACCOBrands.
• Adobe,AdobePDF,AdobeReader,andAcrobatareeitherregisteredtrademarksortrademarksofAdobeSystems
IncorporatedintheUnitedStatesand/orothercountries.
• VirtualRemoteToolusesWinI2C/DDClibrary,©NicomsoftLtd.
• HDMI,theHDMILogoandHigh-DenitionMultimediaInterfacearetrademarksorregisteredtrademarksofHDMI
LicensingLLC.
• DisplayPortandDisplayPortComplianceLogoaretrademarksownedbytheVideoElectronicsStandardsAssocia-
tion.
• TrademarkPJLinkisatrademarkappliedfortrademarkrightsinJapan,theUnitedStatesofAmericaandother
countriesandareas.
• Wi-Fi®,Wi-FiAlliance®,andWi-FiProtectedAccess(WPA,WPA2)®areregisteredtrademarksoftheWi-FiAlli-
ance.
• Blu-rayisatrademarkofBlu-rayDiscAssociation
• CRESTRONandROOMVIEWareregisteredtrademarksofCrestronElectronics,Inc.intheUnitedStatesandother
countries.
• Otherproductandcompanynamesmentionedinthisuser’smanualmaybethetrademarksorregisteredtrademarks
oftheirrespectiveholders.
NOTES
(1)Thecontentsofthisuser’smanualmaynotbereprintedinpartorwholewithoutpermission.
(2)Thecontentsofthisuser’smanualaresubjecttochangewithoutnotice.
(3)Greatcarehasbeentakeninthepreparationofthisuser’smanual;however,shouldyounoticeanyquestionable
points,errorsoromissions,pleasecontactus.
(4)Notwithstandingarticle(3),NECwillnotberesponsibleforanyclaimsonlossofprotorothermattersdeemed
toresultfromusingtheProjector.

i
Important Information
Safety Cautions
Precautions
PleasereadthismanualcarefullybeforeusingyourNECprojectorandkeepthemanualhandyforfuturereference.
CAUTION
Toturnoffmainpower,besuretoremovetheplugfrompoweroutlet.
Thepoweroutletsocketshouldbeinstalledasneartotheequipmentaspossible,andshouldbeeasily
accessible.
CAUTION
TOPREVENTSHOCK,DONOTOPENTHECABINET.
THEREAREHIGH-VOLTAGECOMPONENTSINSIDE.
REFERSERVICINGTOQUALIFIEDSERVICEPERSONNEL.
Thissymbolwarnstheuserthatuninsulatedvoltagewithintheunitmaybesufcienttocauseelectrical
shock.Therefore,itisdangeroustomakeanykindofcontactwithanypartinsideoftheunit.
Thissymbolalertstheuserthatimportantinformationconcerningtheoperationandmaintenanceofthis
unithasbeenprovided.
Theinformationshouldbereadcarefullytoavoidproblems.
WARNING:TOPREVENTFIREORSHOCK,DONOTEXPOSETHISUNITTORAINORMOISTURE.
DONOTUSETHISUNIT’SPLUGWITHANEXTENSIONCORDORINANOUTLETUNLESSALLTHEPRONGS
CANBEFULLYINSERTED.
DOC Compliance Notice (for Canada only)
ThisClassBdigitalapparatusmeetsallrequirementsoftheCanadianInterference-CausingEquipmentRegula-
tions.
Machine Noise Information Regulation - 3. GPSGV,
Thehighestsoundpressurelevelislessthan70dB(A)inaccordancewithENISO7779.
Disposing of your used product
EU-widelegislationasimplementedineachMemberStaterequiresthatusedelectricalandelectronicprod-
uctscarryingthemark(left)mustbedisposedofseparatelyfromnormalhouseholdwaste.Thisincludes
projectorsandtheirelectricalaccessoriesorlamps.Whenyoudisposeofsuchproducts,pleasefollowthe
guidanceofyourlocalauthorityand/orasktheshopwhereyoupurchasedtheproduct.
Aftercollectingtheusedproducts,theyarereusedandrecycledinaproperway.Thiseffortwillhelpus
reducethewastesaswellasthenegativeimpactsuchasmercurycontainedinalamptothehumanhealth
andtheenvironmentattheminimumlevel.
ThemarkontheelectricalandelectronicproductsonlyappliestothecurrentEuropeanUnionMember
States.
WARNING
• Whentheprojectorisdamaged,coolinguidsmaycomeoutofinternalpart.
Shouldthishappen,immediatelyturnofftheACsupplytotheprojectorandcontactyourdealer.
DONOTtouchanddrinkthecoolinguid.Whenthecoolinguidsareswallowedorcontactedwithyour
eyes,pleaseconsultmedicalattentionimmediately.Ifyoutouchthecoolinguidwithyourhand,rinse
yourhandswellunderrunningwater.

ii
Important Information
WARNING TO CALIFORNIA RESIDENTS:
Handlingthecablessuppliedwiththisproductwillexposeyoutolead,achemicalknowntotheStateofCalifornia
tocausebirthdefectsorotherreproductiveharm.WASHHANDSAFTERHANDLING.
RF Interference (for USA only)
WARNING
TheFederalCommunicationsCommissiondoesnotallowanymodicationsorchangestotheunitEXCEPTthose
speciedbyNECDisplaySolutionsofAmerica,Inc.inthismanual.Failuretocomplywiththisgovernmentregu-
lationcouldvoidyourrighttooperatethisequipment.Thisequipmenthasbeentestedandfoundtocomplywith
thelimitsforaClassBdigitaldevice,pursuanttoPart15oftheFCCRules.Theselimitsaredesignedtoprovide
reasonableprotectionagainstharmfulinterferenceinaresidentialinstallation.Thisequipmentgenerates,uses,and
canradiateradiofrequencyenergyand,ifnotinstalledandusedinaccordancewiththeinstructions,maycause
harmfulinterferencetoradiocommunications.However,thereisnoguaranteethatinterferencewillnotoccurina
particularinstallation.
Ifthisequipmentdoescauseharmfulinterferencetoradioortelevisionreception,whichcanbedeterminedby
turningtheequipmentoffandon,theuserisencouragedtotrytocorrecttheinterferencebyoneormoreofthe
followingmeasures:
• Reorientorrelocatethereceivingantenna.
• Increasetheseparationbetweentheequipmentandreceiver.
• Connecttheequipmentintoanoutletonacircuitdifferentfromthattowhichthereceiverisconnected.
• Consultthedealeroranexperiencedradio/TVtechnicianforhelp.
ForUKonly:InUK,aBSapprovedpowercordwithmouldedplughasaBlack(veAmps)fuseinstalledforusewith
thisequipment.Ifapowercordisnotsuppliedwiththisequipmentpleasecontactyoursupplier.
Important Safeguards
Thesesafetyinstructionsaretoensurethelonglifeofyourprojectorandtopreventreandshock.Pleasereadthem
carefullyandheedallwarnings.
Installation
• Donotplacetheprojectorinthefollowingconditions:
- onanunstablecart,stand,ortable.
- nearwater,baths,ordamprooms.
- indirectsunlight,nearheaters,orheatradiatingappliances.
- inadusty,smokyorsteamyenvironment.
- onasheetofpaperorcloth,rugsorcarpets.
• Ifyouwishtohavetheprojectorinstalledontheceiling:
- Donotattempttoinstalltheprojectoryourself.
- Theprojectormustbeinstalledbyqualiedtechniciansinordertoensureproperoperationandreducetherisk
ofbodilyinjury.
- Inaddition,theceilingmustbestrongenoughtosupporttheprojectorandtheinstallationmustbeinaccordance
withanylocalbuildingcodes.
- Pleaseconsultyourdealerformoreinformation.

iii
Important Information
WARNING
• Donotcoverthelenswiththelenscaporequivalentwhiletheprojectorison.Doingsocanleadtomeltingof
thecapduetotheheatemittedfromthelightoutput.
• Donotplaceanyobjects,whichareeasilyaffectedbyheat,infrontoftheprojectorlens.Doingsocouldlead
totheobjectmeltingfromtheheatthatisemittedfromthelightoutput.
Orientation and Fan Mode
• Donottilttheprojectortotheleftorright.Doingsomayresultinmalfunction.Thereisnolimitonthetiltangle
upwardordownward.Selecttheappropriateoptionfor[FANMODE]accordingtotheinstallationangle.
• Whenchangingtheprojectororientationorinstallationangle,alsochangethe[SETTING]optionof[FANMODE]
accordingly.Failuretodosomaycauseproductmalfunction.(→page120, 121, 126)
Fire and Shock Precautions
• Ensurethatthereissufcientventilationandthatventsareunobstructedtopreventthebuild-upofheatinsideyour
projector.Allowminimumspacesbetweenyourprojectorandawall.(→pagevandvi)
• Donottrytotouchtheventilationoutletontherearsideofthecabinetasitcanbecomeheatedwhiletheprojectoris
turnedonandimmediatelyaftertheprojectoristurnedoff.Partsoftheprojectormaybecometemporarilyheatedif
theprojectoristurnedoffwiththePOWERbuttonoriftheACpowersupplyisdisconnectedduringnormalprojector
operation.
Usecautionwhenpickinguptheprojector.
• Preventforeignobjectssuchaspaperclipsandbitsofpaperfromfallingintoyourprojector.Donotattempttoretrieve
anyobjectsthatmightfallintoyourprojector.Donotinsertanymetalobjectssuchasawireorscrewdriverintoyour
projector.Ifsomethingshouldfallintoyourprojector,disconnectitimmediatelyandhavetheobjectremovedbya
qualiedservicepersonnel.
• Donotplaceanyobjectsontopoftheprojector.
• Donottouchthepowerplugduringathunderstorm.Doingsocancauseelectricalshockorre.
• Theprojectorisdesignedtooperateonapowersupplyof100-240VAC50/60Hz(PX750U/PX700W/PX800X)/200-
240VAC50/60Hz(PX750UG/PX700WG/PX800XG).Ensurethatyourpowersupplytsthisrequirementbefore
attemptingtouseyourprojector.
• Donotlookintothelenswhiletheprojectorison.Seriousdamagetoyoureyescouldresult.
• Keepanyitems(magnifyingglassetc.)outofthelightpathoftheprojector.Thelightpathbeingprojectedfromthe
lensisextensive,thereforeanykindofabnormalobjectsthatcanredirectlightcomingoutofthelens,cancause
anunpredictableoutcomesuchasareorinjurytotheeyes.
• Donotplaceanyobjects,whichareeasilyaffectedbyheat,infrontofaprojectorexhaustvent.
Doingsocouldleadtotheobjectmeltingorgettingyourhandsburnedfromtheheatthatisemittedfromtheex-

iv
Important Information
haust.
• Handlethepowercordcarefully.Adamagedorfrayedpowercordcancauseelectricshockorre.
- Donotuseanypowercordotherthantheonesuppliedwiththeprojector.
- Donotbendortugthepowercordexcessively.
- Donotplacethepowercordundertheprojector,oranyheavyobject.
- Donotcoverthepowercordwithothersoftmaterialssuchasrugs.
- Donotheatthepowercord.
- Donothandlethepowerplugwithwethands.
• Turnofftheprojector,unplugthepowercordandhavetheprojectorservicedbyaqualiedservicepersonnelunder
thefollowingconditions:
- Whenthepowercordorplugisdamagedorfrayed.
- Ifliquidhasbeenspilledintotheprojector,orifithasbeenexposedtorainorwater.
- Iftheprojectordoesnotoperatenormallywhenyoufollowtheinstructionsdescribedinthisuser’smanual.
- Iftheprojectorhasbeendroppedorthecabinethasbeendamaged.
- Iftheprojectorexhibitsadistinctchangeinperformance,indicatinganeedforservice.
• Disconnectthepowercordandanyothercablesbeforecarryingtheprojector.
• Turnofftheprojectorandunplugthepowercordbeforecleaningthecabinetorreplacingthelamp.
• Turnofftheprojectorandunplugthepowercordiftheprojectorisnottobeusedforanextendedperiodoftime.
• WhenusingaLANcable:
Forsafety,donotconnecttotheconnectorforperipheraldevicewiringthatmighthaveexcessivevoltage.
CAUTION
• Aminimumoftwopersonsarerequiredtocarrytheprojector.Otherwisetheprojectormaytumbleordrop,caus-
ingpersonalinjury.
• Keephandsawayfromthelensmountingportionwhilethelensshiftisinoperation.
Failuretodosocouldresultinhandsbeingpinchedbythemovinglens.
• Donotusethetilt-footforpurposesotherthanoriginallyintended.Misusessuchasgrippingthetilt-footorhang-
ingonthewallcancausedamagetotheprojector.
• Donotsendtheprojectorinthesoftcasebyparceldeliveryserviceorcargoshipment.Theprojectorinsidethe
softcasecouldbedamaged.
• Set[LAMPSELECT]and[LAMPINTERVALMODE]ifyoucontinuetousetheprojectorforconsecutivedays.
(Fromthemenu,select[LAMPMODE]→[LAMPSELECT]and[LAMPINTERVALMODE].)
• BeforeusingDirectPowerOff,besuretoallowatleast20minutesimmediatelyafterturningontheprojectorand
startingtodisplayanimage.
• Donotunplugthepowercordfromthewalloutletorprojectorwhentheprojectorispoweredon.Doingsocan
causedamagetotheACINconnectoroftheprojectorand(or)theprongplugofthepowercord.
ToturnofftheACpowersupplywhentheprojectorispoweredon,usetheprojector'smainpowerswitchora
powerstripequippedwithaswitchandabreaker.
• DonotturnofftheACpowerfor60secondsafterthelampisturnedonandwhilethePOWERindicatorisblink-
ingblue.Doingsocouldcauseprematurelampfailure.
• Useofawalloutletwitha20Aormorecircuitbreakerisrecommended.
Performing Lens Calibration After Installation of the Optional Lens
Besuretoperform[CALIBRATION]afterinstallationorreplacementofthelens.(→page123)Calibrationcorrects
theadjustablezoomandfocusrange.
Thefollowinglensesneedcalibration:
• NP16FL,NP17ZL,NP18ZL,NP19ZL,NP20ZL,NP21ZL
Caution on Carrying the Projector/Handling the Optional Lens
Whenshippingtheprojectorwiththelens,removethelensbeforeshippingtheprojector.Alwaysattachthedustcap
tothelenswheneveritisnotmountedontheprojector.Thelensandthelensshiftmechanismmayencounterdamage
causedbyimproperhandlingduringtransportation.
v
Important Information
Remote Control Precautions
• Handletheremotecontrolcarefully.
• Iftheremotecontrolgetswet,wipeitdryimmediately.
• Avoidexcessiveheatandhumidity.
• Donotshort,heat,ortakeapartbatteries.
• Donotthrowbatteriesintore.
• Ifyouwillnotbeusingtheremotecontrolforalongtime,removethebatteries.
• Ensurethatyouhavethebatteries’polarity(+/−)alignedcorrectly.
• Donotusenewandoldbatteriestogether,orusedifferenttypesofbatteriestogether.
• Disposeofusedbatteriesaccordingtoyourlocalregulations.
Note for US Residents
Thelampsinthisproductcontainmercury.PleasedisposeaccordingtoLocal,StateorFederalLaws.
Lamp and Color Wheel Replacement
• Usethespeciedlampforsafetyandperformance.
• Toreplacethelampandthecolorwheel,followallinstructionsprovidedonpage180and215respectively.
• Besuretoreplacethelampwhenthemessage[THE LAMP HAS REACHED THE END OF ITS USABLE LIFE.
PLEASE REPLACE THE LAMP 1 (OR 2). USE THE SPECIFIED LAMP FOR SAFETY AND PERFORMANCE.]
appears.Ifyoucontinuetousethelampafterthelamphasreachedtheendofitsusablelife,thelampbulbmay
shatter,andpiecesofglassmaybescatteredinthelampcase.Donottouchthemasthepiecesofglassmaycause
injury.
Ifthishappens,contactyourdealerforlampreplacement.
A Lamp Characteristic
Theprojectorhasahigh-pressuremercurylampasalightsource.
Alamphasacharacteristicthatitsbrightnessgraduallydecreaseswithage.Alsorepeatedlyturningthelampon
andoffwillincreasethepossibilityofitslowerbrightness.
Theactuallamplifemayvarydependingupontheindividuallamp,theenvironmentalconditionsandusage.
CAUTION:
• DONOTTOUCHTHELAMPorTHECOLORWHEELimmediatelyafterithasbeenused.Itwillbeextremely
hot.Turntheprojectoroffandthendisconnectthepowercord.Allowatleastonehourforthelamptocoolbefore
handling.
• Whenremovingthelampfromaceiling-mountedprojector,makesurethatnooneisundertheprojector.Glass
fragmentscouldfallifthelamphasbeenburnedout.
Clearance for Installing the Projector
Allowampleclearancebetweentheprojectoranditssurroundingsasshownbelow.
AvoidinstallingtheprojectorinaplacewhereairmovementfromtheHVACisdirectedattheprojector.
HeatedairfromtheHVACcanbetakeninbytheprojector'sintakevent.Ifthishappens,thetemperatureinsidethe
projectorwillrisetoohighcausingtheover-temperatureprotectortoautomaticallyturnofftheprojectorspower.

vi
Important Information
Example 1 – If there are walls on both sides of the projector.
50 cm/19.7" or greater 30 cm/12" or greater
NOTE:
The drawing shows the proper clearance required for the front, back and top of the projector.
Example 2 – If there is a wall behind the projector.
(1) For floor installation:
70 cm/27.6" or greater
Lens
NOTE:
The drawing shows the proper clearance required for the back, sides and top of the projector.
(2) For ceiling mounting:
Ceiling mount unit 30 cm/12" or
greater
70 cm/27.6"
or greater Lens
NOTE:
1. The drawing shows the proper clearance required for the front, sides, back and bottom of the projector.
2. If suspending the projector 30 cm/12 inches away from the ceiling, allow ample clearance for all four sides and the under the
projector.
(3) Upward or downward projection:
Whenusingtheprojectorinanupwardprojectionangle,allow1m/40inchesorgreaterbetweentheexhaustvent
andthewall.
Whenusingtheprojectorinadownwardprojectionangle,allow70cm/27.6inchesorgreaterbetweentheexhaust
ventandthewall.

vii
Important Information
About High Altitude mode
•
Set[FAN
MODE]to[HIGHALTITUDE]whenusingtheprojectorataltitudesapproximately5500feet/1600meters
orhigher.
Usingtheprojectorataltitudesapproximately5500feet/1600metersorhigherwithoutsettingto[HIGHALTITUDE]
cancausetheprojectortooverheatandtheprotectorcouldshutdown.Ifthishappens,waitacoupleminutesand
turnontheprojector.
• Usingtheprojectorataltitudeslessthanapproximately5500feet/1600metersandsettingto[HIGHALTITUDE]
cancausethelamptoovercool,causingtheimagetoicker.Switch[FANMODE]to[AUTO].
• Usingtheprojectorataltitudesapproximately5500feet/1600metersorhighercanshortenthelifeofinternalparts
suchasthelamp.
About Copyright of original projected pictures:
Pleasenotethatusingthisprojectorforthepurposeofcommercialgainortheattractionofpublicattentioninavenue
suchasacoffeeshoporhotelandemployingcompressionorexpansionofthescreenimagewiththefollowingfunc-
tionsmayraiseconcernabouttheinfringementofcopyrightswhichareprotectedbycopyrightlaw.
[ASPECTRATIO],[3DREFORM],[D-ZOOM]featureandothersimilarfeatures.
Turkish RoHS information relevant for Turkish market
EEE Yönetmeliğine Uygundur.
Thisdeviceisnotintendedforuseinthedirecteldofviewatvisualdisplayworkplaces.Toavoidincommodingreec-
tionsatvisualdisplayworkplacesthisdevicemustnotbeplacedinthedirecteldofview.

viii
Table of Contents
Important Information............................................................................................i
1. Introduction.......................................................................................................... 1
1What’sintheBox?......................................................................................................... 1
IntroductiontotheProjector .......................................................................................... 2
CongratulationsonYourPurchaseoftheProjector ................................................. 2
Featuresyou’llenjoy: ............................................................................................... 2
Aboutthisuser’smanual.......................................................................................... 3
PartNamesoftheProjector .......................................................................................... 4
Front/Top.................................................................................................................. 4
Rear ......................................................................................................................... 5
ControlPanel/IndicatorSection ............................................................................... 6
TerminalPanelFeatures .......................................................................................... 7
PartNamesoftheRemoteControl ............................................................................... 8
BatteryInstallation ................................................................................................... 9
RemoteControlPrecautions.................................................................................... 9
OperatingRangeforWirelessRemoteControl........................................................ 9
OperatingEnvironmentforSoftwareIncludedonCD-ROM ........................................ 10
OperatingEnvironment.......................................................................................... 11
2. Projecting an Image (Basic Operation) .............................................. 12
1FlowofProjectinganImage........................................................................................ 12
ConnectingYourComputer/ConnectingthesuppliedPowerCord .............................. 13
UsingtheSuppliedPowerCordStopper ............................................................... 14
TurningontheProjector .............................................................................................. 16
PerformingLensCalibration.................................................................................. 17
NoteonStartupscreen(MenuLanguageSelectscreen)...................................... 18
Iftheprojectedimageisinvertedorupsidedown.................................................. 19
SelectingaSource ...................................................................................................... 20
Selectingthecomputerorvideosource................................................................. 20
AdjustingthePictureSizeandPosition....................................................................... 21
Adjustingtheverticalpositionofaprojectedimage(Lensshift)............................ 22
Focus ..................................................................................................................... 24
Zoom...................................................................................................................... 25
AdjustingtheTiltFeet ............................................................................................ 25
CorrectingKeystoneDistortion.................................................................................... 26
OptimizingComputerSignalAutomatically ................................................................. 28
AdjustingtheImageUsingAutoAdjust.................................................................. 28
TurningofftheProjector .............................................................................................. 29
AfterUse...................................................................................................................... 30
3. Convenient Features..................................................................................... 31
1Blockingthelamplight(LENSSHUTTER).................................................................. 31
TurningofftheImage................................................................................................... 31
FreezingaPicture ....................................................................................................... 31
EnlargingaPicture ...................................................................................................... 32

ix
Table of Contents
ChangingEcoMode/CheckingEnergy-SavingEffectUsingEcoMode[ECO
MODE] ................................................................................................................... 33
CheckingEnergy-SavingEffect[CARBONMETER] ............................................. 34
UsingtheOptionalRemoteMouseReceiver(NP01MR) ............................................ 35
CorrectingHorizontalandVerticalKeystoneDistortion[CORNERSTONE] ................ 37
Cornerstone ........................................................................................................... 37
DisplayingTwoPicturesattheSameTime.................................................................. 40
SelectingthePIPorPICTUREBYPICTUREMode[MODE]................................ 40
[POSITION]............................................................................................................ 41
PreventingtheUnauthorizedUseoftheProjector[SECURITY] ................................. 42
StoringChangesforLensShift,Zoom,andFocus[LENSMEMORY] ........................ 45
UsageExample...................................................................................................... 45
Tostoreyouradjustedvaluesin[REF.LENSMEMORY]:...................................... 45
Tocallupyouradjustedvaluesfrom[REF.LENSMEMORY]:............................... 46
DisplayingaPictureUsing[EDGEBLENDING] .......................................................... 49
BeforeexplaininguseoftheEdgeBlendingfunction............................................. 49
BlackLevelAdjustment.......................................................................................... 52
9-segmentedportionsforBlackLeveladjustment ................................................. 53
ControllingtheProjectorbyUsinganHTTPBrowser ................................................. 54
ProjectingYourComputer’sScreenImagefromtheProjectorviaaNetwork
[NETWORKPROJECTOR].................................................................................... 61
UsingtheProjectortoOperateYourComputerviaaNetwork[REMOTE
DESKTOP]............................................................................................................. 65
4. Using the Viewer ............................................................................................. 71
❶WhatyoucandowiththeViewer................................................................................. 71
❷Preparingpresentationmaterials ................................................................................ 74
❸ProjectingimagesstoredinaUSBmemorydevice .................................................... 75
StartingtheViewer................................................................................................. 75
ExitingtheViewer .................................................................................................. 78
NamesandfunctionsofViewerscreen.................................................................. 79
Vieweroptionsettings............................................................................................ 84
❹Projectingdatafromsharedfolder .............................................................................. 87
Connectingtheprojectortothesharedfolder....................................................... 87
Disconnectingthesharedfolderfromtheprojector ............................................... 90
❺Projectingdatafrommediaserver............................................................................... 91
Settingup“MediaSharing”inWindowsMediaPlayer11 ...................................... 91
Settingup“MediaSharing”inWindowsMediaPlayer12 ...................................... 93
Connectingtheprojectortothemediaserver........................................................ 94
Disconnectingtheprojectorfromthemediaserver ............................................... 95
❻Restrictionsondisplayingles .................................................................................... 96
SomerestrictionsonPowerPointles.................................................................... 96
SomerestrictionsonPDFles .............................................................................. 96
5. Using On-Screen Menu................................................................................ 97
1UsingtheMenus.......................................................................................................... 97
MenuElements............................................................................................................ 98
ListofMenuItems ....................................................................................................... 99

x
Table of Contents
MenuDescriptions&Functions[SOURCE] .............................................................. 102
COMPUTER1,2,and3 ...................................................................................... 102
HDMI.................................................................................................................... 102
DisplayPort........................................................................................................... 102
VIDEO.................................................................................................................. 102
S-VIDEO .............................................................................................................. 102
VIEWER............................................................................................................... 102
NETWORK........................................................................................................... 102
SLOT(foroptionalboard) .................................................................................... 102
ENTRYLIST ........................................................................................................ 102
TESTPATTERN................................................................................................... 102
MenuDescriptions&Functions[ADJUST]................................................................ 106
[PICTURE] ........................................................................................................... 106
[IMAGEOPTIONS] .............................................................................................. 109
[VIDEO]................................................................................................................ 113
UsingtheLensMemoryFunction[LENSMEMORY]........................................... 114
MenuDescriptions&Functions[SETUP].................................................................. 115
[BASIC] ................................................................................................................ 115
[MENU] ................................................................................................................ 119
[INSTALLATION(1)].............................................................................................. 120
[INSTALLATION(2)].............................................................................................. 124
[OPTIONS(1)] ...................................................................................................... 126
[OPTIONS(2)] ...................................................................................................... 128
[EDGEBLENDING] ............................................................................................. 130
MenuDescriptions&Functions[INFO.] .................................................................... 131
[USAGETIME]..................................................................................................... 131
[SOURCE(1)] ....................................................................................................... 132
[SOURCE(2)] ....................................................................................................... 132
[WIREDLAN]....................................................................................................... 132
[WIRELESSLAN(1)]............................................................................................ 133
[WIRELESSLAN(2)]............................................................................................ 133
[VERSION(1)] ...................................................................................................... 133
[VERSION(2)] ...................................................................................................... 134
[OTHERS] ............................................................................................................ 134
8MenuDescriptions&Functions[RESET].................................................................. 135
ReturningtoFactoryDefault[RESET]................................................................. 135
❾ApplicationMenu....................................................................................................... 137
IMAGEEXPRESSUTILITY................................................................................. 137
NETWORKPROJECTOR.................................................................................... 137
REMOTEDESKTOPCONNECTION .................................................................. 138
NETWORKSETTINGS........................................................................................ 139
TOOLS................................................................................................................. 155
6. Connecting to Other Equipment .......................................................... 160
Mountingalens(soldseparately).............................................................................. 160
Mountingthelens................................................................................................. 160
Removingthelens ............................................................................................... 161
MakingConnections.................................................................................................. 162
AnalogRGBsignalconnection ............................................................................ 162
DigitalRGBsignalconnection ............................................................................. 163
ConnectinganExternalMonitor .......................................................................... 165

xi
Table of Contents
ConnectingYourDVDPlayerorOtherAVEquipment.......................................... 166
ConnectingComponentInput .............................................................................. 167
ConnectingHDMIInput........................................................................................ 168
ConnectingtoaWiredLAN ................................................................................. 169
ConnectingtoaWirelessLAN(soldseparately).................................................. 170
MountingawirelessLANunit .............................................................................. 170
ToremovethewirelessLANunit.......................................................................... 172
Stackingprojectors .............................................................................................. 174
7. Maintenance .................................................................................................... 177
1CleaningtheFilters.................................................................................................... 177
CleaningtheLens...................................................................................................... 179
CleaningtheCabinet................................................................................................. 179
ReplacingtheLampandtheFilters........................................................................... 180
ReplacingtheFilters.................................................................................................. 183
8. User Supportware......................................................................................... 185
InstallingSoftwareProgram ...................................................................................... 185
InstallationforWindowssoftware......................................................................... 185
InstallationforMacintoshsoftware....................................................................... 188
ProjectingImagesorVideosfromtheProjectoroveraLAN(ImageExpressUtility
2.0)....................................................................................................................... 189
WhatyoucandowithImageExpressUtility2.0.................................................. 189
ConnectingtheprojectortoaLAN....................................................................... 190
BasicOperationofImageExpressUtility2.0....................................................... 191
ControllingtheProjectoroveraLAN(PCControlUtilityPro4)................................. 200
ProjectingYourMac’sScreenImagefromtheProjectoroveraLAN(Image
ExpressUtility2forMac)..................................................................................... 201
WhatyoucandowithImageExpressUtility2..................................................... 201
Operatingenvironment ........................................................................................ 201
ConnectingtheprojectortoaLAN....................................................................... 201
UsingImageExpressUtility2.............................................................................. 202
OperatingtheProjectorViatheLAN(VirtualRemoteTool)....................................... 205
ConvertingPowerPointlestoSlides(ViewerPPTConverter3.0)........................... 208
9. Appendix............................................................................................................. 210
Throwdistanceandscreensize ................................................................................ 210
Tablesofscreensizesanddimensions ............................................................... 210
Lenstypesandthrowdistance ............................................................................ 211
Lensshiftingrange............................................................................................... 214
❷ReplacingtheColorWheel(included) ....................................................................... 215
StoringUnusedColorWheel:............................................................................... 217
❸MountingtheOptionalBoard(soldseparately) ......................................................... 218
CompatibleInputSignalList...................................................................................... 220
Specications ............................................................................................................ 222
Optical.................................................................................................................. 222
Electrical .............................................................................................................. 222
Mechanical........................................................................................................... 223

xii
Table of Contents
Optionlens........................................................................................................... 224
CabinetDimensions .................................................................................................. 225
PinAssignmentsofD-SubCOMPUTERInputConnector ........................................ 226
Troubleshooting ......................................................................................................... 227
IndicatorMessages.............................................................................................. 227
CommonProblems&Solutions........................................................................... 229
Ifthereisnopicture,orthepictureisnotdisplayedcorrectly............................... 231
PCControlCodesandCableConnection................................................................. 232
TroubleshootingCheckList........................................................................................ 233
TravelCareGuide....................................................................................................... 235
REGISTERYOURPROJECTOR!(forresidentsintheUnitedStates,Canada,and
Mexico) ................................................................................................................ 236

1
1. Introduction
1What’s in the Box?
Makesureyourboxcontainseverythinglisted.Ifanypiecesaremissing,contactyourdealer.
Pleasesavetheoriginalboxandpackingmaterialsifyoueverneedtoshipyourprojector.
Projector
Dust cap for lens (79TM1061)
* The projector is shipped without
a lens. For the types of lens and
throw distances, see page 211,
212, 213.
Remote control
(7N900961)
AA alkaline batteries
(x2) Power cord
(US: 79TM1001 for AC 120 V
and 79TM1011 for AC 200 V)
(EU: 79TM1021)
• ImportantInformation(ForNorth
America: 7N8N1993) (For Other
countries than North America:
7N8N1993 and 7N8N2003)
• QuickSetupGuide(ForNorth
America: 7N8N2012) (For Other
countries than North America:
7N8N2012 and 7N8N2022)
NEC Projector CD-ROM
User’s manual (PDF) and the
utility software
(7N951653)
For North America only:
Limited warranty
For customers in Europe:
You will find our current
validGuaranteePolicyon
our Web Site:
www.nec-display-solutions.
com
Lens theft prevention
screw (79TM1071)
This screw makes it
difficult to remove the
lens mounted on the
projector. (→page
161)
6-segment color wheel
(79TM1081)
Stacking holders (x 3)
(79TM1101)
Power cord stopper
(79TM1111)
Anti-theft cap for LAN unit (for
optional wireless LAN unit)
(79TM1091)
Attaching/Removing the Dust Cap
Toremovethedustcapfromthe
projector,pulltheupperendofthe
dustcapwhileclutchingit.
Toattachthedustcaptotheprojector,locatethecatchonthelowerendof
thedustcapandplaceitintotheopeningoftheprojectorwiththepointofa
trianglemark()facingdownward(inthegurebelow),andthenpushthe
upperendofthedustcapagainsttheprojectortoplacethecatchesintothe
slotwhileclutchingthehandle(inthegurebelow).

2
1. Introduction
Introduction to the Projector
Thissectionintroducesyoutoyournewprojectoranddescribesthefeaturesandcontrols.
Congratulations on Your Purchase of the Projector
Thisprojectorisoneoftheverybestprojectorsavailabletoday.Theprojectorenablesyoutoprojectpreciseimages
upto500inches(200or300inchesdependingontheoptionallens)across(measureddiagonally)fromyourPCor
Macintoshcomputer(desktopornotebook),VCR,DVDplayer,ordocumentcamera.
Youcanusetheprojectoronatabletoporcart,youcanusetheprojectortoprojectimagesfrombehindthescreen,
andtheprojectorcanbepermanentlymountedonaceiling*1.Theremotecontrolcanbeusedwirelessly.
*1 Donotattempttomounttheprojectoronaceilingyourself.
Theprojectormustbeinstalledbyqualiedtechniciansinordertoensureproperoperationandreducetherisk
ofbodilyinjury.
Inaddition,theceilingmustbestrongenoughtosupporttheprojectorandtheinstallationmustbeinaccordance
withanylocalbuildingcodes.Pleaseconsultyourdealerformoreinformation.
Features you’ll enjoy:
• DLP®projector with high resolution and high brightness
Highresolutiondisplay–PX750U:WUXGA(1920×1200)nativeresolution(16:10),PX700W:WXGA(1280×
800)nativeresolution(16:10),PX800X:XGA(1024×768)nativeresolution(4:3)
• Widerangeofoptionallensesselectableaccordingtotheplaceofinstallation
Thisprojectorsupports6types*ofoptionallenses,providingaselectionoflensesadaptedforavarietyofinstallation
requirements.
Inaddition,thelensescanbemountedandremovedinonetouch.
Notethatnolensismounteduponshipmentfromthefactory.Pleasepurchaseoptionallensesseparately.
* 5typesforPX700WandPX800X
• DualLampsystem
Twolampsystemoffersincreasedlamplifeandenergysavingsalongwithredundancy.
• Doublestackableforbuiltinredundancyandhighlightoutputrequirements
Doublestackingprojectorsincreasethebrightnessandvisibility.
• EDGEBLENDINGfunction
TheEDGEBLENDINGfunctionallowsa multi-screen imagewithhighresolutiontobedisplayedonalarge
screen.
• PoweredLensShift,Zoom,andFocusofferinstallationexibility
PoweredHorizontalandVerticallensshiftprovidestheabilitytoprojectfromoffcenterscreeninstallations.Powered
zoomandfocusprovidequickandeasyadjustment.
• 360°installationangle(tilt-free)
Theprojectorcanbeinstalledatanyangle(360°).
Note,however,thatthe“fanmode”settingmustbechangedaccordingtotheangleofinstallation.
Also,theprojectorcannotbeinstalledtiltedtotheleftorright.
• Twotypesofcolorwheels(6-segmentwhite)and(6-segmentcolor)interchangeable
Theprojectorisshippedwiththe6-segmentwhite colorwheelinstalled.Youcan replaceitwith theincluded
6-segmentcolorwheeltocreateimageswithmorebrilliantcolorstomatchthesource.
• Widerangeofinput/outputconnectors(HDMI,DisplayPort,BNC,etc.)
Theprojectorisequippedwithavarietyofinput/outputconnectors:computer(analog),5BNC,HDMI,DisplayPort,
Video,S-Video,etc.(Thecomputer(analog)andBNCconnectorsalsosupportcomponentinputs.)
Theprojector’sHDMIandDisplayPortinputconnectorssupportHDCP.

3
1. Introduction
• Slotforoptionalboard
Theprojectorhasaslotfortheoptionalboard(SB-01HCorotherNEC’sinterfaceboards).
• Highpicturequalityprocessingcircuit
TheReon-VXvideoprocessorisusedtoprojecthighqualityimages.
• Energy-savingdesignwithastandbypowerconsumptionof0.4Wattsorless
Whentheon-screenmenu’sstandbymodeissetto“PowerSaving”,thepowerconsumptioninthestandbymode
is0.2W(100-130VAC)/0.4W(200-240VAC).
• “Ecomode”forlowpowerconsumptionand“CarbonMeter”display
Theprojectorisequippedwith an“ecomode” forreducing powerconsumption duringuse. Furthermore,the
power-savingeffectwhentheecomodeissetisconvertedintotheamountofreductionsofCO2emissionsand
thisisindicatedontheconrmationmessagedisplayedwhenthepoweristurnedoffandat“Information”onthe
on-screenmenu(CARBONMETER).
• Seamlessswitchfunctionforsmootherscreenchangeswhenswitchingthesignal(forPX750Uonly)
Whentheinputconnectorisswitched,theimagedisplayedbeforeswitchingisheldsothatthatprojectorcanwrite
thenewimagewithoutgoingtoblack.
• Simultaneousdisplayof2images(PIP/PICTUREBYPICTURE)
Twoimagescanbeprojectedsimultaneouslywithasingleprojector.
Therearetwotypesoflayoutsforthetwoimages:“picture-in-picture”inwhichasub-pictureisdisplayedonthe
mainpicture,and“picture-by-picture”inwhichthemainandsubpicturesaredisplayednexttoeachother.
• Securityfunctionforpreventingunauthorizeduse
Thisprojectorisequippedwiththefollowingsecurityfunctions:
- Passwordsecurity:Whenapasswordissetintheon-screenmenu,ascreentoinputthepasswordappears
whentheprojector’spoweristurnedon.
- Theftpreventionlock:AsecuritycablecompatiblewithKensingtonlockscanbeconnectedtotheprojector.
• Wired/wirelessLANcompatibility(wirelessLANunitsoldseparately)
TheprojectorisequippedwithaLANport(RJ-45)forconnectiontoawiredLANfortransferringimagesfroma
computertotheprojector,controllingtheprojectorfromacomputer,etc.
Furthermore,theprojectorcanbeusedinawirelessLANbymountingtheseparatelysoldwirelessLANunit
(NP02LM).
• Convenientutilitysoftware(UserSupportware)providedasstandard
Threeutilitysoftwareprograms(ImageExpressUtility2.0,PCControlUtilityPro4,ImageExpressUtility2forMac)
areprovidedontheincludedNECProjectorCD-ROM.Twomoreutilitysoftwareprogramscanbedownloaded
fromourwebsite:VirtualRemoteToolandViewerPPTConverter3.0.
• LAN-compatibleviewerfunction
StillandmovingimagesinsharedfoldersonacomputerconnectedbywiredorwirelessLANcanbeprojected
withtheprojector’sviewer.
- TheviewersupportstheWindowsMediaPlayer11’s“mediasharing”function.
• CRESTRONROOMVIEWcompatibility
TheprojectorsupportsCRESTRONROOMVIEW,allowingmultipledevicesconnectedinthenetworktobemanaged
andcontrolledfromacomputerorcontroller.
About this user’s manual
Thefastestwaytogetstartedistotakeyourtimeanddoeverythingrightthersttime.Takeafewminutesnowto
reviewtheuser’smanual.Thismaysaveyoutimelateron.Atthebeginningofeachsectionofthemanualyou’llnd
anoverview.Ifthesectiondoesn’tapply,youcanskipit.

4
1. Introduction
Part Names of the Projector
Front/Top
Thelensissoldseparately.ThedescriptionbelowisforwhentheNP18ZLlensismountedonthePX750U.
Control Panel
(→page 6)
Lens
Ventilation (inlet)
Filter Cover
Remote Sensor (located on the
front and the rear)
(→page 9)
Remote Sensor
(→page 9)
Terminal Panel
(→page 7)
IndicatorSection
(→page 6)
Lens Release Button
(→page 161)
ACInput
Connect the supplied power cord's
three-pin plug here, and plug the
other end into an active wall outlet.
(→page 13)
Main Power Switch
USB (LAN) Port (for optional Wire-
less LAN Unit) (→page 170)
Lens Cap
(The lens cap is attached to the
lens.)
Adjustable Tilt Foot
(→page 25)
Adjustable Tilt Foot
(→page 25)
Built-in Security Slot ( )*
Slot for Power Cord Stopper (→
page 14)
* ThissecurityslotsupportstheMicroSaver®SecuritySystem.

5
1. Introduction
Rear
CAUTION:
PartsoftheprojectormaybecometemporarilyheatediftheprojectoristurnedoffwiththePOWERbuttonorifthe
ACpowersupplyisdisconnectedduringnormalprojectoroperation.
Usecautionwhenpickinguptheprojector.
Remote Sensor (located on the
front and the rear)
(→page 9)
Color Wheel Cover
(→page 215)
Ventilation (inlet)
Filter Cover (→page 177, 183)
Ventilation (outlet)
Heated air is exhausted from here.
Lamp Cover (1)
(→page 181, 182)
Lamp Cover (2)
(→page 181, 182)
Stacking Holder
(3 locations)

6
1. Introduction
Control Panel/Indicator Section
1. (POWER) Button (→page17, 29)
2. POWER Indicator (→page17, 29, 227)
3. STATUS Indicator (→page227)
4. LAMP1andLAMP2Indicators(→page180, 228)
5. TEMP.Indicator(→page228)
6. SHUTTERIndicator(→page228)
7. SOURCEButton(→page20)
8. AUTO ADJ. Button (→page28)
9. 3D REFORM Button (→page37)
10.ORIENTATION/CALIBRATIONButton(→page17, 19)
11. SHUTTER/HOME POSITION Button (→page22, 31)
NOTE: The “home position” for lens shift position is not the center position of the adjustable lens shift range. The home position
should be used for lens installation.
12. MENU Button (→page97)
13. Buttons (→page97)
14.ENTERButton(→page97)
15.EXITButton(→page97)
16.LENSSHIFT Buttons (→page22)
17.FOCUS+/−Buttons(→page24)
18.ZOOM+/−Buttons(→page25)
1
12 13 1514 16 17 18
78 9 10 11 2 3 4 5 6
Other manuals for NP-PX700W
3
This manual suits for next models
11
Table of contents
Other NEC Projector manuals

NEC
NEC NC2041L User manual

NEC
NEC NP-VE281 User manual

NEC
NEC LT25 Series User manual

NEC
NEC NP600S XGA User manual

NEC
NEC LT75Z - MultiSync SVGA DLP Projector Assembly instructions

NEC
NEC NP610 Series User manual

NEC
NEC M282X User manual

NEC
NEC VT45 User manual

NEC
NEC ME403U User manual

NEC
NEC VT460 User manual