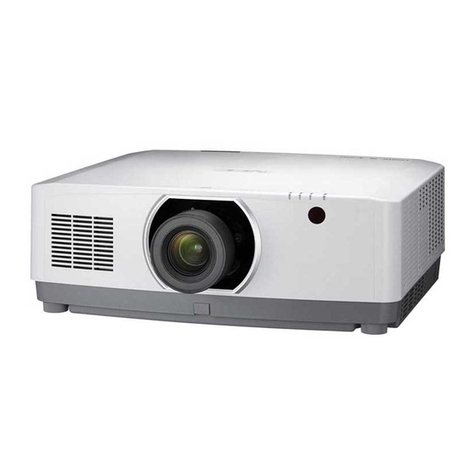
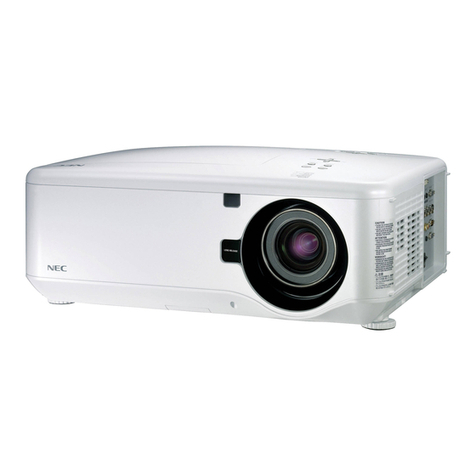
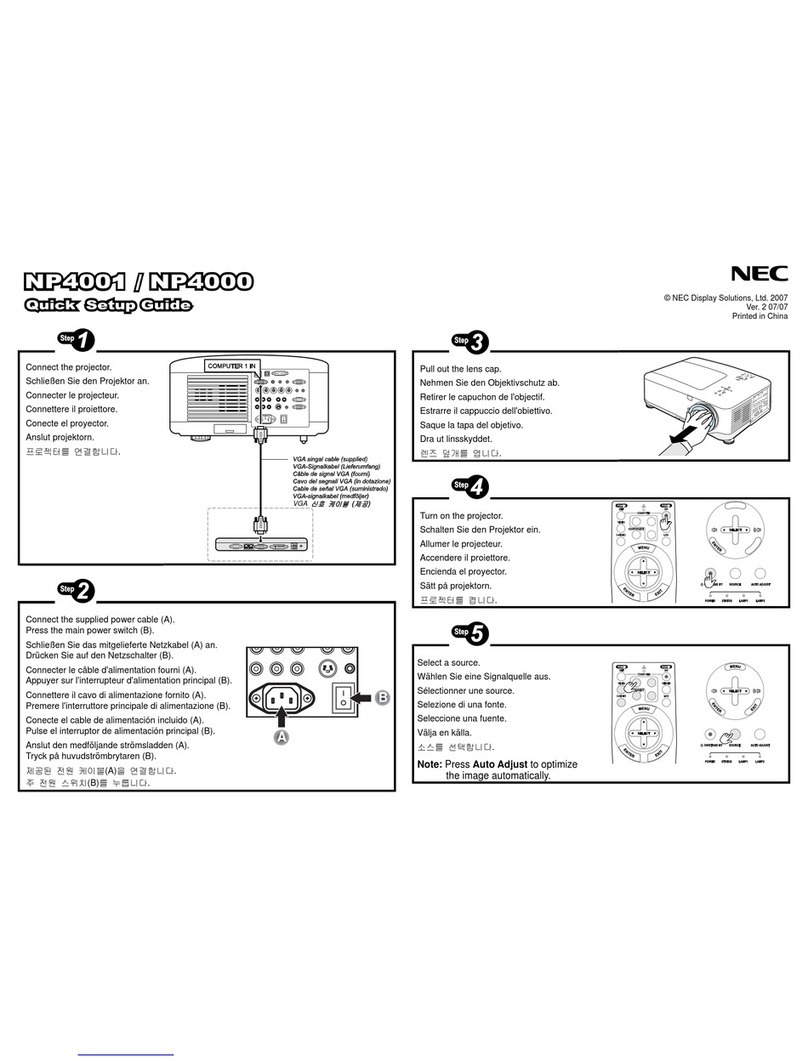
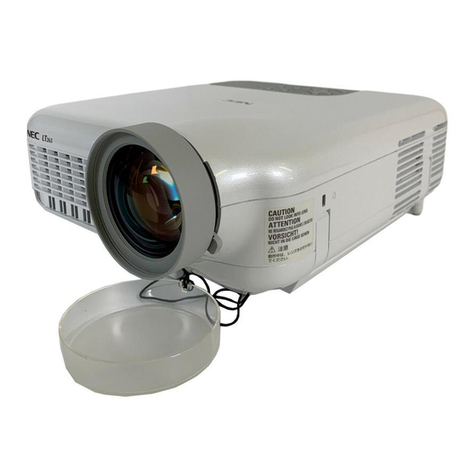
NEC P452H User manual

Projector
P502H/P452H
P502W/P452W
User’s Manual
Model No.
NP-P502H, NP-P452H, NP-P502W, NP-P452W

Ver. 1 10/15
• Apple,Mac,MacOS,MacBook,andiMacaretrademarksofAppleInc.registeredintheU.S.andothercountries.
• AppStoreisaservicemarkofAppleInc.
• IOSisatrademarkorregisteredtrademarkofCiscointheU.S.andothercountriesandisusedunderlicense.
• Microsoft,Windows,WindowsVista,InternetExplorer,.NETFrameworkandPowerPointareeitheraregistered
trademarkortrademarkofMicrosoftCorporationintheUnitedStatesand/orothercountries.
• MicroSaverisaregisteredtrademarkofKensingtonComputerProductsGroup,adivisionofACCOBrands.
• VirtualRemoteToolusesWinI2C/DDClibrary,©NicomsoftLtd.
• ThetermsHDMIandHDMIHigh-DenitionMultimediaInterface,andtheHDMILogoaretrademarksorregistered
trademarksofHDMILicensingLLCintheUnitedStatesandothercountries.
• HDBaseT™isatrademarkofHDBaseTAlliance.
• DLPisatrademarkofTexasInstruments.
• TrademarkPJLinkisatrademarkappliedfortrademarkrightsinJapan,theUnitedStatesofAmericaandother
countriesandareas.
• Wi-Fi®,Wi-FiAlliance®,Wi-FiProtectedAccess®,Wi-FiDirect®areregisteredtrademarksoftheWi-FiAlliance®.
WPA™,WPA2™,Wi-FiProtectedSetup™,Miracast™aretrademarksoftheWi-FiAlliance®.
• Blu-rayisatrademarkofBlu-rayDiscAssociation
• CRESTRONandROOMVIEWareregisteredtrademarksofCrestronElectronics,Inc.intheUnitedStatesandother
countries.
• EthernetiseitheraregisteredtrademarkortrademarkofFujiXeroxCo.,Ltd.
• GooglePlayandAndroidaretrademarksofGoogleInc.
• Otherproductnamesandcompanylogosmentionedinthisuser’smanualmaybethetrademarksorregistered
trademarksoftheirrespectiveholders.
• GPL/LGPLSoftwareLicenses
TheproductincludessoftwarelicensedunderGNUGeneralPublicLicense(GPL),GNULesserGeneralPublic
License(LGPL),andothers.
Formoreinformationoneachsoftware,see“readme.pdf”insidethe“aboutGPL&LGPL”folderonthesuppliedCD-
ROM.
NOTES
(1)Thecontentsofthisuser’smanualmaynotbereprintedinpartorwholewithoutpermission.
(2)Thecontentsofthisuser’smanualaresubjecttochangewithoutnotice.
(3)Greatcarehasbeentakeninthepreparationofthisuser’smanual;however,shouldyounoticeanyquestionable
points,errorsoromissions,pleasecontactus.
(4)Notwithstandingarticle(3),NECwillnotberesponsibleforanyclaimsonlossofprotorothermattersdeemed
toresultfromusingtheProjector.

i
Important Information
Safety Cautions
Precautions
PleasereadthismanualcarefullybeforeusingyourNECprojectorandkeepthemanualhandyforfuturereference.
CAUTION
Toturnoffmainpower,besuretoremovetheplugfrompoweroutlet.
Thepoweroutletsocketshouldbeinstalledasneartotheequipmentaspossible,andshouldbeeasily
accessible.
CAUTION
TOPREVENTSHOCK,DONOTOPENTHECABINET.
THEREAREHIGH-VOLTAGECOMPONENTSINSIDE.
REFERSERVICINGTOQUALIFIEDSERVICEPERSONNEL.
Thissymbolwarnstheuserthatuninsulatedvoltagewithintheunitmaybesufcienttocauseelectrical
shock.Therefore,itisdangeroustomakeanykindofcontactwithanypartinsideoftheunit.
Thissymbolalertstheuserthatimportantinformationconcerningtheoperationandmaintenanceofthis
unithasbeenprovided.
Theinformationshouldbereadcarefullytoavoidproblems.
WARNING:TOPREVENTFIREORSHOCK,DONOTEXPOSETHISUNITTORAINORMOISTURE.
DONOTUSETHISUNIT’SPLUGWITHANEXTENSIONCORDORINANOUTLETUNLESSALLTHEPRONGS
CANBEFULLYINSERTED.
DOC Compliance Notice (for Canada only)
ThisClassBdigitalapparatuscomplieswithCanadianICES-003.
Machine Noise Information Regulation - 3. GPSGV,
Thehighestsoundpressurelevelislessthan70dB(A)inaccordancewithENISO7779.
Disposing of your used product
EU-widelegislationasimplementedineachMemberStaterequiresthatusedelectricalandelectronicprod-
uctscarryingthemark(left)mustbedisposedofseparatelyfromnormalhouseholdwaste.Thisincludes
projectorsandtheirelectricalaccessories.Whenyoudisposeofsuchproducts,pleasefollowtheguidance
ofyourlocalauthorityand/orasktheshopwhereyoupurchasedtheproduct.
Aftercollectingtheusedproducts,theyarereusedandrecycledinaproperway.Thiseffortwillhelpusreduce
thewastesaswellasthenegativeimpacttothehumanhealthandtheenvironmentattheminimumlevel.
ThemarkontheelectricalandelectronicproductsonlyappliestothecurrentEuropeanUnionMemberStates.
For EU:Thecrossed-outwheeledbinimpliesthatusedbatteriesshouldnotbeputtothegeneralhousehold
waste!Thereisaseparatecollectionsystemforusedbatteries,toallowpropertreatmentandrecyclingin
accordancewithlegislation.
According the EU directive 2006/66/EC, the battery can’t be disposed improperly. The battery shall be sepa-
rated to collect by local service.

ii
Important Information
WARNING TO CALIFORNIA RESIDENTS:
Handlingthecablessuppliedwiththisproductwillexposeyoutolead,achemicalknowntotheStateofCalifornia
tocausebirthdefectsorotherreproductiveharm.WASHHANDSAFTERHANDLING.
RF Interference (for USA only)
WARNING
TheFederalCommunicationsCommissiondoesnotallowanymodicationsorchangestotheunitEXCEPTthose
speciedbyNECDisplaySolutionsofAmerica,Inc.inthismanual.Failuretocomplywiththisgovernmentregu-
lationcouldvoidyourrighttooperatethisequipment.Thisequipmenthasbeentestedandfoundtocomplywith
thelimitsforaClassBdigitaldevice,pursuanttoPart15oftheFCCRules.Theselimitsaredesignedtoprovide
reasonableprotectionagainstharmfulinterferenceinaresidentialinstallation.Thisequipmentgenerates,uses,and
canradiateradiofrequencyenergyand,ifnotinstalledandusedinaccordancewiththeinstructions,maycause
harmfulinterferencetoradiocommunications.However,thereisnoguaranteethatinterferencewillnotoccurina
particularinstallation.
Ifthisequipmentdoescauseharmfulinterferencetoradioortelevisionreception,whichcanbedeterminedby
turningtheequipmentoffandon,theuserisencouragedtotrytocorrecttheinterferencebyoneormoreofthe
followingmeasures:
• Reorientorrelocatethereceivingantenna.
• Increasetheseparationbetweentheequipmentandreceiver.
• Connecttheequipmentintoanoutletonacircuitdifferentfromthattowhichthereceiverisconnected.
• Consultthedealeroranexperiencedradio/TVtechnicianforhelp.
ForUKonly:InUK,aBSapprovedpowercordwithmouldedplughasaBlack(veAmps)fuseinstalledforusewith
thisequipment.Ifapowercordisnotsuppliedwiththisequipmentpleasecontactyoursupplier.
Important Safeguards
Thesesafetyinstructionsaretoensurethelonglifeofyourprojectorandtopreventreandshock.Pleasereadthem
carefullyandheedallwarnings.
Installation
• Donotplacetheprojectorinthefollowingconditions:
- Outdoors
- onanunstablecart,stand,ortable.
- nearwater,baths,ordamprooms.
- indirectsunlight,nearheaters,orheatradiatingappliances.
- inadusty,smokyorsteamyenvironment.
- onasheetofpaperorcloth,rugsorcarpets.
• Donotinstallandstoretheprojectorinthebelowcircumstances.Failuretodosomaycauseofmalfunction.
- Inpowerfulmagneticelds.
- Incorrosivegasenvironment.
• Ifyouwishtohavetheprojectorinstalledontheceiling:
- Donotattempttoinstalltheprojectoryourself.
- Theprojectormustbeinstalledbyqualiedtechniciansinordertoensureproperoperationandreducetherisk
ofbodilyinjury.
- Inaddition,theceilingmustbestrongenoughtosupporttheprojectorandtheinstallationmustbeinaccordance
withanylocalbuildingcodes.
- Pleaseconsultyourdealerformoreinformation.

iii
Important Information
WARNING
• Donotcoverthelenswiththelenscaporequivalentwhiletheprojectorison.Doingsocanleadtomeltingof
thecapduetotheheatemittedfromthelightoutput.
• Donotplaceanyobjects,whichareeasilyaffectedbyheat,infrontoftheprojectorlens.Doingsocouldlead
totheobjectmeltingfromtheheatthatisemittedfromthelightoutput.
• Donotsprayammablegastogetridofdustanddirtthataccumulateonthelensandthelters.Doingsocould
causeare.
Place the projector in a horizontal position
Thetiltangleoftheprojectorshouldnotexceed4degrees,norshouldtheprojectorbeinstalledinanywayotherthan
thedesktopandceilingmount,otherwiselamplifecoulddecreasedramatically.
Fire and Shock Precautions
• Ensurethatthereissufcientventilationandthatventsareunobstructedtopreventthebuild-upofheatinsideyour
projector.Allowatleast4inches(10cm)ofspacebetweenyourprojectorandawall.
• Donottrytotouchtheexhaustventsontherightside(whenseenfromthefront)asitcanbecomeheatedwhilethe
projectoristurnedonandimmediatelyaftertheprojectoristurnedoff.Partsoftheprojectormaybecometemporarily
heatediftheprojectoristurnedoffwiththePOWERbutton.
Usecautionwhenpickinguptheprojector.
• Preventforeignobjectssuchaspaperclipsandbitsofpaperfromfallingintoyourprojector.Donotattempttoretrieve
anyobjectsthatmightfallintoyourprojector.Donotinsertanymetalobjectssuchasawireorscrewdriverintoyour
projector.Ifsomethingshouldfallintoyourprojector,disconnectitimmediatelyandhavetheobjectremovedbya
qualiedservicepersonnel.
• Donotplaceanyobjectsontopoftheprojector.
• Donottouchthepowerplugduringathunderstorm.Doingsocancauseelectricalshockorre.
• Theprojectorisdesignedtooperateonapowersupplyof100-240VAC50/60Hz.Ensurethatyourpowersupply
tsthisrequirementbeforeattemptingtouseyourprojector.
• Donotlookintothelenswhiletheprojectorison.Seriousdamagetoyoureyescouldresult.
• Keepanyitemssuchasmagnifyingglassoutofthelightpathoftheprojector.Thelightbeingprojectedfromthe
lensisextensive,thereforeanykindofabnormalobjectsthatcanredirectlightcomingoutofthelens,cancause
unpredictableoutcomesuchasreorinjurytotheeyes.
• Donotplaceanyobjects,whichareeasilyaffectedbyheat,infrontofaprojectorexhaustvent.
Doingsocouldleadtotheobjectmeltingorgettingyourhandsburnedfromtheheatthatisemittedfromtheexhaust
vent.

iv
Important Information
• Donotsplashwaterovertheprojector.Doingsocancauseelectricalshockorre.Iftheprojectorgetswet,turnoff
theprojector,unplugthepowercordandhavetheprojectorservicedbyaqualiedservicepersonnel.
• Handlethepowercordcarefully.Adamagedorfrayedpowercordcancauseelectricshockorre.
- Donotuseanypowercordotherthantheonesuppliedwiththeprojector.
- Donotbendortugthepowercordexcessively.
- Donotplacethepowercordundertheprojector,oranyheavyobject.
- Donotcoverthepowercordwithothersoftmaterialssuchasrugs.
- Donotheatthepowercord.
- Donothandlethepowerplugwithwethands.
• Turnofftheprojector,unplugthepowercordandhavetheprojectorservicedbyaqualiedservicepersonnelunder
thefollowingconditions:
- Whenthepowercordorplugisdamagedorfrayed.
- Ifliquidhasbeenspilledintotheprojector,orifithasbeenexposedtorainorwater.
- Iftheprojectordoesnotoperatenormallywhenyoufollowtheinstructionsdescribedinthisuser’smanual.
- Iftheprojectorhasbeendroppedorthecabinethasbeendamaged.
- Iftheprojectorexhibitsadistinctchangeinperformance,indicatinganeedforservice.
• Disconnectthepowercordandanyothercablesbeforecarryingtheprojector.
• Turnofftheprojectorandunplugthepowercordbeforecleaningthecabinetorreplacingthelamp.
• Turnofftheprojectorandunplugthepowercordiftheprojectorisnottobeusedforanextendedperiodoftime.
• WhenusingaLANcable:
Forsafety,donotconnecttotheterminalforperipheraldevicewiringthatmighthaveexcessivevoltage.
CAUTION
• Donotusethetilt-footforpurposesotherthanoriginallyintended.Misusessuchasgrippingthetilt-footorhang-
ingonthewallcancausedamagetotheprojector.
• Donotsendtheprojectorinthesoftcasebyparceldeliveryserviceorcargoshipment.Theprojectorinsidethe
softcasecouldbedamaged.
• Select[HIGH]inFanmodeifyoucontinuetousetheprojectorforconsecutivedays.(Fromthemenu,select
[SETUP]→[OPTIONS(1)]→[FANMODE]→[HIGH].)
• DonotturnofftheACpowerfor60secondsafterthelampisturnedonandwhilethePOWERindicatorisblink-
ingblue.Doingsocouldcauseprematurelampfailure.
Remote Control Precautions
• Handletheremotecontrolcarefully.
• Iftheremotecontrolgetswet,wipeitdryimmediately.
• Avoidexcessiveheatandhumidity.
• Donotshort,heat,ortakeapartbatteries.
• Donotthrowbatteriesintore.
• Ifyouwillnotbeusingtheremotecontrolforalongtime,removethebatteries.
• Ensurethatyouhavethebatteries’polarity(+/−)alignedcorrectly.
• Donotusenewandoldbatteriestogether,orusedifferenttypesofbatteriestogether.
• Disposeofusedbatteriesaccordingtoyourlocalregulations.
Note for Canadian Environmental Protection Act, 1999
Thelamp(s)inthisproductcontainsmercury.Pleasedisposeaccordingtoyourlocalauthoritylaw.
FORMOREINFORMATION,CONTACT:
NECDisplaySolutionsofAmerica,Inc.
500PartBoulevard,Suite1100,Itasca,Illinois60143-1248
TELEPHONE800-836-0655
www.necdisplay.com

v
Important Information
Note for US Residents
Thelampinthisproductcontainsmercury.PleasedisposeaccordingtoLocal,StateorFederalLaws.
Lamp Replacement
• Usethespeciedlampforsafetyandperformance.
• Toreplacethelamp,followallinstructionsprovidedonpage118.
• Besuretoreplacethelampwhenthemessage[THE LAMP HAS REACHED THE END OF ITS USABLE LIFE.
PLEASE REPLACE THE LAMP.]appears.Ifyoucontinuetousethelampafterthelamphasreachedtheendof
itsusablelife,thelampbulbmayshatter,andpiecesofglassmaybescatteredinthelampcase.Donottouchthem
asthepiecesofglassmaycauseinjury.
Ifthishappens,contactyourdealerforlampreplacement.
A Lamp Characteristic
Theprojectorhasadischargelampforspecialpurposesasalightsource.
Alamphasacharacteristicthatitsbrightnessgraduallydecreaseswithage.Alsorepeatedlyturningthelampon
andoffwillincreasethepossibilityofitslowerbrightness.
Theactuallamplifemayvarydependingupontheindividuallamp,theenvironmentalconditionsandusage.
CAUTION:
• DONOTTOUCHTHELAMPimmediatelyafterithasbeenused.Itwillbeextremelyhot.Turntheprojectoroff
andthendisconnectthepowercord.Allowatleastonehourforthelamptocoolbeforehandling.
• Whenremovingthelampfromaceiling-mountedprojector,makesurethatnooneisundertheprojector.Glass
fragmentscouldfallifthelamphasbeenburnedout.
About High Altitude mode
• Set[FANMODE]to[HIGHALTITUDE]whenusingtheprojectorataltitudesapproximately4000feet/1200meters
orhigher.
Usingtheprojectorataltitudesapproximately4000feet/1200metersorhigherwithoutsettingto[HIGHALTITUDE]
cancausetheprojectortooverheatandtheprotectorcouldshutdown.Ifthishappens,waitacoupleminutesand
turnontheprojector.
• Usingtheprojectorataltitudeslessthanapproximately4000feet/1200metersandsettingto[HIGHALTITUDE]can
causethelamptoovercool,causingtheimagetoicker.Switch[FANMODE]to[AUTO].
• Usingtheprojectorataltitudesapproximately4000feet/1200metersorhighercanshortenthelifeofopticalcom-
ponentssuchasthelamp.
About Copyright of original projected pictures:
Pleasenotethatusingthisprojectorforthepurposeofcommercialgainortheattractionofpublicattentioninavenue
suchasacoffeeshoporhotelandemployingcompressionorexpansionofthescreenimagewiththefollowingfunc-
tionsmayraiseconcernabouttheinfringementofcopyrightswhichareprotectedbycopyrightlaw.
[ASPECTRATIO],[KEYSTONE],Magnifyingfeatureandothersimilarfeatures.
Turkish RoHS information relevant for Turkish market
EEE Yonetmeliğine Uygundur.
Thisdeviceisnotintendedforuseinthedirecteldofviewatvisualdisplayworkplaces.Toavoidincommodingreec-
tionsatvisualdisplayworkplacesthisdevicemustnotbeplacedinthedirecteldofview.

vi
Important Information
Power management function
Theprojectorhaspowermanagementfunctions.Toreducepowerconsumption,thepowermanagementfunctions(1
and2)arefactorypresetasshownbelow.TocontroltheprojectorfromanexternaldeviceviaaLANorserialcable
connection,usetheon-screenmenutochangethesettingsfor1and2.
1. STANDBY MODE (Factory preset: NORMAL)
To control the projector from an external device, select [NETWORK STANDBY] for [STANDBY MODE].
NOTE:
• When[NORMAL]isselectedfor[STANDBYMODE],thefollowingterminalsandfunctionswillnotwork:
MONITOROUTterminal,AUDIOOUTterminal,LANfunctions,MailAlertfunction,DDC/CI(VirtualRemoteTool)
2. AUTO POWER OFF (Factory preset: 60 min.)
To control the projector from an external device, select [OFF] for [AUTO POWER OFF].
NOTE:
• When[1:00]isselectedfor[AUTOPOWEROFF],youcanenabletheprojectortoautomaticallyturnoffin60minutesifthereis
nosignalreceivedbyanyinputorifnooperationisperformed.
Health precautions to users viewing 3D images
Beforeviewing,besuretoreadhealthcareprecautionsthatmaybefoundintheuser’smanualincludedwithyourLCD
shuttereyeglassesoryour3DcompatiblecontentsuchasDVDs,videogames,computer'svideolesandthelike.
Toavoidanyadversesymptoms,heedthefollowing:
• DonotuseLCDshuttereyeglassesforviewinganymaterialotherthan3Dimages.
• Allowadistanceof2m/7feetorgreaterbetweenthescreenandauser.Viewing3Dimagesfromtooclosea
distancecanstrainyoureyes.
• Avoidviewing3Dimagesforaprolongedperiodoftime.Takeabreakof15minutesorlongeraftereveryhour
ofviewing.
• Ifyouoranymemberofyourfamilyhasahistoryoflight-sensitiveseizures,consultadoctorbeforeviewing3D
images.
• Whileviewing3Dimages,ifyougetsicksuchasnausea,dizziness,queasiness,headache,eyestrain,blurry
vision,convulsions,andnumbness,stopviewingthem.Ifsymptomsstillpersist,consultadoctor.
• View3Dimagesfromthefrontofthescreen.Viewingfromananglemaycausefatigueoreyestrain.
Model Number of Wireless LAN unit
WirelessLANunitisanoptionalitem.
Tondtheappropriatemodeltoyourarea,pleasevisitthecompanywebsite:
URL:http://www.nec-display.com/global/support/index.html

vii
Table of Contents
Important Information............................................................................................ i
1. Introduction...........................................................................................................1
❶What’sintheBox?..........................................................................................................1
❷IntroductiontotheProjector ...........................................................................................2
General .....................................................................................................................2
Installation.................................................................................................................2
Videos.......................................................................................................................2
Network.....................................................................................................................2
Energy-saving ...........................................................................................................3
Aboutthisuser’smanual...........................................................................................3
❸PartNamesoftheProjector ...........................................................................................4
Front..........................................................................................................................4
Mountingthelenscapstrap......................................................................................4
Rear ..........................................................................................................................5
Controls/Indicators....................................................................................................6
TerminalPanelFeatures ...........................................................................................7
❹PartNamesoftheRemoteControl ................................................................................8
BatteryInstallation ....................................................................................................9
RemoteControlPrecautions.....................................................................................9
OperatingRangeforWirelessRemoteControl.........................................................9
2. Projecting an Image (Basic Operation) ...............................................10
❶FlowofProjectinganImage.........................................................................................10
❷ConnectingYourComputer/ConnectingthePowerCord..............................................11
❸TurningontheProjector ...............................................................................................12
NoteonStartupscreen(MenuLanguageSelectscreen).......................................13
❹SelectingaSource .......................................................................................................14
Selectingthecomputerorvideosource..................................................................14
❺AdjustingthePictureSizeandPosition........................................................................16
Adjustingtheverticalpositionofaprojectedimage(Lensshift).............................17
Focus ......................................................................................................................19
Zoom.......................................................................................................................19
Adjustingthetilt(Tiltfoot) .......................................................................................20
❻CorrectingKeystoneDistortion[KEYSTONE] ..............................................................21
❼OptimizingComputerSignalAutomatically ..................................................................23
AdjustingtheImageUsingAutoAdjust...................................................................23
❽TurningUporDownVolume .........................................................................................23
❾TurningofftheProjector ...............................................................................................24
❿WhenMovingtheProjector ..........................................................................................25
3. Convenient Features......................................................................................26
❶TurningofftheImageandSound .................................................................................26
❷FreezingaPicture ........................................................................................................26
❸MagnifyingaPicture.....................................................................................................27
❹ChangingEcoMode/CheckingEnergy-SavingEffect .................................................28
UsingEcoMode[ECOMODE]...............................................................................28
CheckingEnergy-SavingEffect[CARBONMETER] ..............................................29

viii
Table of Contents
❺PreventingtheUnauthorizedUseoftheProjector[SECURITY] ..................................30
❻Viewing3DImages.......................................................................................................33
LCDshuttereyeglasses(recommended) ...............................................................33
Stepsforviewing3Dimagesontheprojector.........................................................33
Troubleshootingonviewing3Dimages...................................................................36
4. Using On-Screen Menu.................................................................................37
❶UsingtheMenus...........................................................................................................37
MenuElements.......................................................................................................38
❷ListofMenuItems ........................................................................................................39
❸MenuDescriptions&Functions[SOURCE] .................................................................42
HDMI1andHDMI2..................................................................................................42
COMPUTER ...........................................................................................................42
VIDEO.....................................................................................................................42
HDBaseT ................................................................................................................42
APPS ......................................................................................................................42
❹MenuDescriptions&Functions[ADJUST]...................................................................43
[PICTURE] ..............................................................................................................43
[IMAGEOPTIONS] .................................................................................................46
❺MenuDescriptions&Functions[SETUP].....................................................................50
[GENERAL].............................................................................................................50
[MENU] ...................................................................................................................53
[INSTALLATION] .....................................................................................................55
[OPTIONS(1)] .........................................................................................................59
[OPTIONS(2)] .........................................................................................................61
[3D] .........................................................................................................................64
❻MenuDescriptions&Functions[INFO.] .......................................................................66
[USAGETIME] ........................................................................................................66
[SOURCE(1)] ..........................................................................................................67
[SOURCE(2)] ..........................................................................................................67
[HDBaseT] ..............................................................................................................67
[WIREDLAN]..........................................................................................................67
[WIRELESSLAN] ...................................................................................................67
[VERSION(1)] .........................................................................................................67
[VERSION(2)] .........................................................................................................67
[OTHERS] ...............................................................................................................67
❼MenuDescriptions&Functions[RESET].....................................................................68
ReturningtoFactoryDefault[RESET] ....................................................................68
5. Installation and Connections ....................................................................69
❶SettingUptheScreenandtheProjector......................................................................69
Tablesofscreensizesanddimensions ..................................................................71
Exampleofinstallationonadesktop ......................................................................72
Lensshiftingrange..................................................................................................73
❷MakingConnections.....................................................................................................75
ConnectingYourComputer .....................................................................................75
ConnectinganExternalMonitor .............................................................................77
ConnectingYourDVDPlayerorOtherAVEquipment.............................................78
ConnectingComponentInput .................................................................................79
ConnectingHDMIInput...........................................................................................80
ix
Table of Contents
Connectingyourdocumentcamera ........................................................................81
ConnectingtoaWiredLAN ....................................................................................82
ConnectingtoaWirelessLAN(Optional:NP05LMseries).....................................83
ConnectingtoaHDBaseTtransmissiondevice(soldcommercially)......................86
6. APPS MENU .........................................................................................................88
❶WhatcanyoudowiththeAPPSMENU? .....................................................................88
7. User Supportware............................................................................................92
❶SoftwareIncludedonCD-ROM ....................................................................................92
❷ProjectingYourComputer’sScreenImagefromtheProjectoroveraLAN(Image
ExpressUtilityLite) .................................................................................................93
StartingImageExpressUtilityLitefromaUSBMemoryorSDCard .....................96
❸ProjectinganImagefromanAngle(GeometricCorrectionToolinImageExpress
UtilityLite) ...............................................................................................................98
WhatyoucandowithGCT .....................................................................................98
ProjectinganImagefromanAngle(GCT)..............................................................98
❹ControllingtheProjectoroveraLAN(PCControlUtilityPro4/Pro5) ........................101
❺UsingtheComputerCable(VGA)toOperatetheProjector(VirtualRemoteTool) ....106
❻ProjectingphotosordocumentssavedonthesmartphoneoverawirelessLAN
(WirelessImageUtility).........................................................................................112
8. Maintenance .....................................................................................................113
❶CleaningtheFilters.....................................................................................................113
❷CleaningtheLens.......................................................................................................116
❸CleaningtheCabinet..................................................................................................117
❹ReplacingtheLampandtheFilters............................................................................118
9. Appendix..............................................................................................................125
❶Troubleshooting ..........................................................................................................125
IndicatorMessages...............................................................................................125
CommonProblems&Solutions ............................................................................127
Ifthereisnopicture,orthepictureisnotdisplayedcorrectly................................128
❷Specications .............................................................................................................129
❸CabinetDimensions ...................................................................................................131
❹AttachingtheOptionalCableCover(NP09CV)..........................................................132
Attachingthecablecover......................................................................................132
Removingthecablecover.....................................................................................133
❺Pinassignmentsandsignalnamesofmainterminals ...............................................134
❻CompatibleInputSignalList.......................................................................................136
❼PCControlCodesandCableConnection ..................................................................137
❽UpdatetheSoftware...................................................................................................138
❾TroubleshootingCheckList.........................................................................................140
❿REGISTERYOURPROJECTOR!(forresidentsintheUnitedStates,Canada,and
Mexico) .................................................................................................................142

1
1. Introduction
❶What’s in the Box?
Makesureyourboxcontainseverythinglisted.Ifanypiecesaremissing,contactyourdealer.
Pleasesavetheoriginalboxandpackingmaterialsifyoueverneedtoshipyourprojector.
Projector
Remote control
(7N901122)
Batteries (AAA × 2)
Power cord
(US: 7N080240/7N080243)
(EU: 7N080027/7N080029)
Computer cable (VGA)
(7N520089)
Lens cap strap
For North America only
Limited warranty
For customers in Europe:
You will find our current valid Guar-
antee Policy on our Web Site:
www.nec-display-solutions.com
• ImportantInformation(ForNorth
America: 7N8N6521) (For Other
countries than North America:
7N8N6521 and 7N8N6531)
• QuickSetupGuide(7N8N6541)/
(7N8N6551)
NEC Projector CD-ROM
User’s manual (PDF) and the utility
software
(7N952321)

2
1. Introduction
❷Introduction to the Projector
Thissectionintroducesyoutoyournewprojectoranddescribesthefeaturesandcontrols.
General
• Single-chipDLPprojectorwithhighresolutionandhighbrightness
Modelname DMDpanel Resolution Aspectratio
P502H/P452H 0.65type 1920×1080pixels 16:9
P502W/P452W 0.65type 1280×800pixels 16:10
• Lamplifeupto5000hours
UsinginEcoModeallowsyoutoprolongtheprojector’slamplifeupto5000hours(upto3000hoursinECO
MODEOFF).
• 20Wbuilt-inspeakerforanintegratedaudiosolution/micinputsupprted
Powerful20wattmonauralspeakerprovidesvolumeneedforlargeroomsadynamicorcondensermiccanbe
used.
Installation
• Lensshiftmechanismforadjustingthepositionoftheprojectedimageeasily
Thepositionoftheprojectedimageismovedbyturningthetwodialsontheprojectorcabinettop,oneforthe
verticaldirectionandanotherforthehorizontaldirection.
Videos
• Widerangeofinputterminals(HDMI×2,HDBaseT,etc.)
Theprojectorisequippedwithavarietyofinputterminals:HDMI(×2),Computer(analog),Video,HDBaseT,etc.
HDMIinputterminalonthisproductsupportsHDCP.HDBaseTisaconnectionstandardforhomeappliancesthat
isestablishedbytheHDBaseTAlliance.
• SupportsHDMI3Dformat
Thisprojectorcanbeusedtowatchvideosin3Dusingcommercially-availableactiveshutter-type3Deyewear
and3DemittersthatsupportXpand3D.
Network
• EquipsthefeatureofAPPSMENUthatcanutilizethenetwork.
TheAPPSMENUprovidesvariousfunctionsasVIEWER,REMOTEDESKTOPCONNECTION,IMAGEEXPRESS
UTILITY,Miracast,NETWORKSETTINGS(WiredLAN/WirelessLAN),andPROGRAMTIMER.
• Convenientutilitysoftware(UserSupportware)providedasstandard
TheveutilitysoftwarestoredintheenclosedNECProjectorCD-ROM(ImageExpressUtilityLite(ForWindows/
OSX),VirtualRemoteTool,PCControlUtilityPro4(forWindows)andPCControlUtilityPro5(forOSX))canbe
used.
• CRESTRONROOMVIEWcompatible
ThisprojectorsupportsCRESTRONROOMVIEW,allowingmultipledevicesconnectedtothenetworktobeman-
agedfromacomputerorcontroller.

3
1. Introduction
Energy-saving
• 0.26W(100-130VAC)/0.33W(200-240VAC)instandbyconditionwithenergysavingtechnology
Selecting[NORMAL]for[STANDBYMODE]fromthemenucanputtheprojectorinpower-savingmode.
NORMAL:0.26W(100-130VAC)/0.33W(200-240VAC)
NETWORKSTANDBY:2.6W(100-130VAC)/2.6W(200-240VAC)
• “ECOMODE”forlowpowerconsumptionand“CARBONMETER”display
Thepower-savingiseffectivewhenthe[ECOMODE]issetisconvertedintotheamountofreductionsofCO2
emissionsandthisisindicatedontheconrmationmessagedisplayedwhenthepoweristurnedoffandat[INFO.]
ontheon-screenmenu(CARBONMETER).
About this user’s manual
Thefastestwaytogetstartedistotakeyourtimeanddoeverythingrightthersttime.Takeafewminutesnowto
reviewtheuser’smanual.Thismaysaveyoutimelateron.Atthebeginningofeachsectionofthemanualyou’llnd
anoverview.Ifthesectiondoesn’tapply,youcanskipit.

4
1. Introduction
❸Part Names of the Projector
Front
Remote Sensor
(→page 9)
Lens shift dials (Horizontal/Vertical)
(→page 17)
Lens Cap
Tilt Foot
(→page 20)
Model name
Model name is indicated on the bot-
tom face of the projector
Wireless LAN cover
(→page 83)
Exhaust Vent
Focus Ring
(→page 19)
Lamp cover
(→page 119)
Remote Sensor
(→page 9)
Zoom Lever
(→page 19)
Lens
IntakeVent
(→page 113)
Mounting the lens cap strap
1. Insert the tip of the strap into the lens cap mount hole and pass
the knot through.
Lens cap mount hole
2. Insert the knot into the strap mount hole (large) on the bottom of
the projector, then press it into the narrow (small) hole.

5
1. Introduction
Indicators
(→page 6)
Controls
(→page 6)
IntakeVentFilter
(→page 113, 123)
Remote Sensor
(→page 9)
Security chain opening
Attach an anti-theft device.
The security chain opening accepts
security wires or chains up to 0.18
inch/4.6 mm in diameter.
Terminals
(→page 7)
ACInput
Connect the supplied power cord’s
three-pin plug here, and plug the
other end into an active wall outlet.
(→page 11)
MonauralSpeaker
IntakeVent
(→page 113)
Built-in Security Slot ( )*
Rear
Connection for cable cover (Left/
Right) Screw holes
(→page 132)
* This security slot supports the
MicroSaver®SecuritySystem.

6
1. Introduction
Controls/Indicators
7
9
11
10
23 4
6
8
1
5
1. (POWER)Button
(→page12, 24)
2. POWER Indicator
(→page11, 12, 24, 125)
3. STATUS Indicator
(→page125)
4. LAMPIndicator
(→page125)
5. ECOButton
(→page28)
6. SOURCE Button
(→page14)
7. AUTO ADJ. Button
(→page23)
8. MENU Button
(→page37)
9. ▲▼◀▶/VolumeButtons◀▶ / Keystone Button ▼
(→page13, 21, 23, 37)
10. ENTER Button
(→page37)
11. EXIT Button
(→page37)

7
1. Introduction
Terminal Panel Features
1. COMPUTERIN/ComponentInputTerminal(Mini
D-Sub15Pin)
(→page75, 79, 81)
2. COMPUTERAUDIOINMiniJack(StereoMini)
(→page75, 79)
3. HDMI1INTerminal(TypeA)
(→page75, 76, 80)
4. HDMI2INTerminal(TypeA)
(→page75, 76, 80)
5. MONITOROUT(COMP.)Terminal(MiniD-Sub15
Pin)
(→page77)
6. AUDIOOUTMiniJack(StereoMini)
(→page77)
7. VIDEOINTerminal(RCA)
(→page78, 81)
8. VIDEOAUDIOINL/MONO,R(RCA)
(→page78)
9. Ethernet/HDBaseTPort(RJ-45)
(→page82, 86)
10.LANPort(RJ-45)
(→page82, 87)
11.USB(WirelessLAN)Port
(→page85)
12.USBPort(TypeA)
(→page89)
13.3DSYNCTerminal(MiniDIN3Pin)
(→page35)
14.PCCONTROL[PCCONTROL]Port(D-Sub9Pin)
(→page137)
Use this port to connect a PC or control system.
Thisenablesyoutocontroltheprojectorusingserial
communicationprotocol.Ifyouarewritingyourown
program,typicalPCcontrolcodesareonpage137.
15.SERVICEPort(USBTypeB)
(forservicepurposeonly)
16.REMOTEConnector(StereoMini)
Use this connector for wired remote control of the
projectorusingtheNECremotecontrolforPX750U/
PH1000U/PH1400U/PX602UL/PH1202HLseries.
Connect the projector and optional remote control
usingacommerciallyavailablewiredremotecontrol
cable.
NOTE:
• WhenaremotecontrolcableisconnectedtotheREMOTE
connector, infrared remote control operations cannot be
performed.
• When [HDBaseT] is selected in the [REMOTE SENSOR]
andtheprojectorisconnectedtoacommercially-available
transmissiondevicethatsupportsHDBaseT,remotecontrol
operationsininfra-redcannotbecarriedoutiftransmission
ofremotecontrolsignalshasbeensetupinthetransmission
device.However,remotecontrolusinginfraredrayscanbe
carriedoutwhenthepowersupplyofthetransmissiondevice
isswitchedoff.
1 523 4
716 1413 6
9101511 12
8

8
1. Introduction
❹Part Names of the Remote Control
+
3
4
6
7
1
2
10
16
17
15
14
9
5
8
13
30
31
32
20
21
26
28
29
25
24
23
22
27
33
19
18
12
11
1. Infrared Transmitter
(→page9)
2. POWER ON Button
(→page12)
3. POWER STANDBY Button
(→page24)
4. SOURCEButton
(→page14)
5. COMPUTER1Button
(→page14)
6. COMPUTER 2 Button
(Thisbuttondoesnotworkinthis
seriesofprojectors)
7. AUTO ADJ. Button
(→page23)
8. HDMI 1 Button
(→page14)
9. HDMI 2 Button
(→page14)
10. DisplayPort Button
(Thisbuttondoesnotworkinthis
seriesofprojectors)
11.VIDEOButton
(→page14)
12. HDBaseT Button
(→page14)
13. USB-B Button
(Thisbuttondoesnotworkinthis
seriesofprojectors)
14.APPSButton
(→page14, 88)
15.IDSETButton
(→page57)
16. Numeric Keypad Button/
CLEAR Button
(→page57)
17. FREEZE Button
(→page26)
18.AV-MUTEButton
(→page26)
19. MENU Button
(→page37)
20. EXIT Button
(→page37)
21. ▲▼◀▶ Button
(→page37)
22. ENTER Button
(→page37)
23.D-ZOOM(+)(–)Button
(→page27)
24.MOUSEL-CLICKButton*
(Thisbuttondoesnotworkinthis
seriesofprojectors)
25.MOUSER-CLICKButton*
(Thisbuttondoesnotworkinthis
seriesofprojectors)
26. PAGE ▽/△Button
(→page89)
27. ECO Button
(→page28)
28. KEYSTONE Button
(→page21)
29. PICTURE Button
(→page43, 45)
30.VOL.(+)(–)Button
(→page23)
31. ASPECT Button
(→page48)
32. FOCUS/ZOOM Button
(Thisbuttondoesnotworkinthis
seriesofprojectors)
33. HELP Button
(→page66)

9
1. Introduction
Battery Installation
1. Press firmly and slide the battery
cover off.
2. Install new batteries (AAA). En-
sure that you have the batteries’
polarity (+/−) aligned correctly.
3. Slip the cover back over the bat-
teries until it snaps into place. Do
not mix different types of batter-
ies or new and old batteries.
OPEN
OPEN
Remote Control Precautions
• Handletheremotecontrolcarefully.
• Iftheremotecontrolgetswet,wipeitdryimmediately.
• Avoidexcessiveheatandhumidity.
• Donotshort,heat,ortakeapartbatteries.
• Donotthrowbatteriesintore.
• Ifyouwillnotbeusingtheremotecontrolforalongtime,removethebatteries.
• Ensurethatyouhavethebatteries’polarity(+/−)alignedcorrectly.
• Donotusenewandoldbatteriestogether,orusedifferenttypesofbatteriestogether.
• Disposeusedbatteriesaccordingtoyourlocalregulations.
Operating Range for Wireless Remote Control
30°
30°
30°
30° 30° 30° 30°
30°
23.0 feet/
7 m
23.0 feet/7 m
Remote sensor on projector cabinet
Remote control
Remote control
• Theinfraredsignaloperatesbyline-of-sightuptoadistanceofabout23feet/7mandwithina60-degreeangleof
theremotesensorontheprojectorcabinet.
• Theprojectorwillnotrespondifthereareobjectsbetweentheremotecontrolandthesensor,orifstronglightfalls
onthesensor.Weakbatterieswillalsopreventtheremotecontrolfromproperlyoperatingtheprojector.
This manual suits for next models
3
Table of contents
Other NEC Projector manuals

NEC
NEC NP305 User manual

NEC
NEC NP4001 Operation and maintenance manual

NEC
NEC P501X User manual

NEC
NEC LT260 Series User manual

NEC
NEC LT20 - XGA DLP Projector User manual

NEC
NEC NP40 User manual

NEC
NEC NP4100-09ZL - XGA DLP Projector User manual

NEC
NEC P502WL-2 User manual

NEC
NEC NP610 Series User manual

NEC
NEC PH2601QL User manual