nekos SKYRO 650 User manual

SKY
INSTRUCTION MANUAL
RACK ACTUATOR
Force 600N –
Strokes
Electrical feeding 110
NEKOS S.r.l. -
Via Capitoni, 7/5
+39 0424 411011
EN
EN
4420151 - Rev 0 del 12/2020
SKY
RO 650
INSTRUCTION MANUAL
-
TRANSLATION OF ORIGINAL INSTRUCTIONS
RACK ACTUATOR
Strokes
180, 230,
350, 550, 750, 1000
Electrical feeding 110
-230V~ 50/60Hz and 24V
Via Capitoni, 7/5
- 36064 Colceresa – VI
–
+39 0424 411011
– +39 0424 411013 - www.nekos.it -
info@nekos.it
TRANSLATION OF ORIGINAL INSTRUCTIONS
350, 550, 750, 1000
mm
–
ITALY
2
USER INSTRUCTIONS
CAUTION. Carefully observe all the following installation
instructions to ensure personal safety.
The device is not intended for use by persons (including children)
with reduced physical, sensory or mental capabilities, or lacking
experience and knowledge. Do not allow children to play with the
fixed controls and keep any remote-control units out of their reach.
Have installation checks performed periodically by qualified
personnel from a service centre authorised by the manufacturer. Do
not use if repair or adjustment is required.
CAUTION: if the power cable is damaged, it must be replaced by
qualified personnel from a service centre authorised by the
manufacturer.
CAUTION. Disconnect the power supply during cleaning or
maintenance operations. Do not use solvents or jets of water to
wash the appliance; the appliance should not be submerged in
water.
In the event of fault or malfunction, switch off the device at the main
switch. All repairs and adjustments (e.g. setting the stroke) must
only be performed by qualified personnel from a service centre
authorised by the manufacturer.
Always request exclusive use of original spare parts. Failure to
respect this condition could compromise safety and invalidate the
benefits contained in the warranty for the appliance. In the event of
any problems or queries, consult your agent or contact the
manufacturer directly.
The A-weighted sound pressure level is less than 70dB(A).
Carefully preserve these instructions after installation.

INSTALLER INSTRUCTIONS
nekos
products have been manufactured in accordance with safety standards and conforms to the
stipulations of current standards in force.
When correctly assembled, installed and used according to the present instructions, they will not
generate any danger for persons, animals or items.
Symbols used in the manual
DANGER
This indication draw the attention about potential dangers for safety
health of peoples and animals.
Contents
1.
SECURITY RULES
................................
2.
FORMULAS AND RECOMME
2.1.
Calculation of opening / closure force
2.2.
Maximum opening in accordance with sash height
3.
TECHNICAL INFORMATIO
4.
CONSTRUCTION AND
REGULATORY REFERENCE
5.
USE OF ACTUATOR IN SYNCRO³ VERSION
5.1.
Recognition
................................
5.2.
Use of a Syncro³-
version actuator
6.
ID PLATE AND MARKING
DATA
7.
TECHNICAL DATA
................................
8.
ACTUATOR DIMENSIONS
9.
ELECTRICAL POWER SUP
9.1.
Selection of power cable section
10.
INSTRUCTIONS FOR
ASSEMBLY
10.1.
Preparation of actuator for assembly
10.2.
Calculation of the number of push / retention points
10.3.
Assembly with outward opening window
10.4.
Installation on domed rooflights, dormers or industrial skylights
10.5.
Assembly with opening inwards
10.6.
Installing the actuator and rod (or transmission) with connection bar
11.
ELECTRICAL CONNECTIO
11.1.
Connections of
SKYRO
11.2.
Connections of
SKYRO
12.
PROGRAMMING THE ACTU
12.1.
RESET Procedure
................................
12.2. Closing stroke-end
................................
12.3.
Overlap acquisition
................................
12.4.
LED Light signals
................................
13.
CHECKING FOR CORRECT
14.
EMERGENCY MANOEUVRES
15.
TROUBLESHOOTING
................................
16.
ENVIRONMENTAL PROTEC
17.
CERTIFICATE OF GUARANTEE
18.
DECLARATION OF INCORPORATION (FOR A PARTLY COMPLETED MACHINE)
AND EC
DECLARATION OF CONFORMITY
3
INSTALLER INSTRUCTIONS
products have been manufactured in accordance with safety standards and conforms to the
stipulations of current standards in force.
When correctly assembled, installed and used according to the present instructions, they will not
generate any danger for persons, animals or items.
Symbols used in the manual
This indication draw the attention about potential dangers for safety
health of peoples and animals.
................................
................................
................................
FORMULAS AND RECOMME
NDATIONS FOR INSTALLATION
................................
Calculation of opening / closure force
................................
................................
Maximum opening in accordance with sash height
................................
TECHNICAL INFORMATIO
N ABOUT FUNCTION
................................
REGULATORY REFERENCE
S
................................
USE OF ACTUATOR IN SYNCRO³ VERSION
................................
................................
................................
................................
................................
version actuator
................................
................................
DATA
................................
................................
................................
................................
................................
ACTUATOR DIMENSIONS
................................
................................
ELECTRICAL POWER SUP
PLY
................................
................................
Selection of power cable section
................................
................................
ASSEMBLY
................................
................................
Preparation of actuator for assembly
................................
................................
Calculation of the number of push / retention points
................................
Assembly with outward opening window
................................
................................
Installation on domed rooflights, dormers or industrial skylights
Assembly with opening inwards
................................
................................
Installing the actuator and rod (or transmission) with connection bar
ELECTRICAL CONNECTIO
NS
................................
................................
SKYRO
650 ................................
................................
SKYRO
650 SYNCRO³ ................................
................................
PROGRAMMING THE ACTU
ATOR
................................
................................
................................
................................
................................
................................
................................
................................
................................
................................
................................
................................
................................
................................
CHECKING FOR CORRECT
ASSEMBLY
................................
................................
EMERGENCY MANOEUVRES
, MAINTENANCE OR CLEANING
................................
................................
................................
................................
ENVIRONMENTAL PROTEC
TION
................................
................................
CERTIFICATE OF GUARANTEE
................................
................................
DECLARATION OF INCORPORATION (FOR A PARTLY COMPLETED MACHINE)
DECLARATION OF CONFORMITY
................................
................................
INSTALLER INSTRUCTIONS
products have been manufactured in accordance with safety standards and conforms to the
When correctly assembled, installed and used according to the present instructions, they will not
This indication draw the attention about potential dangers for safety
and
................................
.............. 4
................................
..... 5
................................
............ 5
................................
....................... 5
................................
............................ 5
................................
.................. 6
................................
..... 6
................................
..................... 7
................................
.................. 7
................................
........................ 7
................................
.............. 8
................................
................................. 8
................................
......................... 9
................................
................. 9
................................
..................... 9
................................
...... 10
................................
.............. 10
................................
11
Installation on domed rooflights, dormers or industrial skylights
............................... 11
................................
.............. 11
Installing the actuator and rod (or transmission) with connection bar
........................ 12
................................
......................... 13
................................
.................... 14
................................
.. 14
................................
.................. 15
................................
... 16
................................
.... 16
................................
.. 17
................................
..... 17
................................
....... 19
................................
. 19
................................
....... 20
................................
................... 20
................................
...................... 20
DECLARATION OF INCORPORATION (FOR A PARTLY COMPLETED MACHINE)
................................
... 22
1. SECURITY RULES
C
AREFULLY OBSERVE ALL
PERSONAL SAFETY
.
I
MPROPER INSTALLATION
MANDATORY RISK ANALY
The Nekos electrical actuators comply with the Machinery Directive (2006/42/EC), Standard
IEC 60335-2-
103 (Particular requirements for drives for gates, doors and windows) and other
directives and regulations indicated in the attached Declarations of Incor
Conformity (at the end of the manual). According to the Machinery Directive, actuators are
“partly completed machinery” intended for incorporation into doors and windows. The
manufacturer/supplier of the window is required, with exclusive r
compliance of the entire system with the applicable standards and to issue CE certification.
We strongly discourage any use of the actuators other than that specified and therefore, in
any case, the supplier of the complete sys
For systems installed at a height of less than 2.5 m above floor level or other levels
accessible to users, the manufacturer/supplier of the window must conduct
regarding potential harm (violent blows, crushing, wounds) caused to people by normal use
or possible malfunction or accidental breakage of the automated windows, and to implement
suitable protective measures
in view of these. Such measures include those r
by the specified standard:
-
controlling the actuators via a “deadman’s button” placed near the system and within the
operator’s field of view, to ensure that people are out of the way during operation. The
button must be placed at a height of 1,5
public; or:
-
use of contact safety systems (also included in the actuators) that ensure a maximum
closing force of 400/150/25 N, measured in accordance with paragraph BB.20.107.2 of
IEC 60335-2-103; or:
- use of non-
contact safety systems (lasers, light grids); or:
-
use of fixed safety barriers that prevent access to moving parts.
Automated windows are deemed adequately protected if they:
-
are installed at a height of >2.5 m; or:
- have a leading-
edge opening of <200 m
-
are part of a smoke and heat evacuation system for emergency use only.
In any case, moving parts of windows that could fall below 2.5 m following breakage of a
system component need to be fixed or secured in order to
falling or collapsing: e.g. the use of safety arms on bottom
The device is not intended for use by persons (including children) with reduced
physical, sensory or mental capabilities, or lacking experience and
not allow children to play with the fixed controls and keep any remote
out of their reach.
The actuator is destined exclusively for installation indoors. For any special
application we recommend you consult the manufacturer befo
After removing packaging, check for any damage on the appliance.
Always request exclusive use of original spare parts. Failure to respect this condition
could compromise safety and invalidate the benefits contained in the warranty for the
appliance.
In the event of any problems or queries, consult your agent or contact the
manufacturer directly.
4
AREFULLY OBSERVE ALL
THE FOLLOWING INSTAL
LATION INSTRUCTIONS
MPROPER INSTALLATION
CAN SERIOUSLY ENDANG
MANDATORY RISK ANALY
SIS AND PROTECTION MEASURES
.
The Nekos electrical actuators comply with the Machinery Directive (2006/42/EC), Standard
103 (Particular requirements for drives for gates, doors and windows) and other
directives and regulations indicated in the attached Declarations of Incor
Conformity (at the end of the manual). According to the Machinery Directive, actuators are
“partly completed machinery” intended for incorporation into doors and windows. The
manufacturer/supplier of the window is required, with exclusive r
esponsibility, to ensure the
compliance of the entire system with the applicable standards and to issue CE certification.
We strongly discourage any use of the actuators other than that specified and therefore, in
any case, the supplier of the complete sys
tem retains full liability.
For systems installed at a height of less than 2.5 m above floor level or other levels
accessible to users, the manufacturer/supplier of the window must conduct
regarding potential harm (violent blows, crushing, wounds) caused to people by normal use
or possible malfunction or accidental breakage of the automated windows, and to implement
in view of these. Such measures include those r
controlling the actuators via a “deadman’s button” placed near the system and within the
operator’s field of view, to ensure that people are out of the way during operation. The
button must be placed at a height of 1,5
m and operated by key if accessible to the
use of contact safety systems (also included in the actuators) that ensure a maximum
closing force of 400/150/25 N, measured in accordance with paragraph BB.20.107.2 of
contact safety systems (lasers, light grids); or:
use of fixed safety barriers that prevent access to moving parts.
Automated windows are deemed adequately protected if they:
are installed at a height of >2.5 m; or:
edge opening of <200 m
m and a closing speed of <15 mm/s; or:
are part of a smoke and heat evacuation system for emergency use only.
In any case, moving parts of windows that could fall below 2.5 m following breakage of a
system component need to be fixed or secured in order to
prevent them from suddenly
falling or collapsing: e.g. the use of safety arms on bottom
-
hung windows.
The device is not intended for use by persons (including children) with reduced
physical, sensory or mental capabilities, or lacking experience and
not allow children to play with the fixed controls and keep any remote
The actuator is destined exclusively for installation indoors. For any special
application we recommend you consult the manufacturer befo
After removing packaging, check for any damage on the appliance.
Always request exclusive use of original spare parts. Failure to respect this condition
could compromise safety and invalidate the benefits contained in the warranty for the
In the event of any problems or queries, consult your agent or contact the
LATION INSTRUCTIONS
TO ENSURE
CAN SERIOUSLY ENDANG
ER SAFETY
.
The Nekos electrical actuators comply with the Machinery Directive (2006/42/EC), Standard
103 (Particular requirements for drives for gates, doors and windows) and other
directives and regulations indicated in the attached Declarations of Incor
poration and CE
Conformity (at the end of the manual). According to the Machinery Directive, actuators are
“partly completed machinery” intended for incorporation into doors and windows. The
esponsibility, to ensure the
compliance of the entire system with the applicable standards and to issue CE certification.
We strongly discourage any use of the actuators other than that specified and therefore, in
For systems installed at a height of less than 2.5 m above floor level or other levels
accessible to users, the manufacturer/supplier of the window must conduct
risk analysis
regarding potential harm (violent blows, crushing, wounds) caused to people by normal use
or possible malfunction or accidental breakage of the automated windows, and to implement
in view of these. Such measures include those r
ecommended
controlling the actuators via a “deadman’s button” placed near the system and within the
operator’s field of view, to ensure that people are out of the way during operation. The
m and operated by key if accessible to the
use of contact safety systems (also included in the actuators) that ensure a maximum
closing force of 400/150/25 N, measured in accordance with paragraph BB.20.107.2 of
m and a closing speed of <15 mm/s; or:
are part of a smoke and heat evacuation system for emergency use only.
In any case, moving parts of windows that could fall below 2.5 m following breakage of a
prevent them from suddenly
hung windows.
The device is not intended for use by persons (including children) with reduced
physical, sensory or mental capabilities, or lacking experience and
knowledge. Do
not allow children to play with the fixed controls and keep any remote
-control units
The actuator is destined exclusively for installation indoors. For any special
application we recommend you consult the manufacturer befo
rehand.
After removing packaging, check for any damage on the appliance.
Always request exclusive use of original spare parts. Failure to respect this condition
could compromise safety and invalidate the benefits contained in the warranty for the
In the event of any problems or queries, consult your agent or contact the

2.
FORMULAS AND RECOMMENDATIONS FOR INSTALLATION
2.1.
Calculation of opening / closure force
Using the formulas on this page, approximate calculations can be made for the force
required to open or close the window considering all the factors that determine the
calculation.
Symbols used for the calculation
F (Kg) = Force for opening or closing
C (cm) = Opening stroke (actuator stroke)
For horizontal light domes or skylights
F = 0,54 x P
(Eventual weight of snow or wind on the
cupola should be calculated
2.2.
Maximum opening according to height of
The actuator can be recessed mounted in the frame as well as outside on the frame or on the
sash. In any case the actuator stroke is in accordance with the height of the sash and its
application. Check that
the actuator
are no obstacles for the opening or it does not exert force on the window frame.
A
TTENTION
. For safety reasons the actuator should not be assembled if
dimensions are inferior to those indicated in the table below. In the
height of the sash should be lower, call on the manufacturer to check the
appliance.
3.
GENERAL INFORMATION ABOUT THE ACTUATOR
The Skyro
650 actuator opens and closes window sashes by means of a square
steel rack. The rack is moved by a gear reducer driven by an electric motor, which in turn is
powered and controlled by an electronic circuit board. The opening and closing movemen
is determined by the polarity of the electrical wires in accordance with the wiring carried out
(see wiring
diagrams on page 14 and 15).
5
FORMULAS AND RECOMMENDATIONS FOR INSTALLATION
Calculation of opening / closure force
Using the formulas on this page, approximate calculations can be made for the force
required to open or close the window considering all the factors that determine the
Symbols used for the calculation
F (Kg) = Force for opening or closing
P (Kg) =
Weight of the window (mobile sash only)
C (cm) = Opening stroke (actuator stroke)
H (cm) = Height of the mobile sash
For horizontal light domes or skylights
(Eventual weight of snow or wind on the
cupola should be calculated
separately).
For vertical windows
TOP HUNG WINDOWS
,
OUTWARD OPENING
BOTTOM HUNG WINDOWS
F = 0,54 x P x C : H
(Eventual load of favourable or
unfavourable wind on the sash should be
calculated separately.)
Maximum opening according to height of
sash
The actuator can be recessed mounted in the frame as well as outside on the frame or on the
sash. In any case the actuator stroke is in accordance with the height of the sash and its
the actuator
stroke does not touch the profi
le of the sash and that there
are no obstacles for the opening or it does not exert force on the window frame.
. For safety reasons the actuator should not be assembled if
dimensions are inferior to those indicated in the table below. In the
height of the sash should be lower, call on the manufacturer to check the
GENERAL INFORMATION ABOUT THE ACTUATOR
650 actuator opens and closes window sashes by means of a square
steel rack. The rack is moved by a gear reducer driven by an electric motor, which in turn is
powered and controlled by an electronic circuit board. The opening and closing movemen
is determined by the polarity of the electrical wires in accordance with the wiring carried out
diagrams on page 14 and 15).
FORMULAS AND RECOMMENDATIONS FOR INSTALLATION
Using the formulas on this page, approximate calculations can be made for the force
required to open or close the window considering all the factors that determine the
Weight of the window (mobile sash only)
H (cm) = Height of the mobile sash
For vertical windows
OUTWARD OPENING
(A)
BOTTOM HUNG WINDOWS
(B)
F = 0,54 x P x C : H
(Eventual load of favourable or
unfavourable wind on the sash should be
The actuator can be recessed mounted in the frame as well as outside on the frame or on the
sash. In any case the actuator stroke is in accordance with the height of the sash and its
le of the sash and that there
are no obstacles for the opening or it does not exert force on the window frame.
. For safety reasons the actuator should not be assembled if
dimensions are inferior to those indicated in the table below. In the
event that the
height of the sash should be lower, call on the manufacturer to check the
650 actuator opens and closes window sashes by means of a square
-sectioned
steel rack. The rack is moved by a gear reducer driven by an electric motor, which in turn is
powered and controlled by an electronic circuit board. The opening and closing movemen
t
is determined by the polarity of the electrical wires in accordance with the wiring carried out
The opening and closing stroke
through power absorption when t
internal stop in the rack or complete opening/closure of the window); therefore, no
adjustments are required and the end position depends on the length of the rod connected
to the gear reducer or th
e stroke set during production.
During initial operation, the actuator memorises the stroke end position; during subsequent
operation, it maintains the memorised stroke end positions and also adjusts the start and
stop ramp.
4.
CONSTRUCTION AND REG
INTENDED USE.
The
awning windows, bottom
dormer windows and skylights. Its use is specifically intended for ventilation and
natural air
conditioning of rooms
supplier of the entire system in any case retaining sole liability.
The actuator is manufactured in accordance with the Directives and following
Regulations listed in the attached Decla
Electrical connections must conform to regulations in force for the design and set
up of electrical equipment.
To ensure efficient separation from the grid, an approved type of bipolar “dead
switch should be used. An omnipolar general power switch with minimum distance of
3 mm between contacts should be installed upstream of the control line.
Application is pe
rformed using the brackets provided and any other type of
assembly should be checked with the manufacturer, who will not accept any
responsibility for incorrect or malfunctioning assembly.
The SKYRO 650
actuator is individually packaged in a cardboard con
contains:
• 1
actuator with 2 metre
• 1
standard support bracket with res
• 1 bracket f
or fixing to the frame,
• Small parts packaging,
• Instruction manual
IMPORTANT: The Syncro³ version of the
packaged in a cardboard box and is factory tested as an individual machine
When installing a system that requires the use of several Syncro³ actuators
or a K-
LOCK electro
§ 12.1).
5.
USE OF ACTUATOR IN SYNCRO³ VERSION
In the
SYNCRO
³
version the actuator has been equipped with the new system patented by
NEKOS for coordinated synchronisation of a group of actuators (up to eight at the same
time).
Electronic control of speed is completely automatic device inside the actuator and
does not require any external control station: just connect the feeder cable communication
wires to each other
(see diagram on page 15)
6
The opening and closing stroke
-
end stop occurs with an automatic positioning process
through power absorption when t
he rack encounters an obstacle that stops its stroke (the
internal stop in the rack or complete opening/closure of the window); therefore, no
adjustments are required and the end position depends on the length of the rod connected
e stroke set during production.
During initial operation, the actuator memorises the stroke end position; during subsequent
operation, it maintains the memorised stroke end positions and also adjusts the start and
CONSTRUCTION AND REG
ULATORY REFERENCES
The
SKYRO 650 rack
actuator is designed and built to move
awning windows, bottom
-hung windows, parallel-
opening windows, light domes,
dormer windows and skylights. Its use is specifically intended for ventilation and
conditioning of rooms
; any other use is strongly discouraged, with the
supplier of the entire system in any case retaining sole liability.
The actuator is manufactured in accordance with the Directives and following
Regulations listed in the attached Decla
ration of Incorporation and Conformity
Electrical connections must conform to regulations in force for the design and set
up of electrical equipment.
To ensure efficient separation from the grid, an approved type of bipolar “dead
switch should be used. An omnipolar general power switch with minimum distance of
3 mm between contacts should be installed upstream of the control line.
rformed using the brackets provided and any other type of
assembly should be checked with the manufacturer, who will not accept any
responsibility for incorrect or malfunctioning assembly.
actuator is individually packaged in a cardboard con
actuator with 2 metre
(±5%) lead,
standard support bracket with res
pective grips and fixing screws,
or fixing to the frame,
IMPORTANT: The Syncro³ version of the
actuator comes individually
packaged in a cardboard box and is factory tested as an individual machine
When installing a system that requires the use of several Syncro³ actuators
LOCK electro
-
lock, a new RESET procedure must be performed.
USE OF ACTUATOR IN SYNCRO³ VERSION
version the actuator has been equipped with the new system patented by
NEKOS for coordinated synchronisation of a group of actuators (up to eight at the same
Electronic control of speed is completely automatic device inside the actuator and
does not require any external control station: just connect the feeder cable communication
(see diagram on page 15)
and carry out
R
ESET
procedure.
end stop occurs with an automatic positioning process
he rack encounters an obstacle that stops its stroke (the
internal stop in the rack or complete opening/closure of the window); therefore, no
adjustments are required and the end position depends on the length of the rod connected
During initial operation, the actuator memorises the stroke end position; during subsequent
operation, it maintains the memorised stroke end positions and also adjusts the start and
actuator is designed and built to move
opening windows, light domes,
dormer windows and skylights. Its use is specifically intended for ventilation and
; any other use is strongly discouraged, with the
supplier of the entire system in any case retaining sole liability.
The actuator is manufactured in accordance with the Directives and following
ration of Incorporation and Conformity
.
Electrical connections must conform to regulations in force for the design and set
To ensure efficient separation from the grid, an approved type of bipolar “dead
-man”
switch should be used. An omnipolar general power switch with minimum distance of
3 mm between contacts should be installed upstream of the control line.
rformed using the brackets provided and any other type of
assembly should be checked with the manufacturer, who will not accept any
actuator is individually packaged in a cardboard con
tainer and each pack
pective grips and fixing screws,
actuator comes individually
packaged in a cardboard box and is factory tested as an individual machine
.
When installing a system that requires the use of several Syncro³ actuators
lock, a new RESET procedure must be performed.
(see
version the actuator has been equipped with the new system patented by
NEKOS for coordinated synchronisation of a group of actuators (up to eight at the same
Electronic control of speed is completely automatic device inside the actuator and
does not require any external control station: just connect the feeder cable communication
procedure.

5.1. Recognition
Three elements differentiate the SYNCRO
The technical data label with the “..…
The SYNCRO label to one side of the technical data label on the
actuator.
In the 230V ~ version, the power cord has 4 wires
5.2.
Use of a Syncro³
The Syncro³ version of the actuator is used when the window is particularly heavy or wide
(more than approximately 1,
2 m wide)
of the window, especially in the corners, therefore making it necessary to have two or more
retention points.
When a group of Syncro³ actuators is used, the movement of the window sashes occurs in
a syn
chronized manner, i.e., uniformly without interruptions and/or variations in the speeds
of the actuators. If one of the actuators stops, due to mechanical obstruction or an
electronic problem, the other actuators stop as well, thereby guaranteeing the inte
the window.
Recall that the force exerted by a group of actuators installed on the same
window sash is equivalent to the sum of the forces exerted by each actuator; so
assembling two actuators doubles the force exerted on the window.
IMPORTANT:
when calculating the dimensions of a system with multiple
Syncro³ actuators, it is advisable to consider the force of each actuator as
90% of that stated on the plate.
6.
ACTUATOR DIMENSIONS
The main overall dimensions of the actuator are
7
Three elements differentiate the SYNCRO
3
version of the actuator:
The technical data label with the “..…
SYNCRO
3
” label.
The SYNCRO label to one side of the technical data label on the
In the 230V ~ version, the power cord has 4 wires
(3 power +1 signal
Use of a Syncro³
-version actuator
The Syncro³ version of the actuator is used when the window is particularly heavy or wide
2 m wide)
and a single actuator doesn't allow complete closure
of the window, especially in the corners, therefore making it necessary to have two or more
When a group of Syncro³ actuators is used, the movement of the window sashes occurs in
chronized manner, i.e., uniformly without interruptions and/or variations in the speeds
of the actuators. If one of the actuators stops, due to mechanical obstruction or an
electronic problem, the other actuators stop as well, thereby guaranteeing the inte
Recall that the force exerted by a group of actuators installed on the same
window sash is equivalent to the sum of the forces exerted by each actuator; so
assembling two actuators doubles the force exerted on the window.
when calculating the dimensions of a system with multiple
Syncro³ actuators, it is advisable to consider the force of each actuator as
90% of that stated on the plate.
ACTUATOR DIMENSIONS
The main overall dimensions of the actuator are
shown in the figure
The SYNCRO label to one side of the technical data label on the
(3 power +1 signal
).
The Syncro³ version of the actuator is used when the window is particularly heavy or wide
and a single actuator doesn't allow complete closure
of the window, especially in the corners, therefore making it necessary to have two or more
When a group of Syncro³ actuators is used, the movement of the window sashes occurs in
chronized manner, i.e., uniformly without interruptions and/or variations in the speeds
of the actuators. If one of the actuators stops, due to mechanical obstruction or an
electronic problem, the other actuators stop as well, thereby guaranteeing the inte
grity of
Recall that the force exerted by a group of actuators installed on the same
window sash is equivalent to the sum of the forces exerted by each actuator; so
when calculating the dimensions of a system with multiple
Syncro³ actuators, it is advisable to consider the force of each actuator as
below.
8
7. ID PLATE AND MARKING DATA
The actuators have marking and comply with the Standards listed in the Declaration of
Conformity. They also come with a Declaration of Incorporation, due to their classification
by the Machinery Directive as “partly completed machines”. Both declarations are included
in the final pages of this manual.
The plate data is displayed on an adhesive label placed on the outside of the casing, which
must remain intact and visible.
The main information it displays includes: manufacturer's address, product name - model
number, technical characteristics, production date and serial number.
In the event of a complaint, please indicate the serial number (SN) displayed on the label.
An explanation of the symbols used on the label to abbreviate the technical characteristics
is given in the table in the chapter on “TECHNICAL DATA”.
8. TECHNICAL DATA
Model SKYRO 650 230V 230V SYNCRO³
24V SYNCRO³
Thrust and traction force (FN) 650 N
Course lengths (SV) 180, 230, 350, 550, 750, 1000 mm
Input voltage (UN) 110-230V~ 50/60 Hz 24V
Current absorption at nominal load (IN) 0,37 A (110V) - 0,18 A (230V) 1,0 A
Power absorption at nominal load (PN) 28 W (110V) – 24 W (230V) 24 W
No load speed (Open / Close) 5 mm/s 7 mm/s
Duration of no load stroke In relation to the stroke
Electrical insulation Class II Class III (Selv)
Type of service (DR) 2 cycles 5 cycles
Operating temperature (- 20°C) (+ 70 ºC)
Protection index for electrical devices IP65
Soft-stop function Yes
Relax function Yes
Adjustment of connection to window
frame Position self-determining
Parallel powering of two or more motors Yes (max 20)
Synchronised function No Yes - max 4 Yes max 8
Holding nominal force 3000 N
Stroke-end at opening Electronic with encoder (once the end position is
acquired)
Stroke-end at closing At absorption of power
Protection against overload At absorption of power
Type and length of power cable H05VV-F - 2m
Noise level 55 dB(A)
Dimensions 44 x 113 x (stroke + 163) mm
Weight 1,40/1,45/1,65/2,34/2,69/3,11 Kg
1,70/1,75/1,95/
2,29/2,64/3,07
Kg
Information presented in these illustrations is not binding and is also subject to variation without prior notice.

9. ELECTRICAL POWER
SUPPLY
The actuator is commercially available in
specifications:
1. SKYRO 650 230V:
runs on grid tension of
cable (L
IGHT
B
LUE
, common neutral;
2. SKYRO 650 230V S
YNCRO
four-wire power cord (B
LUE
and a G
REEN
fourth wire for electronic synchronisation with other similar (NEKOS
patent) actuators.
3. SKYRO 650 24V S
YNCRO
B
LACK
connected to + (positive) open,
“3
” third wire is used both for synchronisation with other similar
connection to the K-
Lock electromechanical lock.
Low tension actuators 24V
emergency battery or a security feeder with an output tension of 24V
max. 28.8V).
IMPORTANT
FOR PRODUCT SAFETY
supplies, the G
REEN
WI
9.1.
Selection of power cable section
The following table indicates maximum cable lengths for connection to a single motors.
CABLE SECTION
0,50 mm²
0,75 mm²
1,00 mm²
1,50 mm²
2,50 mm²
4,00 mm²
6,00 mm²
10.
INSTRUCTIONS FOR ASSEMBLY
These indications are for specialised technical personnel and basic work and safety
techniques are not indicated.
All preparatory, assembly and electrical connection operations must be performed by
specialised technical personnel
Check that the following funda
Before installing the actuator, check that the moving parts of the window on which
it is to be installed are in perfect working cond
properly and are well balanced (where applicable).
Actuator specifications must be sufficient for movement of the window without
encountering any
obstacle. The limits indicated in the technical data table must
not be superseded
(page 8)
Calculations should be checked using the formula indicated on page 5.
9
SUPPLY
The actuator is commercially available in
three
versions identified according to electrical
runs on grid tension of
110-230V~
50/60Hz,
, common neutral;
B
LACK
, phase open; B
ROWN
YNCRO
3
: is powered by 110-
230V~ 50/60Hz mains voltage, with a
LUE
, common neutral; B
LACK
, open live;
fourth wire for electronic synchronisation with other similar (NEKOS
YNCRO
3
:
is powered by 24V voltage with a three
connected to + (positive) open,
R
ED
connected to + (positive) close. The
” third wire is used both for synchronisation with other similar
Lock electromechanical lock.
can be powered using a specific RWA station with
emergency battery or a security feeder with an output tension of 24V
FOR PRODUCT SAFETY
: in Syncro³ motors with 24V
WI
re must be insulated if not used.
Selection of power cable section
The following table indicates maximum cable lengths for connection to a single motors.
Actuator fed at
24V 110V~
~20 m ~300 m
~30 m ~450 m
~40 m ~600 m
~60 m ~900 m
~100 m ~1500 m
~160 m ~2500 m
~240m ~3700 m
INSTRUCTIONS FOR ASSEMBLY
These indications are for specialised technical personnel and basic work and safety
techniques are not indicated.
All preparatory, assembly and electrical connection operations must be performed by
specialised technical personnel
to guarantee optimal function and service of the actuator.
Check that the following funda
mental conditions have been met:
Before installing the actuator, check that the moving parts of the window on which
it is to be installed are in perfect working cond
ition and that they open and close
properly and are well balanced (where applicable).
Actuator specifications must be sufficient for movement of the window without
obstacle. The limits indicated in the technical data table must
(page 8)
and the most appropriate stroke should be selected.
Calculations should be checked using the formula indicated on page 5.
versions identified according to electrical
50/60Hz,
with a three wire
ROWN
, phase closed).
230V~ 50/60Hz mains voltage, with a
, open live;
B
ROWN
, close live),
fourth wire for electronic synchronisation with other similar (NEKOS
is powered by 24V voltage with a three
-wire power cable:
connected to + (positive) close. The
G
REEN
” third wire is used both for synchronisation with other similar
actuators and for
can be powered using a specific RWA station with
emergency battery or a security feeder with an output tension of 24V
24V (min. 20.4V,
: in Syncro³ motors with 24V
power
The following table indicates maximum cable lengths for connection to a single motors.
230V~
~1400 m
~2100 m
~2800 m
~4000 m
~6800 m
~11000 m
~15000 m
These indications are for specialised technical personnel and basic work and safety
All preparatory, assembly and electrical connection operations must be performed by
to guarantee optimal function and service of the actuator.
Before installing the actuator, check that the moving parts of the window on which
ition and that they open and close
Actuator specifications must be sufficient for movement of the window without
obstacle. The limits indicated in the technical data table must
and the most appropriate stroke should be selected.
Calculations should be checked using the formula indicated on page 5.
Attention.
Check that the electrical
the technical data plate on the machine and that the indicated temperature range
is compatible with the installation site
Ensure that the actuator has not been damaged during transport.
Check, once the
actuator is installed, that the window is fully closed
For bottom hung window frames injury could be caused by accidental falls of the
window.
An appropriately sized flexible link arm or fall prevention safety system
designed to resist a force equal to at
window MUST
be installed.
10.1.
Preparation of actuator for assembly
Before starting assembly of the actuator, prepare the following material for completion,
equipments and tools.
For fixing onto metal window frames
headed metric screws (6
pieces)
For fixing onto wooden window frames
For fixing onto PVC window frames
Equipment and tools
: measuring tape, pencil, drill/screwdriver, set of drill heads for
metal, insert for screwing in, electricians pliers, screwdrivers.
10.2.
Calculation of the number of push / retention points
If the window has a width exceeding 120 cm, it is
points by assembling several actuators. The simple formula below allows you to calculate
the position of these points.
Formula:
The two side dimensions -
LA : (PA x 2) = QL
The central dimensions
-
QL x 2
Fig. 1
Fig. 4
10
Check that the electrical
supply used corresponds to the indications on
the technical data plate on the machine and that the indicated temperature range
is compatible with the installation site
.
Ensure that the actuator has not been damaged during transport.
actuator is installed, that the window is fully closed
For bottom hung window frames injury could be caused by accidental falls of the
An appropriately sized flexible link arm or fall prevention safety system
designed to resist a force equal to at
least three times the total weight of the
be installed.
Preparation of actuator for assembly
Before starting assembly of the actuator, prepare the following material for completion,
For fixing onto metal window frames
: M5 threaded inserts
pieces)
.
For fixing onto wooden window frames
: self threading screws for wood Ø4.5
For fixing onto PVC window frames
: self threading screws for metal Ø4.8
: measuring tape, pencil, drill/screwdriver, set of drill heads for
metal, insert for screwing in, electricians pliers, screwdrivers.
Calculation of the number of push / retention points
If the window has a width exceeding 120 cm, it is
advisable to use several push / retention
points by assembling several actuators. The simple formula below allows you to calculate
LA : (PA x 2) = QL
QL x 2
Legend:
LA =
Window Sash Width (hinges side)
PA =
Actuator Attachment Points
QL =
Side Dimensions
Fig. 2 Fig. 3
Fig. 5 Fig. 5 bis
supply used corresponds to the indications on
the technical data plate on the machine and that the indicated temperature range
Ensure that the actuator has not been damaged during transport.
actuator is installed, that the window is fully closed
.
For bottom hung window frames injury could be caused by accidental falls of the
An appropriately sized flexible link arm or fall prevention safety system
least three times the total weight of the
Before starting assembly of the actuator, prepare the following material for completion,
: M5 threaded inserts
(6 pieces), M5x12 flat
: self threading screws for wood Ø4.5
(6 pieces).
: self threading screws for metal Ø4.8
(6 pieces).
: measuring tape, pencil, drill/screwdriver, set of drill heads for
Calculation of the number of push / retention points
advisable to use several push / retention
points by assembling several actuators. The simple formula below allows you to calculate
Window Sash Width (hinges side)
Actuator Attachment Points
Side Dimensions
Fig. 3 bis
Fig. 6

11
10.3. Assembly with outward opening window
A. Mark the centre line of the frame in pencil on both moveable and fixed parts (Fig. 1).
When more than one actuator is installed on the same window, mark as indicated in §
10.2 above.
B. Place the motor support bracket along the edge of the fixed part of the frame in line
with the centre line marked out previously and mark the positions for the four holes
for the fixing screws (Fig. 2).
C. Drill the window frame with a suitable bit and mount the motor support bracket, making
sure that the screws are firmly tightened (Fig. 3 and Fig. 3bis).
D. Line up the front bracket along the centre line on the moveable part of the frame and
mark out the holes required for the screws (Fig. 4).
E. Drill the holes and screw in the front bracket, making sure that all screws are fitted
tightly (Fig.5 and Fig. 5bis).
F. Take the clamp screws and connect them to the motor support bracket. Leave them
slack by at least two turns.
G. Insert the dove-tailed section of the actuator into the clamp screws. Make sure the
shaped part of the base fits neatly into the slot to ensure the actuator runs smoothly
along its axis (Fig. 6).
H. Then position the actuator so that the hole provided in the rack engages the front
attachment bracket. Insert the M6x25 screw into the bracket and into the eyebolt and
tighten the self-locking bolt with two 10 spanners.
I. Manually move the actuator along its axis to close the frame and make it weather
tight. Tighten the clamp screws previously only placed and set the actuator in line
with the frame. Suggested tightening torque is 4-5 Nm.
J. Plug the actuator in and carry out a test to check opening and closure of the frame.
Make sure the frame closes fully and is weather tight.
K. The limit switch for the actuator is automatic on re-entry. The equipment will exert a
pressure to guarantee even the largest of frames is completely weather tight.
10.4. Installation on domed rooflights, dormers or industrial skylights
To install the actuator on these types of windows, follow the instructions for “Installation on
awning windows” given in § 10.3 above.
10.5. Assembly with opening inwards
A. Mark the centre line of the frame in pencil on both moveable and fixed parts (Fig. 1).
When more than one actuator is installed on the same window, mark as indicated in § 10.2
above.
B. Place the motor support bracket along the edge of the moveable part of the frame in
line with the centre line marked out previously and mark the positions for the four
holes for the fixing screws (Fig. 2).
C. Drill holes into the frame and screw in the motor support bracket, making sure that
all screws are fitted tightly (Fig. 3 and Fig. 3bis).
12
D. Line up the front bracket along the centre line on the fixed part of the frame and
mark out the holes required for the screws (Fig. 4).
E. Drill the holes and screw in the front bracket, making sure that all screws are fitted
tightly (Fig. 5 and Fig. 5bis).
F. Take the clamp screws and connect them to the motor support bracket. Leave them
slack by at least two turns.
G. Insert the dove-tailed section of the actuator into the clamp screws. Make sure the
shaped part of the base fits neatly into the slot to ensure the actuator runs smoothly
along its axis (Fig. 6).
H. Then position the actuator so that the hole in the rack is aligned with that in the front
attachment bracket. Insert the M6x25 bolt into the bracket and the hole in the rack; then
fix the self-locking nut with two 10 mm hex keys.
I. Manually move the actuator along its axis to close the frame and make it weather
tight. Tighten the clamp screws previously only placed and set the actuator in line
with the frame. Suggested tightening torque is 4-5 Nm.
J. Perform a complete opening and closing test on the window. When the closing
operation is completed, ensure that the window is properly closed by checking the
compression of the seals.
K. The stroke-end of the actuator during return is automatic. The device exerts traction to
ensure perfect compression of the seals.
10.6. Installing the actuator and rod (or transmission) with a connection bar
Skyro 650 actuators can be connected in tandem using a rod without a motor, by
means of a mechanical connection bar. The movement of one actuator is mechanically
linked to the rod in order to transmit motion in a uniform manner and at the same
speed.
Two or more actuators can be installed on the window frame, with one or more Syncro³
version motors, depending on the force requirements.
Assemble as follows:
A. Mark the assembly distance between centres for the two actuators out onto the
frame in accordance with the measurements in the above table.
B. Place the support brackets of the actuator into position, mark
out the holes for drilling, drill the frame and mount the brackets
(see “Assembly for outward opening windows” for details).
C. Place the front brackets into position, mark out the holes for
drilling, drill the frame and mount the front brackets (see
“Assembly for outward opening windows” for details).
D. Mount the actuators
E. Mount the connection bar as follows:
Insert the connection bar first into one of the actuators, and then into the second
actuator. Make sure the bar protrudes at least 2 mm from each actuator (Fig. 7).
Fig.
7

Mount and screw the M8x14 mm flat headed screw
(
provided with connection bar
to
prevent the bar from slipping out.
DISTANCE BETWEEN THE CENTRES OF THE CONNECTION BARS
Code
Description
4010009
Connection bar 1000 mm length
4010010
Connection bar 1500 mm length
4010011
Connection bar 2000 mm length
4010011
Connection bar 2500 mm length
For special measurements, consult the manufacturer
The drawing below shows an installation example with various push point solutions, with
actuators and rods on a large window or on “strip” windows. It should be noted that up to a
maximum of 8 Syncro actuators (4 for 230V) can be fitted, with various rod solutions for
additional push points.
Two or more Syncro³ version
motors in tandem
11.
ELECTRICAL CONNECTIONS
Appliances are equipped with cable manufactured in accordance with safety standards and
protection against radio
disturbances.
E
ACH ACTUATOR MODEL M
UST USE ITS OWN SPEC
Before performing the electrical connection consult the table below and check
correspondence between the feeder cable and the tension data on the actuator label.
13
Mount and screw the M8x14 mm flat headed screw
provided with connection bar
), into the two ends of the bar
prevent the bar from slipping out.
DISTANCE BETWEEN THE CENTRES OF THE CONNECTION BARS
Description
Length of bar
(mm)
Connection bar 1000 mm length
1.035
Connection bar 1500 mm length
1.535
Connection bar 2000 mm length
2.035
Connection bar 2500 mm length
2.535
For special measurements, consult the manufacturer
The drawing below shows an installation example with various push point solutions, with
actuators and rods on a large window or on “strip” windows. It should be noted that up to a
maximum of 8 Syncro actuators (4 for 230V) can be fitted, with various rod solutions for
Two or more Syncro³ version
Two or more Syncro³
version motors + 1 rod
with a connection bar in
tandem
One motor + 1 rod +
connection bar in tandem
ELECTRICAL CONNECTIONS
Appliances are equipped with cable manufactured in accordance with safety standards and
disturbances.
UST USE ITS OWN SPEC
IFIC CABLE
.
Before performing the electrical connection consult the table below and check
correspondence between the feeder cable and the tension data on the actuator label.
DISTANCE BETWEEN THE CENTRES OF THE CONNECTION BARS
“D”
distance between centres
(mm)
1.000
1.500
2.000
2.500
For special measurements, consult the manufacturer
The drawing below shows an installation example with various push point solutions, with
actuators and rods on a large window or on “strip” windows. It should be noted that up to a
maximum of 8 Syncro actuators (4 for 230V) can be fitted, with various rod solutions for
One motor + 1 rod +
connection bar in tandem
Appliances are equipped with cable manufactured in accordance with safety standards and
Before performing the electrical connection consult the table below and check
correspondence between the feeder cable and the tension data on the actuator label.
Tension
Cable length
110-230V~ 50/60Hz
2 m
110-230V~ 50/60Hz
Syncro3
2,5 m
24V Syncro³
2 m
If feeder cables require extending
cable sections should be selected accordingly. Conductor sections are indicated in the
table on page 9
(Selection of cable section)
IMPORTANT FOR PRODUCT SAFETY:
in 24V
actuators, wire Green if not used must be insulated.
11.1. Connections of
SKYRO 650
For cabling, follow the diagrams below.
3
1 2 3
FN
100-230V~ 50/60Hz
1 2
110/230V ~
11.2. Connections of
SKYRO
Cable supplied together with
the SYNCRO
and 2 m long for 24V
Syncro³ version; it’s calculated in accordance with safety rules.
Electrical connection of the communication wires should be performed using a simple
appropriately sized bell clamp
electrical contact (copper to copper) are vital to avoid communication disturbs.
Maximum length of feeding cables can be 10 m.
14
Cable length
Number of
wires Wire colours
2 m
3
L
IGHT
B
LUE
B
LACK
B
ROWN
2,5 m
4
L
IGHT
B
LUE
B
LACK
B
ROWN
2 m
3 R
ED
B
LACK
If feeder cables require extending
to the control button for low voltage actuators (24V
cable sections should be selected accordingly. Conductor sections are indicated in the
(Selection of cable section)
.
IMPORTANT FOR PRODUCT SAFETY:
actuators, wire Green if not used must be insulated.
SKYRO 650
For cabling, follow the diagrams below.
110/230V ~
-+
24V
1 2
SKYRO
650 Syncro³
the SYNCRO
3
actuator is 2,5
m long for 230V~ Syncro³ version
Syncro³ version; it’s calculated in accordance with safety rules.
Electrical connection of the communication wires should be performed using a simple
appropriately sized bell clamp
(supplied with the appliance)
. Secure connections with good
electrical contact (copper to copper) are vital to avoid communication disturbs.
Maximum length of feeding cables can be 10 m.
Colour of wires used
for notification
-
G
REEN
G
REEN
to the control button for low voltage actuators (24V
),
cable sections should be selected accordingly. Conductor sections are indicated in the
actuators, wire Green if not used must be insulated.
3
1
2
3
24V
m long for 230V~ Syncro³ version
Syncro³ version; it’s calculated in accordance with safety rules.
Electrical connection of the communication wires should be performed using a simple
. Secure connections with good
electrical contact (copper to copper) are vital to avoid communication disturbs.

For cabling, follow the diagrams below.
3
1 2 3 4
FN
100-230V~ 50/60Hz
1 2
110/230V ~
WARNING:
after every limit switch or electronic protection device function the
rack will back track for around 2 mm in the opposite direction. This is quite
normal, and has been designed to release tension on mechanical parts and
allow complete weather proofing to
12.
PROGRAMMING THE ACTUATOR
Once all electrical connections are completed, before putting the actuator into operational
use, the procedure for acquiring the operating parameters must first be performed; this
operation is known as R
ESET
.
The actuator has been individually tested in th
comes already programmed for the maximum opening stroke.
R
ESETTING
, or if the actuator loses its basic settings, the internal memory automatically
recognises and saves the install
between sash and frame.
The difference in height between the protruding part of the sash and the frame is known as
“overlay” (See § 12.3)
and in the acquisition phase it allows the actuator to acquire the
closing stroke-
end parameter.
or following a R
ESET
operation, and it
On the left side of
the gear reducer there is a screw cap that must be removed in order to
access the dip-
switch. Beside it there is also an LED indicator used to define errors and the
identifiers
of the various machines
Programming is quick and simple and can be performed
With the dip-
switch set to
implemented and the stroke is memorised
With the dip-
switch set to
installation procedure and implements the operating parameters and stroke end
position.
15
For cabling, follow the diagrams below.
4
110/230V ~
SYNCRO
-+
24V
1
2
1 2
after every limit switch or electronic protection device function the
rack will back track for around 2 mm in the opposite direction. This is quite
normal, and has been designed to release tension on mechanical parts and
allow complete weather proofing to
enhance durability of mechanical parts.
PROGRAMMING THE ACTUATOR
Once all electrical connections are completed, before putting the actuator into operational
use, the procedure for acquiring the operating parameters must first be performed; this
The actuator has been individually tested in th
e factory, its operation is guaranteed and it
comes already programmed for the maximum opening stroke.
During initial installation or
, or if the actuator loses its basic settings, the internal memory automatically
recognises and saves the install
ation and operating parameters, including the distance
The difference in height between the protruding part of the sash and the frame is known as
and in the acquisition phase it allows the actuator to acquire the
end parameter.
This is seen the first time the device fully closes the window,
operation, and it
is saved as an operating parameter
the gear reducer there is a screw cap that must be removed in order to
switch. Beside it there is also an LED indicator used to define errors and the
of the various machines
.
Programming is quick and simple and can be performed
at any time
switch set to
ON
, the actuator is operational, the parameters are
implemented and the stroke is memorised
.
switch set to
OFF
(1), the actuator performs the
installation procedure and implements the operating parameters and stroke end
3
1
3
24V
SYNCRO
after every limit switch or electronic protection device function the
rack will back track for around 2 mm in the opposite direction. This is quite
normal, and has been designed to release tension on mechanical parts and
enhance durability of mechanical parts.
Once all electrical connections are completed, before putting the actuator into operational
use, the procedure for acquiring the operating parameters must first be performed; this
e factory, its operation is guaranteed and it
During initial installation or
, or if the actuator loses its basic settings, the internal memory automatically
ation and operating parameters, including the distance
The difference in height between the protruding part of the sash and the frame is known as
and in the acquisition phase it allows the actuator to acquire the
This is seen the first time the device fully closes the window,
is saved as an operating parameter
.
the gear reducer there is a screw cap that must be removed in order to
switch. Beside it there is also an LED indicator used to define errors and the
at any time
.
, the actuator is operational, the parameters are
(1), the actuator performs the
R
ESET
or initial
installation procedure and implements the operating parameters and stroke end
IMPORTANT: If the K
-
actuator, a new R
ESET
Before starting the
R
connection with the K
-
12.1. R
ESET
procedure
The procedure is valid for configuring a single actuator, a Syncro³ array or when a K
LOCK electromechanical lock is installed
IMPORTANT: The
dip
actuators; after each change it is necessary to wait a few seconds (~ 5 sec)
before restoring the power to the actuators in order for the change to
become effective.
Set the dip-switch to OFF
. For conf
electric lock is installed) in which the
needs to be set for one actuator,
The actuator will start at once (or
perform a full closing manoeuvre (
manoeuvre of about 5 cm.
the movement of the rack and, whe
to complete the procedure
.
When the operation is finished, each connected device gives a flashing orange signal to
indicate completion of the RESET procedure. Each device will give a different number of
flashes to indicate that the access code is received (actuator 1
flash
→ pause; actuator 2 → 2 flashes → pause → 2 flashes → pause, etc.)
The power supply to the devices can now be switched off
The opening stroke
(outward rack movement)
stroke)
or can be customised as required; this is decided at this stage
Command the actuator to
desired position (stroke customisation). The point at which the command is stopped will
be the outward stroke-
end position.
as the
O
PENING
stroke end
the same point.
If the window does not open to the desired position, repeat the
If the K-LOCK electro-
lock is present, refer to the respective user and
installation manual.
12.2. Closing stroke-
end
The opening /
closing stroke
automatic and non-settable.
The actuator stops due to the power absorption effect on it
when the rack –
moving outwards
caus
es the complete compression of the seals, i.e., when the power absorbed exceeds a
preset threshold in the microprocessor
CAUTION:
After each closure or activation of the electronic protection, the rack
moves slightly in the opposite direction, to allow
and/or to relax the internal mechanical components of the actuator
16
-
Lock electro-
mechanical lock is fitted, even to only one
procedure must be performed.
R
ESET
procedure, it is advisable to check the electrical
-
LOCK.
The procedure is valid for configuring a single actuator, a Syncro³ array or when a K
LOCK electromechanical lock is installed
.
dip
-
switch settings should be changed to non
actuators; after each change it is necessary to wait a few seconds (~ 5 sec)
before restoring the power to the actuators in order for the change to
. For conf
iguration with multiple devices (or when a K
electric lock is installed) in which the
G
REEN
wires are connected, the dip
needs to be set for one actuator,
the other devices will link to it automatically
The actuator will start at once (or
after about 8 seconds if there is an electro
perform a full closing manoeuvre (
rack
completely retracted) and then an opening
manoeuvre of about 5 cm.
During this phase, ensure that there are no obstructions to
the movement of the rack and, whe
n using Syncro actuators, wait for all the machines
.
When the operation is finished, each connected device gives a flashing orange signal to
indicate completion of the RESET procedure. Each device will give a different number of
flashes to indicate that the access code is received (actuator 1
→ 1 flash → pause → 1
→ pause; actuator 2 → 2 flashes → pause → 2 flashes → pause, etc.)
The power supply to the devices can now be switched off
.
(outward rack movement)
may be left as set in the factory
or can be customised as required; this is decided at this stage
Command the actuator to
O
PEN
,
without interrupting the command
desired position (stroke customisation). The point at which the command is stopped will
end position.
This outward distance will be saved and used
stroke end
. With Syncro³ actuators, they will move in sync a
If the window does not open to the desired position, repeat the
R
lock is present, refer to the respective user and
end
closing stroke
-end is automatic and non-
settable
The actuator stops due to the power absorption effect on it
moving outwards
–
reaches its internal stroke limit or
es the complete compression of the seals, i.e., when the power absorbed exceeds a
preset threshold in the microprocessor
.
After each closure or activation of the electronic protection, the rack
moves slightly in the opposite direction, to allow
the right compression of the seals
and/or to relax the internal mechanical components of the actuator
mechanical lock is fitted, even to only one
procedure, it is advisable to check the electrical
The procedure is valid for configuring a single actuator, a Syncro³ array or when a K
-
switch settings should be changed to non
-powered
actuators; after each change it is necessary to wait a few seconds (~ 5 sec)
before restoring the power to the actuators in order for the change to
iguration with multiple devices (or when a K
-LOCK
wires are connected, the dip
-switch only
the other devices will link to it automatically
.
after about 8 seconds if there is an electro
-lock) and
completely retracted) and then an opening
During this phase, ensure that there are no obstructions to
n using Syncro actuators, wait for all the machines
When the operation is finished, each connected device gives a flashing orange signal to
indicate completion of the RESET procedure. Each device will give a different number of
→ 1 flash → pause → 1
→ pause; actuator 2 → 2 flashes → pause → 2 flashes → pause, etc.)
.
may be left as set in the factory
(maximum
or can be customised as required; this is decided at this stage
.
without interrupting the command
, up to the
desired position (stroke customisation). The point at which the command is stopped will
This outward distance will be saved and used
. With Syncro³ actuators, they will move in sync a
nd stop at
R
ESET
procedure.
lock is present, refer to the respective user and
settable
closing stroke-end is
The actuator stops due to the power absorption effect on it
reaches its internal stroke limit or
– returning inwards –
es the complete compression of the seals, i.e., when the power absorbed exceeds a
After each closure or activation of the electronic protection, the rack
the right compression of the seals
and/or to relax the internal mechanical components of the actuator
.

After programming the stroke end positions, it is recommended to check the opening and
closing of the window a few times. In the case of error, the programming can be repeated
to achieve the desired stroke. If you need to perform the
instructions given above.
12.3.
Overlap acquisition
The operation that must be carried out to acquire the overlap (after the
has already been executed) is described below:
-
The steps for installing the actuator/s on the window and the electrical connections
have already been explained (see § 10 and
-
Use the controls to open the window a few centimetres
-
Use the controls to close the window up to the stroke end
- When the w
indow is completely closed, if acquisition of the overlap is successful, the
actuator will display an orange flashing light for 3 seconds
IMPORTANT:
If, for any reason, the actuator fails to complete the closure of
the window correctly, stopping before finishing the stroke, the
overlap acquisition operation will have to be repeated in that order, until the
procedure is completed correctly
12.4. LED Light signals
If there are any problems during installation or operation of the machines, consult the
possible causes listed below:
The LED can be seen on the cap that conceals the dip
gear reducer, and has three c
olours
R
ED
, indicates an error or malfunction
G
REEN
, operation is OK
O
RANGE
, wait: functions in progress
17
After programming the stroke end positions, it is recommended to check the opening and
closing of the window a few times. In the case of error, the programming can be repeated
to achieve the desired stroke. If you need to perform the
R
ESET
Overlap acquisition
The operation that must be carried out to acquire the overlap (after the
has already been executed) is described below:
The steps for installing the actuator/s on the window and the electrical connections
have already been explained (see § 10 and
11).
Use the controls to open the window a few centimetres
.
Use the controls to close the window up to the stroke end
.
indow is completely closed, if acquisition of the overlap is successful, the
actuator will display an orange flashing light for 3 seconds
.
If, for any reason, the actuator fails to complete the closure of
the window correctly, stopping before finishing the stroke, the
overlap acquisition operation will have to be repeated in that order, until the
procedure is completed correctly
If there are any problems during installation or operation of the machines, consult the
The LED can be seen on the cap that conceals the dip
-
switch, positioned to the left of the
olours
:
, indicates an error or malfunction
;
, operation is OK
;
, wait: functions in progress
.
After programming the stroke end positions, it is recommended to check the opening and
closing of the window a few times. In the case of error, the programming can be repeated
ESET
procedure, see the
The operation that must be carried out to acquire the overlap (after the
RESET procedure
The steps for installing the actuator/s on the window and the electrical connections
indow is completely closed, if acquisition of the overlap is successful, the
If, for any reason, the actuator fails to complete the closure of
the window correctly, stopping before finishing the stroke, the
RESET and
overlap acquisition operation will have to be repeated in that order, until the
If there are any problems during installation or operation of the machines, consult the
switch, positioned to the left of the
18
WITH RED LED
Number
of
Flashes
Type of Error Possible Solution
1
Current error:
The actuator has detected an
overcurrent in the motor.
Check that there are no obstacles preventing
the actuator from completing its stroke. Check
that the actuator is installed correctly.
2
Communication error:
Communication between the
devices is interrupted, or the
devices being used have
undergone the RESET procedure
separately
Check the condition of the connection cables,
and repeat the RESET procedure if necessary.
3 Electro-lock error
Check the electro
-
lock
.
See the relevant
manual
4 Discordant internal setting:
The internal setting of the actuators
is discordant.
Repeat the RESET procedure
5
RESET Procedure error:
The RESET procedure was not
completed successfully or was
interrupted.
Repeat the RESET procedure
6
Wiring error:
The power supply cables of the
devices configured in Syncro³ are
inverted.
Check and correct the wiring.
7
Encoder error:
The internal encoder had a
counting error
Repeat the RESET procedure
8 Electric power supply error:
The power supply voltage is outside
the permitted range or is unstable.
Check the electrical contacts at the ends of the
actuator cable and ensure that the power
supply is correct.
9
Alignment error:
The rack position displacement of
the actuators connected in Syncro
is beyond the permitted maximum.
Repeat the RESET procedure
10 Memory error:
The internal memory write process
failed.
Repeat the RESET procedure
11
Connection error:
A RESET procedure is being
started with actuators different than
Syncro³
Check the type of actuators chosen for the
system. Repeat the RESET procedure
WITH GREEN LED
LED Status
Meaning
STEADY-ON
Device powered correctly.
The device has correctly performed a return stroke and is completing the
operation by memorising the position, or is currently in movement.
FLASHING
Device correctly powered. The device has successfully performed an
outward stroke. The number of flashes indicates the number previously
assigned to the device during the RESET procedure

LED Status
STEADY-ON
Duration < 0.5 sec.
Internal memory write process in
STEADY-ON RESET
STEADY-ON for 3
sec.
Overlap acquisition procedure finished correctly.
FLASHING
RESET
the number assigned to the device in a configuration with several
devices.
13.
CHECKING FOR CORRECT ASSEMBLY
CAUTION:
In order the ensure perfect operation of the machine, its constant
performance over time and safety for persons and property, it must be installed in
accordance with professional standards, and therefore the following indications for
testing after install
ation are necessary
Check that the window is perfectly closed at corners and that there are no obstacles
caused by incorrect positioning during assembly
Check the alignment of the actuator with the sash bracket; if out of line, the rack will
require
more energy in order to slide
Check that when the window is closed there is a gap of at least 5 mm between the sash
bracket and the actuator body. This will ensure that the window closes properly, with the
right compression on the seals. Otherwise, ther
Check also that the attachments and support brackets are aligned with one another and
firmly secured to the window frame, and that the screws are properly tightened. The use
self-tapping or self-
drilling screws on alu
would tear the profile after a few operations; use metric screws with threaded inserts
(see the indications in § 10.1
Check that the power cord does not impede the rotation of the actuator or interfere with
prope
r operation; this could affect the safety of persons and property
Check that the window reaches the desired position according to the stroke
selected.
14.
EMERGENCY MANOEUVRES, MAINTENANCE OR CLEANING
In the event that the window frame should require
problem with the mechanism or for normal maintenance or externa
frame, proceed as follows:
1.
Unscrew the nut from the pivot screw securing the rack to the sash bracket.
2.
Hold the window in one ha
(this operation should be performed with the window open at least 10 cm to facilitate
the extraction of
the screw
3.
Manually open the window frame.
A
TTENTION
:
DANGER
position by the
rack
19
WITH ORANGE LED
Meaning
Internal memory write process in
progress.
Procedure in progress.
Overlap acquisition procedure finished correctly.
Procedure finished correctly. The number of flashes indicates
the number assigned to the device in a configuration with several
devices.
CHECKING FOR CORRECT ASSEMBLY
In order the ensure perfect operation of the machine, its constant
performance over time and safety for persons and property, it must be installed in
accordance with professional standards, and therefore the following indications for
ation are necessary
.
Check that the window is perfectly closed at corners and that there are no obstacles
caused by incorrect positioning during assembly
.
Check the alignment of the actuator with the sash bracket; if out of line, the rack will
more energy in order to slide
.
Check that when the window is closed there is a gap of at least 5 mm between the sash
bracket and the actuator body. This will ensure that the window closes properly, with the
right compression on the seals. Otherwise, ther
e is no certainty of complete closure
Check also that the attachments and support brackets are aligned with one another and
firmly secured to the window frame, and that the screws are properly tightened. The use
drilling screws on alu
minium windows is not recommended as they
would tear the profile after a few operations; use metric screws with threaded inserts
(see the indications in § 10.1
).
Check that the power cord does not impede the rotation of the actuator or interfere with
r operation; this could affect the safety of persons and property
Check that the window reaches the desired position according to the stroke
EMERGENCY MANOEUVRES, MAINTENANCE OR CLEANING
In the event that the window frame should require
manual opening due to power failure or
problem with the mechanism or for normal maintenance or externa
l cleaning of the window
Unscrew the nut from the pivot screw securing the rack to the sash bracket.
Hold the window in one ha
nd and pull the
pivot screw out of the hole
(this operation should be performed with the window open at least 10 cm to facilitate
the screw
).
Manually open the window frame.
DANGER
–
the window could fall as the sash is no longer held in
rack.
Procedure finished correctly. The number of flashes indicates
the number assigned to the device in a configuration with several
In order the ensure perfect operation of the machine, its constant
performance over time and safety for persons and property, it must be installed in
accordance with professional standards, and therefore the following indications for
Check that the window is perfectly closed at corners and that there are no obstacles
Check the alignment of the actuator with the sash bracket; if out of line, the rack will
Check that when the window is closed there is a gap of at least 5 mm between the sash
bracket and the actuator body. This will ensure that the window closes properly, with the
e is no certainty of complete closure
.
Check also that the attachments and support brackets are aligned with one another and
firmly secured to the window frame, and that the screws are properly tightened. The use
minium windows is not recommended as they
would tear the profile after a few operations; use metric screws with threaded inserts
Check that the power cord does not impede the rotation of the actuator or interfere with
r operation; this could affect the safety of persons and property
.
Check that the window reaches the desired position according to the stroke
-end
EMERGENCY MANOEUVRES, MAINTENANCE OR CLEANING
manual opening due to power failure or
l cleaning of the window
Unscrew the nut from the pivot screw securing the rack to the sash bracket.
pivot screw out of the hole
with the other
(this operation should be performed with the window open at least 10 cm to facilitate
the window could fall as the sash is no longer held in
20
4. After maintenance and/or cleaning repeat points 1 and 2 in reverse order.
In the event in which the cable of feeding it is damaged, to make to replace it from the
constructor or a qualified technician.
15. TROUBLESHOOTING
Please consult the following table for any eventual problems with function during
installation or normal use. Check also the RED LED indications:
Problem Possible cause Solution
Gear motor
does not work.
No electricity at source. Check trip switch and safety switch.
Lead not connected, or one of the
wires has come loose.
Check all electrical connections on
gear motor.
The electrical supply is incorrect
Check whether the power supply to
the actuator has the voltage
indicated in the technical data plate
The actuator
switches on but
does not
function
Electrical wiring error
Check the electrical connections of
the individual wires and their
function
Connection with other
incompatible machines
Check that the machines connected
in the array are compatible by
consulting the relevant instruction
manuals
16. ENVIRONMENTAL PROTECTION
All materials used in the manufacture of this appliance are recyclable.
We recommend that the device itself, and any accessories, packaging, etc. be sent to a
centre for ecological recycling as established from laws in force on recycling.
The device is mainly made from the following materials: aluminium, zinc, iron, plastic of
various type, cuprum.
Dispose materials in conformity with local regulations about removal.
17. CERTIFICATE OF GUARANTEE
The manufacturer will guarantee good function of the appliance. The manufacturer shall
undertake to replace defective parts due to poor quality materials or manufacturing defects
in accordance with article 1490 of the Civil Code. The guarantee covers products and
individual parts for 2 years from the date of purchase. The latter is valid as long as the
purchaser possesses proof of purchase and completion of all agreed conditions of
payment.
Guarantee of good function of appliances agreed by the manufacturer implies that the
latter undertakes to repair or replace free of charge and in the shortest period possible any
parts that break while under warranty.
The purchaser is not entitled to any reimbursement for eventual direct or indirect damage
or other expenses incurred. Attempt to repair by personnel unauthorised by the
manufacture shall render the warranty null and invalid.

21
The warranty does not cover fragile parts or parts subject to natural wear and tear or
corrosion, overload, however temporary etc. The manufacturer will accept no responsibility
for eventual damage incurred by erroneous assembly, manoeuvre or insertion, excessive
stress or inexpert use.
Repairs performed under guarantee are always "ex factory of the manufacturer".
Respective transport expenses (out/back) are the responsibility of the purchaser.
22
18. DICHIARAZIONE DI INCORPORAZIONE (per una quasi macchina)
DICHIARAZIONE CE DI CONFORMITA’ / Declaration of incorporation (for a
partly completed machine) EC Declaration of Conformity.
Con la presente il / Hereby the
Costruttore:
Manufacturer:
NEKOS S.r.l.
Via Capitoni 7/5- 36064 Colceresa – VI – Italy
Tel +39 0424 411011 – Email info@nekos.it
dichiara sotto la propria responsabilità che i seguenti prodotti
declare under its own responsibility that the following products
Descrizione prodotto :
Product Designation:
Attuatore a cremagliera
Rack and pinion drive
Modello:
Type :
230 V: SKYRO 650 230V – SKYRO 650 230V SYNCRO³
24 V : SKYRO 650 24V SYNCRO³
Anno di costruzione dal / Year of manufacturing from: 2021
Soddisfano gli applicabili requisiti essenziali della Direttiva Macchine 2006/42/EC, Allegato I
Fulfil the essential requirements of the Machinery Directive 2006/42/EC, Annex I, Art. 1.1.2, 1.1.3, 1.1.5, 1.2.1,1.2.3,
1.2.6; 1.3.2, 1.3.4, 1.3.9, 1.5.1, 1.5.2, 1.5.6, 1.5.7, 1.5.8, 1.5.9, 1.5.10, 1.5.11, 1.7.1, 1.7.1.1, 1.7.3, 1.7.4.2, 1.7.4.3
La documentazione tecnica pertinente è compilata secondo l’Allegato VII, sezione B
The relevant technical documentation is compiled in accordance with Annex VII, Part B
La persona autorizzata a costituire la documentazione tecnica pertinente è:
The person authorised to compile the relevant technical documentation is: ing. Matteo Stefani – Nekos S.r.l.
Su richiesta adeguatamente motivata delle autorità nazionali, la documentazione tecnica dei citati prodotti sarà resa
disponibile, via e-mail, entro un tempo compatibile con la sua importanza.
In response to a reasoned request by the national authorities, we will provide, via e-mail, the relevant information on the
product listed above within an adequate period proportional to its importance.
Inoltre i succitati prodotti sono conformi alle disposizioni pertinenti delle seguenti Direttive:
Furthermore the products listed above complies with the provisions of followings Directives :
2014/30/EU Direttiva Compatibilità Elettromagnetica / ElectroMagnetic Compatibility Directive (EMCD)
2014/35/EU Direttiva Bassa Tensione / Low Voltage Directive (LVD)
2011/65/EU Direttiva sulla restrizione dell’uso di determinate sostanze pericolose nelle apparecchiature elettriche
ed elettroniche (Direttiva RoHS) / Restriction of the use of certain hazardous substances Directive (RoHS Directive)
2015/863/EU Direttiva Delegata recante modifica dell’allegato II della Direttiva 2011/65/EU del Parlamento Europeo e
del Consiglio per quanto riguarda l’elenco delle sostanze con restrizioni d’uso. / Delegated Directive
amending Annex II of Directive 2011/65/EU of the European Parliament and of the Council regarding the list of substances
with usage restrictions
e delle seguenti norme armonizzate e/o specifiche tecniche:
and of the following harmonised standards and/or technical specifications:
EN 60335
-
2
-
103;
EN 61000
-
6
-
3:2007 + A1:2011
+ AC:2012
;
EN
IEC
61000
-
6
-
2:
2019;
EN 60335-1:2012 + AC:2014 + A11:2014; EN 50581:2012;
La messa in moto di una macchina completa che includa la quasi macchina sopra menzionata, da noi fornita, non è
permessa finché non sia accertato che l’installazione sia stata fatta secondo le specifiche e le indicazioni di
installazione contenute nel “Manuale d’istruzioni” fornito con la quasi-macchina, e che sia stata espletata e
documentata, in apposito protocollo, una procedura di accettazione da parte di un tecnico abilitato.
Commissioning of the complete machinery including the above mentioned drives delivered by us is not allowed until it
is ascertained that the installation of the complete machinery was performed in accordance with the specifications and
the operating and installation advice given in our Mounting Instructions, and that the acceptance procedure was duly
carried out and documented in an acceptance protocol by a specialist.
Questa dichiarazione è fatta dal costruttore / This is declared by the manufacturer :
NEKOS S.r.l. - Via Capitoni 7/5- 36064 Colceresa (Vicenza) - Italy
Rappresentato da / Represented by :
Giuliano Galliazzo – A.D. Presidente / President CEO
Luogo e data / Place and date: Colceresa 1/12/2020 Firma / Valid signature

23
…………………………………………………………………………………………………………………….………………………………………………………
…………………………………………………………………………………………………………………….………………………………………………………
…………………………………………………………………………………………………………………….………………………………………………………
…………………………………………………………………………………………………………………….………………………………………………………
…………………………………………………………………………………………………………………….………………………………………………………
…………………………………………………………………………………………………………………….………………………………………………………
…………………………………………………………………………………………………………………….………………………………………………………
…………………………………………………………………………………………………………………….………………………………………………………
…………………………………………………………………………………………………………………….………………………………………………………
…………………………………………………………………………………………………………………….………………………………………………………
…………………………………………………………………………………………………………………….………………………………………………………
…………………………………………………………………………………………………………………….………………………………………………………
…………………………………………………………………………………………………………………….………………………………………………………
…………………………………………………………………………………………………………………….………………………………………………………
…………………………………………………………………………………………………………………….………………………………………………………
…………………………………………………………………………………………………………………….………………………………………………………
…………………………………………………………………………………………………………………….………………………………………………………
…………………………………………………………………………………………………………………….………………………………………………………
…………………………………………………………………………………………………………………….………………………………………………………
…………………………………………………………………………………………………………………….………………………………………………………
…………………………………………………………………………………………………………………….………………………………………………………
…………………………………………………………………………………………………………………….………………………………………………………
…………………………………………………………………………………………………………………….………………………………………………………
…………………………………………………………………………………………………………………….………………………………………………………
…………………………………………………………………………………………………………………….………………………………………………………
…………………………………………………………………………………………………………………….………………………………………………………
…………………………………………………………………………………………………………………….………………………………………………………
24
NEKOS S.r.l. - Via Capitoni, 7/5
36064 Colceresa – VI – ITALY
+39 0424 411011 – +39 0424 411013
Table of contents
Other nekos Controllers manuals
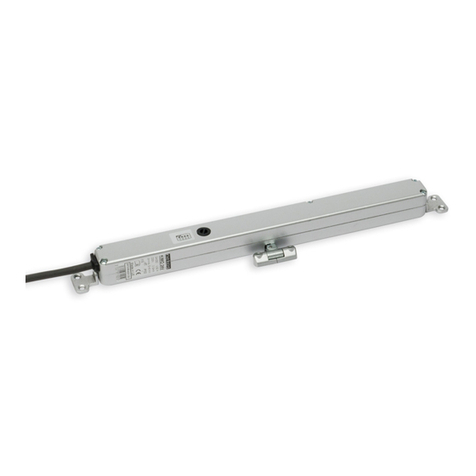
nekos
nekos KIMO 24V User manual
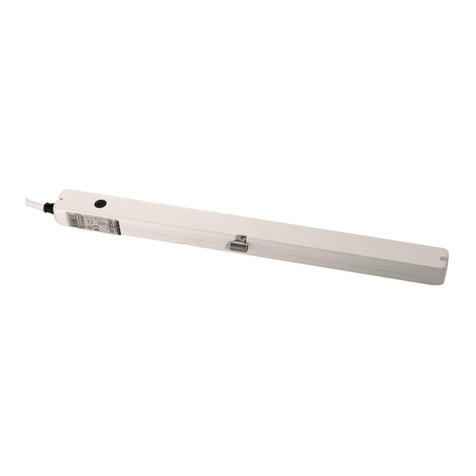
nekos
nekos KIMO 202 User manual
nekos
nekos SKY 650 User manual
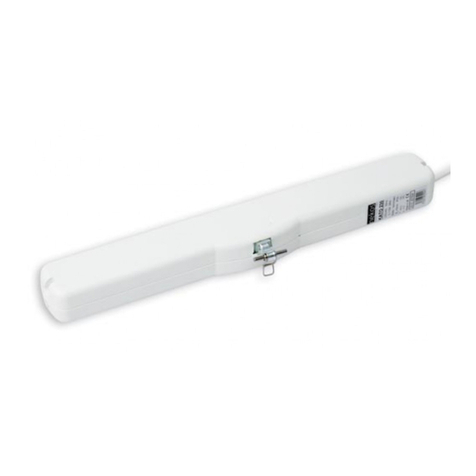
nekos
nekos KATO RADIO 230V User manual
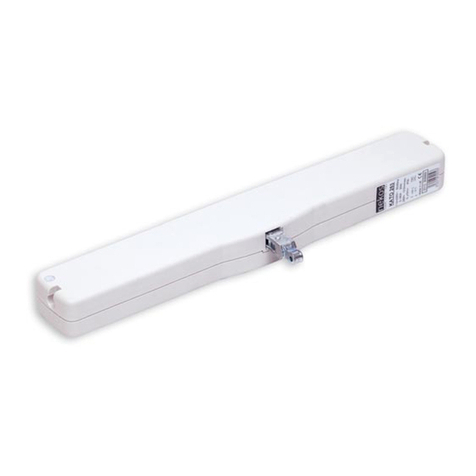
nekos
nekos KATO 253 Reference manual
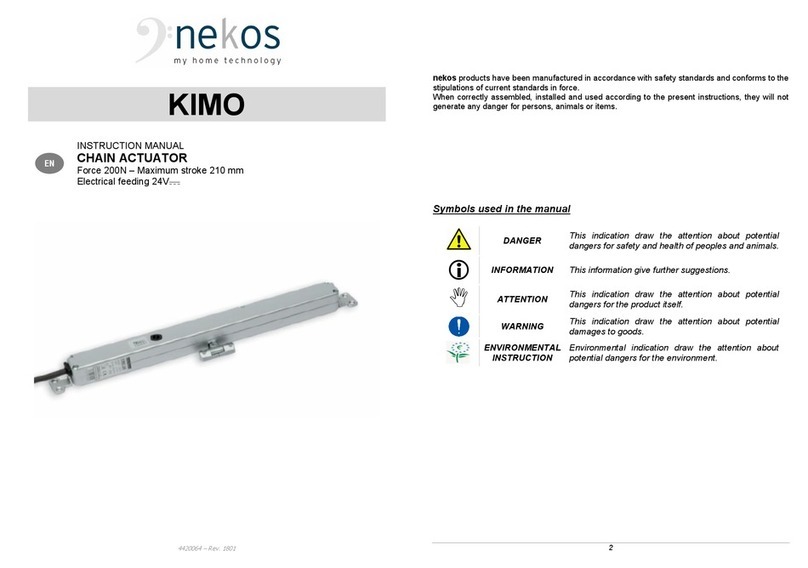
nekos
nekos KIMO User manual
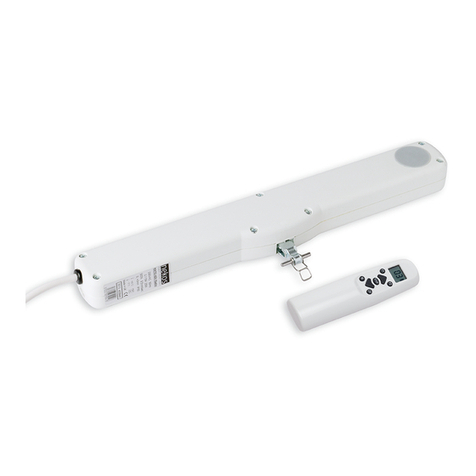
nekos
nekos KATO ADV RADIO User manual
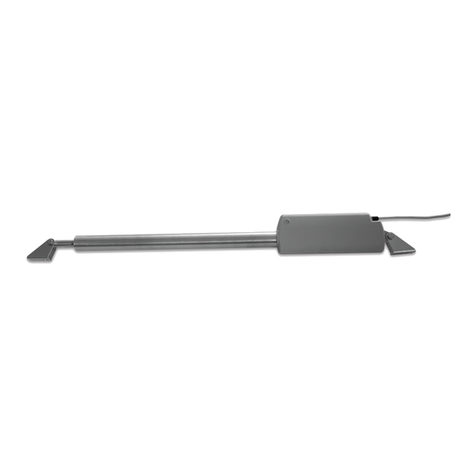
nekos
nekos ROCK 230 V User manual
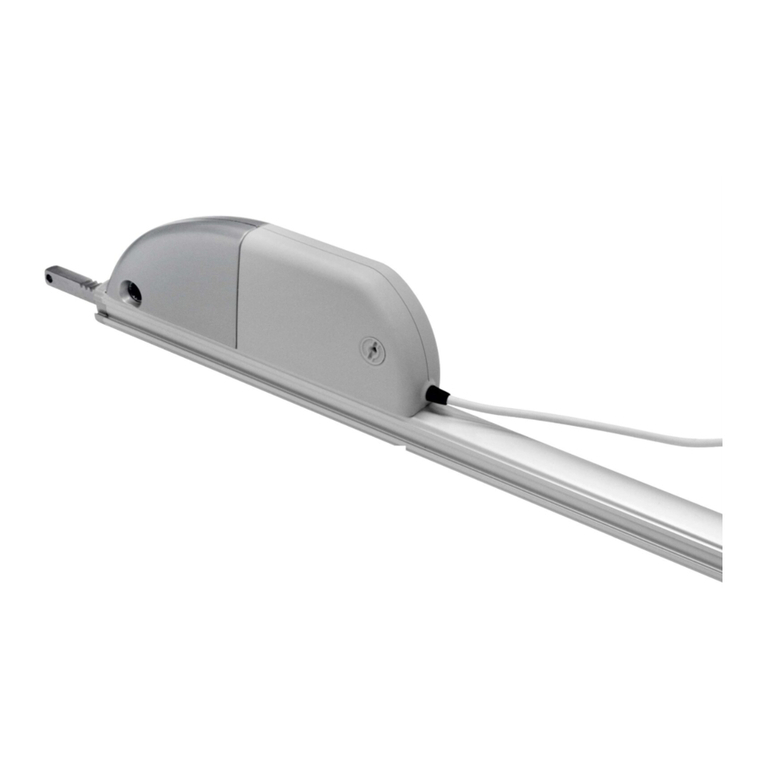
nekos
nekos SKYRO 850 User manual
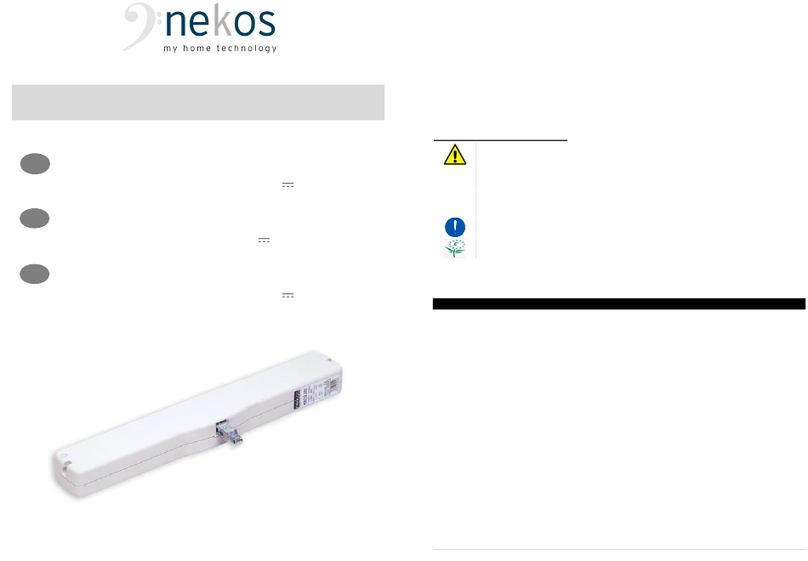
nekos
nekos KATO 253 User manual
