nekos SKY 450 Quick start guide

Code 4420044 Edition no. 3 of May 2012
S
SK
KY
Y
4
45
50
0
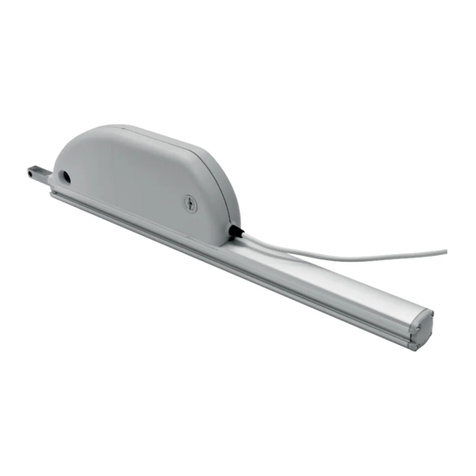
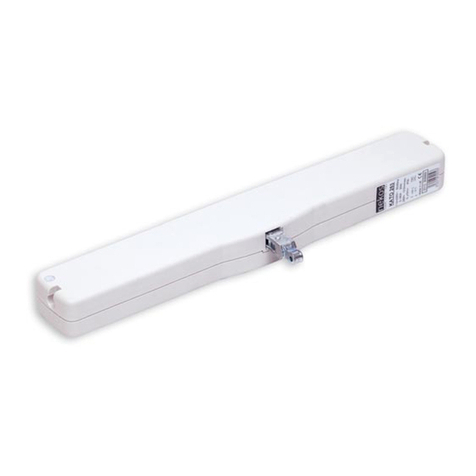
RACK OPERATED ACTUATOR
FORCE 450 N-TRUCKS 180, 230, 350, 550, 750, 1000 MM
VOLTAGE 110/230V~ (A.C.)
MANUAL FOR INSTALLATION AND USE
English
Page 2
The machine described in this manual has been manufactured in
accordance with safety standards and conforms to the stipulations of
current standards in force. When correctly assembled, installed and
used according to the present instructions, it will not generate any
danger for persons, animals or items.
Products subject to EU directives comply with the essential
requirements stipulated by the latter. markings mean that our
products can be sold and installed throughout the European Union
without any further formality.
The marking onthe product, packaging and indications for use
provided with the product indicate ‘presumed conformity to the directives’
issued by the European Community.
The manufacturer holds the technical archive with documentation
providing that products have been examined and evaluated for
conformity to directives.
Symbols used in the manual
DANGER This indication draw the attention about potential
dangers for safety and health of peoples and animals.
INFORMATION This information give further suggestions.
ATTENTION This indication draw the attention about potential
dangers for the product itself.
WARNING This indication draw the attention about potential
damages to goods.
ENVIRONMENTAL
INSTRUCTION Environmental indication draw the attention about
potential dangers for the environment.

Page 3
Contents
1. Safety indications ........................................................................................... 4
2. Formulas and recommendations for installation ............................................5
2.1. Calculation of opening / closure force....................................................5
2.2. Maximum opening in accordance with sash height................................6
3. Technical information about function..............................................................6
4. Technical data................................................................................................6
5. Id plate and marking data...............................................................................7
6. Construction and standards............................................................................7
7. Electrical power supply...................................................................................8
8. Instructions for assembly................................................................................8
8.1. Preparation of actuator for assembly....................................................... 8
8.2. Assembly for top hung windows opening outwards................................. 9
8.3. Assembly on light domes or dormer windows.......................................... 9
8.4. Assembly with bottom hung windows .................................................... 10
8.5. Assembly on louvre windows without mechanical lock or on sunshades.10
8.6. Assembly in tandem with connection bar............................................... 11
9. Electrical connections................................................................................... 12
10. Stroke-end.................................................................................................... 13
10.1. Stroke-end at opening and closure........................................................ 13
10.2. Stroke adjustment where required......................................................... 13
11. Checking for correct assembly ..................................................................... 13
12. Emergency manoeuvres, maintenance and cleaning ...................................13
13. Environmental protection.............................................................................. 14
14. Certificate of guarantee................................................................................14
15. Declaration of conformity..............................................................................15
Page 4
1. Safety indications
ATTENTION
B
EFORE INSTALLING THIS APPLIANCE
,
ENSURE ALL SAFETY
INDICATIONS HAVE BEEN READ CAREFULLY AND UNDERSTOOD IN ORDER TO
PREVENT CONTACT WITH ELECTRICITY
,
INJURY OR ANY OTHER INCIDENT
.
THE
MANUAL SHOULD BE CONSERVED FOR FURTHER CONSULTATION AT A LATER DATE
.
SKY 450 rack actuators have been designed to move windows and cupolas. Use for
any applications other than those indicated must be authorised by the
manufacturer after technical review of the assembly. The following safety indications
should be observed carefully.
The appliance must be installed by competent and qualified technical
personnel.
After removing packaging, check for any damage on the appliance.
Plastic bags, polystyrene, small metal parts such as nails, staples etc
should be placed out of the reach of children as they constitute a potential
source of risk.
Before connecting the appliance, check that the power supply has the same
specifications as those indicated on the technical data label on the
appliance.
This machine is destined exclusively for the use for which it has been
designed and the manufacturer accepts no responsibility for damage
incurred by improper use.
The actuator must be installed in accordance with the manufacturer’s
instructions. Failure to respect these instructions could compromise safety.
Power supply installation must comply with any regulations in force.
To ensure efficient separation from the grid, an approved type of bipolar
pulse switch should be used. An omnipolar general power switch with
minimum distance of 3 mm between contacts should be installed upstream
of the control line.
Do not use solvents or jets of water to wash the appliance. The appliance
should not be submerged in water.
Repairs should only be performed by qualified personnel at assistance
centres authorised by the manufacturer.
Always request exclusive use of original spare parts. Failure to respect this
condition could compromise safety and invalidate the benefits contained in
the warranty for the appliance.
In the event of any problems or queries, consult your agent or contact the
manufacturer directly.

Page 5
ATTENTION
With bottom hung windows injury could be caused if the window accidentally
falls. An appropriately sized flexible link arm or fall prevention safety system
designed to resist a force equal to at least three times the total weight of the
windowMUST be installed.
Danger of crushing or dragging. During function, when the actuator closes the
window, a force of 550N is exerted on the bead of the frame, enough to crush
fingers
in the event of distraction.
In the event of breakage or malfunction, switch the appliance off at the
general switch and call for the services of a qualified technician.
2. Formulas and recommendations for installation
2.1. Calculation of opening / closure force
Using the formulas on this page, approximate calculations can be made for the force
required to open or close the window considering all the factors that determine the
calculation.
Symbols used for the calculation
F (Kg) = Force for opening or closing P (Kg) = Weight of the window (mobile sash only)
C (cm) = Opening stroke (actuator stroke) H (cm) = Height of the mobile sash
For horizontal light domes or skylights
F = 0,54 x P
(Eventual weight of snow or wind on the
cupola should be calculated separately).
For vertical windows
TOP HUNG WINDOWS
,
OUTWARD OPENING
(A)
BOTTOM HUNG WINDOWS
(B)
F = 0,54 x P x C : H
(Eventual load of favourable or unfavourable
wind on the sash should be calculated
separately.)
Page 6
2.2. Maximum opening in accordance with sash height
The actuator stroke should be selected in accordance with the height of the sash and its
application. Make sure that the actuator does not touch the profile of the sash when
moving along its track, and ensure there are no obstacles blocking the opening and that
the rack moves smoothly along the window frame.
A
TTENTION
. For safety reasons, always check application before fixing the
actuator to the frame or sash. In the event of difficulty, request assistance
from the manufacturer to check application.
3. Technical information about function
The rack actuator performs opening and closing movements for the window using a
round section steel rack. Movement is powered by electricity that feeds a reduction
motor controlled by a functional electronic device.
The opening stroke for the window CANNOT be programmed as it is regulated by
the length of the rod on the reduction motor. The electronic control device allows the
rack to protrude until it encounters an obstacle that blocks its stroke. This could be
provided by the internal lock on the rack or complete closing/opening of the window.
In both outwards and return directions the stroke-end uses a self-defining electronic
process with power absorption, and for this reason, no adjustment is required.
4. Technical data
Model SKY 450
Thrust and traction force 450 N
Course lengths 180, 230, 350, 550, 750, 1000 mm (*)
Input voltage 110-230V~ (a.c.) 50/60 Hz
Current absorption at nominal load 0,250 A (110V) / 0,160 A (230V)
Travel speed without load 5,5 mm/s
Length of run without load In accordance with length of truck run
Double electrical insulation Yes
Type of service S
2
of 4 min
Max. and min. temperatures for function -5 +55 ºC
Degree of protection for electrical devices IP44
Adjustment of socket at casing Position self regulating
Connection in parallel of two or more motors Yes
Connection in tandem or in series Yes
Limit switch stop at opening and closure At absorption of power
Protection against overload at opening and
closure At absorption of power
Dimensions 103x47x(Course length+135) mm
Weight Varies according to construction
Information presented in these illustrations is not binding and is also subject to variation without prior notice.
(*) Technical personnel can shorten track runs by adjusting the internal limit switches.

Page 7
5. Id plate and marking data
All actuators have marking and are destined for use in the European
Union without further requirements.
The marking on the product, packaging and indications for use
provided with the product indicate ‘presumed conformity to the
directives’ issued by the European Community.
The manufacturer holds the technical archive with documentation
providing that products have been examined and evaluated for
conformity to directives.
ID plate data are indicated on a polyethylene adhesive label applied
externally on the outside of the container, printed in black on a grey
background. Values conform to EC requirements in force.
See figure for example of labelling.
6. Construction and standards
The SKY 450 rack actuator has been designed and manufactured to open and
close top hung windows opening outwards, bottom hung windows, dormer
windows, light domes, skylights and louvered windows or sun blades. Specific
use is for ventilation and airing of areas; any other use must previously be
approved by the manufacturer.
Application is performed using the brackets provided and any other type of
assembly should be checked with the manufacturer, who will not accept any
responsibility for incorrect or malfunctioning assembly.
Electrical connections must comply with standards in force on the design and
production of electrical appliances.
The actuator has been manufactured according to European Union directives
and conforms to marking.
Any eventual service or control device for the actuator must be produced according to
standards in force and must comply with the standards issued by the European
Community.
The actuator comes packaged in a cardboard container which contains two pieces.
Each package contains:
•Nr. 2 110÷230V~(a.c.) 50/60Hz electrical actuators
•Nr. 2 Standard support brackets with respective grips and fixing screws.
(Grips and fixing screws are inside small part packaging).
•Nr. 2 Brackets for fixing to the frame.
•Nr. 2 Small part packaging.
•
Nr. 1 Instruction manual.
Page 8
7. Electrical power supply
SKY450 is commercially available in one single version:
SKY450 230VAC: runs on grid tension of 110/230V~ (a.c.), 50/60Hz, with a
three wire cable (L
IGHT
B
LUE
, common neutral; B
LACK
, phase open; B
ROWN
,
phase closed).
8. Instructions for assembly
These indications are for specialised technical personnel and basic work and
safety techniques are not indicated.
All preparatory, assembly and electrical connection operations must be performed by
specialised technical personnel to guarantee optimal function and service of the
actuator.
Check that the following fundamental conditions have been met:
Actuator specifications must be sufficient for movement of the window
without encountering any obstacle. The limits indicated in the technical data
table must not be superseded (page 6) and the most appropriate actuator
should be selected. Calculations should be checked using the formula
indicated on page 5.
Attention. Check that the electrical power supply corresponds to that
indicated on the
TECHNICAL DATA
label on the machine.
Ensure that the actuator has not been damaged during transport, first
visually and then by powering in both directions.
For bottom hung window frames injury could be caused by accidental falls of
the window. An appropriately sized flexible link arm or fall prevention safety
system designed to resist a force equal to at least three times the total
weight of the window MUST be installed.
8.1. Preparation of actuator for assembly
Before starting assembly of the actuator, prepare the following material for
completion, equipments and tools.
For fixing onto metal window frames: M5 threaded inserts (6 pieces), M5x12 flat
headed metric screws (6 pieces).
For fixing onto wooden window frames: self threading screws for wood Ø4.5 (6
pieces).
For fixing onto PVC window frames: self threading screws for metal Ø4.8 (6 pieces).
Equipment and tools: measuring tape, pencil, drill/screwdriver, set of drill heads
for metal, insert for screwing in, electricians pliers, screwdrivers.

Page 9
8.2. Assembly for top hung windows opening outwards
A. Pencil in the middle line for the window frame on both
mobile and fixed parts (Fig. 1).
B. Place the motor support bracket in position at the edge
of the fixed part in line with the centre line pencilled in
earlier and pencil in the four openings to be used for
fixing (Fig. 2).
C. Use the appropriate drill head to perforate the window
frame and assemble the motor support bracket, taking
care to tighten all screws well (Fig. 3 and Fig. 3bis).
D. Place the front rod in line with the centre line of the
mobile part of the window frame and trace out the three
fixing openings (Fig. 4).
E. Use the appropriate drill head for perforation and
assemble the front bracket, taking care to tighten all
screws well (Fig.5 and Fig. 5bis).
F. Take the clamp screws and assemble them onto the motor
support bracket. Leave at least two turns of leeway.
G. Slide the swallow tailed profile of the actuator onto the
clamp screws, and check they have been inserted
correctly into the socket of the profile to ensure the
actuator runs smoothly along its axis.
H. Position the actuator so the eyebolt head is inserted into
the front bracket. Insert the M6x25 screw into the
bracket and eyebolt and fix the self-locking nut into
position using two 10 keys.
I. Manually move the actuator along its axis to close the
window and press firmly against the seals. Tighten the
clamp screws previously only placed and set the
actuator in line with the window frame. Suggested
tightening torque is 5÷7 Nm.
Fig. 1
Fig. 2
Fig. 3
Fig. 3 bis
J. The actuator may now be powered up for a complete trial of opening and
closing of the window. After closure, make sure that the window is completely
closed and check the pressure on all seals.
K. The stroke-end for the actuator is automatic. The appliance exerts a traction
force of over 550 N, which guarantees perfect pressure on seals even for
windows with large dimensions.
8.3. Assembly on light domes or dormer windows
First, check the actuator has been applied correctly and check positioning of the brackets
on both frame and sash.
(Follow the instructions set out in “Assembly for outward opening windows”).
Page 10
8.4. Assembly with bottom hung windows
A. Pencil in the centre line for the window on both mobile
and fixed parts (Fig. 1).
B. Position the motor support bracket at the edge of the
frame of the mobile part in line with the centre line and
trace in the four openings to be used for fixing (Fig. 2).
C. Use an appropriately dimensioned drill head to perforate
the window frame and assemble the motor support
bracket, taking care to fix the screws securely into
position (Fig. 3 and Fig. 3bis).
D. Position the front bracket in line with the centre line on
the fixed part of the frame and trace in the three
openings for fixing (Fig. 4).
E. Use an appropriate size of drill head for perforation and
assemble the front bracket, taking care to fix the screws
securely into position (Fig. 5 and Fig. 5bis).
F. Take the clamp screws and assemble them onto the motor
support bracket. Leave at least two turns of leeway.
G. Insert the swallow tailed profile of the actuator onto the
clamp screws, taking care to insert correctly into the
socket of the profile to ensure the actuator runs
smoothly along its track.
Fig. 4
Fig. 5
Fig. 5 bis
H. Position the actuator so the eyebolt head is inserted into the front bracket.
Insert the M6x25 screw into the bracket and eyebolt and fix the self-locking nut
into position with two fixed 10 keys.
I. Manually move the actuator along its axis to close the window and press firmly
against the seals. Tighten the clamp screws previously only placed and set the
actuator in line with the window frame. Suggested tightening torque is 5÷7 Nm.
J. The actuator can now be powered up for a complete trial of opening and closing
the window. After closing, check the window is completely shut and check
pressure on the seals.
K. The stroke-end of the actuator is automatic. The appliance exerts a traction
force of over 550 N to guarantee perfect pressure against the seals even for
large dimension windows.
8.5. Assembly on louvre windows without mechanical lock or on
sunshades
To perform this assembly, the actuator must be powered electrically. Check the
technical data label on the motor for the appropriate form of electricity.
A. Connect the actuator to the power supply and activate so the rod protrudes until
the maximum opening stroke-end steps in.
B. Set the louvres to closed position by manually adjusting the casement levers.

Page 11
Fig. 7
C. Position the eyebolt head of the actuator in the middle of the two levers (or in
line with the lever opening where there is only one lever), insert the pin and lock
into position using the nuts.
D. Take the clamp screws and assemble them onto the motor support bracket,
taking care not to screw them into their final position.
E. Assemble the motor support bracket onto the profile of the
actuator, inserting the clamp screws correctly into the socket of
the profile and positioning it into the tail of the actuator (Fig. 7).
F. Keep the louvres or sunshades closed, position the bracket
against the vertical side of the window, ensuring that the axis
of the actuator is parallel to the lever and perpendicular to the
connecting pin, with the bracket in the tail of the actuator.
G. Trace in the four fixing openings for the motor support bracket.
H. Use an appropriate size of drill head for perforation, insert the screws and fix
the motor support bracket to the casement.
I. Tighten the clamp screws. Suggested tightening torque is 5÷7 Nm.
J. The actuator can now be powered up for a complete trial of opening and closing
procedures.
8.6. Assembly in tandem with connection bar
(1 – actuator, 2 – bar, 3 – rod)
SKY450 actuators can be connected in tandem with a
mechanical connection bar. Two pressure points can
be obtained using one single motor.
The movement of the motorised actuator (1) is
connected to the rod (3) (no motor) mechanically for
the window to move evenly at a steady speed.
The illustration to the side indicates the layout and
inter-axes that should be used during assembly. The
length of the connection bar (2) is expressed by “D”
(Interaxis for actuators) + 5 mm.
INTERAXES FOR CONNECTION BARS
Code Description Bar length
(mm)
“
D
” (± 1.5 mm)
Interaxis for actuators
(mm)
4010009 Connection bar 1000 mm 1.035 1.030
4010010 Connection bar 1500 mm 1.535 1.530
For assembly, proceed as follows:
A. Trace the interaxis for assembly for the two actuators onto the frame according to
the dimensions in the above table.
B.
Position and assemble the support frames for the actuator
(see detailed explanation
in the paragraph entitled “assembly for top hung windows opening outwards”).
Page 12
C. Position the brackets onto the sash, trace in the points for the openings,
perforate the window frame and assemble the brackets onto the sash.
D. Assemble the motorised actuator (1), inserting the clamp screws slightly into the
profile and lightly fix the screws into position. Check the rack is in “stroke-end
return” (rack in full return position) position.
E. Take the rod (3) in one hand and use the other hand to insert the connection bar
into the opening provided (2). Insert the other end of the connection bar into the
opening on the motorised actuator (1).
F. Assemble the rod (3), inserting the clamp screws slightly into the profile and
lightly fix the screws into position. Check the rack is aligned with that of the
motorised actuator.
G.Loosen the clamp screws and place the eyebolt heads into the brackets
assembled onto the sash. At each point, insert the M6x25 screw into both
bracket and eyebolt and fix the nut in position using two 10 mm keys.
H. Manually move the actuator along its axis to close the window correctly and
firmly against the seals. Tighten the clamp screws right in and align the actuator
with the casement.
I. The actuator can then be powered up for a complete trial of opening and closure.
After closure is complete, check that the window is completely shut and check
pressure on the seals.
J. The stroke-end of the actuator is automatic. The appliance exerts a traction force of
over 550Nto ensure perfect pressure against seals even for large dimension windows.
9. Electrical connections
Appliances are equipped with cable
manufactured in accordance with safety
standards and protection against radio
disturbances. It is three wired B
LUE
(
SHARED
),
B
LACK
(
OPENS
),
B
ROWN
(
CLOSES
)
,
and is 1 m (±5%) long
After connecting the electricity supply to
the control button (bipolar with arrows if
possible), check that the up key function
opens the window frame and the and
down key function closes it.
In the event of incorrect function, invert
the two wires marked
BLACK
and
BROWN
.
For harness, please follow the diagram by
the side.

Page 13
10. Stroke-end
10.1.Stroke-end at opening and closure
The stroke-end at opening and closure is automatic, electronic and cannot be
programmed. The actuator is stopped by the absorption of power encountered
when the window is completely open or completely closed, or when the absorbed
power is 20% over nominal. In this case, at maximum load, the actuator exerts a
force of around 550N.
10.2.Stroke adjustment where required
Strokes shorter than the stroke produced during manufacture can be created at will
to suit the protrusion length of the rod.
This operation should be performed on the bench using the appropriate equipment
by qualified technical personnel with the ability to perform each operation with
maximum diligence and safety.
Work phases are as follows:
1. Remove the four screws on the front head of the actuator.
2. Remove the body of the actuator and the rack from the rod.
3. Unscrew the two screws locking the two limit switch block pieces.
4. Move the rubber stopper and block to the required position.
5. Screw the two screws used for fixing the block into position back in again.
6. Reassemble everything onto the actuator rod.
7. Screw in the four screws on the front head and check the settings for the new track
run.
11. Checking for correct assembly
Check that the frame has closed completely, even at the corners, and check
there are no obstacles caused by assembly in the wrong position.
Make sure the actuator is aligned with the axis of the window at 90°to the
window itself, otherwise the rack will exert incorrect pressure on the rod and
consume more voltage.
Check the lead is not too tight, as this could damage the actuator during
rotation, opening and closing of the window.
Check all screws and nuts have been properly tightened.
12. Emergency manoeuvres, maintenance and cleaning
Should the window have to be opened manually in the event of no electricity,
mechanical failure, or for normal maintenance or cleaning of the external surface of
the window frame, the following instructions should be followed:
Page 14
1. Unscrew the nut from the pin screw fixing the eyebolt head to the front shaft.
2.
Hold the window with one hand and use the other hand to remove the pin screw
(This operation should be performed with the window open at least 10 cm to make it
easier to remove the screw).
3. Manually open the window.
A
TTENTION
:
RISK OF THE WINDOW FALLING OUT;THE SASH IS IN DANGER OF
FALLING OUT AS IT IS NO LONGER HELD IN PLACE BY THE RACK.
4. After maintenance and/or cleaning operations are complete, repeat points 1 and
2 in reverse order.
In the event in which the cable of feeding it is damaged, to make to replace it from
the constructor or a qualified technician.
13. Environmental protection
All materials used in the manufacture of this appliance are recyclable.
We recommend that the device itself, and any accessories, packaging, etc. be
sent to a centre for ecological recycling as established from laws in force on
recycling.
The device is mainly made from the following materials: aluminium, zinc, iron,
plastic of various type, cuprum. Dispose materials in conformity with local
regulations about removal.
14. Certificate of guarantee
The manufacturer will guarantee good function of the appliance. The
manufacturer shall undertake to replace defective parts due to poor quality
materials or manufacturing defects in accordance with article 1490 of the Civil
Code.
The guarantee covers products and individual parts for 2 years from the date
of purchase. The latter is valid as long as the purchaser possesses proof of
purchase and completion of all agreed conditions of payment.
Guarantee of good function of appliances agreed by the manufacturer implies
that the latter undertakes to repair or replace free of charge and in the
shortest period possible any parts that break while under warranty.
The purchaser is not entitled to any reimbursement for eventual direct or
indirect damage or other expenses incurred. Attempt to repair by personnel
unauthorised by the manufacture shall render the warranty null and invalid.
The warranty does not cover fragile parts or parts subject to natural wear and
tear or corrosion, overload, however temporary etc. The manufacturer will
accept no responsibility for eventual damage incurred by erroneous assembly,
manoeuvre or insertion, excessive stress or inexpert use.
Repairs performed under guarantee are always "ex factory of the
manufacturer". Respective transport expenses (out/back) are the
responsibility of the purchaser.

Page 15
15. Certificato di conformità
D
ECLARATION OF CONFORMITY
NEKOS
S.r.l. - Via Capitoni, 7/5
36064 Mason Vicentino (VI) – ITALY
+39 0424 411011 – Fax +39 0424 411013
www.nekos.it [email protected]
Il sottoscritto legale rappresentante del costruttore NEKOS S.r.l.
The undersigned, representative of the following manufacturer
dichiara
declares
che il prodotto elettrico:
that the electrical product:
Modello / Model
Designazione / Designation
Attuatore a cremagliera 110/230V~ (a.c.)
Rack operated actuator 110/230V~ (a.c.)
SKY450
è conforme alle disposizioni legislative che traspongono le seguenti direttive:
Direttiva 2004/108 CE (Direttiva EMC) e successivi emendamenti
Direttiva 2006/95 CE (Direttiva Bassa Tensione) e successivi emendamenti
Is in accordance with the following Directives:
2004/108 EC Directive (EMC Directive) and subsequent amendments
2006/95 EC Directive (Low Voltage Directive) and subsequent amendments
Ultime due cifre dell’anno in cui è affissa la marcatura CE: 09
Last two figures of the year of the CE marking:
Luogo: Mason Vicentino (VI) - Italy
Place:
Data: 10/02/2009 /
2009/02/10
Date:
Firma:
Giuliano Galliazzo
President
Signature:
Page 16
NEKOS
S.r.l.
I - 36064 - MASON VICENTINO (VI) - Via Capitoni, 7/5
Telephone (0039) 0424 411011 Fax (0039) 0424 411013
Table of contents
Other nekos Controllers manuals
nekos
nekos KATO ADV RADIO User manual
nekos
nekos KIMO 24V User manual
nekos
nekos KIMO User manual
nekos
nekos ROCK 230 V User manual

nekos
nekos SKY 650 User manual
nekos
nekos KATO RADIO 230V User manual
nekos
nekos KIMO 202 User manual
nekos
nekos SKYRO 850 User manual
nekos
nekos SKY 650 User manual

nekos
nekos SKY 450 User manual
Popular Controllers manuals by other brands
Wilkerson
Wilkerson RB3 Installation and service instructions
Belimo
Belimo AMB24-SR-X1 manual
Alemite
Alemite 7504-1 Installation and service instructions

Lime
Lime GiA-K007-8 Installation and instruction manual
Linear
Linear ANALOG DEVICES LTC7106 Demo Manual
Lexicon
Lexicon MC-4 Software upgrade instructions

