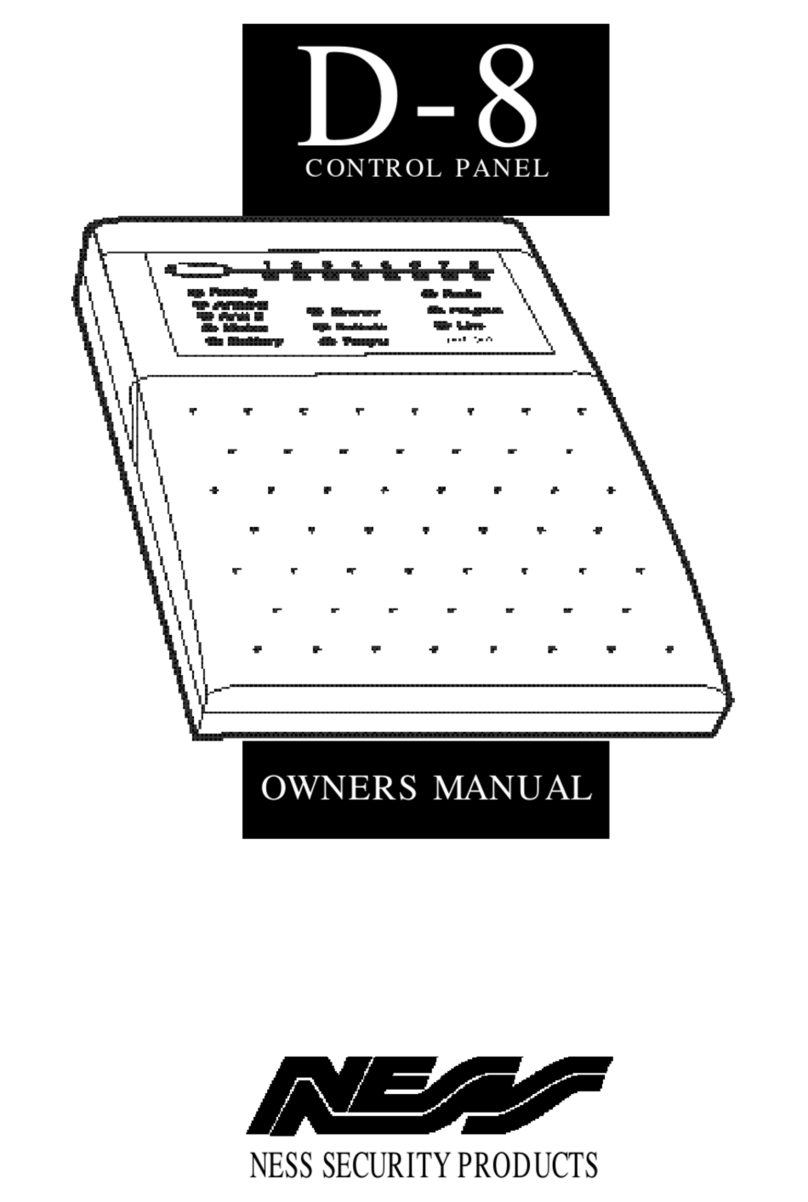
Ness Security Products 5000 SERIES User manual

5000 SERIES 8 ZONE INSTRUCTION MANUAL
NESS SECURITY PRODUCTS
4/167 PROSPECT HIGHWAY
SEVEN HILLS. 2147
NSW AUSTRALIA
SYDNEY Phone: (02) 8825 9222 (Head Office)
BRISBANE Phone: (07) 3343 7744
MELBOURNE Phone: (03) 9878 1022
PERTH Phone: (08) 9328 2511
To the best of our knowledge the information contained in this manual is correct at the
time of going to print. NESS Security Products reserve the right to make changes so the
features and specifications at any time and without notice in the course of product
development.
TABLE OF CONTENTS
INTRODUCTION OPERATION
Terminology 2 General Information 10
Features 3 Operating Rules 10
5000 SERIES Optional Equipment 4 Arming the Control Panel 10
Specifications 4 Disarming the Control Panel 11
Monitor Mode 11
CONTROLS AND INDICATIONS 5 Emergency Functions 12
Zone Expander Functions 12
Keypad 5 Alarms 13
Audible Indications 5 Resetting an Alarm 13
Visual Indications 5 Alarm Memory 13
Zone Indications 6 Excluding Zones 14
Including Zones 14
PROGRAMMING Auxiliary Output 14
How to Enter Program Mode 6 TESTING AND TROUBLESHOOTING
How to Program 6
Access Codes 7 Testing 15
Entry Delay Time 7 Troubleshooting Guide 16
Exit Delay Time 8 Operation and Zone Summary 17
Monitor Mode Type 8
Zones to be Monitored 9
Zones to Control the Auxiliary Output 9
Programming Summary 9
INTRODUCTION ******************************************************************************************************
Thank you for purchasing a NESS 5000 At the very least, you need only know how to
SERIES Control Panel. Please do not be ARM and DISARM the Panel plus have a basic
frightened by its apparent complexity. The understanding of the indicators. Please take
Panel is very powerful but also very easy to use the time to read this manual so that you
and you only need to use as many or as few understand the full benefits of the 5000
features as you require. SERIES Control Panel.

2
TERMINOLOGY ************************************************************************************************
The microcomputer based 8 Zone CONTROL If you wish to protect one area while you
PANEL forms the heart of your security system occupy another, MONITOR MODE allows
and connects to all other equipment. Each selected zones to be Armed while leaving
ZONE of the Panel will be connected to one or others Disarmed.
more detection devices to protect an area such
as the front door, hallway, windows, etc. The Control Panel housing and the metal
covers over external sirens are protected by
The Panel is said to be ARMED when it is set TAMPER switches to detect someone
to detect an intruder. At other times it is attempting to disable the security system.
DISARMED. Activation of these switches will cause an
instant TAMPER ALARM.
Normally a zone is considered SECURED
Activation of a detector will cause the zone to If a detector becomes faulty, you can
be UNSECURED and may cause an alarm. EXCLUDE the associated zone so that it is
totally ignored and cannot generate an alarm.
Detectors such as fire detectors and panic INCLUDING the zone will enable it to generate
buttons must be able to generate an alarm at an alarm again.
all times regardless of the Panel setting. A
zone with this assignment is called a 24 HOUR The Control Panel is fitted with a STAND-BY
ZONE. BATTERY to ensure your security system
continues to operate it the MAINS POWER is
Before leaving the premises you must ARM the interrupted. This battery is checked every hour
Panel to enable it to detect intruders and and whenever you Arm the Panel.
generate an alarm. After ARMING, the Panel
will ignore most detectors for the EXIT DELAY Whenever an alarm occurs, it may be silenced
TIME to enable you to depart without triggering by entering an ACCESS CODE, otherwise it
an alarm. will reset at the end of RESET TIME. All
alarms are stored in MEMORY and may be
When you enter the premises the Panel will retrieved at any time by entering MEMORY
ignore selected zones for the ENTRY DELAY MODE.
TIME and will not alarm unless you fail to
DISARM the panel during this allowed time.

3
****************************************************************************************************
The 5000 SERIES 8 Zone Control Unique dynamic input system which will
Panel is one pan of an integrated range detect any component failure of the
of equipment. zone input circuitry and generates an
alarm.
4 Access codes. ALL inputs and outputs are heavily
Monitor mode (partial Arming). Simple protected against lightning and high
operation allows selected zones to be voltage power supply transients. An
Armed while others are ignored. Ideal earth terminal is provided for extra
for monitoring doors and windows protection.
while you are safe inside. TRUE DYNAMIC BATTERY TEST under
Additional security is provided by the load, every hour and when Arming the
various programming options: panel. Your system will warn you in
advance of possible battery failure.
- Arm via a code Works irrespective of whether the
mains is on or off.
- Exclude zones via a code A large 6.5 A-H backup battery and a
- Indication of zones that are unsecured 1.4 amp plug-pack transformer provides
when arming. more than sufficient current to maintain
the operation and security of the entire
Special interface to allow the system, even under full alarm
connection of NESS Remote Keypads conditions.
which offer full programmability and
operation of the panel from a remote The mains input is constantly
location. monitored. A warning is given when the
mains is disconnected.
Unique keyswitch input to allow simple
remote operation of the Control Panel. Audible warnings to indicate trouble
when Arming.
Easy connection of the 5000 SERIES
Satellite Siren to greatly increase the Comprehensive Memory Mode for easy
security of your system. retrieval of important events such as
Primary Alarms, Secondary Alarms,
The Control Panel housing has 4 Tamper Alarms, Low Battery and Mains
separate tamper systems - Keypad, Fail.
Wall, Lid and Panel impact. The panel
impact tamper system protects against All Programming data is permanently
control panel intrusion by heavy stored in secure non-volatile EEPROM.
impacts. These tampers are protected
24 hours a day.
Different siren sound for 24-hour
alarms
Outputs are separately fused.

4
5000 SERIES OPTIONAL EQUIPMENT ****************************************************************************
The following optional 5000 SERIES equipment
is available for use with the 8 zone Control
Panel. Securitel Interface Unit
Similar to the Telephone Auto Dialler but
Remote Intelligent Keypad provides higher security.
Remote or Intelligent Keypads can increase
convenience of operation and security of your Radio Control Equipment
system. A Radio Control Receiver can be connected to
the Panel to receive signals from Radio Trans-
Remote Keyswitch mitters such as hand-held panic/emergency
The Remote keyswitch will simplify the buttons.
operation of the Control Panel it is required. Real Time Event Recorder Printer
This device is connected to the Panel to
Satellite Siren RECORD and/or PRINT when any activity
Fitted with its own battery and electronics, a takes place.
Satellite Siren will operate independently of the
control panel if there is any interference to the Output Expander
system wiring. Provides 20 additional outputs for interfacing to
other equipment.
Telephone Auto Dialler
The Telephone Auto Dialler allows the 5000 Zone Expander
SERIES Control Panel to communicate alarms Provides an extra 16 Zones for the Panel.
via your telephone line.
Dialler Remote Control
This small hand-held device allows com-
munication and remote control between you at
a remote telephone and your Control Panel.
Securitel is a Trademark of Telecom Australia.
SPECIFICATIONS **********************************************************************************************
Construction 3mm Polycarbonate.
Dimensions (mm) 233 wide x 300 high x 85 deep.
Weight (with 6.5 AH battery) 3.3 kg.
Plug pack Input -240V AC. Output-17V AC. at 1.4A.
Power supply 13.8 V DC. at 1.25 Amps, current limited.
Quiescent Current Less than 80 mA.
Operating Voltage 10 V to 15V DC.
Rechargeable Battery 12 V, 6.5AH.
Battery Charge Current 450 mA maximum, current limited.
Dynamic Battery Test Every hour and when the Panel is Armed.
(whether mains power is on or off)
Dynamic Battery Test Low Voltage 10.7 V with a 5A load.
Fuses (5x20 mm) 4 x 1.5A, fast blow.
Zone Inputs End-of-line resistor = 2200 plus/minus 900 ohms
Remote Tamper Input Same as zone input.
Remote Keyswitch / Panic Button Input Same as zone input.
Remote Keypads' Inputs Proprietary.
Intelligent Keypad Outputs Proprietary.
Internal Siren Output Open collector, fused.
External Siren Output Open collector, fused.
Satellite Siren Output Proprietary.
Maximum number of Sirens 3 x 8 ohm Ohm speakers (not including Satellite
sirens since they have a separate siren driver circuit)
Latched Alarm (Strobe) Output 1.5 A at 12 V, open collector, fused.
Power Output for Optional Equipment With battery, 12 V, 1.5 A, fused.
Resetting Alarm Output 1.5 A at 12 V, open collector, fused.
24 hour Alarm Output 100 mA at 12 V, open collector, current limited.
Monitor Alarm Output 100 mA at 12 V, open collector, current limited.
Auxiliary Output 50 mA at 5 V emitter follower, current limited.

5
CONTROLS AND INDICATIONS
KEYPAD ******************************************************************************************************
The keypad consists of 12 buttons or keys. The PROG (or P) button is used to begin any
Each button of the keypad is used for three. programming sequence.
purposes,
a) to enter a number (eg. 1,2,3),
b) to select a client programming option
marked in blue (eg. CODE 1), The END (or E) button is used in all cases to
c) to select a command marked in white signify the end of the button sequence just
(eg. ARM). pressed.
AUDIBLE INDICATIONS
******************************************************************************************************
Every time a button is pressed the Panel At other times, the beeper will sound various
responds with a very brief beep In warnings such as 10 beeps for a low battery.
acknowledgment.
The beeper is also used to indicate whether the
entry was valid or invalid. For example, When Arming the Panel, 1-8 beeps will indicate
whenever E is pressed, all the buttons pressed that a zone is unsecured, eg. Zone 3 will be
before it are checked to see whether they are indicated by 3 long beeps.
valid. If they are valid, the response will be 3
short beeps. A continuous tone on Arming indicates a
Tamper or 24-Hour zone is unsecured. During
If they are invalid (or incorrect) the response Entry time, it indicates that an alarm has
will be 1 long beep and they will be ignored. occurred.
VISUAL INDICATIONS
******************************************************************************************************
The panel has 16 indicator lights surrounding the keypad. Each light has three basic states to indicate function.
These are: ON, OFF, FLASHING
ARMED ON The panel is Armed OFF The panel is Disarmed
MONITOR FLASHING The panel is in Monitor Mode
ALARM ON Memory mode is selected OFF No alarms
MEMORY FLASHING FAST An alarm has occurred FLASHING SLOW An alarm is stored in memory
ZONE ON The panel is in EXCLUDE mode OFF No zones are EXCLUDED
EXCLUDED FLASHING Zone(s) have been EXCLUDED
PROGRAM OFF The panel is in normal operation mode. ON The panel is in client program mode.
FLASHING SLOW The panel is in installer FLASHING FAST The program memory is faulty.
program mode.
BATTERY ON The panel battery is healthy. FLASHING The panel battery is low.
(If flashing in unison with the satellite light, the satellite
battery is low.)
MAINS ON The mains power is connected and FLASHING The mains power is disconnected or
turned on. turned off.
TAMPER OFF The control panel and satellite siren tamper FLASHING The panel or satellite siren tamper are
SATELLITE are secure and satellite siren battery is healthy. unsecured. If flashing in unison with the battery light,
the satellite battery is low.
LINE OFF The dialler is inactive. ON The dialler has seized the phone line, a dialler or
EXPAND FLASHING SLOW The dialler senses a phone zone expander option is selected.
line fault or a failure to communicate with the FLASHING FAST The dialler or zone expander has a
base station. System fault, or the dialler cannot store the information
just programmed into it.
FLASHING at the incoming call rate. The dialler is detecting an incoming call.

6
ZONE INDICATIONS
******************************************************************************************************
FLASHING FAST Primary alarm ie. indicates the
There are 8 Zone indicator lights above the first zone to become unsecured and cause the
keypad. In normal operating mode they show alarm.
the following states:
.FLASHING SLOW Secondary alarm - ie. indicates
OFF Zone secured those zones that have become unsecured
during the Alarm Reset time.
ON Zone unsecured As explained elsewhere in this manual,
these zone lights are used to indicate other
information in the Memory, Exclude,
Monitor, Installation and Client Program
modes.
PROGRAMMING
HOW TO ENTER PROGRAM MODE
******************************************************************************************************
The program Mode is entered whenever TO ENTER PROGRAM MODE, PRESS
programming options are to be changed.
(PROG) (MASTER CODE) (END)
IMPORTANT: The Control Panel will The Program light will be illuminated.
automatically exit the Program Mode if no keys
are pressed within a two minute period.
HOW TO PROGRAM
******************************************************************************************************
Programming the NESS 5000 SERIES 8 zone The PROG or P button is used in the selection
Control Panel is achieved via the keypad on the of PROGRAM mode, and thereafter in the
front. Every time a button is pressed, the panel selection of the option to be programmed.
responds with a very brief beep in
acknowledgment. Each button is used for
three purposes,
a) to enter a number (eg. 1,2,3), The END or E button is used in all cases to
signify the end of the button sequence just
b) to select a programming option pressed.
c) to select a command (eg. ARM).
Note: that programming options can Visual feedback of the options programmed is
only be selected whilst in PROGRAM achieved by illuminating the zone indicator
mode. lights or flashing the BATTERY/ MAINS light.
The particular type of indications are described
Programming of options can be carried out with the setting of each option in the following
in any order. pages.
All Programming follows this pattern
Select your option and VIEW the current value ENTER the new value(s)
(PROG) (OPTION) (END) (VALUE) (END)
One long beep indicates an invalid entry.

7
ACCESS CODES ***********************************************************************************************
The control Panel may be programmed with up 1) To program code 1 to be, say, 3456, then
to 4 separate Access Codes. Therefore each enter:
user may be allocated with their own unique
code for higher security. P 1 E 3456 E 3456 E
REMEMBER 2) To program code 2 to be, say, 9765, then
enter:
Access CODE 1 (master code) MUST
be programmed. P 2 E 9765 E 9765 E
All codes must contain a minimum of 3 3) To CANCEL code 2, then enter:
digits to a maximum of 6 digits and
must not begin with a zero. P 2 E 09765 E 09765 E
Codes 2,3 and 4 are optional.
A code may be cancelled by beginning
the code with zero.
As a security measure, the existing
code will not be displayed and the new
code must be entered twice. If the
second entry differs from the first, the
existing code will remain unchanged.
To input Code 1 ENTER
(PROG) (1) (END) (_ _ _ _ ) (END) (_ _ _ _ ) (END)
(_ _ _ _ ) Represents the numbers required as the code.
To input Code 2 ENTER
(PROG) (2) (END) (_ _ _ _ ) (END) (_ _ _ _ ) (END)
(_ _ _ _ ) Represents the numbers required as the code.
Access Codes 3 and 4 are programmed as above.
ENTRY DELAY TIME
******************************************************************************************************
The Entry Delay Time is the time the Control 1. To view the current Entry Delay Time, enter:
Panel gives you to disarm the Panel after a
delay zone is unsecured. P5E
For maximum security, the Entry Delay Time 2. The value programmed will be displayed via
should be as short as possible. the zone (1-8), battery (9) and mains (0)
lights. The display of the current value must
The Entry Delay Time can be set to a minimum be complete before a new value can be
of 1 second up to a maximum of 99 seconds. entered.
3. To change the current value to say,
10 seconds enter: 10 E
Zone 1 light will flash on for 1 second followed
by the MAINS light (0) to indicate the new value
To VIEW the Entry Delay Time ENTER To CHANGE the Entry Delay Time ENTER
(PROG) (5) (END) (VALUE) (END)

8
EXIT DELAY TIME
******************************************************************************************************
The Exit Delay Time is the time the Control 1. To view the current Exit Delay Time, enter:
Panel gives you to secure and depart the
premises after the Panel is Armed. P 6E
The Exit Delay Time should be just long enough 2. The value programmed will be displayed via
to allow departure comfortably without rushing the zone (1-8), battery (9) and mains (0)
and making mistakes. lights. This display of the current value must
be complete before a new value can be
entered.
The Exit Delay Time can be set to a minimum of 3. To change the current value to say,
1 second up to a maximum of 99 seconds. 80 seconds enter: 80 E
Zone 8 light will flash on for 1 second followed
by the MAINS light (0) to indicate the new value
To VIEW Exit Delay Time ENTER To CHANGE Exit Delay Time ENTER
(PROG) (6) (END) (VALUE) (END)
MONITOR MODE 'TYPE
******************************************************************************************************
The 8 zone Control Panel provides an unique The 4 different types of Monitor mode alarms
Monitor mode to ensure your security even are:
while the Panel is disarmed and the premises
are occupied. 1 = Beeper warning for the duration of the panel
entry time, then full siren alarm. Used for
perimeter protection.
Typically, Monitor mode is used to monitor the 2 = Beeper and siren operate for 2 seconds
perimeter zones (doors, windows) of a house only. Use this for medium security warnings or
while the occupants are at home or to monitor as a walk test mode.
entry through front doors or fire doors in shops
and offices while the premises are in use. 3 = Full siren alarm immediately. Use this for
high security, such as monitoring fire doors etc.
4 = Zone number is beeped out only. Use this
You can program which zones are to be for door opened warning.
monitored as well as select 1 of 4 different
types of Monitor alarms. To select, say, Monitor mode 3, enter:
P7E 3E
When the above option is programmed into the
panel, zone light 3 will flash on for 1 second.
Talk to your security installation company
about your specific requirements.
To VIEW Monitor Mode Type ENTER To CHANGE Monitor Mode Type ENTER
(PROG) (7) (END) (VALUE) (END)

9
ZONES TO BE MONITORED
******************************************************************************************************
Any zone can be selected for operation in To program, say, zones 3 and 4 to be
Monitor mode. However, do not select a zone Monitor zones, enter,
that has been installed to generate a 24 hour
alarm (eg. Fire Detector). P8E 2E 3E 4E
To remove a zone from the Monitor mode As each zone is programmed, the
selection, re-enter the zone number. corresponding zone light is illuminated (if it was
previously off). If the zone light was previously
on, it will be extinguished, thus de-selecting that
zone from Monitor mode.
To VIEW Zones to be monitored ENTER To CHANGE zones to be monitored ENTER
(PROG) (8) (END) (ZONE NUMBER) (END)
ZONES TO CONTROL THE AUXILIARY OUTPUT
******************************************************************************************************
The 8 Zone Control Panel provides an Auxiliary To program, say, zones 4, 6 and 8 to control
output which can be turned on and off by ANY the Auxiliary Output, enter:
selected zones or via the keypad. This output
can be used for a variety of applications. Talk P9E 4E 6E 8E
to your security installation company about
your specific requirements. As each zone is programmed, the
corresponding zone light is illuminated (if it was
A zone programmed for Auxiliary will cause the previously off). If the zone light was previously
Auxiliary Output to turn on when it becomes on, it will be extinguished, thus de-selecting
unsecured, regardless of whether the Panel is that zone.
Armed or Disarmed. The output can also be turned on or off
To remove a zone from the selection, re-enter (toggled) by pressing 9 E while Disarmed or
the zone number of the zone to be removed. in Monitor mode.
To VIEW Auxiliary Zones ENTER To CHANGE Auxiliary Zone(s) ENTER.
(PROG) (9) (END) (ZONE NUMBER) (END)
PROGRAMMING SUMMARY
******************************************************************************************************
DESCRIPTION OPTION DEFAULT PROGRAMMED
Code 1 P1E code Ecode E
Code 2 P2E code Ecode E
Code 3 P3E code Ecode E
Code 4 P4E code Ecode E
Entry Delay Time P5E time E20 secs (1-99)
Exit Delay Time P6E time E60 secs (1-99)
Monitor Type P7E type EType 2 (1-4)
Monitor Zones P6E zone EAll Zones (1-8)
Aux Output Zones P9E zone EAll Zones (1-8)

10
OPERATION
GENERAL INFORMATION
******************************************************************************************************
This section describes the operation of a The Control Panel is normally operated via the
typical Control Panel installation. Keep in mind keypad on the front of the Panel or the optional
that your installation may vary depending on Remote Keypad, or the optional Intelligent
the selected options and equipment. Remote Keypad.
The operating instructions which follow will
endeavour to cover the most common options.
If you have any doubts speak to your Installer.
OPERATING RULES
******************************************************************************************************
The various operations that can be performed The optional keyswitch is operated by
are indicated in white on the top of the relevant turning it clockwise (until it stops)
buttons, (eg. memory). momentarily.
Generally, the Panel will be in the Disarmed, If you make a MISTAKE while entering any
Armed or Monitor modes which provide codes, press the END (E) button and start again.
different levels of security for your premises. When you are required to enter your Access
Three other temporary modes, Program, code, you are given THREE opportunities to
Memory and Exclude, allow you to perform enter it correctly. After the third invalid attempt
various operations. The Panel will automatically the alarm is activated (requiring the correct
exit from these temporary modes it you do not code to silence the alarm). This prevents
press any buttons on the keypad within a 2 anyone trying to guess your code by entering
minute period. random numbers.
ARMING THE CONTROL PANEL
******************************************************************************************************
The Control panel must be ARMED prior to There are three methods of Arming the Panel.
vacating the premises in order to detect
intruders. a) Normally the panel is ARMED by entering on
the keypad
Ensure that the Panel is not in Program, 0 E
Memory or Exclude modes.
b) However, your Installer may have
NOTE: If the panel is already in alarm, you programmed the Panel to require the entry of
must first silence the alarm before you can a code to Arm the Panel.
Arm. 0 (CODE) E
c) If the optional keyswitch is connected, this is
turned momentarily to ARM the Panel.
1. CHECK that all windows and doors are securely locked.
2. Enter (0) (END) or (0) (CODE) (END)
3. The ARMED light should be ON and the keypad should beep 3 times.
4. Leave the premises within your Exit Delay Time.
5. At the end of the Exit Delay Time, three beeps will indicate successful Arming.
If something is wrong when Arming the control panel, the normal 3 beeps will be replaced by other warnings;
10 BEEPS Indicates either a Mains fault, Control Panel Battery fault or Satellite Siren Battery fault.
LONG BEEPS Warn that a zone is unsecured. Eg. 4 long beeps if zone 4 is unsecured.
CONSTANT TONE Indicates a 24 hour zone is unsecured. (Tamper, Panic or 24 hour zone.)

11
SIREN WARNING At the end of the Exit Time, all zones should be secured. If any are
unsecured, the siren will sound as a warning to indicate that those zones have been
automatically Excluded. For maximum security, you should return, DISARM, check the premises
and then ARM again. Continual warnings could mean that a detector is faulty and may have to
be manually Excluded. If the Auto Exclude option is disabled, the siren will sound
continuously if a zone is unsecured at the end of Exit Time.
DISARMING THE CONTROL PANEL
******************************************************************************************************
Upon entering the protected premises through If one of your codes is, say, 7676 then to
a delay zone, the Control Panel responds with Disarm, enter
BEEPS AT ONE SECOND INTERVALS as a
reminder to Disarm. You then have your 7676 E
programmed Entry Delay Time to Disarm the
Panel by either: If you make a mistake in entering your code,
then you must press E and start again. Three
a) Entering one of your access codes and END, OR incorrect entries will cause an alarm.
b) Activating the keyswitch.
If the Panel is not Disarmed by the end of the
Entry Delay Time, an alarm will occur. You may
still enter your code to silence the alarm.
1. ENTER the protected premises via a DELAY ZONE.
2. LISTEN for the beeps coming from the panel.
3. Enter (CODE) (END)
4. The ARMED light should now be extinguished.
A Continuous beep on entry is a warning that an alarm occurred while the
Control Panel was Armed, the external strobe light (If fitted) will also be
flashing as a reminder.
The 1 second entry beeps (not the continuous warning) can be disabled as a function of the installation options.
MONITOR MODE ******************************************************************************************************
Monitor mode allows you to ARM selected Monitor mode cannot be selected while in
zones while others are ignored. Typically, Program memory or Exclude modes.
Perimeter zones (doors and windows) can be
Monitored while the occupants are at home. To EXIT from monitor mode, either
To select MONITOR mode, either a) Enter (CODE) E to DISARM, OR
a) Press 8E, OR b) Activate the keyswitch momentarily to
DISARM, OR
b) If you are using a Remote Keyswitch, first
Arm the Panel (by turning the keyswitch c) Enter 0E, or 0 (CODE) E, to ARM the
once), then turn the keyswitch twice within Panel.
2 seconds. NOTE: If an alarm occurs, while in Monitor
The Control Panel will respond with 3 beeps mode, silence the alarm by entering
and the Armed/Monitor indicator will FLASH to (CODE) E or activate the keyswitch.
indicate that you are in Monitor mode.
If an alarm does occur in Monitor mode, the zone light will remain flashing as a memory until
you exit Monitor mode.

12
EMERGENCY FUNCTIONS
******************************************************************************************************
For personal protection, the Control Panel a) Audible - Activates sirens and will transmit
contains an INSTANT panic feature. the alarm signal if monitored.
Panic can be used to; b) Silent - Will transmit the alarm signal if
Scare away intruders inside or outside monitored remotely.
your premises. To activate emergency alarms:
Summon help from friends or
neighbours. MEDICAL enter 1E
FIRE enter 2E
Test the operation of the siren. PANIC enter 3E
Three Emergency functions exist: To SILENCE the siren, you must enter:
MEDICAL. A silent alarm that is only used if (CODE) E
the Alarm system is monitored remotely
(eg. Central Station). Panic cannot be used while the Panel is in
Program, Memory or Exclude mode
FIRE. An audible alarm that activates sirens and
will transmit the alarm signal if monitored If you have the optional Remote Keyswitch,
remotely (eg. Central Station). press the separate panic button fitted above the
keyswitch.
PANIC. This function may have been
programmed to be either;
EMERGENCY!
1. ENTER 3E The siren will sound.
2. ENTER (CODE) EThe siren will stop.
ZONE EXPANDER FUNCTIONS
******************************************************************************************************
These buttons are ONLY USED in conjunction
with the NESS 5000 Series Zone Expander to
address the sixteen additional zones.
(4) (END) (6) (END)
Address first additional bank of 8 zone Address the second bank of 8 zones

13
ALARMS ******************************************************************************************************
Alarms may be caused by one of the following condition
* A Zone has been activated while the Panel was Armed.
* A Tamper circuit has been activated.
* A Panic button has been activated.
* A 24 Hour Zone has been activated.
All of these can cause your sirens and strobe to operate. Various visual indications relevant to the
alarm will be retained in the memory. If this occurs, disarm your Control Panel which will silence and reset the
alarm. The cause of the alarm can be identified by entering the Alarm Memory Mode as described under ALARM MEMORY.
RESETTING AN ALARM
******************************************************************************************************
Your Panel can be reset and the alarm silenced If you arrive at your premises and find the
by entering your CODE followed by the END strobe light flashing (if installed), reset the panel
button. as below. Refer to the description listed under
ALARM MEMORY, to help you interpret the
Alternatively, if a keyswitch is installed, the flashing lights on the panel and what they mean.
Panel may be reset by momentarily activating
the keyswitch. Enter (CODE) (END)
ALARM MEMORY
******************************************************************************************************
The 8 Zone Control Panel contains a This Memory display may only be selected
comprehensive Alarm Memory to show those while the Panel is In the Disarmed, Monitor or
alarms that occurred while the Panel was last Armed modes.
armed. To view the MEMORY display, enter
5 E
The Panel will respond with 3 beeps, the
ALARM/MEMORY light will be illuminated and
the other indicators will change to show the alarms, if any.
1. To View Memory press (5) (END)
2. Observe lights,
3. To Exit press (END)
The Indicators are used as follows:
ZONE LIGHTS FAST FLASH for a primary alarm, ie. point of entry.
SLOW FLASH for a secondary alarm,
ie. other zones entered by the intruder.
ARMED LIGHT FLASHING for a Panic or Code alarm.
TAMPER LIGHT FLASHING for a Tamper alarm,
ie. Siren Cover, Satellite Siren etc.
BATTERY LIGHT FLASHING for a low battery.
MAINS LIGHT FLASHING for a Mains failure.
BATTERY & TAMPER LIGHTS FLASHING for a Satellite low battery.

14
EXCLUDING ZONES
******************************************************************************************************
If a detector becomes faulty and cannot be All the lights will be turned off and then the
secured when Arming the Panel, then its zone Zone Excluded light will show a steady light.
may be excluded, ie. ignored by the system so You may now exclude zones.
that it does not generate false alarms. Zones
can only be excluded during the EXIT DELAY To exclude say, zones 4 and 8 after Arming,
To enter the Exclude mode, FIRST ARM THE 7E 4E 8E E
PANEL and then press 7E. Zone lights 4 and 8 will turn on.
1. ARM the Panel.
2. Press (7) (END)
3. Enter the zone(s) to be EXCLUDED (ZONE) (END) (ZONE) (END)
4. To Exit and save Exclusion (END)
If you make a mistake, enter the zones number again to remove it from your selection.
Zones which you exclude will be indicated by the relevant zone light Showing a steady light in
the exclude mode.
Premises can achieve a higher level of security by partially arming the control panel when
people still occupy some areas To do this first Arm the Panel and then exclude those zones
those zones and depart the premises. The exit delay time will be automatically re- enabled
allowing them time to depart.
INCLUDING ZONES
******************************************************************************************************
Zones which have been Excluded, may be The main reason for providing the capability to
included while you are in the Armed, Disarm or include zones, is to allow an easy means for
Monitor modes. employees working back to include their own
areas on leaving the premises. The Exit Time
All Excluded zones are automatically Included will re-start automatically.
when the panel is Disarmed. Thus if a detector is
still faulty it must be Excluded again. Pressing 7E will light the zone lights for the
zones that have been Excluded.
To Include, say, zones 4 and 8 press,
7E 4E 8E E
Zone lights 4 and 8 will turn off.
1. Press (7) (END)
2. Enter the zone(s) to be INCLUDED (ZONE) (END) (ZONE) (END)
3. To Exit and save Inclusion (END)
An attempt to include a zone which has not already been excluded, will result in one long beep and the zone remains unchanged.
If you make a mistake selecting a zone to Include, it is not possible to exclude that zone,
without returning to the Exclude Zone option
AUXILIARY OUTPUT
******************************************************************************************************
Any or all zones may be assigned to control the By using the keypad it is possible to over-ride
Auxiliary Output. While any of these zone(s) are the zones controlling the output. If the output is
unsecured, the Auxiliary output will be turned on on, press 9E and it will turn off. Press 9E
Thus all zones must be secured for the again and it will turn on.
Auxiliary output to be turned off. Enter, (9) (END)
* You cannot change the Auxiliary output while in the Program, Memory or Exclude mode

15
TESTING AND TROUBLE SHOOTING
TESTING ******************************************************************************************************
To ensure the integrity of your security system, WALK TEST
it should be checked on a regular basis. To check correct operation of all zones
YOU can carry out any of the tests outlined (indicated by a 2 second siren and beeper
below or engage a qualified Technician from a warning).
licensed Alarm Company to carry out a more
technical assessment according to Australian NOTE: Programming described in steps 14 are
Standards AS.2201.1 normal default values. Therefore these steps
may be bypassed if Monitor mode is not being
used and has not been reprogrammed.
9.2 MAINTENANCE (extract AS.22O1.1)
9.2.1 Routine maintenance. 1. Enter Program mode P (CODE) E
9.2.1.1 General Routine maintenance visits to the 2. Select Monitor mode 2 P 7E 2E
alarmed premises shall be made by an authorised 3. Set all the zones to Monitor zones.
representative of an alarm company at a minimum
rate of twice per year with no more than 7 months P 8E 1E 2E 3E 4E 5E 6E 7E 8E.
between visits. (Select only those zones whose lights are not lit.)
Remember: If your system is connected to a 4. Exit the client Program mode PE
Central Monitoring station, please advise them
prior to carrying out any of these tests. Ensure that all zones are secured and then,
SIREN TEST 5. Select Monitor mode. 8E.
- Enter 2 E, Siren will sound Now move around your premises and
unsecured each detector in turn. The siren will
- To reset siren Enter (CODE) E. operate for 2 seconds each time a detector is
unsealed.
When you have tested all detectors, check the
SYSTEM CHECK control panel to ensure that all zone indicators
are flashing ie. all zones have been tested.
-ARM Panel. 0E or O (CODE) E.6. EXIT FROM MONITOR MODE by disarming
-Wait for exit time to expire - trigger any the panel.
Instant zone and the siren should sound, OR
trigger a Delay zone - wait for the entry time to 7. Don't forget to re-program the Monitor
expire and the siren should sound mode type, and Monitor zones back to their
normal settings.
- Reset the panel (CODE) E.

16
TROUBLE SHOOTING GUIDE
******************************************************************************************************
SYMPTOM POSSIBLE CAUSE CORRECTIVE ACTION
Zone light on or long beeps Zone detection device (eg. Close door or window. Find
on Arming. reed switch, movement cause of movement.
detector) unsecured.
Number of beeps determine
which zone is unsecured.
10 beeps upon Arming. Mains power off. Battery Check plug pack is plugged
Mains light flashing low. in and power point on, or
Battery light flashing. call Installation Company.
10 Beeps at any time (as above) (as above)
(mains / battery light flashing)
1 long beep during keypad Invalid keypad entry. Press END button and re-
entry. enter.
Constant tone upon Arming. Tamper, panic or 24 hour Check panic button (If in-
zone unsecured. stalled), or call Installation
Company.
2 second siren at end of Zone unsecured before ex- Re-enter premises, disarm
exit time. piry of exit time. system, check zone isolate
memory to determine zone
Constant tone on entering Alarm occurrence since last Check Alarm memory to
premises. arming of panel. determine zone at fault.
External strobe light flash- Alarm occurrence since last Check Alarm memory to
ing. arming of panel. determine zone at fault.
Siren sounding when sys- Tamper, panic or 24 hour Reset alarm by entering
tem disarmed. zone activated. code or activating key-
switch, check panic buttons
(if installed), or call Install-
ation Company.
Armed/monitor light flash- Monitor mode entered by Exit monitor mode.
ing. mistake.
Zone Excluded light flash- A zone has been excluded. Check zone excluded
ing. memory. Arm panel with all
zones secured.
Tamper light flashing. Tamper unsecured. Call Installation Company.
Alarm memory light flashing. Alarm in memory. Check alarm memory to see
cause of alarm.

17
OPERATION SUMMARY
******************************************************************************************************
ARM 0 E or 0 (CODE) E or Keyswitch
DISARM (CODE) Eor Keyswitch
RESET ALARM (CODE) Eor Keyswitch
MONITOR MODE 8E or Keyswitch
Exit MONITOR MODE (CODE) Eor OE
ALARM MEMORY 5E
Exit MEMORY E
EXCLUDE ZONES ARM as above, then 7E zone E zone Eetc.
Exit EXCLUDE MODE E
INCLUDE ZONES 7E zone Ezone Eetc.
Exit INCLUDE MODE E
PANIC ALARM 3E
CHANGE AUXILIARY OUTPUT 9E
ZONE SUMMARY
******************************************************************************************************
TYPE LOCATION
ZONE 1 ________ ________
Z0NE 2 ________ ________
ZONE 3 ________ ________
Z0NE 4 ________ ________
ZONE 5 ________ ________
ZONE 6 ________ ________
ZONE 7 ________ ________
ZONE 8 ________ ________
Table of contents
Other Ness Security Products Control Panel manuals
Popular Control Panel manuals by other brands
Belimo
Belimo WRF04 manual
Bosch
Bosch REXROTH IndraControl VAM 42.1 Project planning manual
Blue Giant
Blue Giant Blue Genius Touch Control installation manual
Electronics Line
Electronics Line infiniti user manual
Amperes
Amperes RP1104 instruction manual
Pyronix
Pyronix Castle EURO 46 Series Programming reference
