Ness M1KAM User manual

Page 1
Single Door Access Module NESS-M1KAM
FEATURES:
zInput for a 26 bit Wiegand Reader
zHeavy Duty Form "C" Relay Contacts for Switching Door Strike Power
zLow Current (50mA) 12VDC Output for Door Held Open Alarm
zLow Current (50mA) 12VDC Output for System Ready To Arm indication
zLow Current (50mA) 12VDC Output for System Armed indication
zSupervised Input for RTE (Request To Exit) Button/Device
zSupervised Input for Door Status Sensor
zInstalls in place of an M1 Keypad and operates from the RS-485 4-Wire Keypad
Data Bus
zFour selectable Time settings for "Request to Exit" and "Door Held Open"
zHardware Watchdog Circuit
SPECIFICATIONS:
zConnections: Unpluggable Screw Terminals, 16 Position
zOperating Voltage: 13.8 VDC
zCurrent Draw: Less than 30 mA with min. activity, 44 mA fully active
zHousing Dimensions: 4.25" x 6.375" x 2.125"
zCircuit Board Dimensions: 3.95" W x 2.875" H x .95" D
Features and Specifications subject to change without notice.
Doc No. 890-373 - 10 May 2007
APPLICATION
A single door access interface module for use on the M1 and M1EZ8
Control Panels. The M1KAM connects to the 4 wire keypad data bus in
place of a traditional M1 Keypad. Since the maximum number of
keypads on an M1 or M1EZ8 is 16, the maximum number of M1KAM
modules (and controlled doors) is 16, minus any installed keypads.
Even though an M1 Keypad can accept a 26 bit access reader, the
M1KAM is a more powerful and less expensive access solution. For
example; the M1KAM includes a relay (door unlock) output with form "C"
dry contacts, making it compatible with most door lock devices regard-
less of the voltage rating and style (AC or DC). The M1KAM accepts
many types of card swipe or proximity readers conforming to the 26 bit
wiegand format.
The M1KAM also has additional inputs and outputs, including: a
request to exit (RTE) button or device and a Door Contact (Sensor)
input. Both inputs are supervised with a 2,200 EOL resistor. Outputs
on the M1KAM consists of a voltage output for Door Held Open Alarm,
a voltage output for System Ready to Arm, and a voltage output for
System Armed. These outputs are 12VDC (switched negative) and are
rated for a maximum current of 50 milliamps. The M1KAM is mounted
in a universal surface mount plastic housing with knockouts for surface
mount raceways.
Ness Security Products - 4/167 Prospect Hwy, Seven Hills. NSW, 2147

Page 2
INSTALLING THE ELK-M1KAM
Mount the M1KAM within 10 Metres of the door being controlled. Since It connects to the 4-wire keypad data bus the M1KAM can be
located from the control up to the maximum distance of the data bus. The location should have an ambient temperature range
between 0°to 49°C (32° to +120°F). CAT5 or CAT6 wire (4 pair, 8 conductor) is recommended for all data bus cables as the spare
wires may be required for data return paths where multiple homeruns or devices are installed. NOTE: Refer to the M1 or EZ8 Installa-
tion Manual for information about Data Bus termination when multiple homerun cables are installed. Recommended min. conductor
size is 22 or 24 gauge. Maximum resistance per wire is 25 Ohms. DO NOT SPLICE OR CONNECT WIRES WITH THE CONTROL POWER
ON.
Wiring Connections:
1. Turn OFF all power on the M1 or M1EZ8 Control before making any wiring connections.
2. Connect the 4-wire data bus +12V, Data A, Data B, and Neg wires coming from the M1 or EZ8 to the identically marked terminals labeled
M1 DATA BUS on the M1KAM. NOTE: The M1KAM features unpluggable terminals blocks for ease and installation and service.
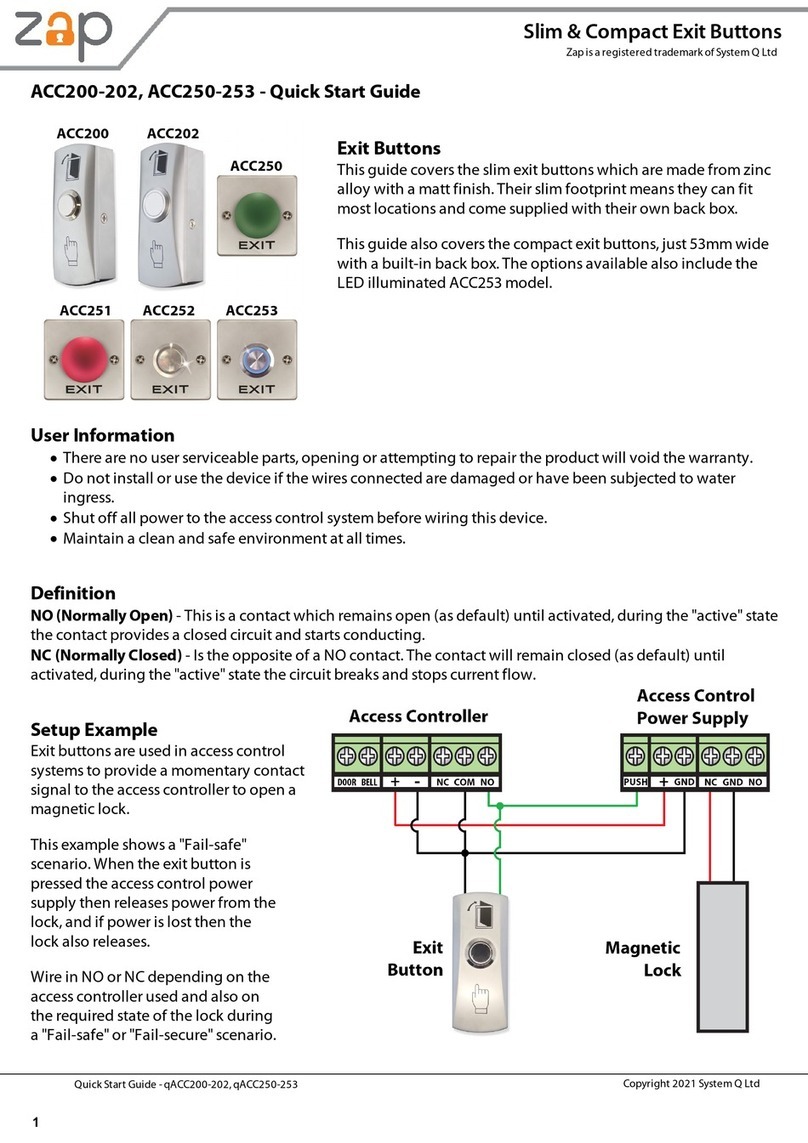
3. Install a separate local power supply for the locking device (door strike or mag lock).
NEVER attempt to power an electric door strike or mag lock from the +12VDC of the M1/EZ8 Data Bus.
4. The Relay (Output) on the M1KAM operates as an On/Off switch between the locking device and the power source. Depending on how
the wiring is connected the voltage to the locking device can either be "turned On" or "turned off" when the Relay (Output) becomes
energized. Connect the wires in one of the following manners:
Cut one of the two wires leading from the power source to the locking device. Strip and connect one end to the RELAY COM terminal.
N/C - If the locking device is "Fail Safe" (unlocks when power removed), connect the other end of the wire to the RELAY N/C terminal.
N/O - If the locking device is "Fail Secure (stays locked until power applied), connect the other end of the wire to the RELAY N/O terminal.
Important points to follow:
1) A general purpose blocking diode (supplied) MUST BE INSTALLED on Door Strikes (at the strike) across the + and - connections
as shown in the hookup diagram. This helps stop voltage kickback 'transient' when the strike coil releases.
2) The M1KAM requires a Whenever/And/Then Rule to be written using the NessRP software. The rule instructs the Relay (Output)
on a specific M1KAM module to energize when a valid access credential (card, fob is read. See page 5 for an example of an M1
Access Rule.
3) The Output ID (Identification) of the Relay (Output) on the M1KAM is based on the Data Bus Address of the M1KAM. See Table 1
under "Setting the Data Bus Address" for more details.
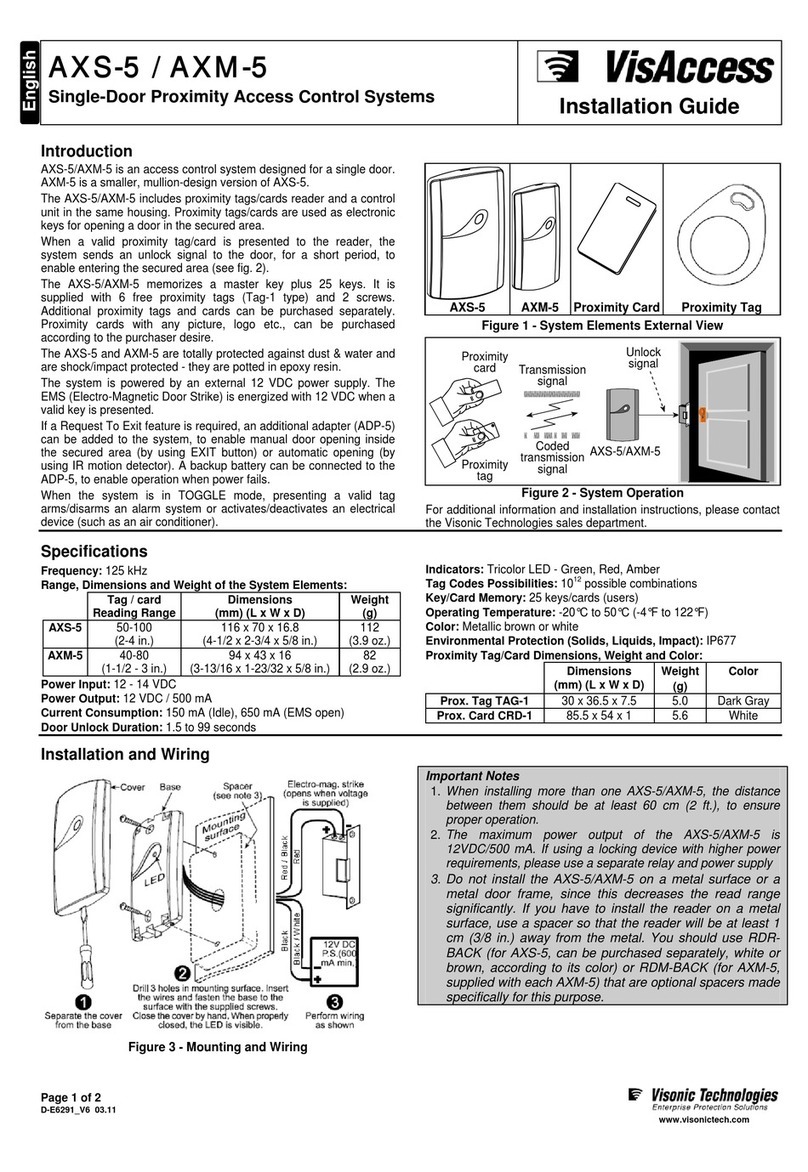
5. Install a proximity reader ("26 BIT" Wiegand compatible) reader and connect it to the M1KAM as follows:
- 26 Bit Wiegand Reader - Requires a 4 wire connection, 2 for power and 2 for data to the M1KAM. Ideally the reader should be powered
from the local power supply being used for the locking device. It is important for the Negative (-) sides of both power sources (M1/EZ8
Data bus power and local power supply) to be commonly connected. See wiring diagram.
* Some readers have LED indicators for features like status, armed, ready, etc. It may be possible to connect and utilize these with
the M1KAM. See step 8 and the wiring diagram or contact Ness Technical Support for details.
6. Install a Normally Closed (N/C) alarm contact on the door. Connect this to the M1KAM using a two conductor wire. One wire connects
to the terminal marked IN2DOOR, the other connects to one of the terminals marked NEG. Install a 2,200 Ohm end of line (EOL) resistor
(provided) in series with the switch. There are two (2) NEG terminals on the M1KAM. See wiring diagram on opposite page.
Important point to remember:
1) The Zone number (ID) associated with the IN2 DOOR (door status) input on the M1KAM is based on the Data Bus Address of the
M1KAM. See Table 1 under "Setting the Data Bus Address" for more details. From the control panel programming this same input
ID can be defined as a Burglar alarm zone, allowing the door switch to be used for both the alarm and the Access Module.
7. Install a Request to Exit ( RTE) sensor or switch. This is generally required by law to allow free exit from the building. The output from
an RTE device is typcially the same as a two wire N/C door switch. One wire connects to the terminal marked IN1 RTE, the other connects
to one of the two terminals marked NEG. Install a 2,200 Ohm end of line (EOL) resistor (provided) in series with the switch. There are
two (2) NEG terminals on the M1KAM. See wiring diagram on opposite page.
8. There are three (3) additional Outputs on the M1KAM. OUT1 ALARM is designed to allow a local alarm if the door is held open too long.
OUT2 READY is a remote Ready To Arm indication of the Area or partition which the M1KAM is assigned. OUT3 ARM is a remote Armed
indication of the Area or partition which the M1KAM is assigned. Each of these outputs is 12 VDC low current (50mA.), switched negative.
See wiring diagram on opposite page. Be carefully to NOT EXCEED the maximum drive current of each output.
9. Turn on the power to the control along with the local power source for the locking device and reader. Proceed to the section titled "Setting
the Data Bus Address and Enrolling Data Bus Modules".

Page 3

Page 4
Setting the Data Bus Address and Enrolling Device(s) into the System
All devices that operate on the RS-485 4-wire data bus must have a unique address setting from 1 to 16 within their device TYPE.
Keypads and Access Modules are device TYPE 1, input (zone) expanders TYPE 2, output expanders TYPE 3, etc. The purpose of device
types is so that the address numbers can be re-used in each different device type. It is OK to have a Keypad, a Zone Expander, and a
Output Expander all set to address 2 and on the same data bus since each device is a different device type. It is NOT OK to have
duplications of addresses within the same device type. I.E. Multiple keypads on the same control cannot be set to 'like' addresses.
Setting the Data Bus Address of the M1KAM Access Module: The address setting is very important because it establishes the Zone
ID of the Door Status Input AND the Output ID of the on-board relay that is used to operate the locking device. Refer to Table 1 below.
Since the Access Module is the same device "type" as a Keypad, its bus address must be unique among any of the possible 16 keypad
addresses. If more than 1 Keypad or Access Module is installed, each one MUST be set to a unique address (2, 3, etc). The maxi-
mum number of keypad addresses is 16. Duplicate addresses MUST NOT EXIST. I.E. Multiple keypads and/or Access Modules must
each have a unique address.
1. There are 4 white switches located in the top right hand corner of the M1KAM board. Each switch has a position of OFF or ON
(binary value 0 or 1) and a decimal equivalent value of (1, 2, 4, or 8). The total decimal value of the "ON" switches equates to the data
bus address.
2. Proceed to the ENROLLING process to make the Access Module operational.
Switch Settings Input ID Output ID
S1 S2 S3 S4 (Zone) (Relay)
ON Off Off Off 193 193
Off ON Off Off 194 194
ON ON Off Off 195 195
Off Off ON Off 196 196
ON Off ON Off 197 197
Off ON ON Off 198 198
ON ON ON Off 199 199
Off Off Off ON 200 200
ON Off Off ON 201 201
Off ON Off ON 202 202
ON ON Off ON 203 203
Off Off ON ON 204 204
ON Off ON ON 205 205
Off ON ON ON 206 206
ON ON ON ON 207 207
Off Off Off Off 208 208
Data Bus
Address
1
2
3
4
5
6
7
8
9
10
11
12
13
14
15
16
Table 1: Data Bus Address Switches
The Zone Input and Relay Output ID is determined by
the Data Bus Address setting.
Jumper Settings for RTE (Request to Exit) &
DHO (Door Held Open) Times
NOTE: Jumper JP1 located in the middle left
side of the board is used to engage a 120
Ohm resistor for terminating the M1 Data
Bus. Please see Data bus wiring
instructions before using this jumper.
Other Jumper Settings
S2 S1
Door Time
S2 S1
Door Time
S2 S1
Door Time
S2 S1
Door Time
These two jumpers select the time values
assigned to Request to Exit (RTE) and
Door Hold Open (DHO) functionality.
00 > RTE Time = 10 Seconds
DHO Time = 20 Seconds
10 > RTE Time = 20 Seconds
DHO Time = 40 Seconds
01 > RTE Time = 30 Seconds
DHO Time = 60 Seconds
11 > RTE Time = 45 Seconds
DHO Time = 90 Seconds
Enrolling the M1KAM with the control: Once the address is set and the M1KAM powered up it will be necessary to manually ENROLL
the new device so that the M1 Control knows it is present. This is accomplished either from keypad programming "Menu 1 - Bus
Module Enrollement" or from the NessRP Remote Programming Software. Proceed to the ENROLLING process to enroll the device
and make it operational.
(This step requires an LCD Keypad or the ElkRP software)
1. Press the ELK key, then press 9 (or scroll up) to display 9 - Installation Programming. Press the
RIGHT arrow key to select this menu. The Installer Program Code (PIN) must be entered to access
this menu.
2. Enter the Installer Program Code. (See M1 Manual for the default Code)
3. The first Installer Programming menu displayed will be "Bus Module Enrollment"
4. Press the RIGHT arrow key to select this menu. "Enrolling Bus Modules" will display
5. The M1 will transmit an enrollment message to all data bus devices, following by a display showing the
total Bus Modules that are enrolled. To view the enrolled devices and/or remove a device press the
RIGHT arrow key to select Edit mode.
6. Press the * or Exit keys to exit Installer Programming.
12345678901234567890123456
1
234567890123456789012345
6
1
234567890123456789012345
6
1
234567890123456789012345
6
1
234567890123456789012345
6
1
234567890123456789012345
6
1
234567890123456789012345
6
1
234567890123456789012345
6
12345678901234567890123456
Auth. Required
Enter Valid Pin
12345678901234567890123456
1
234567890123456789012345
6
1
234567890123456789012345
6
1
234567890123456789012345
6
1
234567890123456789012345
6
1
234567890123456789012345
6
1
234567890123456789012345
6
1
234567890123456789012345
6
1
234567890123456789012345
6
12345678901234567890123456
01-Bus Module
Enrollment
12345678901234567890123456
1
234567890123456789012345
6
1
234567890123456789012345
6
1
234567890123456789012345
6
1
234567890123456789012345
6
1
234567890123456789012345
6
1
234567890123456789012345
6
1
234567890123456789012345
6
12345678901234567890123456
XX Bus Modules
Enrolled,Editr
Jumper Settings for RTE and DHO Time Values
The M1KAM has four possible jumper settings that adjusts the amount of time on the Request To Exit (RTE) and Door Held Open
(DHO) features. The time values for RTE and DHO are adjusted together. See Table 1 for the time adjustments.
Request To Exit (RTE) refers to the amount of time that the Door Lock will remain Unlocked by the action of the RTE device.
Door Held Open (DHO) refers to the amount of "Delay" time the door status may remain open before the Out1 Alrm output becomes
active. The timer starts upon a valid access, when a RTE occurs, and/or when the IN2DR input (door status) is tripped. The Out1
Alrm can be connected to activate a relay or a low current sounder device as a local alert. The output stays on until the door is
physically restored to a closed/secure state.

Page 5
Programming the Control Panel "Keypad" Options
There are only two (2) attributes under the Keypad programming menu which have any effect or functionality with the M1KAM.
1) NAME: The NAME field allows a 16 digit description for the location of purpose of each M1KAM. i.e., employee entry
2) AREA: This is an important field as it defines to which area (partition) the M1KAM belongs. The default setting is area 1.
IMPORTANT The Ness-M1KAM installs in place of a regular M1 Keypad. Although each Keypad has multiple programming
attributes, only the 2 listed above have any purpose with the M1KAM. All the others can remain blank or as-is.
Adding Access Credentials (Cards or Fobs)
There are two (2) different procedures for adding access credentials (Cards or Fobs) to an M1 or M1EZ8 control.
A) Attach a traditional M1 Keypad with a built-in or attached reader to the M1 or M1EZ8. This will allow you to learn (enroll) an access
credential (cards and fobs only) directly into any user code slot. Once the credential is stored in the control it automatically
becomes available for use by any M1KAM Access Module connected to this control.
NOTE: It is NOT POSSIBLE to learn (enroll) an access credential directly using only an M1KAM.
B) If you already know or can determine the special code unique to each access credential then it is possible to enter that code into
the control using the NessRP Programming Software.
Using an M1 Keypad with an attached Prox Reader to add access credentials:
1. Make sure the keypad is attached, enrolled, and fully operation on the M1 or M1EZ8 control. The keypad MUST have either an
internal or external reader attached to it.
2. From the Keypad press the ELK key followed by the 6 key (or scroll up) to display 6 - Change User Codes.
3. Press the RIGHT arrow key to select the Change User Code menu.
4. When prompted, enter a valid Authorization Code (MUST be a "Master" user code) to gain access to this menu.
5. The next display will show 001 (User Code 1). Press the UP or DOWN arrow keys to scroll to the User Code which you wish to
use, OR use the number keys to enter three (3) digits and jump directly to any desired User Code. Once the display shows the
correct User Code number simply press the RIGHT arrow CHG key to make changes to this User.
6. The display will show any existing code digits that might be programmed for this user. It will also show the user name.
7. Momentarily present the credential (card or fob) to the reader that's attached to the Keypad.
8. The Keypad should beep 3 times if the access credential is accepted. If the credential is rejected the Keypad will produce a low
error tone and display Code Not Authorized, Redo. The most common causes for rejection are: A.The credential has already
been enrolled (duplicate codes are not allowed) or B.The facility code in the credential is not the same brand or is not compatible
with the reader. Some manufacturers credentials are not readable by other brands of readers.
9. After the credential has been learned (enrolled) it is important to remember that its capabilities MUST be selected in the User
Code Options Menu, Menu 02 from the Installer Level Programming. These options include: what area(s) or partition(s) for which
the code shall be valid, whether it can Arm, Disarm, trip the Access function, etc.
10. The credential should now be usable with any attached M1KAM (or Keypad w/reader) as long as the area (partition) settings match
and the credential is valid for the features you are trying to perform.
Using NessRP Downloading Software to add access credentials:
The NessRP Downloading Software makes it very simple to add, change, or delete access credentials (a.k.a. user codes) both
locally and remotely. For an existing user code simply double click and make any changes on the screen. To add a new code
select Add / New User. The following steps explain the process for adding or changing a user code).
1. The NessRP User Code screen contains a code field for entering the actual code digits. To the upper left of this code field is a
check box labeled: "This user has an access key......". This box MUST be checked to add a access credential. Access credentials
have a longer code string of alphanumeric characters. Some credentials have the code string printed on the outside while others
do not. Even if a code is printed on the credential it may be encrypted so that the actual digits are not disclosed. In that event a
separate software program may be required to decript the digits so that they are usable by the NessRP program. Refer to the
Ness Website http://www.ness.com.au/m1/ for a decode program titled: Proximity Card - M1 Code converter
2. Once the code string is known it’s just a matter of typing the string into the NessRP code field. Don’t forget to check the box identify-
ing this as an access credential.
3. Once the code field has been entered it is important to select the User Code Options. These options include: what area(s) or
partition(s) for which the code shall be valid, whether it can Arm, Disarm, trip the Access function, etc.
4. When everything is completed as needed be sure to connect to the control and SEND this user code data.
5. The credential should now be usable with any attached M1KAM (or Keypad w/reader) as long as the area (partition) settings and
options are correct for the features that you are trying to perform.

Page 6
Programming an Access Event from the NessRP Rules Engine
When an access credential (card, fob,) is read by a reader attached to a Keypad or M1KAM the Control immediately scans each of it's
programmed User Codes looking for a match to the code string. If a match is found the control will produce an appropriate action
based on the authorization options for that particular User Code. For example:
If the ARM option is enabled for that User Code the control will attempt to arm the area (partition).
If the DISARM option is enabled for that User Code the control will disarm the area (partition).
If the ACCESS option is enabled for that User Code the control will log an Access event and then scan for any Rules that may contain
an Access event. IMPORTANT: No outputs or action will take place beyond the logging UNLESS a Whenever/And/Then rule has
been written to tell the control what it is supposed to do. See the paragraph below concerning Whenever/And/Then Rules.
NOTE: It is possible for an access credential to Disarm the Control and unlock (Access) the door at the same time provided
the User Options for DISARM and ACCESS are both enabled.
Whenever/And/Then Rules
As mentioned above, an ACCESS event flag does not actually do anything (other than log) unless there has been a Whenever/And/
Then Rule written to tell the control what it is suppose to do. Rules are written using the ElkRP Programming Software. An Access
event can be used to create virtually any desired reaction. i.e., turn on an output, a light, close/open a relay, etc. The following is an
example of a rule designed to turn an output ON for 10 seconds whenever a valid credential (card, fob, iButton) is presented and
verified by the control. The output might be wired to a door locking device which could unlock the door for 10 seconds.
WHENEVER ACCESS 'Keypad Name' (KP 2) IS TRIGGERED
THEN TURN Output 194 ON FOR 10 SECS
NOTE: NessRP will always use the reference of "KP" (for Keypad) followed by an address number (2 in this case) even if the
actual device at this address happens to be an M1KAM Access Module. The actual Keypad Name can be custom programmed
to a more descriptive identity such as "Employee Entry" to help keeps things organized.
Ness Security Products
4/167 Prospect Hwy
Seven Hills, NSW, 2147
Australia
www.ness.com.au/m1
Sales offices :NSW - (02) 8825 9222, Vic (03) 9875 6400, Qld (07) 3399 4910, W.A. (08) 9328 2511, S.A. (08) 8125 0000
Other Ness IP Access Controllers manuals

