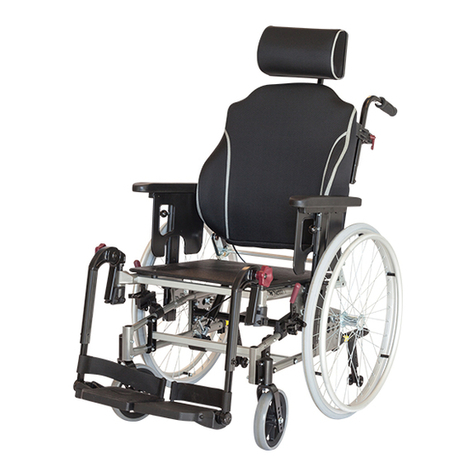
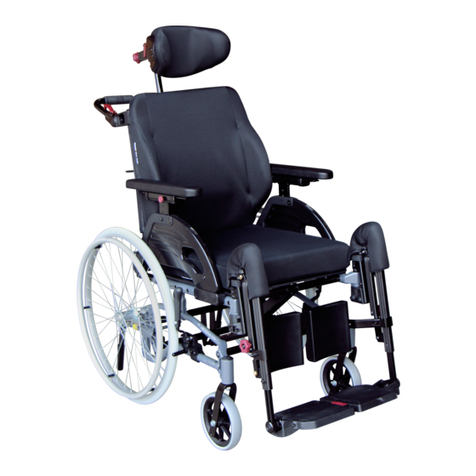
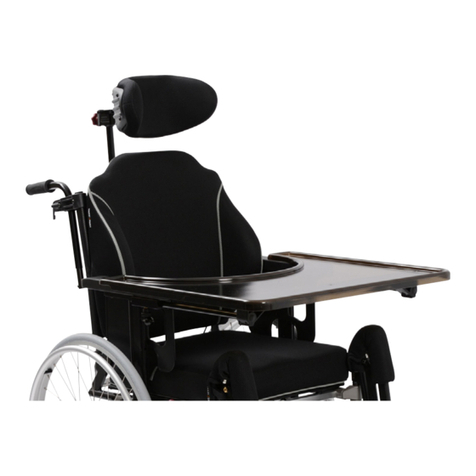
Netti Vision User manual

USER
MANUAL
My-Netti.com
This product conforms to
93/42/EEC for medical products.

2
Model: Netti Vision
Language: English Version: 3/092014
CONTENTS
1. INTRODUCTION 4
1.1 Areas of use/indications for Netti Vision 5
1.2 Contraindications 5
1.3 Quality and durability 5
1.4 Environment and waste disposal 5
1.5 Information for re-use 6
1.6 About this manual 6
1.7 Vital measures 7
2. QUICK REFERENCE 8
3. DESCRIPTION 9
4. FEATURES OF NETTI Vision 10
5. ACCESSORIES 11
6. ASSEMBLY AND ADJUSTMENT 12
6.1 Unpacking 12
6.2 Folding / unfolding the chair 12
6.3 Main wheel 15
6.4 Front castors 15
6.5 Backrest cushions 15
6.6 Seat depth adjustment 16
6.7 Anti tip 16
6.8 Seat cushion 16
6.9 Foot support 17
6.10 Head support 19
6.11 Arm support 22
6.12 Brakes 23
6.13 Seat angle/tilt 24
6.14 Back rest angle 24
6.15 Installation of hip belt 25

3
Model: Netti Vision
Language: English Version: 3/092014
7. MANOEUVRING THE WHEELCHAIR 26
7.1 General about driving and parking 26
7.2 Driving techniques - Step up 26
7.3 Driving techniques - Step do 26
7.4 Driving techniques - Slope 27
7.5 Driving techniques - Up stairs 27
7.6 Driving techniques - Down stairs 27
7.7 Transfer 28
7.8 Lifting the wheelchair 29
8. PUBLIC TRANSPORT 29
9. MAINTENANCE 30
9.1 Maintenance instructions 30
9.2 Cleaning and washing instructions 31
10. TROUBLESHOOTING 32
11. TESTS & WARRANTY 33
11.1 Tests 33
11.2 Guarantee 33
11.3 Claim 33
11.4 Spare part guarantee 34
11.5 Special adjustment/adaptation 34
11.6 Combination with other products 34
11.7 Service and repair 34
12. MEASURES & WEIGHT 35

4
Model: Netti Vision
Language: English Version: 3/092014
1. INTRODUCTION
Netti Vision is a comfort wheelchair meant for
both indoor and out-door use.
In Alu Rehab we believe that wheelchairs should
be chosen based on a thorough assessment fo-
cusing on the needs of the user and demands
from the environment.
Therefore it is important to know about the pos-
sibilities and restrictions of the wheelchair. Netti
Vision is a wheelchair designed for users with
the need for comfort and relief. The combination
between the seating system and the ergonomical
solutions in the frame construction, oers many
possibilities for adaptation and adjustments for
long time seating.
The wheelchair is constructed for indoor and
outdoor use, and oers the possibility to vary the
sitting position from activity to rest using tilt and
recline functions.
Max user weight: 100 kg.
Specifications varies between
countries.

5
Model: Netti Vision
Language: English Version: 3/092014
1.1 Areas of use/indications
Netti Vision
Netti Vision is a multi-function wheelchair
created for only attendant handling,
for partially or fully immobile persons with
physical and/or mental disabilities. These
disabilities may have multiple causes. Netti
Vision has an adjustable seat and back
angle,
thus facilitating for the user change of
position, mobilisation or posture correction
(stabilisation), wherever the following
functional impediments with their multiple
possible causes are present:
• limited or lacking mobility
• limited or lacking muscle power
• limited movement range
• lacking or limited trunk and body stability
• hemiplegia
• rheumatic-type disorders
• craniocerebral injuries
• amputations
• other neurological or geriatric disorders.
1.2 Contraindications
Netti Vision is not suited for persons with
a strongly enhanced muscular spasticity. In
this case we recommend the Netti Dynamic
System, which oers a frame construction
that follows the movement pattern of the
user. Ignoring this advice could in unfavour-
able circumstances lead to the deformation
or fracture of metal parts in the area of the
back tube, the leg rests or the arm rests
1.3 Quality and durability
As manufacturer, Alu Rehab A.S evalu-
ates the test to be equal to 5-6 years
of normal use of the chair. The dis-
ability of the user as well as the level
of maintenance done foremost decides
the durability of the wheelchair. Thus,
the durability will vary depending on
these two factors.
1.4 The environment and
waste disposal
Alu Rehab and its suppliers wish to
protect the environment.
This means:
• That we avoid using environmentally
harmful substances and processes to
the greatest extent possible.
• That Alu Rehab’s products are en-
sured a long service life and a high
degree of flexibility - to
benefit the environment
and economy.
• That all packaging can be
recycled.
• That the wheelchair was designed to
be separated into its component ma-
terials - to make recycling easier.
Contact your local recycling agent
to get correct information how to
handle in you area.

6
Model: Netti Vision
Language: English Version: 3/092014
1.5 Information for re-use
All products from Alu Rehab are de-
signed to require low maintenance and
easy service. All products can be adapt-
ed for re-use by an authorised dealer.
In order to guarantee performance and
safety, Alu Rehab recommends the fol-
lowing tests prior to any re-use.
Please examine the following compo-
nents for function, integrity etc. and
replace parts as necessary:
• Wheels (tyre tread)
• Wheelchair frame
• Cushions
• Hubs
• Brake function
• Directional stability of wheels
• Bearings
• Foot supports
• Arm supports
• Head support
• Recline / tilt function
• Push bar
• Anti tip
Please also note the content of chapter
9.2 Cleaning and washing
Anti-tip
Correctly fitted, the anti-tip will secure
the chair from tipping backwards. We
strongly recommend use of the anti-
tips.
Recycling
All wheelchair components can be split
into separate one material pieces for
easy recycling; exception is the armrest
with metal frame integrated in PUR
foam which has to be cut.
1.6 About this manual
In order to avoid damages while using the
Netti Vision wheelchair, please read this
manual carefully before starting to use the
chair.
Symbol of forbidden actions. No war-
ranty can be claimed whenever these
actions are implemented.
Symbol of warning. Whenever this sym-
bol is used, caution has to be taken.
Symbol for important information.
Symbol for useful tips.
Symbol for tools.

7
Model: Netti Vision
Language: English Version: 3/092014
1.7 Vital measures
Netti Vision is a comfort wheelchair de-
signed for both outdoor and indoor use.
Specifications varies between
countries.
Total weight: 27 Kg
(400 mm width chair)
Seat width:
400 mm *
*Assortment varies between markets.
Seat depth:
(From back rest cushion to front of seat
plate)
350, 375, 400, 425 mm
Seat height:
(From floor to top seat plate)
385 mm*
*16” drum brake wheels.
Backrest height:
450 mm
Specification min. max.
Overall length with foot
support (WB 399)
865 mm -
Overall width 552 mm -
Folded length 658 mm -
Folded width 283 mm -
Folded height 840 mm -
Total mass with cushions 27 27
Mass heaviest part 17 kg -
Static stability uphill
Seat plane angle -2° 30°
Eective seat depth 350 mm 425 mm
Eective seat width 350 mm 450 mm
Seat surface height at
front
382 mm -
Backrest angle 90° 109°
Backrest height 453 mm 400 mm
Foot support to seat
distance
222 mm 400 mm
Leg to seat surface
angle
90° 210°
Arm support to seat
distance
39 mm 340 mm
Front location of arm
support structure
338 mm -
Horizontal axle location 0 mm 0 mm
Minimum turning radius R628 -
Measured with std. 16” & 6” wheels.

8
Model: Netti Vision
Language: English Version: 3/092014
The content of this page is a summary of
the whole manual. It gives a brief introduc-
tion to the use and care of the
Netti Vision wheelchair.
The quick reference is not a replace-
ment for the manual, only a reminder/
check list.
• Unpack the wheelchair (Chapter 6.1)
• Mount the seat cushion (Chapter 6.8)
• Mount the backrest cushion (Chapter 6.5)
• Mount the foot supports (Chapter 6.9)
• Mount the head support (Chapter 6.10)
• Mount accessory. (See chapter 5 for more
information. Mounting descriptions will
accompany the accessory.)
For troubleshooting, see chapter 10.
For mounting and adjustments see
chapter 6.
Drive carefully!
Salt water can increase risk of
corrosion. Further precautions related
to environmental conditions not
needed.
When the chair is tilted rearwards,
the anti tips and brakes should
always be in use.
Be sure to lock all handles properly.
The anti-tips should always be used
for the safety of the user.
Surface temperature of metal parts in
frame structure might increase when
exposed to direct sunlight.
Never stand on the foot supports due
to risk of tipping forwards.
Never lift the wheelchair by the foot
supports or arm supports.
Product configuration may vary
between dierent countries.
For visually impaired people, manuals
and catalogues can be downloaded
at www.alurehab.com
If in doubt - contact your dealer!
2. QUICK REFERENCE

9
Model: Netti Vision
Language: English Version: 3/092014
3. DESCRIPTION
Standard version*
1. Head support
2. Angle and depth adjustment
for head support
3. Head support bracket
4. Push bow
5. Release handle
6. Main wheel
7. Anti tip
8. Brakes
9. Front castors
10. Front fork
11. Foot plate
12. Calf support
13. Calf support bracket
14. Angle adjustable foot support
15. Seat cushion
16. Arm support with pad
17. Back cushion
18. Push bow shaped tube
19. Release handle Tilt
20. Release handle Back
If any of these parts are
missing, please contact your
dealer.
* Product configuration may vary
between dierent countries.

10
Model: Netti Vision
Language: English Version: 3/092014
STANDARD
SEAT
• Pressure distributive cushion
• Tilt -2° to +30°
• Adjustable depth of 7,5 cm
WHEELS*
• 16” puncture proof main wheels
with fixed axle
• 6” Puncture proof front castors with
quick release axle
* Standard main wheels may vary
between countries.
BACKREST
• Angle: 90° to 110°
• Height: 45 cm
• Netti Nordic Back
• Push bar
• Push handles
FOOT SUPPORT
• Angle adjustable foot support
• Height- and angle adjustable foot
plates
• Height & depth adjustable calf sup-
ports
• Removable
ARM SUPPORT
• Height adjustable
• Removable
HEAD SUPPORT
• Height, depth and angle adjustable
• Removable
ACCESSORIES
SEAT
• Pressure distributive cushions
HIP BELTS
• 2 types of hip belts
BACKREST
• Dierent backrest cushions
HEAD SUPPORT
• Dierent head support models
4. Features of Netti Vision

11
Model: Netti Vision
Language: English Version: 3/092014
5. Accessories
Seat Cushions
Many to choose from.
Please contact your
dealer.
Backrest Cushions
Many to choose from.
Please contact your
dealer.
Hip belts
Head support
Support D Medium
Support C Large
Support A Side support
Support B Small
Hygiene cover
Protects the core of the
head support.
Recommended seat cushion
Recommended backrest cushion
Netti Contour
Anatomic shaped
seat cushion with
high pressure dis-
tribution properties
and low seat height.
Netti Nordic
Pressure distribution
and side support
properties with visual
design elements to
make positioning
easy. Multilayer back
specially fitted to be
used together with
Netti Vision.
Netti Flip
Simple back padding.
Provides room for
movement.
Hip belt with car
lock.
BP Evoflex belt

12
Model: Netti Vision
Language: English Version: 3/092014
6.1 Unpacking
1. Unpack all the parts, and check that
everything is there according to the
packing list.
2. Unfold the chair (Chap. 6.2)
3. Check and adjust the seat dept (Chap. 6.6)
4. Mount the back rest cushion (Chapter 6.5)
5. Mount the seat cushion (Chapter 6.8)
6. Mount the foot supports (Chapter 6.9)
7. Mount the head support (Chapter 6.10)
9. Mount any accessories (Chapter 5).
Weight of components:
Main wheels: 2 kg each
Anti tip: 0,4 kg each
Front castors: 0,6 kg each
Foot support angle adj.: 2,3 kg each
Seat cushion: 0,7 kg
Head support A: 1 kg
Head support C: 1 kg
Head support D: 0,9 kg
6.2 Unfolding/folding the chair
Grab red handle, and
push seat plate down
until it clicks into po-
sition.
Push red knob until
cross bar clicks into
position.
Unlock push handles by opening red
clamp, and turn rearwards into position.
The chair comes
folded with wheels
backrest and arm
supports pre-
mounted.
6. ASSEMBLY AND ADJUSTMENT
Pull side frames
apart.

13
Model: Netti Vision
Language: English Version: 3/092014
Slide push bar with head support and re-
lease handles into slot on top of backrest
tubes on both sides.
To attach the cross bar to the wheelchair
be aware that the red lockers are adjust-
ed in the rearwards position.
Slide the triangular part of the cross bar
into the triangular shank of the back on
both sides.
After move the lockers frontwards back
to the “Lock” position. If you hear the
“click” sound on both sides the cross-
bar is locked. The head rest can now be
mounted.
Swing head support
up into position.
Place backrest onto
velcro.
Fold bottom flap up
then top flap down, to
fix backrest.
Follow instruc-
tions under cush-
ion to place it cor-
rectly.

14
Model: Netti Vision
Language: English Version: 3/092014
Dismounting the cross bar
When folding the chair, dismount the cross bar
like this:
Before you take the cross bar o make sure the
tilt and recline functions are in their neutral po-
sitions: (0 degrees recline, and -2 degrees tilt).
As a first step the head rest should be removed.
After you must lift on both sides the lower part
of the red locker with 2 fingers and pull the
locker backwards.
When both lockers are in the unlocked position
the triangular upper part of the crossbar is now
free to lift out of the shank of the back. With
smooth forces you can lift the crossbar with 2
hands upwards until you have separated it.
Place foot support pin into lock in front
of seat frame, and swing into position.
Grab anti tip and swing into position
(pointing rearwards).

15
Model: Netti Vision
Language: English Version: 3/092014
6.3 Main wheel
The main wheel comes pre-mounted
and fixed to the frame with a bolt.
Sand and sea water (salt used for grit-
ting in the winter) can damage the
bearings of the main wheels and front
castors. Clean the wheelchair thor-
oughly after exposure
6.4 Front castors
Removing:
• Press the release button under the front
fork, and pull down.
Mounting:
• Lead the quick release axle into the bear-
ing house. Pull the fork slightly to ensure
that the fork is fully locked.
6.5 Backrest cushions
Backrest cushions are fixed onto the
wheelchair using velcro.
The backrest comes with 6 adjustable
straps for optimal individual fitting.
It is imperative to correctly set-up
the cushion in order to ensure good
seating comfort
The cushion covers are washable and
thereby reuseable. Follow the
instruction on the back of the
cushion for correct maintenance and
washing of the cushion.

16
Model: Netti Vision
Language: English Version: 3/092014
6.6 Seat depth adjustment
• Seat depth is adjusted at the front by
loosening the screws on each side.
• Pull out extension pieces attached to
the seat plate on each side to required
position. Seat plate follows adjustment.
Make sure to lock bolt on both sides.
5 mm Allen-key
6.7 Anti tip
Netti Vision is on both sides equipped
with an anti tip. These have a swing away
mechanism which is easy to operate. Pull
the red knob with one hand outwards and
swing the anti tip with the other hand
frontwards. The ending and locked posi-
tion is indicated by a “click” sound.
Adjusting the height of the anti tip
The anti tip can be adjusted in height by
loosening the screw close to the hinge point.
• Unfix the screw and pull or push to re-
quired position.
4 & 6 mm Allen keys
The anti tip should always be used for
the safety of the user.
6.8 Seat cushion
The seat cushion is fixed on the wheelchair
with velcro.
It is very important to place the cushion
in the wheelchair before use.
The cushion cover is washable and
reusable. Follow the instruction
on the back of the cushion for
correct maintance and washing of
the cushion.

17
Model: Netti Vision
Language: English Version: 3/092014
You can operate knob 1 with one hand
if you want to elevate the leg rest front
wards in height. Therefore you have to
push the knob inwards with your thump
while you lift (with the other fingers) the
leg rest front – and high wards.
To elevate the leg rest beneath the stan-
dard locking position you need to press the
round knop (knob 2) with 1 finger inwards
and with the other hand you have to push
the square knob (knob 2) to unlock the leg
rest and get it down.
Foot plate height adjustment – operating
instructions
The foot plates are step less height adjust-
able.
Unfix the adjustment screw so that the ad-
justment bar moves freely.
Adjust the foot plate to required height,
then tighten the screw.
6.9 Foot supports
The elevating foot support is angle ad-
justable, swingable and removable.
It comes with height- and depth adjust-
able calf support. The foot plates are
hinged, and can be angled in
fixed positions. As a standard the foot
plates come with a locking bolt which
makes the plates stronger.
Leg rest elevating adjustment instruc-
tions
The leg rest of Netti Vision is designed
for easy operating and avoids potential
squeeze hazard.
There are 2 red knobs to operate when
elevating the leg rest.
Knob 1 is the square one at the front
area of the upper leg rest and
knob 2 is a round one at the side.
In the standard posi-
tion the leg rest is
locked at 97°.
From here you can
elevate furthermore
up to 210° in addition with knob 1.
To elevate below the standard lock posi-
tion down to 90° you need to use knob
2.
1
2

18
Model: Netti Vision
Language: English Version: 3/092014
Adjusting the calf support
To adjust in height:
• Release clamp on foot support stem.
• Find the required position.
• Tighten clamp on foot support stem.
To adjust in depth:
• Release pad by using a 13 mm spanner.
• Find the required position
• Fix screw.
5 mm Allen key
Foot plates with red lock – operating in-
structions
The foot plates come with a locking bolt
in red meant to oer a higher stability to
the foot plates. To lock the foot plates pull
the plastic lock on the right foot plate and
place the lock over the bolt on the left foot
plate.
To release the foot plate pull the plastic
lock front wards and lift the right foot plate
up.
While making the adjustment there
must be no load on the foot plates.
For outdoor use, there should be a
clearance of 4-5 cm between the foot
plate and the ground.
Never stand on the foot plates due to
the risk of tipping forward.
Foot plate – angle adjustment
Unfix the screw as shown by using a 5 mm
Allen key. Adjust the foot plate to the re-
quired angle and tighten the screw.
5 mm Allen key

19
Model: Netti Vision
Language: English Version: 3/092014
Removing the foot support
• Pull the red release handle in hinge
point.
• The foot support can now be lifted up in
any position.
Never stand on the foot supports!
Never lift the wheelchair by the
foot supports.
6.10 Head support
Netti Vision has a stabilizing cross
bar at the upper part of the back
tube carrying the head support
bracket and the operating handles for
tilt and recline. If there is any rea-
son to fold the chair (transport or
storing) the cross bar can be dis-
mounted. After you have done this, it
is for security reasons not more possible
to tilt and recline the chair.
When mounting the cross bar
at the wheelchair the correct
mounting is indicated with a “click” sound.
A - Lever for depth adjustment
B - Wheel for angle adjustment
C - Lever for height adjustment
D - Head support bracket

20
Model: Netti Vision
Language: English Version: 3/092014
• The head support bracket is fixed by
tightening the four screws two by two
diagonally so the bracket is fixed with
the same strength divided on the four
screws.
Adjusting the head support in depth:
• Release the locking lever on top of the
vertical bar (A).
• Adjust the head support and fix it in
required position.
Adjusting the head support in height:
• Release the locking lever on the head
support adapter (C).
• Adjust the head support and fix it in
required position.
Adjusting the head support in angle:
• Release the adjustment wheel at the rear
of the horizontal bar (B).
• Adjust the head support and fix it in
required position.
• Place the squared nut in the trace of the
head support bracket as shown above.
• Place the head support in the head sup-
port bracket.
• The height and the depth of the head
support is set to the required positions
and tightened.
Table of contents
Other Netti Wheelchair manuals
Netti
Netti III comfort User manual

Netti
Netti Dynamic System User manual

Netti
Netti GMDN 41620 User manual

Netti
Netti Dynamic System User manual

Netti
Netti Uno Seat User manual

Netti
Netti GRANDIS User manual

Netti
Netti GMDN 41620 User manual

Netti
Netti AdaptPro User manual

Netti
Netti NETTI III User manual

Netti
Netti 4U-Family Instruction Manual

Netti
Netti Dynamic System User manual

Netti
Netti III Series User manual

Netti
Netti 4U CED XL User manual

Netti
Netti Mobile User manual

Netti
Netti Mobile User manual

Netti
Netti 4U CE Plus User manual
Netti
Netti III Comfort HD User manual

Netti
Netti BASIC Guide

Netti
Netti Tray with lock Guide

Netti
Netti II User manual