New Cosmos Electric ML-310 User manual

This gas detector detects methane gas.
When gas is detected, an alarm (flashing of red LED, sounding of warning
alarm) will be activated.
Read, understand and retain this manual for future reference.
User’s Manual
Natural Gas Detector
ML-310
Safety Precautions
Read these precautions before using the product and be sure to follow these
precautions in order to prevent hazardous situations and property damage.
Precautions are classified with the following symbols according to the
severity of the hazards and damage that may arise due to incorrect
handling of this product.
DANGER
This indicates details for which incorrect handling of the
product is expected to lead to situations having an imminent
chance of hazards leading to death or serious injury.
WARNING
This indicates details for which incorrect handling of
the product is expected to lead to situations having a
chance of hazards leading to death or serious injury.
CAUTION
This indicates details for which incorrect handling of
the product is expected to lead to situations having a
chance of injury or property damage.
DANGER
Make sure that the following are observed when a gas alarm sounds.
There may be a risk of explosion.
Leave the building immediately, opening doors and windows as you leave.
Take others with you.
If you are outside when you smell the gas, leave the area immediately.
Avoid causing a spark, which might cause the gas to explode:
1. Do not remove the connector from the lithium battery
2. Do not light a match or smoke.
3. Do not turn appliances or lights on or off.
4. Do not use a flashlight.
5. Do not start a car.
6. Do not use a telephone.
Find a phone away from the area and immediately call 911 and/or your
natural gas utility. You can report leaks anonymously. Always call to
report the problem. Do not assume someone else will do it.
Do not re-enter the area until the source of the leak is found and corrected. Follow
directions from utility employees or emergency responders who are on site.
WARNING
•This gas detector is equipped with an End Of Life timer that will expire
after 5 years from date of installation. Replace any gas detectors for
which 5 years has passed since their installation with a new gas detector.
•Do not subject the gas detector to water either by submerging it in
water or spraying water on it.
•Do not disassemble or modify this product.
•Do not subject this product to any impact.
•Do not remove the dedicated lithium battery, except for when disposing
of the gas detector.
•Never cover this product.
•When removing or installing the gas detector, do so by using a stable
ladder or step stool and proceed with caution.
•Do not change this product’s installation position.
•Do not place or install objects in front of the gas detector.
•Do not spray cleaning chemicals or insect sprays directly on or near the
detector, as this may cause the detector to malfunction.
•Do not expose this detector to high concentrations of Freon, other
CFCs or Volatile Organic Compounds, as over exposure to such
substances may cause the detector to malfunction.
•Do not expose this detector to silicones, as over exposure to such
substances may cause the detector to malfunction.
•Do not paint over the Alarm. Doing so may permanently damage the detector.
CAUTION
•Do not listen to alarms with your ear close to the gas detector.
•Do not expose this detector to abnormally strong radio waves/signals,
like those emitted from amateur radio equipment, as this may cause the
detector to malfunction.
Target Gas
•This gas detector detects methane gas.
Names and Functions of Parts
Gas Detector Functions
Visual and audible signals will not stop until the product is reset by
removing and reinstalling the battery.
When a gas leak occurs
An alarm sounds when the level of gas in the area of the gas detector
reaches or exceeds a certain concentration.
When trouble occurs
When trouble occurs, a trouble alarm sounds.
When the battery is low
When the battery is low, a low battery alarm sounds.
When the end of service life is reached
When the end of service life is reached, an end of service life notification is
issued.
Usage Instructions
1. Open the battery cover on the back of the gas detector.
2. Connect the included lithium battery by inserting the battery harness
connector into the product as shown in the attached illustration.
* Once the lithium battery is connected, the gas detector’s green LED
(power) will flash once for 1 second.
3. Insert the lithium battery and close the cover.
4. After the battery is plugged in, the detector will enter an initialization
period for approximately 30 seconds . A "Beep" will sound after this 30
second period and the detector will begin monitoring.
* The device status will be confirmed during that 30 second period.
5. After the 30 second initialization period, press and hold the Test Switch
for more than 3 seconds to test the alarm.
General Maintenance
This detector has been designed to be as maintenance-free as possible,
but there are a few simple things you must do to keep it working properly:
•Test it at least once a week.
•Clean the detector at least once a month; gently vacuum the outside
of the detector using your household vacuum's soft brush attachment.
Test the alarm. Never use water, cleaners or solvents since they may
damage the unit.
•Relocate the unit if it sounds frequent unwanted alarms. See "Where
This Alarm Should Not Be Installed" for details.
•If product enters low battery mode, the batteries must be replaced.
Batteries in this device are not available in retail. Please call NEW
COSMOS ELECTRIC CO.,LTD. for replacement batteries.
In order to replace the battery, open the battery cover on the back of
the product and gently disconnect the battery harness connector from
the product. Follow the Usage Instructions section to install the new
battery.
4
2
3
1
ML-310INT_(02)_
•Gas detection
unit
Detects a gas
leak. •Battery cover
(transparent)
Open to replace
a battery.
•Production serial number label
•Alarm speaker
Sounds an
alarm when gas
leakage, gas
detector trouble,
or low battery is
detected.
•Green LED
(power)
This LED flashes
when the
test switch is
pressed.
•Test switch
Used to test
power, alarm
sounds.
•Red LED
(alarm)
This LED flashes
when gas is
detected.
•Yellow LED
(trouble)
This LED flashes
when trouble
occurs, when the
battery is low, or
when the end of
service life has
been reached.
An alarm sounds every 6 seconds
stating “Beep Beep Beep Beep
Danger – gas leak explosion risk –
evacuate, then call 911.”
Red LED (alarm)
Flashes once every 2 seconds
An alarm sounds every 60 seconds
stating “Beep Beep Beep Detector
error”
By pressing the switch for 3
seconds, an alarm will sound stating
“Beep Beep Beep Detector error”
An alarm sounds every 60 seconds
stating “Beep Low Battery”
By pressing the switch for 3
seconds, an alarm will sound
stating “Beep Low Battery”
* Batteries in this device are not
available in retail. Please call
NEW COSMOS ELECTRIC
CO.,LTD.for replacement
batteries.
An alarm sounds every 60 seconds
stating “Beep Beep Please replace
detector”
By pressing the switch for 3
seconds, an alarm will sound
stating “Beep Beep Please replace
detector”
Yellow LED (trouble)
Flashes 3 times every 10 seconds
Yellow LED (trouble)
Flashes once every 10 seconds
Yellow LED (trouble)
Flashes twice every 10 seconds
Green LED (power)
Flashes once every second during
the 30 second initialization period.
A “Beep” sounds 30 seconds after
power is turned on

Test Functions
Power check function
A “Beep” sounds when the switch is pushed. If the switch is then released
in less than 3 seconds, the green LED will flash twice every second (for 3
seconds) to indicate that the power is on.
“Beep”
Green LED (power)
Flashes twice every second
(for 3 seconds)
Alarm push button function
If the switch is pressed for approximately 3 seconds, both a “Beep” and
a “Beep Beep” will sound. If the switch is then released in less than 10
seconds, the red LED will flash once every 2 seconds and the gas alarm
“Beep Beep Beep Beep Danger – gas leak explosion risk – evacuate, then
call 911.” will sound twice.
“Beep”
“Beep Beep”
When the switch is
released “Beep Beep
Beep Beep Danger –
gas leak explosion risk
– evacuate, then call
911.” will sound twice.
Red LED (alarm)
Flashes once every
2 seconds
What to do when the alarm “Beep Beep
Beep Beep Danger – gas leak explosion
risk – evacuate, then call 911.” sounds
DANGER
Make sure that the following are observed when a gas
alarm sounds. There may be a risk of explosion.
Leave the building immediately, opening doors and windows as you leave.
Take others with you. If you are outside when you smell the gas, leave the
area immediately.
Avoid causing a spark, which might cause the gas to explode:
1. Do not remove the connector from the lithium battery
2. Do not light a match or smoke.
3. Do not turn appliances or lights on or off.
4. Do not use a flashlight.
5. Do not start a car.
6. Do not use a telephone.
Specifications
Conforming standards UL standard (UL1484), FCC certified
Detection principle MEMS hot wire semiconductor sensor
Target gas Methane gas
Gas immunity* Acetone, ethanol, bleach solution
Operating temperature
range
32°F(0°C) to 122°F (50°C)
Operating humidity
range
5% to 95%, no condensation
Power supply CR17450E-R-2-CN DC3V, 300mA
(dedicated connector connection)
Battery warranty 5 years
Alarm level 10%LEL
Response time 120 sec. (25%LEL)
Sound pressure Gas alarm : 85 dB/10 feet
Initial power-up timer Approx. 30 seconds
(green LED flashes once every second)
Power indicator A “Beep” will sound once when the switch is
pressed for less than 3 seconds and the green
LED will flash twice every second (for 3 seconds)
Gas alarm Red LED flashes once every 2 seconds
Gas alarm sounds “Beep Beep Beep Beep Danger
– gas leak explosion risk – evacuate, then call 911”
every 6 seconds.
Alarm will continue as described for 4 minutes.
After 4 minutes, Alarm Sound will be produced
1X/60sec and LED will blink as described during
sound.
Visual and audible signals will not stop until the
product is reset by removing and reinstalling the
battery.
Trouble alarm Yellow LED flashes 3 times every 10 seconds
Trouble alarm sounds"Beep Beep Beep Detec-
tor error"every 60 seconds.
Low battery Yellow LED flashes once every 10 seconds
Low battery sounds"Beep Low battery"every 60
seconds.
Alarm push button
function
Product produces Gas alarm signal when the
switch is pressed for more than 3 seconds.
End of service life Yellow LED flashes twice every 10 seconds
End of service life sounds"Beep Beep Please
replace detector"every 60 seconds.
Battery removal indica-
tor
The battery removal indicator will consist of a
transparent battery cover that when a battery
is not present exposes a warning flag label with
the following markings:
WARNING : NO BATTERY!
Alarm is non-operational.
Weight and dimensions Approx. 130 g, W 85 × H 100 × D 22 mm
(excluding protrusions)
Installation Pipe mount by cable ties or wall mount with
hardware.
Accessories User’s Manual (this manual)
FCC Compliance This device complies with Part 15 of the FCC
Rules. Operation is subject to the following two
conditions: (1) This device may not cause harm-
ful interference. and (2) this device must accept
any interference received, including interference
that may cause undesired operation.
* Validated by Gas Technology Institue report, Evaluation of Residential
Methane Detectors, Phase III. Project No. 21696. Report Issued July 25,
2017 https://www.newcosmos-global.com/product/gti_report.pdf
Contact Details
NEW COSMOS ELECTRIC CO.,LTD.
Overseas Business Department
Hamamatsucho 262 Bldg.,2-6-2 Hamamatsu-cho,
Minato-ku, Tokyo 105-0013 JAPAN
WEB: https://www.newcosmos-global.com/
TEL: (847)749-3064
Find a phone away from the area and immediately call 911 and/or your
natural gas utility. You can report leaks anonymously. Always call to
report the problem. Do not assume someone else will do it.
Do not re-enter the area until the source of the leak is found and corrected.
Follow directions from utility employees or emergency responders who are
on site.
How to Install
Gas detectors should be installed in all rooms where a gas leak may occur
or a gas appliance is located. Examples are a kitchen (gas leaks from gas
ovens and cook tops), laundry (gas leaks from a gas clothes dryer), and
furnace area (gas leaks from furnace burners or boilers). However, do not
install closer than 10 feet (3 meters) from gas appliance.
It is possible that gas leaks may migrate along pipes so consideration
should be given to place gas detectors in multiple rooms.
Gas detectors should be located between 6 to 12 inches (0.15 to 0.3
meters) from the ceiling.
Air movement around the detector must not be impeded by items hanging
from the ceiling or near the ceiling such as curtains, drapes, ceiling fans.
The detector should not be installed in the peak of a cathedral ceiling.
Wall Mounting
Tools you will need:Drill with 3/16” or 5mm drill bit,Phillips head
screwdriver, hammer.
1. Choose a location on the wall between 6 inches (0.15 meters) to 12
inches (0.3 meters) from the ceiling. Make a mark in the Mounting Tab
of the detector where you will drill the mounting hole.
2. Use a 3/16” (5 mm) drill bit to drill the mounting hole.
3. Insert the plastic screw anchor into the mounting hole until it is flush
with the wall. If necessary, tap it gently with a hammer.
4. Tighten the screw into the anchor until the screwhead is about 3/16
inch (5 mm) away from the wall, leaving enough space for the Mounting
Tab.
Drill a hole
Insert the plastic screw anchor
Fix the screw temporarily
5. Hang the Mounting Tab on the screw.
Mounting Tab
screw
6. Lightly tighten the screw to secure the detector.
7. Press and hold the Test Switch for more than 3 seconds to test the
alarm.
Where This Alarm Should Not Be Installed
•In a small enclosed space.
•Directly above or near sources of water or humidity such as a sink,
cooktop, dishwasher or bathroom.
•Although it is important to install detectors in rooms were gas
appliances exist, it is recommended the detector be placed as far from
these appliances as possible, preferably more than 10 feet (3 meters)
away. The placement recommendations are intended to keep these
detectors at a reasonable distance from a gas source, and thus reduce
“unwanted” alarms. Unwanted alarms can occur if a detector is placed
directly next to a gas source.
•If you must install the detector near a cooking appliance or cooktop
hood, install at least 5 feet (1.5 meters) from appliance because cooking
vapors or grease may contaminate the detector.
•Next to a door or window.
•Next to a ventilation fan.
•Near a room return or HVAC duct.
•In an area where the temperature will drop below 32°F (0°C) or exceed
122°F (50°C).
•In an area that is dusty or dirty.
•In an area where organic solvents exist.
•In a damp or very humid location.
Troubleshooting
Symptom Cause Action
The green LED does
not flash even when
the switch is pressed
Battery connector not
plugged in
Plug in the battery con-
nector.
Battery is low Replace the gas detector.
The yellow LED is
flashing
Flashes 3 times every
10 seconds
Gas detector trouble
Replace the gas detector.
Flashes twice every
10 seconds
End of gas detector
service life
Replace the gas detector.
Flashes once every
10 seconds
Low gas detector
battery
Replace the gas detector.
Disposal
When disposing of this product, do so in accordance with local laws and
regulations.
Also, remove the lithium battery when disposing.
WARNING
•Wrap the removed lithium battery with tape, etc., so that the connector
portion does not short.
Such a short may cause heat generation, an explosion, or ignition to
occur.
Any of these may result in injury or fire.

Test Functions
Power check function
A “Beep” sounds when the switch is pushed. If the switch is then released
in less than 3 seconds, the green LED will flash twice every second (for 3
seconds) to indicate that the power is on.
“Beep”
Green LED (power)
Flashes twice every second
(for 3 seconds)
Alarm push button function
If the switch is pressed for approximately 3 seconds, both a “Beep” and
a “Beep Beep” will sound. If the switch is then released in less than 10
seconds, the red LED will flash once every 2 seconds and the gas alarm
“Beep Beep Beep Beep Danger – gas leak explosion risk – evacuate, then
call 911.” will sound twice.
“Beep”
“Beep Beep”
When the switch is
released “Beep Beep
Beep Beep Danger –
gas leak explosion risk
– evacuate, then call
911.” will sound twice.
Red LED (alarm)
Flashes once every
2 seconds
What to do when the alarm “Beep Beep
Beep Beep Danger – gas leak explosion
risk – evacuate, then call 911.” sounds
DANGER
Make sure that the following are observed when a gas
alarm sounds. There may be a risk of explosion.
Leave the building immediately, opening doors and windows as you leave.
Take others with you. If you are outside when you smell the gas, leave the
area immediately.
Avoid causing a spark, which might cause the gas to explode:
1. Do not remove the connector from the lithium battery
2. Do not light a match or smoke.
3. Do not turn appliances or lights on or off.
4. Do not use a flashlight.
5. Do not start a car.
6. Do not use a telephone.
Specifications
Conforming standards UL standard (UL1484), FCC certified
Detection principle MEMS hot wire semiconductor sensor
Target gas Methane gas
Gas immunity* Acetone, ethanol, bleach solution
Operating temperature
range
32°F(0°C) to 122°F (50°C)
Operating humidity
range
5% to 95%, no condensation
Power supply CR17450E-R-2-CN DC3V, 300mA
(dedicated connector connection)
Battery warranty 5 years
Alarm level 10%LEL
Response time 120 sec. (25%LEL)
Sound pressure Gas alarm : 85 dB/10 feet
Initial power-up timer Approx. 30 seconds
(green LED flashes once every second)
Power indicator A “Beep” will sound once when the switch is
pressed for less than 3 seconds and the green
LED will flash twice every second (for 3 seconds)
Gas alarm Red LED flashes once every 2 seconds
Gas alarm sounds “Beep Beep Beep Beep Danger
– gas leak explosion risk – evacuate, then call 911”
every 6 seconds.
Alarm will continue as described for 4 minutes.
After 4 minutes, Alarm Sound will be produced
1X/60sec and LED will blink as described during
sound.
Visual and audible signals will not stop until the
product is reset by removing and reinstalling the
battery.
Trouble alarm Yellow LED flashes 3 times every 10 seconds
Trouble alarm sounds"Beep Beep Beep Detec-
tor error"every 60 seconds.
Low battery Yellow LED flashes once every 10 seconds
Low battery sounds"Beep Low battery"every 60
seconds.
Alarm push button
function
Product produces Gas alarm signal when the
switch is pressed for more than 3 seconds.
End of service life Yellow LED flashes twice every 10 seconds
End of service life sounds"Beep Beep Please
replace detector"every 60 seconds.
Battery removal indica-
tor
The battery removal indicator will consist of a
transparent battery cover that when a battery
is not present exposes a warning flag label with
the following markings:
WARNING : NO BATTERY!
Alarm is non-operational.
Weight and dimensions Approx. 130 g, W 85 × H 100 × D 22 mm
(excluding protrusions)
Installation Pipe mount by cable ties or wall mount with
hardware.
Accessories User’s Manual (this manual)
FCC Compliance This device complies with Part 15 of the FCC
Rules. Operation is subject to the following two
conditions: (1) This device may not cause harm-
ful interference. and (2) this device must accept
any interference received, including interference
that may cause undesired operation.
* Validated by Gas Technology Institue report, Evaluation of Residential
Methane Detectors, Phase III. Project No. 21696. Report Issued July 25,
2017 https://www.newcosmos-global.com/product/gti_report.pdf
Contact Details
NEW COSMOS ELECTRIC CO.,LTD.
Overseas Business Department
Hamamatsucho 262 Bldg.,2-6-2 Hamamatsu-cho,
Minato-ku, Tokyo 105-0013 JAPAN
mail: [email protected]
WEB: https://www.newcosmos-global.com/
TEL: (847)749-3064
Find a phone away from the area and immediately call 911 and/or your
natural gas utility. You can report leaks anonymously. Always call to
report the problem. Do not assume someone else will do it.
Do not re-enter the area until the source of the leak is found and corrected.
Follow directions from utility employees or emergency responders who are
on site.
How to Install
Gas detectors should be installed in all rooms where a gas leak may occur
or a gas appliance is located. Examples are a kitchen (gas leaks from gas
ovens and cook tops), laundry (gas leaks from a gas clothes dryer), and
furnace area (gas leaks from furnace burners or boilers). However, do not
install closer than 10 feet (3 meters) from gas appliance.
It is possible that gas leaks may migrate along pipes so consideration
should be given to place gas detectors in multiple rooms.
Gas detectors should be located between 6 to 12 inches (0.15 to 0.3
meters) from the ceiling.
Air movement around the detector must not be impeded by items hanging
from the ceiling or near the ceiling such as curtains, drapes, ceiling fans.
The detector should not be installed in the peak of a cathedral ceiling.
Wall Mounting
Tools you will need:Drill with 3/16” or 5mm drill bit,Phillips head
screwdriver, hammer.
1. Choose a location on the wall between 6 inches (0.15 meters) to 12
inches (0.3 meters) from the ceiling. Make a mark in the Mounting Tab
of the detector where you will drill the mounting hole.
2. Use a 3/16” (5 mm) drill bit to drill the mounting hole.
3. Insert the plastic screw anchor into the mounting hole until it is flush
with the wall. If necessary, tap it gently with a hammer.
4. Tighten the screw into the anchor until the screwhead is about 3/16
inch (5 mm) away from the wall, leaving enough space for the Mounting
Tab.
Drill a hole
Insert the plastic screw anchor
Fix the screw temporarily
5. Hang the Mounting Tab on the screw.
Mounting Tab
screw
6. Lightly tighten the screw to secure the detector.
7. Press and hold the Test Switch for more than 3 seconds to test the
alarm.
Where This Alarm Should Not Be Installed
•In a small enclosed space.
•Directly above or near sources of water or humidity such as a sink,
cooktop, dishwasher or bathroom.
•Although it is important to install detectors in rooms were gas
appliances exist, it is recommended the detector be placed as far from
these appliances as possible, preferably more than 10 feet (3 meters)
away. The placement recommendations are intended to keep these
detectors at a reasonable distance from a gas source, and thus reduce
“unwanted” alarms. Unwanted alarms can occur if a detector is placed
directly next to a gas source.
•If you must install the detector near a cooking appliance or cooktop
hood, install at least 5 feet (1.5 meters) from appliance because cooking
vapors or grease may contaminate the detector.
•Next to a door or window.
•Next to a ventilation fan.
•Near a room return or HVAC duct.
•In an area where the temperature will drop below 32°F (0°C) or exceed
122°F (50°C).
•In an area that is dusty or dirty.
•In an area where organic solvents exist.
•In a damp or very humid location.
Troubleshooting
Symptom Cause Action
The green LED does
not flash even when
the switch is pressed
Battery connector not
plugged in
Plug in the battery con-
nector.
Battery is low Replace the gas detector.
The yellow LED is
flashing
Flashes 3 times every
10 seconds
Gas detector trouble
Replace the gas detector.
Flashes twice every
10 seconds
End of gas detector
service life
Replace the gas detector.
Flashes once every
10 seconds
Low gas detector
battery
Replace the gas detector.
Disposal
When disposing of this product, do so in accordance with local laws and
regulations.
Also, remove the lithium battery when disposing.
WARNING
•Wrap the removed lithium battery with tape, etc., so that the connector
portion does not short.
Such a short may cause heat generation, an explosion, or ignition to
occur.
Any of these may result in injury or fire.
Other manuals for ML-310
1
Table of contents
Other New Cosmos Electric Gas Detector manuals
New Cosmos Electric
New Cosmos Electric KS-7D User manual

New Cosmos Electric
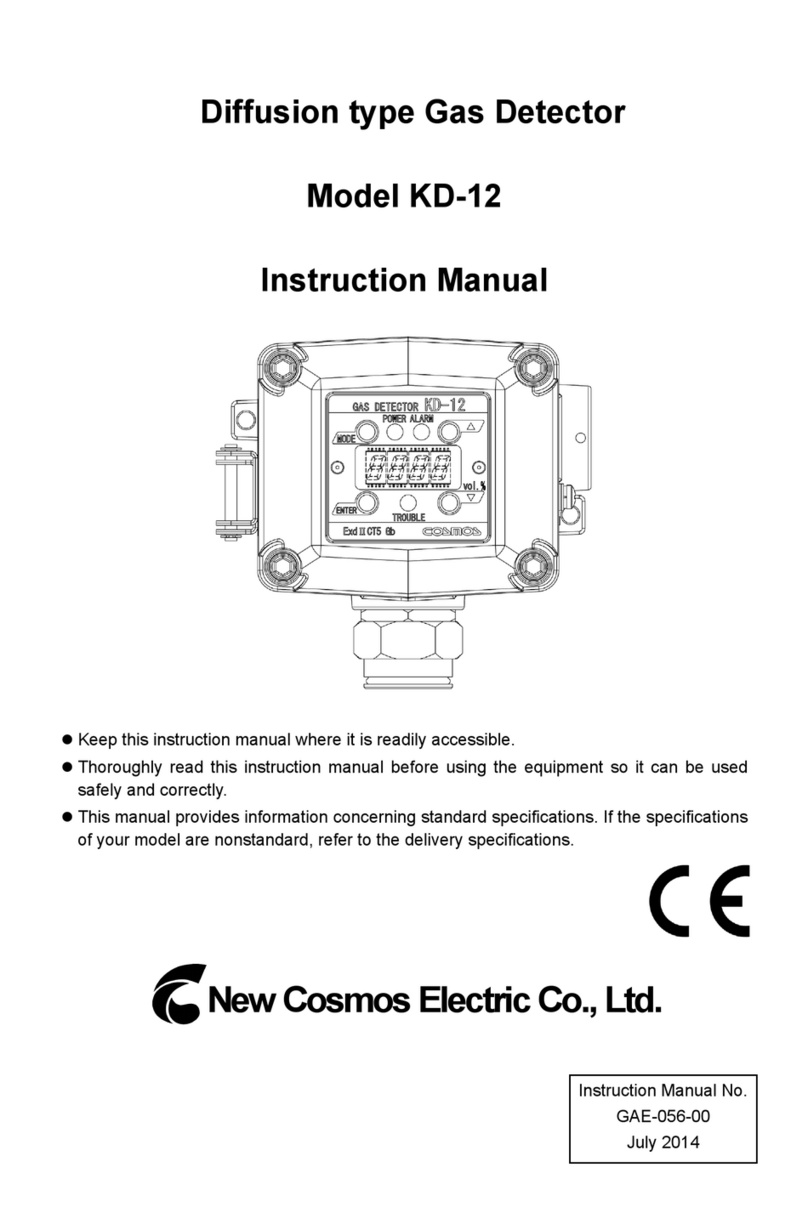
New Cosmos Electric KD-12 User manual

New Cosmos Electric
New Cosmos Electric PS-7-M Use and care manual

New Cosmos Electric
New Cosmos Electric PE-2CC User manual

New Cosmos Electric
New Cosmos Electric NV-100H User manual
New Cosmos Electric
New Cosmos Electric XP-3000II Series User manual
New Cosmos Electric
New Cosmos Electric XPS-7II User manual

New Cosmos Electric
New Cosmos Electric XA-4400II User manual
New Cosmos Electric
New Cosmos Electric KD-12 User manual
New Cosmos Electric
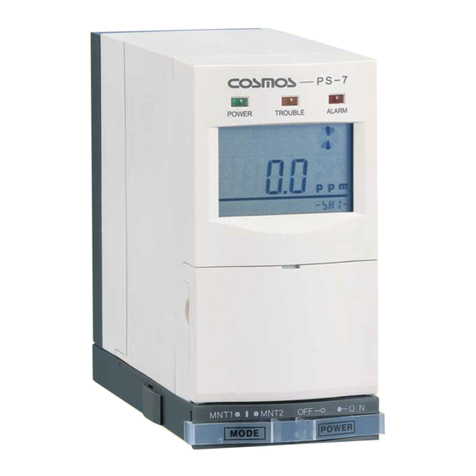
New Cosmos Electric PS-7 User manual
