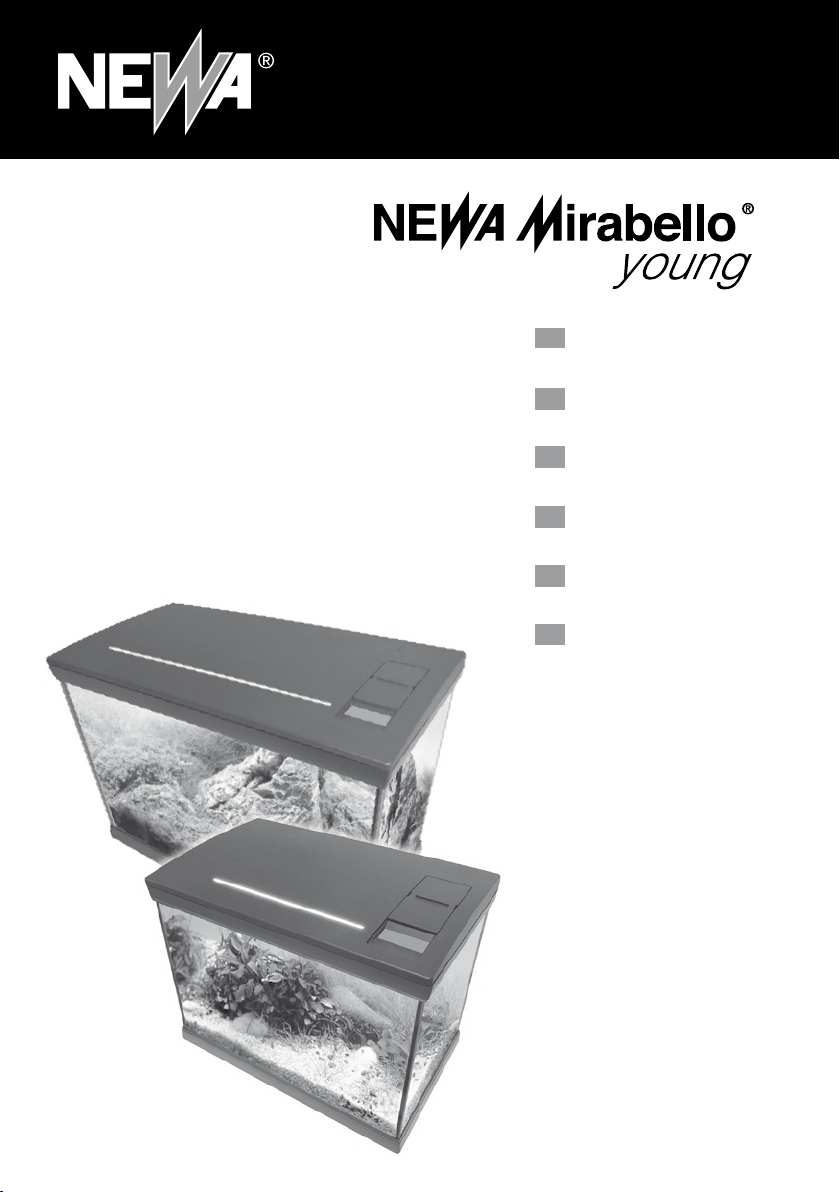
Newa Mirabello young Installation guide
EN
NL
DE
FR
ES
IT
ACQUARIO COMPLETO
PRONTO PER L’INSTALLAZIONE
Istruzioni e garanzia
COMPLETE AQUARIUM
READY TO INSTALL
Instructions and warranty
AQUARIUM COMPLET
PRÈT POUR L’INSTALLATION
Mode d’emploi et garantie
KOMPLETTES AQUARIUM,
FERTIG ZUR MONTAGE
Gebrauchs-anleitung und Garantie
COMPLEET AQUARIUM
KLAAR VOOR GEBRUIK
Aanwunzingen garantie
AQUARIO COMPLETO
LISTO PARA SU INSTALACIÒN
Instrucciones y garantia
MIR 30 YOUNG
MIR 30 YOUNG-MF
MIR 60 YOUNG
MIR 60 YOUNG-MF
2
NEWA Mirabello young
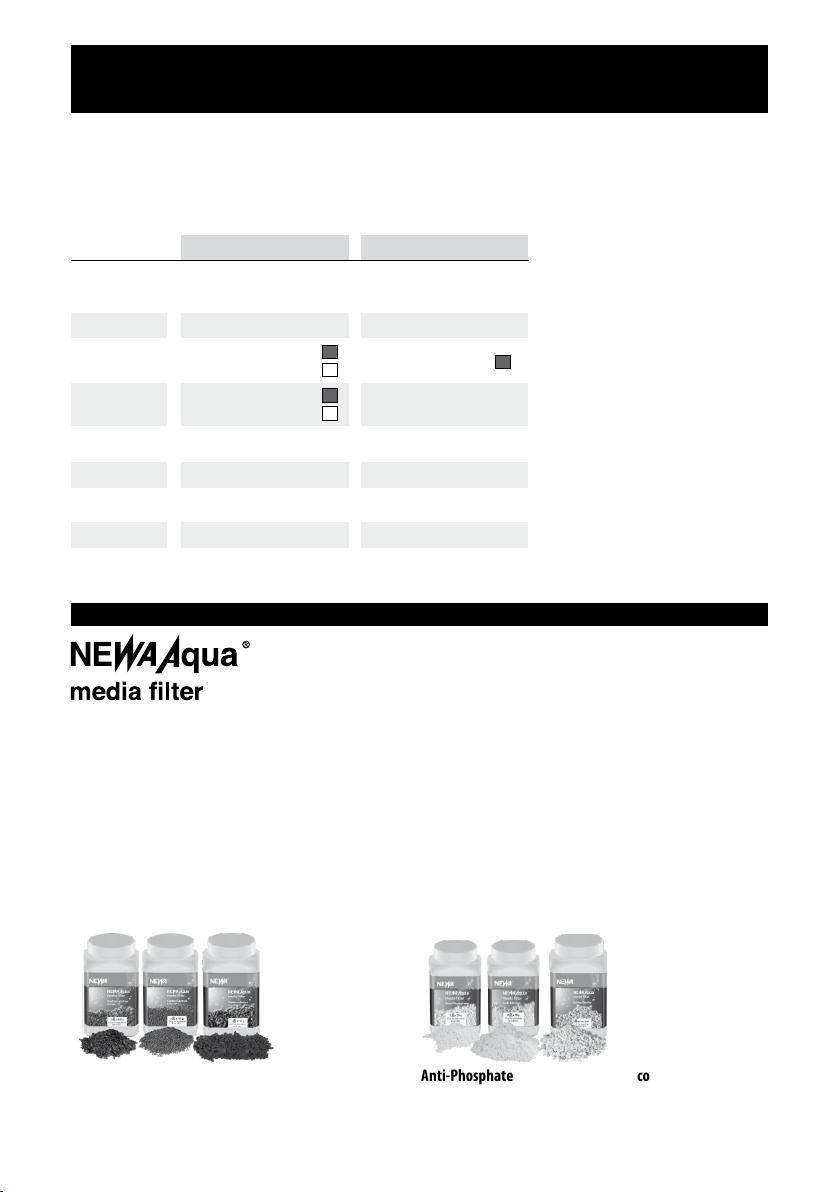
FILTERING MATERIALS
IT) RICAMBI ED ACCESSORI
FR) PIÈCES DE RECHANGE ET ACCESSOIRES
NL) RESERVEONDERDELEN EN ACCESSOIRES
EN) SPARE PARTS AND ACCESSORIES
DE) ERSATZ- UND ZUBEHÖRTEILE
ES) PIEZAS DE REPUESTO Y ACCESORIOS
Active Charbon pellets cod. 00.11.230
Active Charbon granules cod. 00.11.231
Active Charbon mixture cod. 00.11.232
Anti-Phosphate cod. 00.11.240
Anti-Nitrate cod. 00.11.241
Active-Zeolite cod. 00.11.242
IT- Materiali ltranti di alta qualità, contenuti in pratici
barattoli richiudibili ed impermeabili, che mantengono
inalterate le caratteristiche nel tempo.
Scopri le caratteristiche sul sito www.newa.it.
FR- Matériaux ltrants de haute qualité. Un boîtier
pratique se refermant, imperméable à l’eau, garantit le
maintien des caractéristiques du matériau dans le temps.
Découvrez les fonctionnalités sur le site www.newa.it.
NL- Hoogwaardige ltermaterialen. De praktische
hersluitbare en waterdichte bus zorgt ervoor dat de
eigenschappen onveranderd blijven. Ontdek de functies
op de website www.newa.it.
EN- The special quality of each dierent ltering
material in the NEWA Aqua range is preserved over time,
thanks to practical reclosable waterproof canisters.
See more details ol website www.newa.it
DE- Hochwertige Filtermaterialien; die praktische,
verschließbare und wasserundurchlässige Dose behält
ihre Eigenschaften im Laufe der Zeit unverändert bei.
Entdecken Sie die Funktionen auf der Website www.newa.it.
ES- El práctico bidón que se puede cerrar e impermeable
mantiene inalteradas las características a través del tiempo.
Descubra las funciones en el sitio web www.newa.it.
(*)
IT- Componenti soggetti a consumo ed usura.
EN- Components subject to wear and tear.
FR- Composants sujets à usure.
DE- Verschleißteile componenten.
NL- Onderdelen aan slijtage onderhevig.
ES - Componentes sujetos a desgaste.
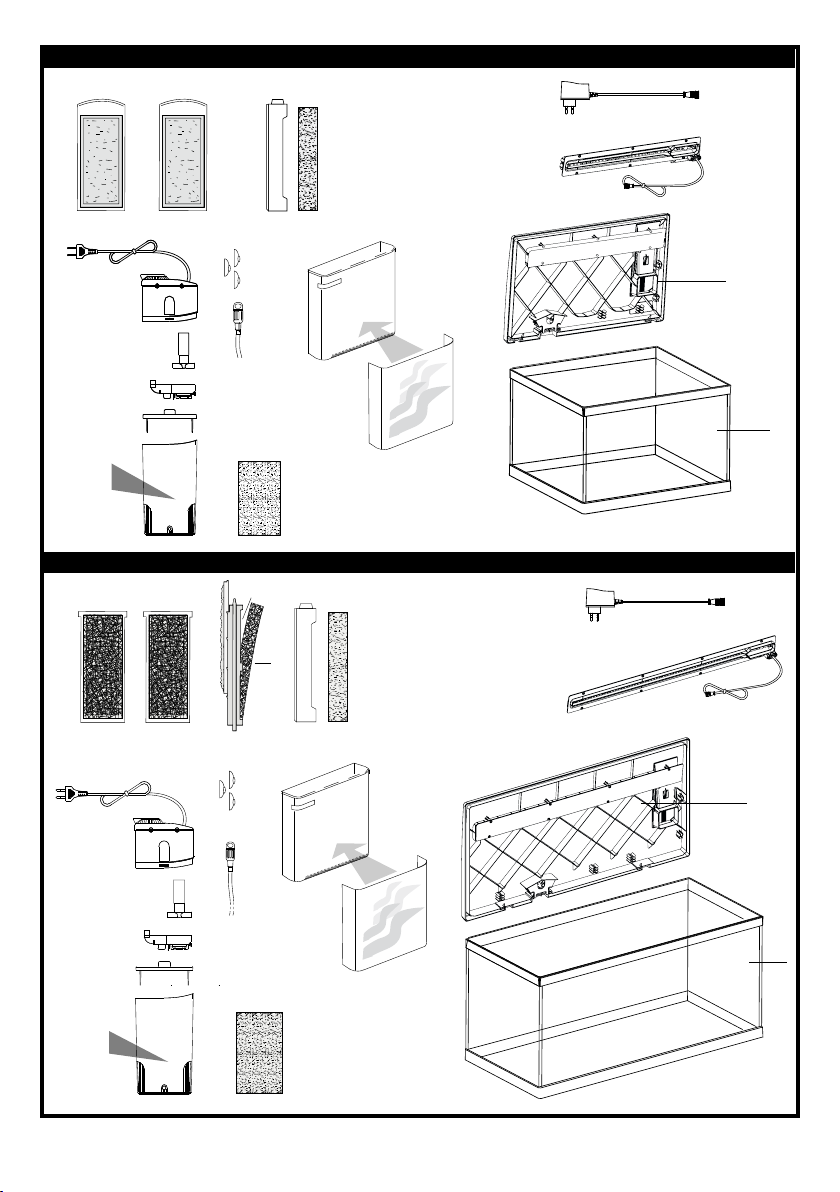
Mod. NEWA Mirabello youngCodes
Ref. g.1 page 3 MIR 30 YOUNG
00.185.064 (EURO plug)
00.185.206 (UK plug)
00.58.032
00.58.030 ANTHRACITE
00.58.031 WHITE
00.58.029 ANTHRACITE
00.58.024 WHITE
7445868
2617050
4020050
7445848
MIR 60 YOUNG
00.185.064 (EURO plug)
00.185.206 (UK plug)
00.63.041
00.63.040 ANTHRACITE
00.63.042 ANTHRACITE
7481728
2617050
4020050
7445848
1
2
3
4
5 (*)
6 (*)
7
8

3
MIR 30 YOUNG
MIR 60 YOUNG
3
4
1
1
2
3
5
4
2
6
8
(4 x)
8
(4 x)
5
6
NEWA Mirafilter
cod. 00.21.017
NEWA Therm eco
VTO100W
NEWAMirascene
set of 4 decorative PVC panels
cod. 00.61.047
Professional LEDs for plants
cod. 00.63.038
OPTIONAL
Professional items for upgrading to NEWA MIRABELLO:
NEWA Mirafilter
cod. 00.21.017
NEWA Therm eco
VTO50W
NEWAMirascene
set of 4 decorative PVC panels
cod. 00.61.047
Professional LEDs for plants
cod. 00.58.028
OPTIONAL
Professional items for upgrading to NEWA MIRABELLO:
Active Charbon pellets cod. 00.11.230
Active Charbon granules cod. 00.11.231
Active Charbon mixture cod. 00.11.232
Anti-Phosphate cod. 00.11.240
Anti-Nitrate cod. 00.11.241
Active-Zeolite cod. 00.11.242
OPTIONAL
You can customize your filtration with NEWA Aqua media filter:
Active Charbon pellets cod. 00.11.230
Active Charbon granules cod. 00.11.231
Active Charbon mixture cod. 00.11.232
Anti-Phosphate cod. 00.11.240
Anti-Nitrate cod. 00.11.241
Active-Zeolite cod. 00.11.242
OPTIONAL
You can customize your filtration with NEWA Aqua media filter:
7
(additional
upgrade kit)
7
(additional
upgrade kit)
Fig. 1
(*)
IT- Componenti soggetti a consumo ed usura.
EN- Components subject to wear and tear.
FR- Composants sujets à usure.
DE- Verschleißteile componenten.
NL- Onderdelen aan slijtage onderhevig.
ES - Componentes sujetos a desgaste.

4
MIR30 young-MF
1 (with carbon)
14
10
7
8
9
11
11
12
12
65
MIR60 young-MF
Mechanichem I
2 (no carbon)
1 (with carbon) 2 (no carbon)
BioFoam
10
9
8
7
14
Mechanichem II BioFoam
4
3
5 6
17
18
20
19
20
19
17
18
13
13
16
21
OPTIONAL
16
21
OPTIONAL
Heater NEWA Therm eco
VTO100W
NEWAMirascene
set of 4 decorative PVC panels
cod. 00.61.047
Professional LEDs for plants
cod. 00.63.038
OPTIONAL MIR70 young-MF
Professional items for upgrading to NEWA MIRABELLO:
OPTIONAL
You can customize
your filtration with
NEWA Aqua
media filter
OPTIONAL
You can customize
your filtration with
NEWA Aqua
media filter
Heater NEWA Therm eco
VTO50W
NEWAMirascene
set of 4 decorative PVC panels
cod. 00.61.047
Professional LEDs for plants
cod. 00.58.028
OPTIONAL MIR40 young-MF
Professional items for upgrading to NEWA MIRABELLO:
Active Charbon pellets cod. 00.11.230
Active Charbon granules cod. 00.11.231
Active Charbon mixture cod. 00.11.232
Anti-Phosphate cod. 00.11.240
Anti-Nitrate cod. 00.11.241
Active-Zeolite cod. 00.11.242
OPTIONAL
You can customize your filtration with NEWA Aqua media filter:
IT- Componenti soggetti a consumo ed usura.
EN- Components subject to wear and tear.
FR- Composants sujets à usure.
DE- Verschleißteile - aan slijtage onderhevige componenten.
NL- Onderdelen aan slijtage onderhevig.
ES - Componentes sujetos a desgaste.
(*)
NEWA Mirabello young-MF
1 (*)
2 (*)
3
4 (*)
5
6
7
8 (*)
9
11
12
13 (3 pcs)
14
16
17
18
19
20
21 (4 pcs)
Codes
Ref. g.1 page 3
OPTIONAL ITEMSSPARE PARTS
Mod. NEWA Mirabello
MIR30 young-MF
00.61.030
00.61.039
-
-
00.61.033
00.61.031
00.48.076 (EURO plug)
00.48.200 (UK plug)
00.48.070
00.48.063
00.48.080
00.48.078
00.48.069
00.48.068
00.61.045
00.185.064 (EURO plug)
00.185.206 (UK plug)
00.58.028
00.58.029 ANTRACITE
00.58.024 WHITE
00.58.030 ANTRACITE
00.58.031 WHITE
00.61.047
MIR60 young-MF
00.61.032
00.61.040
00.61.042
00.61.041
00.61.033
00.61.031
00.48.081 (EURO plug)
00.48.201 (UK plug)
00.48.072
00.48.063
00.48.080
00.48.078
00.48.069
00.48.068
00.61.045
00.185.064 (EURO plug)
00.185.206 (UK plug)
00.63.038
00.63.039
00.63.040
00.61.047
IT) RICAMBI ED ACCESSORI
FR) PIÈCES DE RECHANGE ET ACCESSOIRES
NL) RESERVEONDERDELEN EN ACCESSOIRES
EN) SPARE PARTS AND ACCESSORIES
DE) ERSATZ- UND ZUBEHÖRTEILE
ES) PIEZAS DE REPUESTO Y ACCESORIOS
5
MIR30 young-MF
1
(with carbon)
14
10
7
8
9
11
11
12
12
65
MIR60 young-MF
Mechanichem I
2
(no carbon)
1
(with carbon)
2
(no carbon)
BioFoam
10
9
8
7
14
Mechanichem II BioFoam
4
3
5 6
17
18
20
19
20
19
17
18
13
13
16
21
OPTIONAL
16
21
OPTIONAL
Heater NEWA Therm eco
VTO100W
NEWAMirascene
set of 4 decorative PVC panels
cod. 00.61.047
Professional LEDs for plants
cod. 00.63.038
OPTIONAL MIR70 young-MF
Professional items for upgrading to NEWA MIRABELLO:
OPTIONAL
You can customize
your filtration with
NEWA Aqua
media filter
OPTIONAL
You can customize
your filtration with
NEWA Aqua
media filter
Heater NEWA Therm eco
VTO50W
NEWAMirascene
set of 4 decorative PVC panels
cod. 00.61.047
Professional LEDs for plants
cod. 00.58.028
OPTIONAL MIR40 young-MF
Professional items for upgrading to NEWA MIRABELLO:
Active Charbon pellets cod. 00.11.230
Active Charbon granules cod. 00.11.231
Active Charbon mixture cod. 00.11.232
Anti-Phosphate cod. 00.11.240
Anti-Nitrate cod. 00.11.241
Active-Zeolite cod. 00.11.242
OPTIONAL
You can customize your filtration with NEWA Aqua media filter:
Fig. 1

6
Fig. 2
Fig. 7
Fig. 4Fig. 3 Fig. 5
Fig. 1
MIR60 young
MIR60 young-MF
MIR60 young-MF
MAX
MIR30 young
MIR30 young-MF
MAX
MIR60 young
MIR60 young-MF
MIR30 young
MIR30 young-MF
Fig. 11
Fig. 8 Fig. 9
Fig. 10
Fig. 6CFig. 6BFig. 6A

7
Fig. 12 Fig. 13
Fig. 15 Fig. 16
MIN
MAX
Fig. 14
Fig. 17
Fig. 26
Fig. 29
Fig. 30 Fig. 31
Fig. 27 Fig. 28
Fig. 27 Fig. 28

8
IT
IT Istruzioni d’uso
I. NORME IMPORTANTI PER LA SICUREZZA pag. 5
II. DATI TECNICI pag. 7
III. DISIMBALLAGGIO E CONTROLLI PRELIMINARI pag. 8
IV. DOVE COLLOCARE L’ACQUARIO pag. 9
V. INSTALLAZIONE E ACCENSIONE DELL’ACQUARIO pag. 8
VI. GESTIONE E PULIZIA pag. 18
VII. PROBLEMI E SOLUZIONI pag. 9
VIII. CORRETTO SMALTIMENTO DEL PRODOTTO pag. 9
IX. GARANZIA pag.10
RICAMBI ED ACCESSORI pag. 2
I. NORME IMPORTANTI PER LA SICUREZZA
Questo apparecchio è destinato all’uso come acquario di acqua dolce da usarsi all’interno delle abitazioni. Qualsiasi altro uso
non è ammesso e conseguentemente non è coperto dalla responsabilità del costruttore. NEWA Mirabello young è conforme
alla norma di sicurezza EN60598-2-11, la pompa è conforme alla norma EN60335-2-41. Il prodotto è stato progettato e
realizzato per garantire un utilizzo sicuro in tutto il ciclo di vita. Tuttavia un uso scorretto del prodotto (un uso non conforme
alle prescrizioni del presente manuale) può provocare danni al prodotto e compromettere la sicurezza dell’utilizzatore.
ATTENZIONE: Il presente simbolo riportato sull’etichetta del NEWA Mirabello young indica che è necessario leggere
attentamente questo manuale di istruzioni operative prima di mettere in funzione, usare e manutenzionare l’apparecchio.
ATTENZIONE: Durante l’installazione e la manutenzione scollegare l’acquario e tutti i suoi accessori dalla corrente elettrica. Non
collegare l’acquario alle prese di alimentazione se non è completamente pieno d’acqua.
Onde evitare qualsiasi tipo di infortunio osservare scrupolosamente, oltre alle più elementari disposizioni di sicurezza, le
seguenti avvertenze:
1)
ATTENZIONE: L’apparecchio può essere utilizzato da bambini di età non inferire a 8 anni e da persone
con ridotte capacità fisiche, sensoriali o mentali, o prive di esperienza o della necessaria conoscenza,
purché sotto sorveglianza oppure dopo che le stesse abbiano ricevuto istruzioni relative all’uso sicuro
dell’apparecchio e alla comprensione dei pericoli ad esso inerenti. I bambini non devono giocare con
l’apparecchio perché questo non è un giocattolo. La pulizia e la manutenzione destinata ad essere
effettuata dall’utilizzatore non deve essere effettuata da bambini senza sorveglianza.
2) ATTENZIONE: Scollegare o spegnere tutti gli apparecchi presenti nell’acquario prima di svolgere
operazioni di installazione e manutenzione.
3) Il cordone di alimentazione non può essere né riparato né sostituito. Se danneggiato, sostituire
l'accessorio (pompa). Se risulta danneggiato il cavo di alimentazione della luce dell’acquario è necessario
sostituire l'intero corpo illuminante.
4) Leggere gli avvertimenti ed osservare i simboli riportati nelle etichette di tutti gli apparecchi elettrici e riportate nelle
istruzioni.
5) Versare l’acqua no a raggiungere il livello desiderato, facendo attenzione che il livello massimo dell’acqua NON superi
l’indicatore presente nella cornice superiore dell’acquario (g.1).
6) Controllare che il voltaggio stampato sull’etichetta presente all’interno del coperchio, sulla pompa corrisponda a quello della
rete di alimentazione.
7) Non inserire le spine dei cavi di alimentazione prima di aver riempito completamente l’acquario d’acqua.
8)Vericare che gli accessori elettrici contenuti siano privi di ammaccature e segni indicanti cadute e schiacciamenti.
9)Icavidi alimentazionedovrebberoessereinseritinella presadi correntein modotale cheun puntodel cavoformiun’ansaad un
livelloinferiorerispettoallapresadicorrente.Questoevitachegocced’acqua,seguendoilcavo,possanoentrarenellapresa(g.2).
10) Staccare sempre le spine quando l’acquario non è in uso, nonché prima di inserire o togliere suoi componenti e prima di
procedere alla pulizia. Non cercare di staccare le spine degli apparecchi, tirando il cavo, ma prenderle con la mano per staccarle.
11) Non toccare con mani bagnate le spine di alimentazione, inoltre non toccare a mani nude le spine se queste risultano bagnate.
9
IT
12) Nel caso l’acquario sia alla portata di bambini, utilizzare particolari precauzioni e vericare più volte la corretta installazione
e funzionamento.
13) La massima temperatura dell’acqua veicolata dalla pompa non deve superare i 35°C.
14) L’acquario non deve funzionare a secco.
15) Il prodotto ha dei componenti in vetro. Maneggiare con cura e posizionarlo secondo le istruzioni del presente manuale
evitando di appoggiare la vasca direttamente sugli spigoli.
16) Non appoggiare il prodotto su piani inclinati (g.10).
17) Dopo l’installazione, non movimentare il prodotto. Se necessario, muoverlo solo se la vasca è completamente vuota.
18) Ogni componente è parte integrante del prodotto e non deve essere utilizzato su altri prodotti.
19) Non utilizzare il prodotto per uso alimentare.
20) Non utilizzare il prodotto come terrario.
21) Non utilizzare il prodotto danneggiato e/o smontato.
22) Non danneggiare e/o togliere il sigillante posto sulle giunzioni dei vetri della vasca.
23) Non appoggiare direttamente sul fondo della vasca rocce, sassi o altri elementi ornamentali pesanti.
23) Non posizionare alcun oggetto sopra al prodotto.
24) E’ importante che l’acquario, come tutti gli altri dispositivi elettrici, sia protetto, a monte, da uno speciale interruttore
dierenziale (salvavita) con corrente d’intervento Idn < 30 mA.
25) Si consiglia di spegnere la lampada durante la manutenzione e di non ssare mai la stessa quando è accesa.
CONSERVARE QUESTE ISTRUZIONI PER FUTURE CONSULTAZIONI.
II. DATI TECNICI young young-MF
Modello (220-240V, 50Hz) MIR30 young MIR60 young MIR30 young-MF MIR60 young-MF
Dimensioni Altezza (mm) 333 377 333 377
Larghezza (mm) 427 624 427 624
Profondità (mm) 266 325 266 325
Peso A secco (Kg) 6,2 10,5 7,8 12,5
Capacità Volume (L) 30 60 30 6
Pompa Portata (L/h) 160-300 210-440 80-250 140-350
Potenza (W) 4,5 4,7 4 5
Illuminazione Potenza (W) 3,1 5,5 3,1 5,5
Lumen (lm) 310 525 310 525
Kelvin (K) 6350 6100 6350 6100
III. DISIMBALLAGGIO E CONTROLLI PRELIMINARI
a. Aprire la confezione;
b. Estrarre il prodotto maneggiandolo con cura;
c. Appoggiare l’acquario su una supercie piana e liscia;
d. Smaltire i materiali d’imballaggio nel rispetto delle normative vigenti del Paese di smaltimento.
L’acquario NEWA Mirabello young è confezionato in modo tale che possa resistere ai normali urti e pressioni che si vericano
durante il trasporto. Può comunque capitare che urti eccessivi o errate manipolazioni possano causare danni all’acquario perciò
consigliamo di seguire queste avvertenze per attuare un controllo della tenuta della vasca:
• Collocare la vasca su un piano orizzontale asciutto, appoggiandolo sopra un telo di tessuto o fogli di giornale.
• Riempire la vasca d’acqua e controllare attentamente ogni lato. Vericare che non vi siano perdite d’acqua passando un panno
asciutto lungo i bordi esterni di giunzione dei vetri (g. 3).
• Se vi sono perdite d’acqua, consegnare l’acquario al rivenditore anché venga controllato attentamente o sostituito.
ATTENZIONE: non svuotare l’acquario sollevandolo e rovesciandolo, potrebbe rompersi ! (g. 4).

10
IT
IV. DOVE COLLOCARE L’ACQUARIO
ATTENZIONE: leggere attentamente e rispettare scrupolosamente queste istruzioni.
a. Collocare l’acquario (vasca e base) su un supporto solido e idoneo a sopportare il peso massimo previsto del prodotto (vedi dati
tecnici) dotato di un piano di appoggio livellato, liscio e pulito.
b.Vericare che la supercie del piano d’appoggio sia perfettamente orizzontale, in caso contrario il livello dell’acqua contenuta
nell’acquario risulterebbe obliqua.
c. Non appoggiare il prodotto su piani inclinati.
d. Collocare l’acquario vicino ad almeno un paio o più prese di corrente rispettando le istruzioni per la sicurezza.
e. Collocare l’acquario lontano da fonti di calore e correnti d’aria fredda, come stufe, termosifoni, caminetti e nestre (g. 5).
f. Non collocare l’acquario vicino a televisori, radio o altri apparecchi elettrici che temono gli spruzzi d’acqua.
ATTENZIONE: la luce solare diretta, o diusa ma intensa (ambienti con molte nestre), favorisce la crescita ipertroca di alghe
che pregiudicano lo sviluppo delle piante superiori e compromettono l’equilibrio biologico dell’acquario. La corretta“dose”di luce
deve provenire esclusivamente dall’impianto di illuminazione in dotazione all’acquario.
V. INSTALLAZIONE E ACCENSIONE DELL’ACQUARIO
V.a PULIZIA DELLA VASCA
Pulire accuratamente l’interno della vasca utilizzando un panno umido o una spugna pulita.
Non utilizzare detergenti o spugne venute a contatto con saponi, solventi o altri composti chimici.
V.b MESSA IN FUNZIONE
MIR30 young / MIR60 young: Aprire il coperchio. Passare i cavi di alimentazione della pompa e della plafoniera LED e di un
eventuale riscaldatore (non incluso) negli appositi fermacavi presenti sul coperchio dell’acquario. Mantenendo saldamente il
coperchio dell’acquario aperto con una mano, togliere il coperchietto di protezione del passaggio dei cavi tirandolo a sè (g 6C). Fare
uscire le spine ed i cavi di alimentazione dall’apposito foro. Riposizionare il coperchietto di protezione precedentemente tolto.
MIR30 young-MF: Agganciare il ltro agli appositi supporti presenti nella cornice superiore (g. 6B). Bloccare i cavi di
alimentazione della pompa e del riscandatore negli appositi ferma-cavo posti sul coperchio. Bloccare i cavi di alimentazione
della pompa, del riscaldatore e della plafoniera LED negli appositi ferma-cavo posti sul coperchio. Mantenendo saldamente il
coperchio dell’acquario aperto con una mano, togliere il coperchietto di protezione del passaggio dei cavi, tirandolo a sè (g 6C).
Fareuscirele spineedicavidialimentazionedall’appositoforo. Riposizionareilcoperchiettodiprotezioneprecedentementetolto.
MIR60 young-MF: individuare il luogo desiderato dove agganciare il ltro, tenendo presente che è possibile applicarlo su 2 lati
dell’acquario, escluso il vetro frontale e il lato ove si trova l’apertura scorrevole sul coperchio (g.6A). Agganciare quindi il ltro
agli appositi supporti presenti nella cornice superiore (g.6B). Bloccare i cavi di alimentazione della pompa, del riscaldatore e
della plafoniera LED negli appositi ferma-cavo posti sul coperchio. Mantenendo saldamente il coperchio dell’acquario aperto
con una mano, togliere il coperchietto di protezione del passaggio dei cavi, tirandolo a sè (g 6C). Fare uscire le spine ed i cavi di
alimentazione dall’apposito foro. Riposizionare il coperchietto di protezione precedentemente tolto.
V.c FILTRAZIONE
IL FILTRO È UNSISTEMA DIDEPURAZIONE A“CICLO CHIUSO”CHE RENDE L’ACQUARIO COMPLETAMENTE SVINCOLATO DAL COLLEGAMENTO
CON SORGENTI E SCARICHI D’ACQUA (g. 7). Il ltro è uno strumento fondamentale nella gestione dell’acquario, senza il quale
occorrerebbero cambi d’acqua molto frequenti. Il potente ed ecace ltro incluso ha lo scopo di far circolare e “pulire” l’acqua,
trattenendo sia le impurità in sospensione sia le sostanze invisibili disciolte che derivano da escrementi di animali, da foglie morte e
da residui di cibo.
V.d ATTIVAZIONE DELLE CARTUCCE FILTRANTI (MIR30/60 young-MF)
Biofoam: sciacquare leggermente con acqua corrente tiepida la spugna contenuta nel ltro e riposizionarla all’interno.
Mechanichem: NON sciacquare la cartuccia ltrante, in quanto contiene carbone attivo pre-condizionato.
V.e PERSONALIZZAZIONE POMPA-FILTRO (MIR30/60 young-MF)
La pompa/ltro possiede un proprio contenitore per alloggiare materiali ltrati. Si consiglia raccomanda l’uso dei materiali
ltranti della linea NEWAaqua. Per inserire tali materiali, eseguire le seguenti operazioni: Estrarre la pompa assieme al
contenitore per il ltraggio supplementare avendo cura di ruotare prima il deettore d’uscita dell’acqua verso l’interno (g.12).
Staccare il contenitore dal corpo pompa e togliere il coperchio-griglia (g. 13).

11
IT
V.f REGOLAZIONE PORTATA DELLA POMPA (MIR30/60 young-MF)
La portata della pompa è normalmente regolata alla massima potenza. Per vericare che sia così o per cambiare la portata,
controllare l’apposito regolatore (g. 14).
V.g SISTEMA DI AERAZIONE (MIR30/60 young-MF)
Nel caso lo si desideri, per migliorare l’ossigenazione dell’acqua e lo scambio gassoso, è possibile mettere in funzione il sistema
di aerazione incorporato alla pompa seguendo semplici procedure:
• Aprire il sacchetto che contiene il sistema di aerazione, montare le varie parti che costituiscono il ltro-regolatore dell’aria e
collegarlo al tubetto essibile. (g. 15).
• Aprire il coperchio“AIR”posto sulla pompa ed introdurre il tubetto essibile nel foro (g. 16).
• Regolare la portata d’aria desiderata e bloccare il regolatore, nonché il tubetto di raccordo, negli speciali fermagli presenti sul
lato interno del coperchio (g. 17).
V.h ACCENSIONE DELL’ACQUARIO
ATTENZIONE: Collegare alla rete di alimentazione elettrica gli apparecchi elettrici solo dopo aver allestito l’acquario a proprio
piacimento e riempitolo d’acqua.
1. Introdurre le spine nelle prese di alimentazione, seguendo con attenzione le istruzioni per la sicurezza descritte al capitolo
I. Da questo momento i cavi di alimentazione non andranno mai scollegati se non in occasione delle periodiche operazioni di
pulizia e di manutenzione.
2.Vericare il funzionamento dei vari apparecchi (nel caso di malfunzionamenti fare riferimento al cap. VII):
• Dalla mandata della pompa deve uscire acqua;
• Agendo manualmente sui pulsanti d’accensione delle luci queste si dovranno attivare.
3. Procedere all’eventuale inserimento dei pesci secondo la propria esperienza e nel rispetto delle regole di“buona prassi”relative
all’acquariologia.
VI. GESTIONE E PULIZIA
OGNI SETTIMANA:
a. Pulire i cristalli interni dell’acquario con una spazzola magnetica (non inclusa nella confezione) per eliminare la patina di alghe
(g. 8).
b. Pulire con una spugna o un panno bagnato la protezione del sistema illuminante a LED (g. 9).
c. Controllare il livello dell’acqua. Se troppo basso, riportarlo al livello desiderato con acqua avente circa la stessa temperatura di
quella dell’acquario.
d. Controllare la temperatura dell’acqua con apposito termometro ad immersione.
OGNI MESE: Sostituire il carbone del ltro scegliendo tra quelli disponibili nella gamma NEWA Aqua media lter.
OGNI 3 MESI:
a.Sciacquarela cartuccialtranteinspugna delltro conacqua prelevatadall’acquario,al nedi preservarelecolonie batteriche.
b. Pulire il fondo dell’acquario aspirando delicatamente l’eventuale sedimento depositatosi. Si consiglia l’uso dell’aspira-riuti
NEWA Power Gravel Cleaner. Questa operazione deve essere fatta con molta cautela al ne di non sradicare le piante e lasciare
scoperte le radici.
c. Pulire il rotore e la girante della pompa da eventuali incrostazioni.
GESTIONE E PULIZIA NEWA MIralter (MIR30/60 young-MF)
SOSTITUZIONE DELLA CARTUCCE
Al ne di mantenere le prestazioni dei ltri sempre alla massima ecienza ed assicurare le migliori condizioni dell’acqua del
vostro acquario, si consiglia di sostituire regolarmente le cartucce ltranti seguendo le tempistiche indicate nel cap. VI. Le
cartucce Mechanichem e Biofoam sono realizzate espressamente per poter essere sostituite con la massima semplicità senza
fermo del ltro e senza bagnarsi le mani.
Per svolgere correttamente tale operazione agire come segue:
1. Prelevare le cartucce che si desidera sostituire prendendole dall’apposita maniglietta. Smaltirle rispettando le normative

12
IT
vigenti nel Paese di smaltimento del prodotto;
2. Per la cartuccia di ltraggio chimico Mechanichem I o II: togliere dalla confezione ed inserire la nuova cartuccia nel vano ltro
3. Per il ltro biologico Biofoam : prelevare dalla confezione la spugna ltrante ed inserirla nel rispettivo telaio di supporto.
Riporre la cartuccia nella propria sede.
PULIZIA DEL ROTORE
ATTENZIONE: Staccare dall’alimentazione ogni apparecchio elettrico funzionante nell’acquario.
Pulire il rotore e la girante della pompa seguendo questi punti:
a. Staccare dalla pompa il tubetto del sistema di aerazione, qualora fosse collegato.
b. Ruotare il deettore d’uscita della pompa verso l’interno del ltro (g. 26).
c. Estrarre la pompa ed il contenitore ad essa collegato, tirando delicatamente il cavo di alimentazione (g. 27).
d. Staccare la pompa dal contenitore mettendo quest’ultimo da parte (g.28).
e. Accedere al rotore magnetico con girante aprendo e staccando la camera della girante (g. 29).
f. Estrarre il rotore magnetico e pulirlo con uno spazzolino ed acqua corrente assieme alla camera della girante. Nel caso fosse
incrostato da calcare,metterlo a bagno in aceto per 15-20 minuti prima di pulirlo. Sciacquare con cura.
ATTENZIONE: non utilizzare acidi o soluzioni diverse dal normale aceto ad uso alimentare, potrebbero risultare
tossici per i pesci.
PULIZIA DEL SISTEMA DI AERAZIONE
Se in funzione, potrebbe esssere necessario pulire il sistema di aerazione della pompa, seguendo queste semplici procedure:
A) Seguire i punti da A ad F del punto inerente la pulizia del rotore con girante.
B) Utilizzare il lo in materiale plastico presente nel sacchetto-manutenzione ed introdurlo nel foro presente nell’albero del
motore (g. 30).
C) Nel caso risultasse dicoltoso, insistere con maggior determinazione, potrebbe esserci un “tappo”di calcare. Qualora fosse
impossibile provare delicatamente con un lo d’acciaio di diametro opportuno.
D) Se anche questa operazione non ha successo, è necessario immergere in aceto il corpo pompa per almeno 15-20 minuti, poi
riprovare con il lo. Per fare ciò è necessario liberare tutto il cavo disponibile della pompa, staccandolo dagli appositi ferma-cavo
(g. 31).
VII. PROBLEMI E SOLUZIONI
Se l’installazione è stata eseguita in modo corretto e gli accessori elettrici funzionano regolarmente, molto dicilmente
potranno comparire problemi tecnici. Nel caso vi fossero, consultare un installatore qualicato di materiale elettrico o rivolgersi
al rivenditore di prodotti per acquari per l’attuazione di un accurato controllo o per la sostituzione dell’acquario.
ANOMALIE CAUSE RIMEDI
Il coperchio dell’acquario
non chiude bene
Il piano d’appoggio dell’acquario non è
perfettamente orizzontale.
Agire sul mobile o sul piano d’appoggio con
opportuni spessori al ne di renderlo
perfettamente orizzontale (g. 10).
Il coperchio dell’acquario non è ben
collegato alla vasca Rivolgersi al rivenditore di ducia
L’impianto d’illuminazione
non funziona
L’impianto d’illuminazione non è collegato
alla presa di alimentazione elettrica o i jack
tra alimentatore e cavo della plafoniera
LED non sono collegati correttamente
Collegare la spina alla presa di alimentazione
elettrica
Black out momentaneo -
L’impianto d’illuminazione
non funziona correttamente Rivolgersi al rivenditore di ducia
13
IT
ANOMALIE CAUSE RIMEDI
Portata d’acqua
limitata o assente
La pompa di movimento non è collegata
alla presa di alimentazione elettrica Collegare la spina alla presa
di alimentazione elettrica
Cartuccia intasata Sciacquare o sostituire la cartuccia
La pompa è bloccata per sporcizia
o usura del rotore Provvedere alla manutenzione della pompa.
La pompa non funziona correttamente Rivolgersi al rivenditore di ducia
VIII. CORRETTO SMALTIMENTO DEL PRODOTTO
DIRETTIVA EUROPEA RAEE 2012/19/UE (EN50419)
Applicabile nei paesi dell’Unione Europea e in quelli con sistema di raccolta dierenziata.
Nel momento in cui si decide di rottamare l’acquario, al ne di recuperare le materie riciclabili (plastiche, vetro, ecc.) e di smaltire
insicurezzale componentielettriche, siprovvedaa divideree smaltireseparatamentei diversimaterialisecondole vigentinorme
locali. Si dovrà aver cura di dividere l’apparecchio di illuminazione (coperchio) dalla vasca in vetro e dagli accessori elettrici.
L’apparecchio di illuminazione e gli apparecchi elettrici, in base alla Direttiva Europea RAEE, seguono la via dello smaltimento
secondo quanto esposto nel paragrafo sottostante. Prima di procedere alla separazione dei componenti dell’acquario, scollegare
tuttelespine dallepresedicorrenteevuotarecompletamentel’acquario. ATTENZIONE:Persganciareilcoperchioconil dispositivo
di illuminazione dalla vasca in vetro, è necessario aprire il coperchio dell’acquario ed estrarre entrambe le spine delle cerniere
del coperchio. Tenendo fermo il coperchio, abbassare le spine , una alla volta, facendole roteare verso il basso e successivamente
spingendole verso sinistra no all’estrazione (g.11). Sganciare quindi il coperchio.
II marchio riportato sul prodotto o sulla sua documentazione indica che il prodotto non deve essere smaltito con altri riuti
domestici al termine del ciclo di vita. Per evitare eventuali danni all’ambiente o alla salute causati dall’inopportuno smaltimento
dei riuti, si invita l’utente a separare questo prodotto da altri tipi di riuti e di riciclarlo in maniera responsabile per favorire
il riutilizzo sostenibile delle risorse materiali. • Gli utenti domestici potranno riconsegnare l’apparecchio giunto a ne vita al
rivenditore al momento dell’acquisto di un nuovo apparecchio di tipo equivalente in ragione di uno a uno, oppure contattare
l’ucio locale preposto per tutte le informazioni relative alla raccolta dierenziata e al riciclaggio per questo tipo di prodotto.
Vericare con il rivenditore, in base alla sua dimensione commerciale, la possibilità di ritiro dei RAEE gratuitamente anche senza
acquisto di un apparecchio nuovo. • Gli utenti aziendali sono invitati a contattare il proprio fornitore e vericare i termini e
le condizioni del contratto di acquisto. Questo prodotto non deve essere smaltito unitamente ad altri riuti commerciali. • Lo
smaltimento abusivo da parte dell’utente comporta l’applicazione delle sanzioni amministrative come da vigente legge.
IX. GARANZIA
L’acquario NEWA Mirabello young è garantito secondo la Direttiva Europea 1999/44 CE da difetti di materiali e di lavorazione
per un periodo di 24 mesi dalla data d’acquisto. Se l’apparecchio non funzionasse correttamente entro questo termine dalla
data d’acquisto, restituirlo al rivenditore di zona. L’apparecchio verrà sostituito senza alcun costo aggiunto. Per il servizio di
garanzia restituire l’apparecchio allegando la prova d’acquisto e una dettagliata motivazione del reclamo. L’apparecchio deve
essere svuotato completamente dall’acqua e dai decori, confezionato accuratamente e protetto per evitare eventuali danni da
trasporto. La garanzia non copre danni dovuti a urti o cadute successive alla vendita. La garanzia non è valida nel caso di uso
improprio del prodotto, né risponde a danni causati da manomissioni o negligenza da parte dell’acquirente con conseguente
perdita di pesci o altri animali, danni personali, perdita della proprietà o altri danni che possono insorgere. La garanzia non è
valida per componenti soggetti a consumo ed usura (vedi *, pag.2-4).
CONSERVARE QUESTE ISTRUZIONI.

14
EN
EN Operating Instructions
Contents
I. IMPORTANT SAFETY REGULATIONS page 10
II. TECHNICAL DATA page 11
III. UNPACKING AND PRELIMINARY CHECKS page 14
IV. WHERE TO POSITION THE AQUARIUM page 14
V. INSTALLING AND SWITCHING ON THE AQUARIUM page 14
VI. OPERATING AND CLEANING page 15
VII. MAINTENANCE page 31
VII. TROUBLESHOOTING page 15
VIII. CORRECT DISPOSAL OF THE PRODUCT page 16
IX. WARRANTY page 16
SPARE PARTS AND ACCESSORIES page 3
I. IMPORTANT SAFETY REGULATIONS
This appliance is intended for use as a fresh or marine water aquarium in homes. Any other use is not permitted
and therefore the manufacturer shall not be held liable. NEWA Mirabello complies with safety regulations
EN60598-2-11, the pump complies with the EN60335-2-41 standard. The aquarium has been designed and made
in order to guarantee safe use throughout its life cycle. Nevertheless, improper use of the aquarium (use not
compliant with the provisions of this manual) may cause damage to the aquarium and compromise user safety.
WARNING: the symbol on the label of NEWA Mirabello young indicates that you must thoroughly read this operating
instruction manual before starting up, operating or carrying out any maintenance operations on the appliance.
WARNING: during installation and maintenance, disconnect the aquarium and all its accessories from the electrical mains. Do
not connect the aquarium to power sockets unless it is completely lled with water.
To avoid any kind of accident, carefully follow the simplest safety provisions and the following warnings:
1) CAUTION: This appliance can be used by children aged from 8 years and above and persons with
reduced physical, sensory or mental capabilities or lack of experience and knowledge if they have been
given supervision or instruction concerning use of the appliance in a safe way and understand the
hazards involved. Children shall not play with the appliance because this is not a toy. Cleaning and user
maintenance shall not be made by children without supervision.
2) WARNING: turn off and disconnect all the electrical equipment in the aquarium before carrying out
any maintenance tasks.
3) The power cord must not be repaired or replaced. If it is damaged, replace the entire accessory
(pump). If the power cable for the aquarium light is damaged, the entire light unit must be replaced.
4) Read the warnings and observe the symbols on the labels of all electrical appliances and in the instructions.
5) Pour in the water up to the desired level, making sure that the maximum water level does NOT exceed the indicator on the
upper edge to the aquarium (g. 1).
6) Check that the voltage printed on the label inside the aquarium lid, on the pump and also on the heater, if included, to make
sure it corresponds to the main power supply.
7) Do not insert the plugs of the appliances before completely lling the tank with water.
8) Check that all the electrical accessories have no knocks or marks indicating falls or crushing.
9) The power supply cables should be inserted in the socket so that a part of the cable forms a loop at a lower level than the
socket.This will prevent water droplets from entering the socket (Fig.2) by running along the cable.
10) Always disconnect the plugs when the aquarium is not in use, before inserting or removing its components and before
cleaning. Do not try to disconnect from the socket or the plugs of the appliances by pulling the cable, but disconnect it by hand.
11) Do not touch the power plugs with wet hands or touch the plugs with your bare hands if they are wet.
15
EN
12) If the aquarium is within children’s reach, take special precautions and check correct installation and operation several times.
13)The maximum water temperature conveyed from the pump must not exceed 35°C.
14)The aquarium must not run dry.
15) The aquarium has glass components. Handle it with care and position it according to the instructions given in this manual,
avoiding placing the tank directly on its edges.
16) Do not place the aquarium on tilting surfaces (Fig. 10).
17) After installation, do not move the aquarium. If necessary, only move it if the tank is completely empty.
18) Each component is an integral pa rt of the aquarium and must not be used with other products.
19) Do not use the aquarium for food use.
20) Do not use the aquarium as a terrarium.
21) Do not use the aquarium if it is damaged and /or dismantled.
22) Do not damage and/or remove the seal on the couplings of the glass panels of the tank.
23) Do not place rocks, stones or other heavy ornamental elements directly on the bottom of the tank.
24) Do not position any objects on the aquarium.
25) It is important for the aquarium, just like all other electrical appliances, to be protected upstream by a special dierential
safety switch (safety cutout) with a trip current of Idn < 30 mA.
26)We recommend to switch-o the lamp o during maintenance and never x it when it is on.
KEEP THESE INSTRUCTIONS FOR FUTURE REFERENCE.
II. TECHNICAL DATA young young-MF
Version (220-240V, 50Hz) MIR30 young MIR60 young MIR30 young-MF MIR60 young-MF
Dimensions Height (mm) 333 377 333 377
Width (mm) 427 624 427 624
Depth (mm) 266 325 266 325
Weight Dry (Kg) 6,2 10,5 7,8 12,5
Capacity Volume (L) 30 60 30 60
Pump Flow rate (L/h) 160-300 210-440 80-250 140-350
Power (W) 4,5 4,7 4 5
Lighting Rated input (W) 3,1 5,5 3,1 5,5
Lumen (lm) 309 522 309 522
Kelvin (K) 6340 6122 6340 6122
III. UNPACKING AND PRELIMINARY CHECKS
a. Open the packaging.
b.Take out the aquarium, handling it with care;
c. Place the aquarium on a smooth at surface;
d. Dispose of the packaging materials in compliance with current regulations in the country of disposal;
TheNEWAMirabelloyoung aquariumhas beenpackagedso thatitcanwithstand normalknocks andpressuresduringtransport.
However, excessive knocks or incorrect handling may cause damage to the aquarium therefore we recommend you follow these
warnings in order to check that the tank is watertight:
• Place the tank on a dry horizontal surface, on a layer of fabric sheeting or sheets of newspaper.
• Fill the tank with water and carefully check each side. Check that there are no leaks by wiping along the outer edges of the glass
panel couplings with a dry cloth (Fig. 3).
• If there are leaks, take the aquarium to the dealer so that it can be carefully checked or replaced.
WARNING: do not empty the aquarium by lifting or tilting it, as it may break! (Fig. 4).

16
EN
IV. WHERE TO POSITION THE AQUARIUM
WARNING: carefully read and strictly follow these instructions.
a. Position the aquarium (tank and base) on a solid support, which is appropriate for bearing the maximum intended weight of
the aquarium (see technical data), with a smooth, clean and level support surface.
b. Check that the support surface is perfectly horizontal; otherwise the water level in the aquarium will tilt.
c. Do not position the aquarium on tilting surfaces.
d. Position the aquarium near at least a couple or more power sockets, following the safety instructions.
e. Position the aquarium away from sources of heat and cold draughts such as stoves, radiators, replaces and windows (Fig. 5).
f. Do not position the aquarium near a television, radio or other electrical appliances that should be protected from splashes of water.
WARNING: direct or diused yet intense sunlight (rooms with many windows) encourage the hypertrophic growth of algae,
which can prevent the growth of plants higher up and jeopardise the biological balance of the aquarium. The correct amount of
light should only be provided by the lighting system in the aquarium.
V. INSTALLING AND SWITCHING ON THE AQUARIUM
V.a CLEANING THE TANK
Carefully clean the inside of the tank using a damp cloth and a clean sponge.
Do not use detergents or sponges that have come into contact with soap, solvents or other chemical substances.
V.b STARTING OPERATION
MIR30 young / MIR60 young: Open the cover. Pass the power cables of the pump, lamp and any heater (not included) through
the appropriate cable clamps on the aquarium lid.While holding the aquarium lid open rmly with one hand, remove the cable
passage protection cover by pulling it toward yourself (g. 6C). Extract the plugs and the power cables. Insert the power cables
into the cable ties on the aquarium lid. Reposition the previously removed protective cover.
MIR30young-MF: Use special supports located on the upper frame to x the lter (Fig. 6B). Lock the power cables of the pump,
of the LED lamp and of the heater in their specic cable ties on the lid.While holding the aquarium lid open rmly with one hand,
remove the cable passage protection cover by pulling it toward yourself (g. 6B). Extract the plugs and the power cables. Insert
the power cables into the cable ties on the aquarium lid. Reposition the previously removed protective cover.
MIR60 young-MF: locate the place chosen to attach the lter, bearing in mind that it is possible to apply it on 2 sides of the
aquarium, excluding the front glass and the side of with sliding opening for feeding (g. 6A). Then hook the lter to the lter
supports in the upper frame (g. 6B). Lock the power cables of the pump, of the LED lamp and of the heater in their specic cable
ties on the lid.While holding the aquarium lid open rmly with one hand, remove the cable passage protection cover by pulling
it toward yourself (g. 6C). Extract the plugs and the power cables. Insert the power cables into the cable ties on the aquarium
lid. Reposition the previously removed protective cover.
V.c FILTERING
THE FILTER IS A“CLOSED CYCLE”PURIFICATION SYSTEM THAT MAKES THE AQUARIUMTOTALLY INDEPENDENT FROM CONNECTIONS
WITHWATER INLETS AND OUTLETS (Fig. 7). The lter is an essential tool for operating the aquarium.Without it, the water would
need to be changed very often. The powerful and eective lter is intended to circulate and“clean”water, trapping suspended
impurities and invisible dissolved substances derived from animal excrement, dead leaves and food debris.
V.d ACTIVATION OF FILTERING CARTRIDGES (MIR30/60 young-MF)
Biofoam: Slightly rinse the sponge with warm water and install it back.
Mechanichem: Do NOT rinse the lter cartridge containing the activated pre-conditioned carbon.
V.e PUMP-FILTER CUSTOMIZATION (MIR30/60 young-MF)
The pump / lter has its own housing to place the ltered materials. We recommend the use of ltering materials from the
NEWAQUA line.
To insert these materials, follow these steps:
Remove the pump along with its case for additional ltering by controlling the rst rotation of the water drain reector to the
internal part (Fig. 12). Separate the pump from the housing and remove the grid cover (Fig. 13).

17
EN
V.f PUMPING CAPACITY REGULATION (MIR30/60 young-MF)
Typically, the pump capacity is adjusted to the maximum power. It is necessary to adjust the specic mechanism to verify or
change the performance (Fig. 14).
V.g AERATION SYSTEM (MIR30/60 young-MF)
If desired, it is possible to initiate the ventilation system built into the pump to improve oxygenation and gas exchange. To do
so, follow these simple steps:
•Openthe bag contactingthe ventilationsystem, assembleall the componentpartsof thepressure-regulatinglter andconnect
it to the elastic tube (Fig. 15).
• Open the AIR cap located under the pump and insert the elastic tube into the hole (Fig. 16).
• Set the desired air pressure, lock the mechanism and the connection tube to the special clamps located under the internal unit
cap (Fig. 17).
V.h SWITCHING ON THE AQUARIUM
1. Insert the plugs into the power sockets, carefully following the safety instructions given in Chapter I. From this point onwards,
the power supply cables should not be disconnected unless regular cleaning or maintenance operations are to be carried out.
2. Check that the various appliances are operating (in the event of a fault, see ChapterVII):
•Water should come out of the pump outlet;
•When the lights buttons are pressed, they should switch on.
3. Proceed with adding any sh according to your own experience and complying with the “good practice” regulations for
aquariums.
VI. OPERATING AND CLEANING
EVERY WEEK:
a. Clean the inside of the aquarium glass panels with a magnetic brush (not included) to remove the patina of algae (Fig. 8).
b. Clean the LED lighting system protection with a sponge or a wet cloth (Fig. 9).
c. Check the water level. If it is too low, top it up to the required level with water at about the same temperature as the water in
the aquarium.
d. Check the water temperature using the immersion thermometer provided.
EVERY MONTH:
a. Replace the carbon lter by choosing from those available in the“NEWA AQUA media lter”range.
EVERY 3 MONTHS:
a. Rinse the foam cartridge using the aquarium water, so that the bacterial colonies are preserved.
b. Clean the bottom of the aquarium by gently sucking up any deposited sediment. It is advisable to use the NEWA Power Gravel
Cleaner gravel cleaning set. This operation should be done with great care in order not to uproot any plants or leave any roots
uncovered.
c. Remove any deposits from the rotor and the pump impeller.
CLEANING NEWA Miralter (NEWA Mirabello young-MF):
REPLACING THE FILTER CARTRIDGES
To maintain maximum performance of lters and ensure the best conditions for the water in your aquarium, it is advisable to
regularly replace the lter cartridges following the times specied in ChapterVI.The Mechanichem and Biofoam lter cartridges
are specically designed to be replaced with the utmost ease, without having to stop the lter or get your hands wet.
To carry out this operation correctly, proceed as follows:
1. Open the lid of the ltering area and remove the lter cartridges that you want to replace, taking them by the special handle.
Dispose of them in compliance with the regulations in force in the country of disposal.
2. For the Mechanichem chemical lter cartridge: remove it from its packaging and insert the new lter cartridge into the
ltering department.
3. For the Biofoam biological lter: remove the sponge lter from its packaging and insert it in the support frame. Replace the

18
EN
lter cartridges.
4. Put the lid back on the ltering compartment.
CLEANING THE ROTOR
WARNING: Disconnect all electrical devices of the aquarium from the power grid.
To clean the rotor turbine pump perform the following steps:
1) Remove NEWA Miralter cover and disconnect the ventilation tube from the pump.
2) Spin the pump outlet reector to the inside part of the lter (Fig. 26).
3) Separate the pump from the case and put it aside (g. 28).
4) Move the magnetic rotor close to the turbine by opening and disconnecting the chamber from the turbine (Fig. 29).
5) Remove the magnetic rotor along with the turbine chamber; clean them with a brush and plain water. If they are covered with
lime, leave them in diluted acetic acid for 15-20 minutes before brushing. Rinse carefully.
WARNING: Do not use acid or solutions dierent from diluted acetic acid as they can be toxic for sh.
MAINTENANCE OF THE VENTILATION SYSTEM
Follow these simple instructions to clean the ventilation system of the pump:
A) Implement paragraphs 1-5 relating to cleaning the rotor turbine.
В) Use a plastic wire packed with service details and insert it into the hole of the motor shaft (Fig. 30).
С) In the event of any diculties make Mirabello eorts. If this fails, try to gently insert the steel wire of suitable diameter.
D) If this action has led to the failure, it is necessary to put the pump housing into the diluted acetic acid and then try to clean it
with a wire.To do so, it is necessary to release the cord pump and to remove the locking mechanisms (Fig. 31).
VII. TROUBLESHOOTING
If installation has been carried out correctly and the electrical accessories are operating normally, it is unlikely that any
technical problems will arise. If they should, consult an installer specialised in electrical appliances or contact the aquarium
product dealer to make a careful check or to replace the aquarium.
FAULTS CAUSES SOLUTIONS
The cover does not remain
properly closed.
The cover does not remain properly closed. Apply specic pads on a movable part or along
the perimeter of the support, making it nally
completely horizontal (Fig. 10).
The perimeter of the support is not
horizontal. Contact your local dealer
The lighting system are not
in operation
The lighting system is not connected to
the mains power supply socket or the jacks
between the power supply and the LED
hood cable are not properly connected.
Connect the plug to the electrical socket
A temporary black out ---
The lighting system is not operating
correctly Contact your local dealer
Limited or no water ow
The ow pump is not connected to the
electrical socket Connect the plug to the electrical socket
The lter cartridge is clogged Rinse or replace the lter cartridge
The pump is clogged due to dirt or wear
and tear on the rotor Carry out maintenance on the pump.
The pump is not operating correctly Contact your local dealer

19
EN
VIII. CORRECT DISPOSAL OF THIS PRODUCT (WASTE ELECTRICAL & ELECTRONIC EQUIPMENT)
2012/19/UE (EN50419)
(Applied in European Union and countries, where the separate waste collection system is in force).
Please dispose of this equipment (plastic, glass, etc.) separately from other waste according to local legislation.The glass cover
of the case and electrical appliances should be disposed of separately. According to the directive on the ‘RAEE’, electrical and
electronic equipment should be recyclable as described in this pharagraph. Disconnect the unit from the electric network before
removing parts from the aquarium. Make sure it is empty.
ATTENTION: To release the lid with the lighting xture from the glass tank, you must open the aquarium lid and extract both
hinge pins on the lid.While keeping the lid steady, lower the pins, one at a time, by rolling them down and then pushing them
to the left until they are extracted (g.11).Then release the lid.
This marking shown on the product or its literature, indicates that it must not be disposed with other household wastes at
the end of its working life. To prevent possible harm to the environment or human health from uncontrolled waste disposal,
please separate this from other types of wastes and recycle it responsibly to promote the sustainable reuse of material resources.
• Household users should contact either the retailer where they purchased this product, or their local government oce, for
details of where and how they can take this item for environmentally safe recycling. Check with the distributor (depending
on its activities) if they can collect WEEE even without the condition of purchasing a new appliance. • Business users should
contact their supplier and check the terms and conditions of the purchase contract.This product should not be mixed with other
commercial wastes for disposal. • Illegal release of wastes by the user implicates administrative actions in accordance with the
eective legislation.
IX. WARRANTY
This product is guaranteed, in compliance to European directive 1999/44. As fee from faults both in materials and workmanship for a
period of 24 months from date of purchase. If the product fails to operate correctly within the rst two years of the date of purchase,
return it to the retailer where it was purchased.The product shall be replaced free of charge. During the period of warranty the product
shall be replaced if: 1) The product is returned carefully packaged and has not been damaged intransport. 2) Proof of purchase is
supplied along with a detailed explanation of reasons for the claim.The warranty is subject to the following restrictions and conditions:
1) The warranty does not cover accidental damage or breakage. 2) Replacement of the product in no way represents admission of
responsibility. 3) The warranty is not valid in the case of improper use, and does not cover damage caused by tempering or negligence
on the part of the purchaser.
4)The warranty is not valid for components subject to wear and tear, see (* on page 2-4 ).
KEEP THESE INSTRUCTIONS.

20
FR
FR Instructions d’utilisation
I. CONSIGNES IMPORTANTES DE SÉCURITÉ page 17
II. CARACTÉRISTIQUES TECHNIQUES page 19
III. DÉBALLAGE ET CONTRÔLES PRÉLIMINAIRES page 19
IV. CHOIX DE L’EMPLACEMENT DE L’AQUARIUM page 19
V. INSTALLATION ET ALLUMAGE DE L’AQUARIUM page 20
VI. GESTION ET NETTOYAGE page 20
VII. PROBLÈMES ET SOLUTIONS page 21
VIII. COMMENT ÉLIMINER CE PRODUIT page 21
IX. GARANTIE page 22
PIÈCES DE RECHANGE ET ACCESSOIRES page 3
I. CONSIGNES IMPORTANTES DE SÉCURITÉ
Cet appareil est destiné à être utilisé comme aquarium d’eau douce ou salée à l’intérieur des logements. Aucune autre utilisation
n’est admise et le fabricant décline toute responsabilité si cette interdiction n’est pas respectée. Newa Mirabello young est
conforme à la norme de sécurité EN60598-2-11 , la pompe est conforme à la norme EN60335-2-41 . Cependant, une utilisation
incorrecte du produit (une utilisation non conforme aux prescriptions fournies dans ce manuel) peut provoquer des dommages
au produit et compromettre la sécurité de l’utilisateur.
ATTENTION: le présent symbole reporté sur l’étiquette du NEWA Mirabello young indique qu’il est nécessaire de lire
attentivement ce manuel d’instructions avant de mettre l’appareil en service, de l’utiliser et de procéder à son entretien.
ATTENTION:lors desopérationsd’installationet d’entretien,débrancher l’aquarium ettous sesaccessoiresducourant électrique.
Ne pas brancher l’aquarium aux prises d’alimentation s’il n’est pas entièrement rempli d’eau. An d’éviter tout risque d’accident,
respecterscrupuleusement nonseulement les consignesde sécuritéles plusélémentaires maisaussi les avertissements suivants:
1) ATTENTION: L’appareil peut être utilisé par des enfants âgés de 8 ans au moins et par des personnes
dont les capacités physiques, sensorielles ou mentales sont réduites ou qui ne possèdent pas l'expérience
et les connaissances nécessaires, à condition que cette utilisation se déroule sous surveillance ou après
que les personnes en question ont reçu des instructions sur l'utilisation de l'appareil en conditions de
sécurité et sur les dangers liés à son utilisation. Les enfants ne doivent pas jouer avec l'appareil parce que
ce n'est pas un jouet. Les opérations de nettoyage et d'entretien incombant à l'utilisateur ne doivent pas
être effectuées par des enfants sans surveillance.
2) ATTENTION: Débrancher ou éteindre tous les appareils se trouvant dans l’aquarium ou dans le bassin
avant d’installer le chauffage ou d’effectuer une opération d’entretien quelconque.
3) 3) Le câble d’alimentation ne peut pas être réparé, ni changé. S’il est abîmé, il faut changer de pièce
(pompe). Si le cordon d’alimentation de la lumière de l’aquarium est endommagé, il faudra remplacer
tout le luminaire.
4) Lire les avertissements et respecter les symboles gurant sur les étiquettes de tous les appareils électriques et reprises dans
les instructions.
5) Verser l’eau jusqu’à atteindre le niveau souhaité, en veillant à ce que le niveau maximum de l’eau NE dépasse PAS l’indicateur
présent sur l’encadrement supérieur de l’aquarium (g. 1).
6) Contrôler que le voltage imprimé sur l’étiquette du couvercle, sur la pompe et - si present - sur le chauage, correspond à celui
du réseau d’alimentation.
7) Ne pas brancher les ches des câbles d’alimentation avant d’avoir entièrement rempli l’aquarium d’eau.
8)Vérier qu’aucun accessoire électrique fourni ne présente de bosses ou de signes de chutes et d’écrasements.
9) Il faudrait brancher les câbles d’alimentation dans la prise de courant de façon à ce qu’un point du câble forme un coude à un
niveau inférieur par rapport à la prise de courant. Ceci évite que des gouttes d’eau ne puissent pénétrer dans la prise en suivant
le câble (g. 2).
10) Toujours débrancher les ches lorsque l’aquarium n’est pas utilisé ainsi qu’avant d’introduire ou de retirer ses composants
This manual suits for next models
4
Table of contents
Languages:
Other Newa Aquarium manuals

Newa
Newa More NMO20 User manual

Newa
Newa PGR 1000 Installation guide

Newa
Newa Mirabello MIR 30 Installation guide

Newa
Newa More NMO20 Installation guide

Newa
Newa Mirabello MIR 40 Installation guide

Newa
Newa Duetto DJ50 Installation guide

Newa
Newa FRESH DAYLIGHT Installation guide

Newa
Newa More NMO 20 CRNE Installation guide

Newa
Newa NEWA Hobby NH 20 Installation guide

Newa
Newa NEWA Mirebello MIR 30 LED Installation guide


