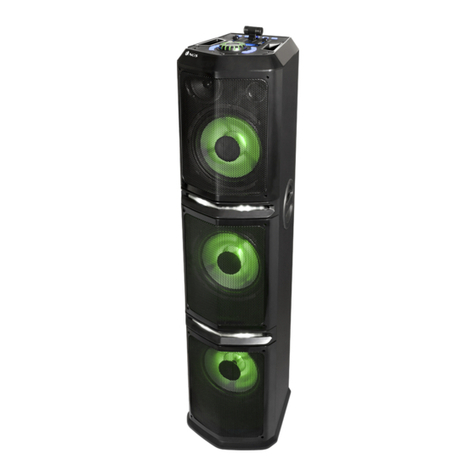
NGS Sky Gazer User manual

www.ngs.eu
ENGLISH I FRANÇAIS I ESPAÑOL I DEUTSCH
ITALIANO I PORTUGUÊS I POLSKI I NEDERLANDS
ČEŠTINA I SLOVENČINA I ΕΛΛΗΝΙΚΑ

USER’S MANUAL
2
INSTALLATION DESCRIPTION
1. After all the screws are screwed in, tighten them evenly
clockwise to avoid misplacement of the stand and the base
plate.
2. Do not force excessively in case of irreparable damage to the
speaker cabinet.
1 6 1113 12 7 3 4
14
18
19
20
21
22
15
16
17

ENGLISH
3
Power ON/OFF
Auto power o mode: Press
repeatedly to select the timer and
the speaker will turn o when the
time is up.
Mute: Mutes the speaker.
Eject CD tray
Time / Alarm: Press to enable or
disable the alarm and set the time.
Change mode: CD, Bluetooth, USB,
AUX.
Audio volume
Repeat: Only in CD mode.
Stop
Random: Only in CD mode.
Skip to previous track
Play / Pause: Hold for 5 seconds to
disconnect the connected Bluetooth
device.
Skip to next track
Wireless charging base
Support for mobile device or tablet
LED display
CD slot
USB charging input
USB audio input
AUX input
Power switch
Power cord
1
2
3
4
5
6
7
8
9
10
11
12
13
14
15
16
17
18
19
20
21
22
1
4
8
11
2
5
9
7
12
3
6
10
13

USER’S MANUAL
4
TIME SETUP
ALARM SETUP
When the speaker is connected to the power supply, the display
will show 00:00. To set the desired time, keep the loudspeaker
connected to the power supply but turned o.
1. Press TIME/ALARM. The numbers will ash.
2. Press the buttons repeatedly until the correct time is
selected.
3. Press TIME/ALARM again to conrm the time and the next 2
digits of the minute hand will ash.
4. Press again to select the minutes and then press
TIME/ALARM to save the time.
This speaker can be used as an alarm.
1. Make sure the speaker is turned o.
2. Make sure you have set the time correctly.
SLEEP MODE SETUP
3. Press and hold the TIME/ALARM button. The display will show
ON. Switch between ON and OFF with the button and
press TIME/ALARM again, when the display will ash.
4. Press to select the alarm time. Conrm by pressing
TIME/ALARM. Select the minute and press TIME/ALARM again.
5. Finally select CD/USB and conrm by pressing TIME/ALARM.
As a result, the speaker will start to play at the desired time in
the selected mode.
6. The volume will gradually rise from 0 to 20.
Press and hold the SLEEP button until the display ashes. Press
again repeatedly until the desired time is selected.You can select
from 90 minutes to 10 minutes. It will ash 3 times to indicate
conrmation. If you want to cancel it, just repeat the process
and select “00”.

ENGLISH
5
BLUETOOTH MODE
• TurnonthespeakerandthenswitchtoBluetoothmode:a
beep will sound and the display will show BT intermittently.
Keep the speaker and Bluetooth enabled device within 10
meters or less of each other during paring process. Dierent
environments may aect the transmission distance.
• SetyourmobilephoneortheBluetoothenableddeviceto
search for Bluetooth devices.
• WhentheBluetoothenabledndsthespeaker,select“NGS
SKYGAZER”from the list of found devices.
• Ifrequired,enterthepassword“0000”.SelectOKorYEStopair
the two units.
• Aftersuccessfullybeingpaired,BTwillremainlituponthe
screen.
• Pressandholdthe button for 5 seconds to enter the
search mode.
AUX MODE
USB PLAYBACK MODE
• Keeptheunitpoweredon.PlugoneendoftheAUXcordto
the headphone jack on your device (phone, tablet, MP3, etc.).
• PlugtheotherendoftheAUXcordintotheAUXjackonthe
speaker.
• SelecttheAUXplaybackmodewiththeSOURCEbutton.
• Usetheconnecteddevice’saudiocontrolsformusicplayback.
• Turnontheunit.ConnecttheUSBdevicewithMP3music
to the USB port and select the USB playback mode with the
SOURCE button.

USER’S MANUAL
6
TECHNICAL SPECIFICATIONSCD MODE
• SelectCDmodewiththeSOURCEbutton.
• InsertaCDintotheCDslotunderthedisplay.
• Pressthe button to remove the CD.
• Duringplayback,theelapsedtimeofthetrackbeingplayed
will be shown on the display.
Output power: 120W
2.1 speaker system
Woofer speaker x 1
Tweeter speaker x 2
CD player
Wireless charger (10W)
LED display
Bluetooth
USB audio input
USB charger 5V/2A
Aux In
Remote control

ENGLISH
7
If at any time in the future you should need to
dispose of this product please note that:
Waste electrical products should not be disposed
of with household waste. Please recycle where
facilities exist.
Check with your Local Authority or retailer for
recycling advice.
(WasteElectricalandElectronicEquipment
Directive)

MANUEL DE L’UTILISATEUR
8
INSTALLATION DESCRIPTION
1. Après avoir vissé toutes les vis, serrez-les uniformément (dans
lesensdesaiguillesd’unemontre)pouréviterunemauvaise
position du support et de la carte mère.
2. Ne forcez pas trop car cela pourrait causer des dommages
irréparables aux enceintes.
1 6 1113 12 7 3 4
14
18
19
20
21
22
15
16
17

FRANÇAIS
9
Interrupteur ON/OFF
Moded’extinctionautomatique:
appuyez plusieurs fois sur cette
touche pour sélectionner la
minuterie,latours’éteindraunefoisle
temps écoulé.
Muet : met la tour en mode silencieux.
Éjecter le CD
Heure / Alarme : appuyez pour activer
oudésactiverl’alarmeetrégler
l’heure.
Changer de mode : CD, Bluetooth,
USB, AUX.
Réglage du volume audio
Répéter:uniquementenmodeCD.
Arrêter
Aléatoire:uniquementenmodeCD.
Passer à la piste précédente
Reproduire / Pause : maintenez ce
bouton enfoncé pendant 5 secondes
pourdéconnecterlepériphérique
Bluetooth connecté.
Passer à la piste suivante
Base de charge sans l
Assistancepourplacerl’appareil
mobile ou la tablette
Écran LED
Fente pour CD
Entrée de charge USB
Entrée audio USB
Entrée AUX
Interrupteur de courant
Câbled’alimentation
1
2
3
4
5
6
7
8
9
10
11
12
13
14
15
16
17
18
19
20
21
22
1
4
8
11
2
5
9
7
12
3
6
10
13

MANUEL DE L’UTILISATEUR
10
REGLAGE DE L’HEURE
CONFIGURATION DE L’ALARME
Lorsquel’enceinteestconnectéeaucourantélectrique,l’écran
ache00:00.Pourpouvoirréglerl’heuresouhaitée,ilfautgarder
lehaut-parleurconnectéaucourantélectrique,maisdésactivé
à son tour.
1. Appuyez sur TIME/ALARM. Les chires vont clignoter.
2. Appuyez plusieurs fois sur les boutons jusqu’àce
quel’heurecorrectesoitsélectionnée.
3.AppuyezdenouveausurTIME/ALARMpourconrmerl’heure
et les 2 prochains chires des minutes clignoteront.
4. Appuyez à nouveau sur pour sélectionner le nombre
correct pour les minutes et appuyez sur TIME/ALARM pour la
dernièrefoispourenregistrerl’heure.
Ce haut-parleur peut être utilisé comme une alarme.
1.Assurez-vousquelehaut-parleurestéteint.
2.Assurez-vousd’avoirréglél’heurecorrectement.
CONFIGURATION DU MODE VEILLE
3. Appuyez sur le bouton TIME/ALARM et maintenez-le enfoncé.
L’écranacheraON.BasculezentreONetOFFavecla
touche etappuyezdenouveausurTIME/ALARM,l’écran
clignotera.
4. Appuyez sur poursélectionnerl’heuredel’alarme.
Conrmez en appuyant sur TIME/ALARM. Sélectionnez les
minutes et appuyez à nouveau sur TIME/ALARM.
5. Enn, sélectionnez CD/USB et conrmez en appuyant sur
TIME/ALARM. Ainsi, le haut-parleur commencera à sonner à
l’heuresouhaitéedanslemodesélectionné.
6. Le volume augmentera progressivement de 0 à 20.
AppuyezsurleboutonSLEEPetmaintenez-leenfoncéjusqu’à
cequel’écranclignote.Appuyezdenouveauàplusieursreprises
jusqu’àcequel’heuresouhaitéesoitsélectionnée.Vouspouvez
choisirde90minutesjusqu’à10minutes.Ilclignotera3foispour
indiqueruneconrmation.Sivoussouhaitezl’annuler,répétez
simplementl’opérationetsélectionnez«00».

FRANÇAIS
11
MODE BLUETOOTH
• Allumezlehaut-parleurpuispassezenmodeBluetooth:
un«bip»retentitetl’écranache«BT»parintermittence.
Gardezlehaut-parleuretl’appareilBluetoothdansunrayon
de10mètresoumoinslorsduprocessusd’appariement.Les
caractéristiquesenvironnementalespeuventavoirunimpact
sur la distance de transmission.
• ActivezvotretéléphonemobileouunappareilBluetoothpour
rechercherlespériphériquesBluetooth.
• LorsquelesystèmeBluetoothtrouvelehaut-parleur,
sélectionnez«NGSSKYGAZER»danslalistedesappareils
trouvés.
• Sinécessaire,entrezlemotdepasse«0000».SélectionnezOK
ou Oui pour appairer les deux appareils.
• Aprèsuncouplageréussi,«BT»seraachédemanièrexe
surl’écran.
• Appuyezsurlebouton et maintenez-le enfoncé pendant 5
secondes pour accéder au mode de recherche.
MODE AUX
MODE LECTURE USB
• Maintenezl’appareilallumé.LiezuneextrémitéducâbleAUX
àlasortiecasquedevotreappareil(téléphone,tablette,MP3,
etc.).
• Connectezl’autreextrémitéducâbleAUXàlasortieAUXdu
haut-parleur.
• SélectionnezlemodedelectureAUXavecleboutonSOURCE.
• Utilisezlescommandesdel’appareilaudioconnectépour
écouterdelamusique.
• Allumezl’appareil.ConnectezlepériphériqueUSBavec
musiqueMP3auportUSBetsélectionnezlemodedelecture
USB avec le bouton SOURCE.

MANUEL DE L’UTILISATEUR
12
SPÉCIFICITÉS TECHNIQUESMODE CD
• SélectionnezlemodeCDavecleboutonSOURCE.
• InsérezunCDdanslafenteprévueàceteetsousl’écran.
• Pourl’extraire,appuyezsurlebouton .
• Pendantlalecture,laduréeécouléedelapisteencoursde
lectureseraachéeàl’écran.
Puissance de sortie : 120 W
Système audio 2.1
Haut-parleur woofer x 1
Haut-parleur tweeter x 2
Lecteur CD
Chargeur sans l (10 W)
Écran LED
Bluetooth
Entrée audio USB
Port de charge USB: 5V / 2A
Entrée auxiliaire
Commande à distance

FRANÇAIS
13
Sidansl’avenirvousdeviezvousdébarrasserde
ceproduitveuillezremarquerque:
Lesdéchetsélectriquesnedoiventpasêtrejetés
avec les déchets ménagers. Veuillez recycler les
produits dans une déchetterie.
Consulter votre responsable local ou votre
revendeur pour un conseil sur le recyclage.
(Directivesurlesdéchetsdeséquipements
électriquesetélectroniques)

MANUAL DE USUARIO
14
INSTALACIÓN DESCRIPCIÓN
1. Después de atornillar todos los tornillos, apriételos
uniformemente en sentido horario para evitar una mala
colocación del soporte y la placa base.
2.Nofuerceexcesivamente,yaquepodríacausarundaño
irreparable a la caja de altavoces.
1 6 1113 12 7 3 4
14
18
19
20
21
22
15
16
17

ESPAÑOL
15
Encendido ON/OFF
Modo apagado automático: Presione
repetidamente para seleccionar el
temporizador, la torre se apagará
cuando el tiempo concluya.
Mute: Silencia la torre.
Expulsar CD
Hora / Alarma: Presione para activar
o desactivar la alarma y congurar
la hora.
Cambiar modo: CD, Bluetooth, USB,
AUX.
Ajuste del volumen de audio
Repetir: Solo en modo CD.
Parar
Aleatorio: Solo en modo CD.
Saltar a la pista anterior
Reproducir / Pausar: Mantener
durante 5 segundos para desconectar
el dispositivo Bluetooth conectado.
Saltar a la pista siguiente
Base de carga inalámbrica
Soporte para colocar el dispositivo
móvil o tableta
Pantalla LED
Ranura de CD
Entrada de carga USB
Entrada de audio USB
Entrada de AUX
Interruptor de corriente
Cable de corriente
1
2
3
4
5
6
7
8
9
10
11
12
13
14
15
16
17
18
19
20
21
22
1
4
8
11
2
5
9
7
12
3
6
10
13

MANUAL DE USUARIO
16
CONFIGURACIÓN DE LA HORA
CONFIGURACIÓN DE LA ALARMA
Cuando el altavoz se conecta a la corriente eléctrica, la pantalla
mostrará 00:00. Para poder jar la hora deseada, debemos
mantener el altavoz conectado a la corriente eléctrica, pero a su
vez, apagado.
1. Presione TIME/ALARM. Los números parpadearán.
2. Presione repetidamente los botones hasta
seleccionar la hora correcta.
3. Presione de nuevo TIME/ALARM para conrmar la hora y los
siguientes2dígitosdelminuteroparpadearán.
4. Presione otra vez para seleccionar los minutos
correctos y pulse por última vez TIME/ALARM para guardar la
hora.
Este altavoz puede ser utilizado como alarma.
1.Asegúresedequeelaltavozestáapagado.
2. Asegúrese de haber congurado la hora correctamente.
CONFIGURACIÓN DEL MODO SLEEP
3. Mantenga presionado el botón TIME/ALARM. La pantalla
mostrará ON. Cambie entre ON y OFF con el botón y
presione de nuevo TIME/ALARM, la pantalla parpadeará.
4. Presione para seleccionar la hora de alarma.
Conrme presionando TIME/ALARM. Seleccione el minuto y
vuelva a presionar TIME/ALARM.
5. Finalmente seleccione CD/USB y conrme presionando TIME/
ALARM.Asíelaltavozcomenzaráasonarenlahoradeseada
en el modo seleccionado.
6. El volumen subirá de 0 a 20 gradualmente.
MantengapresionadoelbotónSLEEPhastaqueparpadeela
pantalla. Vuelva a presionar repetidamente hasta seleccionar
el tiempo deseado. Puede seleccionar desde los 90 minutos
hasta los 10. Parpadeará 3 veces para indicar conrmación. Si
deseacancelarlo,solotienequevolverarepetirelprocesoy
seleccionar“00”.

ESPAÑOL
17
MODO BLUETOOTH
• Enciendaelaltavozy,acontinuación,cambiealmodo
Bluetooth: se escuchará un“beep”y la pantalla mostrará
“BT” intermitentemente. Mantenga el altavoz y el dispositivo
con Bluetooth habilitado en un radio de 10 metros o menos
duranteelprocesodeemparejamiento.Lascaracterísticasdel
entorno pueden afectar a la distancia de transmisión;
• HabilitesuteléfonomóvilodispositivoBluetoothparabuscar
dispositivos Bluetooth;
• CuandoelBluetoothhabilitadoencuentreelaltavoz,
seleccione“NGS SKYGAZER”de la lista de dispositivos
encontrados;
• Siselerequiere,introduzcalacontraseña“0000”.Seleccione
OK o YES para emparejar las dos unidades;
• Trasunemparejamientoconéxito,“BT”semostrarájamente
en la pantalla.
• Manteniendopulsadodurante5segundoselbotón el
altavozentraráenmodobúsqueda.
MODO AUX
MODO DE REPRODUCCIÓN USB
• Mantengalaunidadencendida.Conecteunextremodelcable
AUX al conector de auriculares de su dispositivo (teléfono,
tablet, MP3, etc.).
• ConecteelotroextremodelcableAUXalconectorAUXdel
altavoz.
• SeleccioneelmododereproducciónAUXconelbotón
SOURCE.
• Utiliceloscontrolesdeldispositivodeaudioconectadoparala
reproducción de música.
• Enciendalaunidad.ConecteeldispositivoUSBconmúsica
MP3 en el puerto USB y seleccione el modo reproducción USB
con el botón SOURCE.

MANUAL DE USUARIO
18
ESPECIFICACIONES TÉCNICASMODO CD
• SeleccioneelmodoCDconelbotónSOURCE.
• IntroduzcaunCDenlaranuradeCD’sbajolapantalla.
• Paraextraerlopulseelbotón .
• Durantelareproducciónsemostraráenlapantallaeltiempo
transcurrido de la pista en reproducción.
Potencia de salida: 120 W
Sistema de sonido 2.1
Altavoz woofer x 1
Altavoz tweeter x 2
Reproductor CD
Cargador inalámbrico (10W)
Pantalla LED
Bluetooth
Entrada de audio USB
Puerto de carga USB: 5V/2A
Entrada auxiliar
Mando a distancia

ESPAÑOL
19
Sienelfuturotienequedesecharesteproducto,
tengaencuentaque:
Los residuos de productos eléctricos no se tienen
quetirarconlabasuradoméstica.Recícleloenlas
instalaciones disponibles.
Consulte a las Autoridades Locales o al
distribuidorparaqueledeinstruccionessobre
el reciclaje.
(Directiva sobre la eliminación de Aparatos
Electrónicos y Eléctricos)

GEBRUIKERSHANDLEIDING
20
INSTALLATION BESCHREIBUNG
1. Nach dem Verschrauben aller Schrauben, ziehen Sie sie
gleichmäßig im Uhrzeigersinn an, um eine Fehlanbringung
der Halterung und der Grundplatte zu vermeiden.
2. Wenden Sie nicht zu viel Kraft auf, da dies zu einem
irreparablen Schaden des Lautsprechergehäuses führen
könnte.
1 6 1113 12 7 3 4
14
18
19
20
21
22
15
16
17
Table of contents
Languages:
Other NGS Speakers manuals
NGS
NGS ROLLER BYRON 360 User manual

NGS
NGS ROLLER SLANG User manual

NGS
NGS Roller Cube User manual
NGS
NGS ROLLER JOY User manual

NGS
NGS Roller Tumbler User manual
NGS
NGS WILDHOUSE User manual

NGS
NGS ROLLER PINEAPPLE User manual
NGS
NGS Roller Tempo User manual
NGS
NGS WILDDANCE User manual
NGS
NGS WILD DUB ZERO User manual
