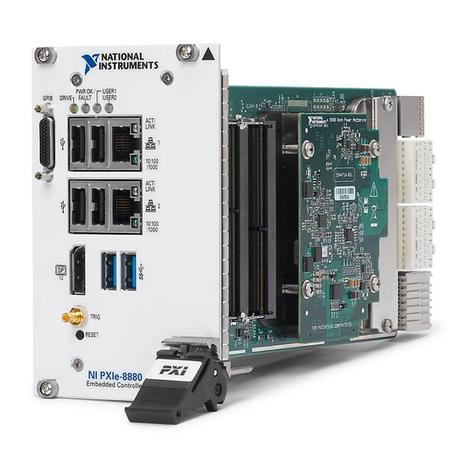
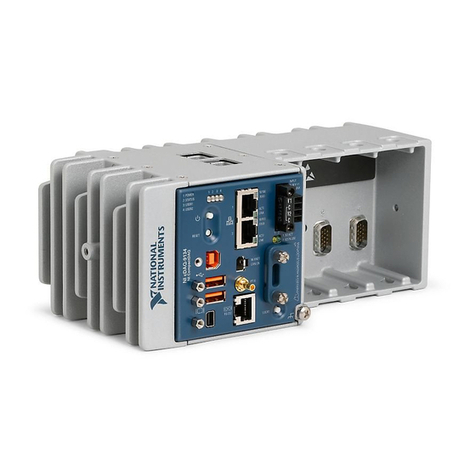
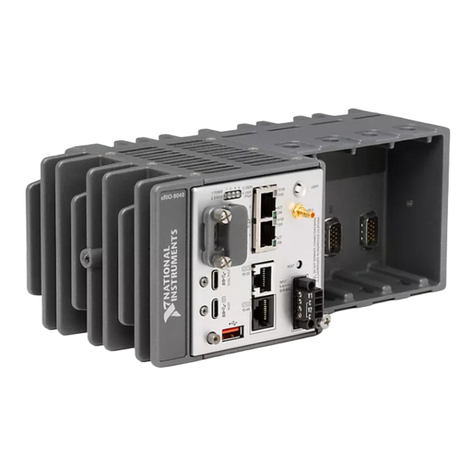
NI 7931R User manual

FlexRIOTM
NI-7931R/7932R/7935R User Manual
NI-793xR User Manual
August 2015
375181B-01

Support
Worldwide Technical Support and Product Information
ni.com
Worldwide Offices
Visit ni.com/niglobal to access the branch office websites, which provide up-to-date
contact information, support phone numbers, email addresses, and current events.
National Instruments Corporate Headquarters
11500 North Mopac Expressway Austin, Texas 78759-3504 USA Tel: 512 683 0100
For further support information, refer to the NI Services appendix. To comment on National
Instruments documentation, refer to the National Instruments website at ni.com/info and
enter the Info Code feedback.
©2015 National Instruments. All rights reserved.

Legal Information
Limited Warranty
This document is provided ‘as is’ and is subject to being changed, without notice, in future editions. For the latest version,
refer to ni.com/manuals. NI reviews this document carefully for technical accuracy; however, NI MAKES NO EXPRESS
OR IMPLIED WARRANTIES AS TO THE ACCURACY OF THE INFORMATION CONTAINED HEREIN AND
SHALL NOT BE LIABLE FOR ANY ERRORS.
NI warrants that its hardware products will be free of defects in materials and workmanship that cause the product to fail to
substantially conform to the applicable NI published specifications for one (1) year from the date of invoice.
For a period of ninety (90) days from the date of invoice, NI warrants that (i) its software products will perform substantially
in accordance with the applicable documentation provided with the software and (ii) the software media will be free from
defects in materials and workmanship.
If NI receives notice of a defect or non-conformance during the applicable warranty period, NI will, in its discretion: (i) repair
or replace the affected product, or (ii) refund the fees paid for the affected product. Repaired or replaced Hardware will be
warranted for the remainder of the original warranty period or ninety (90) days, whichever is longer. If NI elects to repair or
replace the product, NI may use new or refurbished parts or products that are equivalent to new in performance and reliability
and are at least functionally equivalent to the original part or product.
You must obtain an RMA number from NI before returning any product to NI. NI reserves the right to charge a fee for
examining and testing Hardware not covered by the Limited Warranty.
This Limited Warranty does not apply if the defect of the product resulted from improper or inadequate maintenance,
installation, repair, or calibration (performed by a party other than NI); unauthorized modification; improper environment;
use of an improper hardware or software key; improper use or operation outside of the specification for the product; improper
voltages; accident, abuse, or neglect; or a hazard such as lightning, flood, or other act of nature.
THE REMEDIES SET FORTH ABOVE ARE EXCLUSIVE AND THE CUSTOMER’S SOLE REMEDIES, AND SHALL
APPLY EVEN IF SUCH REMEDIES FAIL OF THEIR ESSENTIAL PURPOSE.
EXCEPT AS EXPRESSLY SET FORTH HEREIN, PRODUCTS ARE PROVIDED "AS IS" WITHOUT WARRANTY OF
ANY KIND AND NI DISCLAIMS ALL WARRANTIES, EXPRESSED OR IMPLIED, WITH RESPECT TO THE
PRODUCTS, INCLUDING ANY IMPLIED WARRANTIES OF MERCHANTABILITY, FITNESS FOR A
PARTICULAR PURPOSE, TITLE OR NON-INFRINGEMENT, AND ANY WARRANTIES THAT MAY ARISE FROM
USAGE OF TRADE OR COURSE OF DEALING. NI DOES NOT WARRANT, GUARANTEE, OR MAKE ANY
REPRESENTATIONS REGARDING THE USE OF OR THE RESULTS OF THE USE OF THE PRODUCTS IN TERMS
OF CORRECTNESS, ACCURACY, RELIABILITY, OR OTHERWISE. NI DOES NOT WARRANT THAT THE
OPERATION OF THE PRODUCTS WILL BE UNINTERRUPTED OR ERROR FREE.
In the event that you and NI have a separate signed written agreement with warranty terms covering the products, then the
warranty terms in the separate agreement shall control.
Copyright
Under the copyright laws, this publication may not be reproduced or transmitted in any form, electronic or mechanical,
including photocopying, recording, storing in an information retrieval system, or translating, in whole or in part, without the
prior written consent of National Instruments Corporation.
National Instruments respects the intellectual property of others, and we ask our users to do the same. NI software is protected
by copyright and other intellectual property laws. Where NI software may be used to reproduce software or other materials
belonging to others, you may use NI software only to reproduce materials that you may reproduce in accordance with the
terms of any applicable license or other legal restriction.
End-User License Agreements and Third-Party Legal Notices
You can find end-user license agreements (EULAs) and third-party legal notices in the following locations:
• Notices are located in the <National Instruments>\_Legal Information and <National Instruments>
directories.
• EULAs are located in the <National Instruments>\Shared\MDF\Legal\license directory.
•Review
<National Instruments>\_Legal Information.txt for information on including legal information in
installers built with NI products.
U.S. Government Restricted Rights
If you are an agency, department, or other entity of the United States Government (“Government”), the use, duplication,
reproduction, release, modification, disclosure or transfer of the technical data included in this manual is governed by the
Restricted Rights provisions under Federal Acquisition Regulation 52.227-14 for civilian agencies and Defense Federal
Acquisition Regulation Supplement Section 252.227-7014 and 252.227-7015 for military agencies.
Trademarks
Refer to the NI Trademarks and Logo Guidelines at ni.com/trademarks for more information on National Instruments
trademarks.
ARM, Keil, and µVision are trademarks or registered of ARM Ltd or its subsidiaries.
LEGO, the LEGO logo, WEDO, and MINDSTORMS are trademarks of the LEGO Group.
TETRIX by Pitsco is a trademark of Pitsco, Inc.
FIELDBUS FOUNDATION™and FOUNDATION™are trademarks of the Fieldbus Foundation.

EtherCAT®is a registered trademark of and licensed by Beckhoff Automation GmbH.
CANopen®is a registered Community Trademark of CAN in Automation e.V.
DeviceNet™and EtherNet/IP™are trademarks of ODVA.
Go!, SensorDAQ, and Vernier are registered trademarks of Vernier Software & Technology. Vernier Software & Technology
and vernier.com are trademarks or trade dress.
Xilinx is the registered trademark of Xilinx, Inc.
Taptite and Trilobular are registered trademarks of Research Engineering & Manufacturing Inc.
FireWire®is the registered trademark of Apple Inc.
Linux®is the registered trademark of Linus Torvalds in the U.S. and other countries.
Handle Graphics®, MATLAB®, Real-Time Workshop®, Simulink®, Stateflow®, and xPC TargetBox®are registered
trademarks, and TargetBox™and Target Language Compiler™are trademarks of The MathWorks, Inc.
Tektronix®, Tek, and Tektronix, Enabling Technology are registered trademarks of Tektronix, Inc.
The Bluetooth®word mark is a registered trademark owned by the Bluetooth SIG, Inc.
The ExpressCard™word mark and logos are owned by PCMCIA and any use of such marks by National Instruments is under
license.
The mark LabWindows is used under a license from Microsoft Corporation. Windows is a registered trademark of Microsoft
Corporation in the United States and other countries.
Other product and company names mentioned herein are trademarks or trade names of their respective companies.
Members of the National Instruments Alliance Partner Program are business entities independent from National Instruments
and have no agency, partnership, or joint-venture relationship with National Instruments.
Patents
For patents covering National Instruments products/technology, refer to the appropriate location: Help»Patents in your
software, the patents.txt file on your media, or the National Instruments Patent Notice at ni.com/patents.
Export Compliance Information
Refer to the Export Compliance Information at ni.com/legal/export-compliance for the National Instruments global
trade compliance policy and how to obtain relevant HTS codes, ECCNs, and other import/export data.
WARNING REGARDING USE OF NATIONAL INSTRUMENTS PRODUCTS
YOU ARE ULTIMATELY RESPONSIBLE FOR VERIFYING AND VALIDATING THE SUITABILITY AND
RELIABILITY OF THE PRODUCTS WHENEVER THE PRODUCTS ARE INCORPORATED IN YOUR SYSTEM OR
APPLICATION, INCLUDING THE APPROPRIATE DESIGN, PROCESS, AND SAFETY LEVEL OF SUCH SYSTEM
OR APPLICATION.
PRODUCTS ARE NOT DESIGNED, MANUFACTURED, OR TESTED FOR USE IN LIFE OR SAFETY CRITICAL
SYSTEMS, HAZARDOUS ENVIRONMENTS OR ANY OTHER ENVIRONMENTS REQUIRING FAIL-SAFE
PERFORMANCE, INCLUDING IN THE OPERATION OF NUCLEAR FACILITIES; AIRCRAFT NAVIGATION; AIR
TRAFFIC CONTROL SYSTEMS; LIFE SAVING OR LIFE SUSTAINING SYSTEMS OR SUCH OTHER MEDICAL
DEVICES; OR ANY OTHER APPLICATION IN WHICH THE FAILURE OF THE PRODUCT OR SERVICE COULD
LEAD TO DEATH, PERSONAL INJURY, SEVERE PROPERTY DAMAGE OR ENVIRONMENTAL HARM
(COLLECTIVELY, “HIGH-RISK USES”). FURTHER, PRUDENT STEPS MUST BE TAKEN TO PROTECT AGAINST
FAILURES, INCLUDING PROVIDING BACK-UP AND SHUT-DOWN MECHANISMS. NI EXPRESSLY DISCLAIMS
ANY EXPRESS OR IMPLIED WARRANTY OF FITNESS OF THE PRODUCTS OR SERVICES FOR HIGH-RISK
USES.

Compliance
Electromagnetic Compatibility Information
This hardware has been tested and found to comply with the applicable regulatory requirements and limits
for electromagnetic compatibility (EMC) as indicated in the hardware’s Declaration of Conformity (DoC)1.
These requirements and limits are designed to provide reasonable protection against harmful interference
when the hardware is operated in the intended electromagnetic environment. In special cases, for example
when either highly sensitive or noisy hardware is being used in close proximity, additional mitigation
measures may have to be employed to minimize the potential for electromagnetic interference.
While this hardware is compliant with the applicable regulatory EMC requirements, there is no guarantee
that interference will not occur in a particular installation. To minimize the potential for the hardware to
cause interference to radio and television reception or to experience unacceptable performance degradation,
install and use this hardware in strict accordance with the instructions in the hardware documentation and
the DoC1.
If this hardware does cause interference with licensed radio communications services or other nearby
electronics, which can be determined by turning the hardware off and on, you are encouraged to try to correct
the interference by one or more of the following measures:
• Reorient the antenna of the receiver (the device suffering interference).
• Relocate the transmitter (the device generating interference) with respect to the receiver.
• Plug the transmitter into a different outlet so that the transmitter and the receiver are on different branch
circuits.
Some hardware may require the use of a metal, shielded enclosure (windowless version) to meet the EMC
requirements for special EMC environments such as, for marine use or in heavy industrial areas. Refer to
the hardware’s user documentation and the DoC1for product installation requirements.
When the hardware is connected to a test object or to test leads, the system may become more sensitive to
disturbances or may cause interference in the local electromagnetic environment.
Operation of this hardware in a residential area is likely to cause harmful interference. Users are required to
correct the interference at their own expense or cease operation of the hardware.
Changes or modifications not expressly approved by National Instruments could void the user’s right to
operate the hardware under the local regulatory rules.
1 The Declaration of Conformity (DoC) contains important EMC compliance information and instructions
for the user or installer. To obtain the DoC for this product, visit ni.com/certification, search by
model number or product line, and click the appropriate link in the Certification column.

© National Instruments |vii
Contents
About This Manual
Related Documentation .................................................................................................... xi
Xilinx Documentation .............................................................................................. xiii
Additional Resources................................................................................................ xiv
Chapter 1
Before You Begin
Development Requirements ............................................................................................. 1-1
Xilinx Licensing Information ........................................................................................... 1-2
Chapter 2
Mounting the NI-793xR
Mounting the NI-793xR Directly on a Flat Surface................................................. 2-3
Installing the Rubber Feet......................................................................................... 2-4
Chapter 3
Hardware Architecture
NI-7931R .......................................................................................................................... 3-1
NI-7931R Key Features............................................................................................ 3-4
Clocking Architecture............................................................................................... 3-5
NI-7932R .......................................................................................................................... 3-6
NI-7932R Key Features............................................................................................ 3-9
Clocking Architecture............................................................................................... 3-11
NI-7935R .......................................................................................................................... 3-12
NI-7935R Key Features............................................................................................ 3-15
Clocking Architecture............................................................................................... 3-16
Chapter 4
Developing with LabVIEW FPGA
Developing with LabVIEW FPGA................................................................................... 4-1
Adding the NI-793xR to a LabVIEW Project .......................................................... 4-1
Adding an Adapter Module to the Target......................................................... 4-1
Adding Items to the NI-793xR Target.............................................................. 4-2
Adding NI-793xR Target I/O ................................................................................... 4-2
Configuring a 10 MHz Reference Clock.................................................................. 4-2
Auto-loading Bitfiles on Power-up........................................................................... 4-3
Interactive Front Panel Communication................................................................... 4-3
Using the NI Common Instrument Design Libraries................................................ 4-4
Using niInstr Instruction Framework ............................................................... 4-4
Streaming Overview ......................................................................................... 4-4
CLIP Adapters Overview ................................................................................. 4-4

Contents
viii |ni.com
Data Trigger Overview ..................................................................................... 4-4
Basic Elements Overview ................................................................................. 4-5
Memory Overview............................................................................................ 4-5
Compiling LabVIEW FPGA VIs..............................................................................4-5
Download, Reset, and Run Side Effects in the LabVIEW FPGA Host Interface ....4-5
Streaming .................................................................................................................. 4-6
Flow Control ..................................................................................................... 4-6
DMA Streaming................................................................................................ 4-7
Simulating FPGA Behavior ...................................................................................... 4-8
Chapter 5
Programming the High-Speed Serial Ports
Development Flow............................................................................................................ 5-1
Developing MGT Socketed CLIP.....................................................................................5-2
Socketed CLIP Architecture ..................................................................................... 5-2
Accessing the Xilinx Vivado Tools .......................................................................... 5-3
Generating an IP Core from the Xilinx Vivado IP Catalog ...................................... 5-4
Modifying Third-Party IP Core Logic ..............................................................5-4
Building a Netlist from the IP Core .................................................................. 5-5
Writing a VHDL Wrapper Around the Protocol IP Core ......................................... 5-7
Constraints and Hierarchy ................................................................................ 5-8
Documenting Your IP ....................................................................................... 5-9
Adding MGT Socketed CLIP to the LabVIEW Project ...................................................5-9
Configuring MGT Socketed CLIP in the NI-793xR LabVIEW FPGA Targets....... 5-10
Using Existing VHDL IP inside CLIP or IPIN.........................................................5-11
Improving Performance in Larger Designs through Enable Chain Removal........... 5-11
Chapter 6
Programming with the Real-Time Target
Best Practices .................................................................................................................... 6-1
Key Concepts ....................................................................................................................6-1
Installing and Configuring the NI-793xR.........................................................................6-2
Creating a Real-Time Application ....................................................................................6-2
Real-Time System Integration .......................................................................................... 6-3
Querying Fan Speed and Temperature Sensors ........................................................ 6-3
Power/Thermal Protection and Shutdown ................................................................6-4
LabVIEW System Configuration API ...................................................................... 6-4
Communicating with Applications on an RT Target........................................................6-5
Front Panel Communication ..................................................................................... 6-5
Network Communication..........................................................................................6-6
Where to Go from Here .................................................................................................... 6-6
LabVIEW Help ......................................................................................................... 6-6
LabVIEW Real-Time Module Release and Upgrade Notes.....................................6-7

© National Instruments |xi
About This Manual
The NI-7931R/7932R/7935R User Manual describes how to use the NI-7931R, NI-7932R, and
NI-7935R controllers for FlexRIO to develop high-performance embedded applications.
This manual provides detailed information about the electrical and mechanical requirements of
component-level IP (CLIP) and LabVIEW FPGA design.
Related Documentation
The following documents contain information that you may find helpful as you read this manual.
Table 1. Documentation Overview
Document Location Description
Getting started
guide for your
controller for
FlexRIO
Available from the Start menu
(Start»All Programs»National
Instruments»NI FlexRIO) and
at ni.com/manuals.
Contains information about
installing, configuring, and
troubleshooting your controller
for FlexRIO.
Specifications for
your controller for
FlexRIO
Contains specifications for your
controller for FlexRIO.
FlexRIO Help Contains information about the
controller for FlexRIO front
panel connectors and I/O,
programming instructions, and
adapter module
component-level IP (CLIP).
LabVIEW
High-Performance
FPGA Developer’s
Guide
Available at ni.com/
tutorial.
Summarizes the most effective
techniques for optimizing
throughput, latency, and FPGA
resources when using the
LabVIEW FPGA Module and
the RIO hardware platform.

About This Manual
xii |ni.com
FPGA Module Help This document is a book within
the LabVIEW Help. Access this
document by navigating to
Start»All Programs»National
Instruments»LabVIEW 201x»
LabVIEW 201x Help, or by
searching for FPGA Module
Help at ni.com/manuals.
Browse to the FPGA Module
book in the Contents tab for
information about using the
LabVIEW FPGA Module.
With the LabVIEW FPGA
Module and LabVIEW, you can
create VIs that run on National
Instruments FPGA targets.
The Getting Started with the
LabVIEW FPGA book provides
links to the top resources that
you can use to get started with
LabVIEW FPGA.
The Integrating Third-Party IP
(FPGA Module) book contains
information about adding
custom HDL code to your
LabVIEW project.
Real-Time Module
Help
This document is a book within
the LabVIEW Help. Access this
document by navigating to
Start»All Programs»National
Instruments»LabVIEW 201x»
LabVIEW 201x Help, or by
searching for Real-Time Module
Help at ni.com/manuals.
Browse to the Real-Time
Module book in the Contents
tab for information about using
the LabVIEW Real-Time
Module.
The Real-Time Module
combines LabVIEW graphical
programming with the power of
a real-time operating system,
enabling you to build real-time
applications. Use this help to
access information about
real-time programming
concepts, step-by-step
instructions for using LabVIEW
with the Real-Time Module,
reference information about
Real-Time Module VIs and
functions, and information
about LabVIEW features on
real-time operating systems.
LabVIEW FPGA
Module Release and
Upgrade Notes
Available at ni.com/
manuals. You can also view
this document by selecting
Start»All Programs»National
Instruments»LabVIEW»
LabVIEW Manuals.
Contains information
about installing the
LabVIEW FPGA Module,
describes new features, and
provides upgrade information.
Table 1. Documentation Overview (Continued)
Document Location Description

NI-793xR User Manual
© National Instruments |xiii
Xilinx Documentation
Xilinx FPGA documentation provides information required for the successful development of
your controller for FlexRIO. The following table provides a list of specific Xilinx documentation
resources.
All Xilinx documentation can be found at www.xilinx.com.
Table 2. Xilinx Documentation
Document Document Part Number Description
7 Series FPGAs Overview DS180 Outlines the features and
product selection of the
Xilinx 7 series FPGAs,
including Kintex-7 devices.
Kintex-7 FPGAs Data
Sheet: DC and AC Switching
Characteristics
DS182 Contains the DC and AC
switching characteristic
specifications for the
Kintex-7 FPGAs.
Vivado Design Suite:
Release Notes, Installation,
and Licensing
UG973 Provides an overview of the
new release of the Vivado
Design Suite, including
information on new and
changed features,
installation requirements for
the software, and licensing
information.
High-Speed Serial I/O Made
Simple: A Designer’s Guide,
with FPGA Applications
—Recommended for users
new to high-speed serial.
7 Series FPGAs GTX/GTH
Transceivers User Guide
UG476 Technical reference
describing the 7 series
FPGAs GTX/GTH
transceivers.
Vivado Design Suite User
Guide: Using Constraints
UG903 Describes using Xilinx
Design Constraints (XDC)
in Vivado tools.

About This Manual
xiv |ni.com
Additional Resources
Table 3. FlexRIO Development Resources
Development
Resource Location Description
FlexRIO website ni.com/flexrio Contains information about
FlexRIO devices,
application areas, and
technical resources.
FlexRIO Instrument
Development Library
https://decibel.ni.com/
content/docs/DOC-15799
The FlexRIO Instrument
Development Library is a set
of host and FPGA code that
provides FPGA capabilities
commonly found in
instruments such as
acquisition engines, DRAM
interfaces, and trigger logic,
along with the associated
host APIs.
LabVIEW examples Available in NI Example Finder.
In LabVIEW, click Help»Find
Examples»Hardware Input
and Output»FlexRIO.
Contains examples of how to
run FPGA VIs and Host VIs
on your device.
IPNet ni.com/ipnet Contains LabVIEW FPGA
functions and intellectual
property to share.

© National Instruments |1-1
1
Before You Begin
This section contains information you need before developing high-performance embedded
applications using the NI-7931R, NI-7932R, and NI-7935R devices.
Development Requirements
Successful system design with the NI-793xR devices may require knowledge in the following
areas, depending on your application.
• Real-time programming
• VHDL code design
• LabVIEW and LabVIEW FPGA programming
If you are unfamiliar with any of these concepts, refer to the following table for a list of resources
for learning the fundamentals required for NI-793xR development.
Table 1-1. Fundamentals Resources
Concept Resources
Real-time programming Real-time programming courses are
available at ni.com/training. You can
also refer to the LabVIEW Real-Time
Module Help at ni.com/manuals.
VHDL code design Some VHDL training or experience is
required before implementing custom
protocols with the high-speed serial
transceivers. Do not attempt to develop
Component-Level IP (CLIP) without
VHDL knowledge. Refer to the FlexRIO
Help for more information about CLIP.
LabVIEW and LabVIEW FPGA
programming
LabVIEW and LabVIEW FPGA training
are available at ni.com/training. You
can also refer to the NI LabVIEW
High-Performance FPGA Developer’s
Guide, available at ni.com/tutorials.

© National Instruments |2-1
2
Mounting the NI-793xR
This section contains information about mounting the NI-793xR devices.
Note Before you begin mounting the NI-793xR, refer to the getting started guide
for your NI-793xR for instructions about wiring power to the NI-793xR, powering
on the NI-793xR, and connecting the NI-793xR to a host computer.
Caution The NI-793xR mounting orientation is not restricted; however, when
mounting the NI-793xR upside-down, ensure that the FlexRIO adapter module is
supported if you expect shock greater than 30 g/11 ms.
Caution In order to obtain the maximum allowable ambient temperature as
specified in your device’s specifications document, you must maintain at least 1 in.
of clearance on either side of the NI-793xR. Refer to Figure 2-1 for fan clearance
information.
Figure 2-1. Fan Clearance
Keep Out
Zone
1.0 in.
(25.4 mm)
1.0 in.
(25.4 mm)

2-2 |ni.com
Chapter 2 Mounting the NI-793xR
You can mount the NI-793xR in a variety of configurations. The following table lists the
ecommended mounting methods.
The following sections contain instructions for the mounting methods. Before using any of these
mounting methods, record the serial number from the back of the device. You will be unable to
read the serial number from the back of the device after you have mounted it.
Caution You must provide physical support for any FlexRIO adapter modules
during the mounting process.
Table 2-1. Mounting Options
Method Required Accessory Kit NI Part Number
Direct mounting — —
Panel Panel Mount Accessory Kit 784365-01

© National Instruments |2-3
NI-793xR User Manual
Mounting the NI-793xR Directly on a Flat Surface
For applications sensitive to shock and vibration, NI recommends mounting the device directly
on a flat, rigid surface using the mounting holes in the device.
You will need the following items to mount the device directly on a flat surface:
• Three screws, M4, 7 mm + thickness of mounting surface
Complete the following steps to mount the device.
1. Use the dimensions shown in Figure 2-2 to drill the holes required for mounting the device.
2. Drill clearance holes 4.5 mm in diameter.
3. Align the device on the surface.
4. Fasten the device to the surface with the screws.
Figure 2-2. NI-793xR Dimensions
2.433
4.400
9.214 in.
6.050 in.
5.137 in.

2-4 |ni.com
Chapter 2 Mounting the NI-793xR
Installing the Rubber Feet
The NI-793xR ships with optional rubber feet. Install the rubber feet to the bottom of the device,
as shown in Figure 2-3.
Caution Do not install rubber feet when directly mounting the NI-793xR. The
rubber feet will prevent full contact between the unit and the mounting surface.
Figure 2-3. Installing the Rubber Feet

© National Instruments |3-1
3
Hardware Architecture
This chapter contains information about the NI-793xR hardware architecture.
NI-7931R
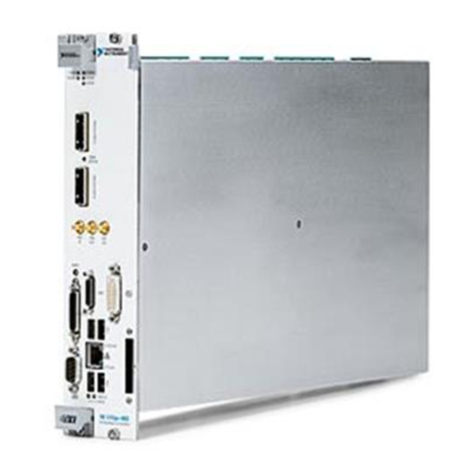
The NI-7931R is an embedded FlexRIO controller with an embedded processor and
reconfigurable FPGA.
Note The NI-7931R hardware does not require calibration.
The following figure shows the NI-7931R front panel connectors. For more information about
the front panel connectors, refer to your device’s specifications document and the FlexRIO Help.
For information about connecting the device to a host computer, refer to the NI-7931R Getting
Started Guide.
Figure 3-1. NI-7931R Front Panel Connectors
1TRIG
2REFIN
3µSDcard
4 USB device port
5 USB host
6 1 Gb Ethernet
7LEDindicators
*
8 Reset
9 DC power source†
10 FlexRIO adapter module connector‡
*Refer to Figure 3-2 for LED placement.
†Refer to the NI-7931R Getting Started Guide for instructions about how to wire power to the NI-7931R.
‡Refer to Figure 3-3 for the pinout.
7
34 6
9
58
10
21

3-2 |ni.com
Chapter 3 Hardware Architecture
The following figure shows the NI-7931R LEDs in more detail.
Figure 3-2. NI-7931R LEDs
RT User
LED
Power
LED
Status
LED
FPGA User
LED
This manual suits for next models
2
Table of contents
Other NI Controllers manuals
Popular Controllers manuals by other brands

Omega
Omega CND3 Series manual

ELPRO
ELPRO ULTIMA LLC-2 operating manual

TEUCER
TEUCER WP-4RGBCCT quick start guide

Balboa Water Group
Balboa Water Group HydroAir 20-0344 manual

Westinghouse
Westinghouse WH10 Electrical Installation and Operating Instructions

Hisense
Hisense YXE-A03U Technical & service manual