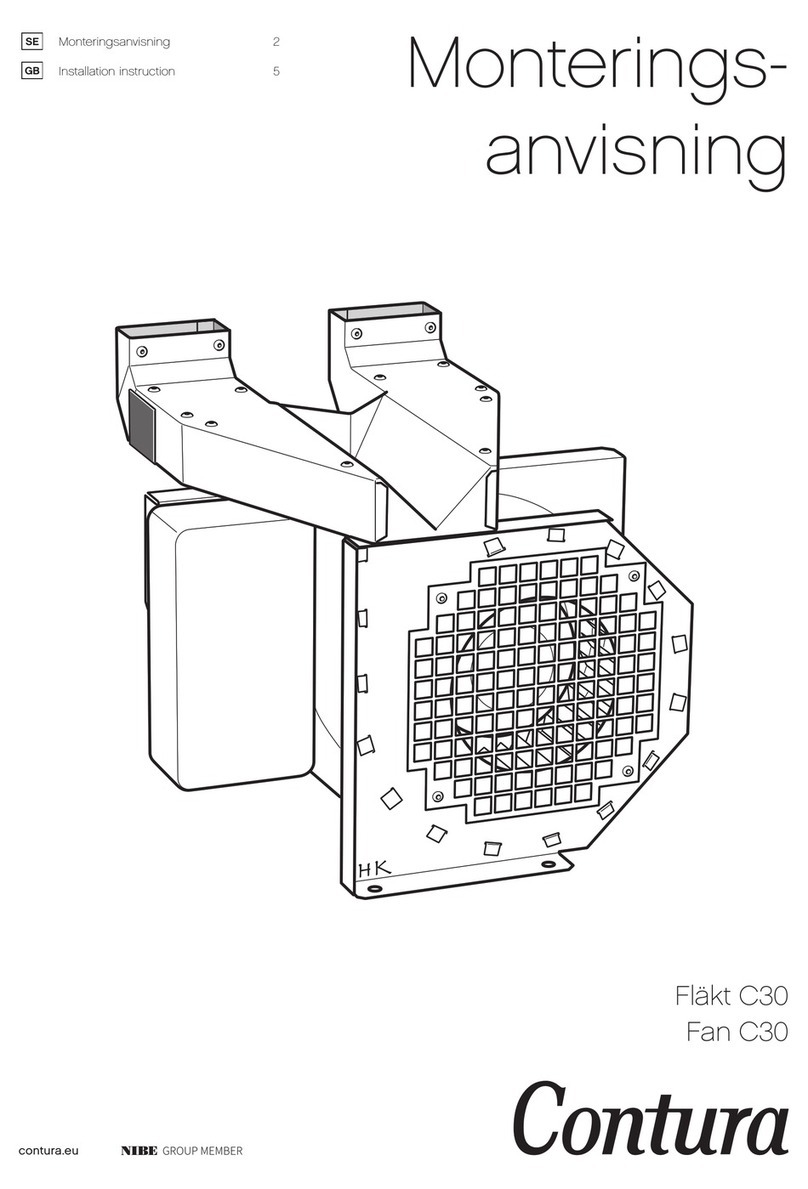
Nibe Contura C500 Style User manual

Installations-
anvisning
Fläkt • Ventilator • Fan • Ventola
C500 Style
C600 Style
Installationsanvisning 2
Installationsanleitung 5
Installation instruction 8
Istruzioni di montaggio 11
SE
DE
GB
IT
contura.eu

SE
2
Allmänt
Läs noggrant igenom hela monteringsanvisningen innan du
monterar fläkten. Fläkten ökar värmeavgivningen från kaminen
och får luften i rummet att cirkulera vilket ger en bättre
värmespridning och en jämnare temperatur.
Förberedelser
Packa upp och kontrollera innehållet. Vid tilluftanslutning utifrån
krävs ett avstånd på ca 75 mm mellan kondensisoleringen och
eldstadsbottnen, detta för att få plats med fläkten.
C500 Style (Före 2019)
C600 Style
C510 Style, C520 Style, C556 Style
C610 Style, C620 Style
!
Barn från 8 år eller över och personer, som har begränsade fysiska, sensoriska och mentala egenskaper eller som
inte har tillräckliga erfarenheter eller fackkunskaper får endast använda apparaten om de övervakas och de har
skolats att använda apparaten säkert och de förstår de faror som kan uppstå. Barn får inte leka med apparaten.
Barn får inte utföra rengöring eller serviceåtgärder utan övervakning.
C500 Style

SE
3
Slå bort brytlocket inne i kaminens ben. Trä manöverdosan och stickkontakten genom de båda
bakre plåtarna.
!
Kamin med fläkt får ej utrustas
med konvektionsspjäll!
Vid längre tids eldningsuppehåll
(till exempel på sommaren), ska
stickkontakten dras ur. Detta för att
skydda fläktens känsliga elektronik mot
åsknedslag.
!
C500 Style
C600 Style
Montering av fläkt
För in fläkten i den rektangulära öppningen under eldstaden.
I bakkant skall fläkten stödja mot kanten på öppningen.
Kontrollera att gummilisten på fläkten ligger an mot kanten på
öppningen i fotplåten, annars kan det uppstå missljud.
Fläkten drivs med 230V, att frångå
anvisningen är förenat med livsfara.
Ingrepp i fläkten eller dess delar får
ej göras. Åverkan på kablarnas hölje är
förenat med livsfara. Skulle fel på fläkten
uppstå skall den lämnas vid inköpsstället.
510/ 520S/T/ 556 62 mm
590/ 596 160 mm
610/ 620T 65 mm
690 175 mm
!

SE
4
Tag bort den inre skruven på beslaget vid rosterreglaget.
Fäst temperaturgivaren i hålet med den medföljande M6X20
skruven.
Automatik
Fläkten använder sig av en styrenhet för att starta och stoppa
fläkten automatiskt. Denna fungerar enligt följande:
Fläkten startar ungefär när det är dags för första illägg
detta inträffar cirka 25 minuter efter att brasan tänds (läs
eldningsinstruktionen). När man slutar att elda stannar
fläkten cirka 2 timmar från att brasan övergått till glödfas.
Fläkten tar tillvara på värmen som kaminen alstrar och får
den att cirkulera i rummet på ett effektivt sätt. Detta gör
att fläkten kan stängas av och startas ett par gånger när den
precis ska stanna. Om kaminen redan är varm och man ställer
vredet i läge ”auto” behöver fläkten någon minut för att känna
av kaminens temperatur innan den startar. Tiderna kan variera
lite beroende på vedmängd och sort. Exempelvis torr ved ger
snabbare start och stor glödbädd längre avsvalningstid.
Vid eventuell driftstörning kan styrenheten nollställas för att
rätta till problem. Detta görs genom att dra ut stickkontakten
och ansluta den igen efter ca 15 minuter.
Teknisk data
Strömförsörjning: 230V 50Hz Effekt: 40W
Temperaturgivaren får endast
fastbringas med kabelskon. Åverkan på
kabelns hölje är förenat med livsfara.
Montering av manöverdosa
Stickkontakten och manöverdosan förs ut genom brytlocket
på kaminens baksida. Montera manöverdosan på väggen i
lämplig höjd. Anslut stickkontakten först efter det att du har
monterat klart fläkten.
Handhavande
Anslut stickproppen till vägguttaget.
Fläktens manöverdosa har åtta lägen.
Läge (0) = Fläkten är helt avstängd.
Läge (1-4 Auto) = Fyra olika hastigheter då fläkten startar och
stannar automatiskt när kaminen blir varm eller kall.
Läge (1-3 Man) = Fläkten styrs manuellt med tre olika
hastigheter.
!
C500 Style
C500 Style (Före 2019)
C600 Style

DE
5
Allgemeines
Bitte lesen Sie die Montageanleitung komplett durch, bevor
Sie den Ventilator installieren. Der Ventilator erhöht die
Wärmeabgabe des Kaminofens und sorgt für eine Zirkulation
der Raumluft sowie eine bessere Wärmeverteilung und
gleichmäßigere Temperatur.
Vorbereitungen
Die Verpackung öffnen und den Inhalt kontrollieren. Bei einem
Zuluftanschluss von außen ist ein Abstand von etwa 75 mm
zwischen der Kondensisolierung und dem Boden der Feuerstelle
erforderlich, damit der Ventilator ausreichend Platz findet.
!
Kinder ab acht Jahren sowie Personen mit eingeschränkten physischen, sensorischen oder mentalen Fähigkeiten
sowie Personen ohne ausreichende Erfahrung oder Fachkenntnisse dürfen den Kamin nur verwenden, wenn sie
dabei beaufsichtigt werden und in seiner sicheren Handhabung unterwiesen wurden und wenn sie die möglichen
Gefahren verstehen. Der Kamin ist kein Kinderspielzeug. Kinder dürfen den Kamin unbeaufsichtigt weder reinigen
noch anderweitig daran hantieren.
C500 Style (Vor 2019)
C600 Style
C510 Style, C520 Style, C556 Style
C610 Style, C620 Style
C500 Style

DE
6
Die Sollbruchstelle im unteren Teil des Kaminofens
herausschlagen.
Den Schaltkasten und den Stecker durch die beiden hinteren
Bleche führen.
Bei längerem Nichtgebrauch des Kaminofens
( z.B. in den Sommermonaten), bitte den
Stecker des Ventilators ziehen. Dies schützt
die empfindliche Elektronik des Ventilators,
bei auftretenden Gewitter und eventuellen
Blitzeinschlägen.
!
!
Kaminöfen mit Konvektionsklappe
dürfen nicht mit einem Ventilator
bestückt werden!
Montage des Ventilators
Den Ventilator durch die viereckige Öffnung unter der
Feuerstelle einführen. Die Rückseite des Ventilators und seine
Gummileiste müssen dicht an der Kante der Öffnung anliegen,
anderenfalls können störende Geräusche entstehen.
Der Ventilator wird mit 230 V
Netzspannung betrieben, Änderungen
der Netzspannung sind mit Lebensgefahr
verbunden. Es dürfen keine Eingriffe am
Ventilator oder dessen Teilen durchgeführt
werden. Beschädigungen der Kabel sind
mit Lebensgefahr verbunden. Wenn
der Ventilator defekt ist, sollte er beim
Fachhändler abgegeben werden.
!
510/ 520S/T/ 556 62 mm
590/ 596 160 mm
610/ 620T 65 mm
690 175 mm
C500 Style
C600 Style

DE
7
Entfernen Sie die innere Schraube des Rüttelrost-
beschlages und befestigen Sie den Temperaturfühler in
der entsprechenden Öffnung mit der beigefügten M6X20
Schraube.
Der Temperatursensor darf nur mit
dem Kabelschuh angeschlossen werden.
Beschädigungen des Kabels sind mit
Lebensgefahr verbunden.
Montage des Steuerkastens
Stecker und Steuerkasten werden durch die
herausgeschlagene Öffnung an der Rückseite des Kaminofens
nach außen geführt. Den Steuerkasten an der Wand in
geeigneter Höhe montieren. Den Stecker erst anschließen,
wenn der Ventilator komplett montiert wurde.
Handhabung
Den Stecker an eine Netzsteckdose anschließen.
Der Steuerkasten des Ventilators hat acht Positionen.
Position (0) = Der Ventilator ist vollständig ausgeschaltet.
Position (1-4 Auto) = Der Ventilator startet und stoppt
automatisch mit vier verschiedenen Drehzahlen, wenn der
Kaminofen warm oder kalt wird.
Position (1-3 Man) = Der Ventilator wird manuell mit drei
verschiedenen Drehzahlen gesteuert.
Automatik
Der Ventilator wird durch eine Steuereinheit automatisch
gestartet und gestoppt. Dies funktioniert folgendermaßen:
Der Ventilator startet ungefähr dann, wenn nach cirka 25
Minuten nach dem Anzünden des Kaminofens das erste Mal Holz
nachgelegt werden muss (siehe Befeuerungsanleitung). Wenn
kein Holz mehr nachgelegt wird, stoppt der Ventilator etwa zwei
Stunden nachdem der Kaminofen in die Glühphase eingetreten
ist. Der Ventilator verteilt die vom Kaminofen abstrahlte Wärme
effektiv im Raum. Daher kann es passieren, dass der Ventilator
einige Male stoppt und wieder startet, bevor er ausgeschaltet
wird. Wenn der Kaminofen bereits warm ist und man den
Drehschalter auf „auto“ stellt, dauert es einige Minuten, bevor
der Ventilator die Temperatur des Kaminofens erkennt und dann
startet. Die Zeiten sind abhängig von der Holzmenge und der
Holzsorte. So startet der Ventilator beispielsweise bei trockenem
Brennholz schneller, und eine große glühende Holzmenge
verlängert die Abkühlungsdauer.
Bei einer eventuellen Betriebsstörung kann die Steuereinheit
zurückgestellt werden. Hierzu zieht man den Netzstecker aus der
Steckdose und schließt ihn nach etwa 15 Minuten wieder an.
Technische Daten
Stromversorgung: 230 V 50 Hz Leistungsaufnahme: 40 W
!
C500 Style
C500 Style (Vor 2019)
C600 Style

GB
8
General
Read through the entire installation instruction before installing
the fan. The fan increases the heating from the stove and makes
the air in the room circulate which gives better heat distribution
and a more even temperature.
Preparations
Unpack and check the contents. For supply air connection from outside,
a distance of 75 mm is required between the condensation insulation
and the hearth base, this is so that there is space for the fan.
!
This appliance may be used by children over the age of 8 years, by persons with reduced physical, sensory or mental
capabilities and by persons with a lack of experience or knowledge provided that they are supervised and have been
instructed how to use the appliance in a safe way and they understand the hazards involved. Children must not
play with the appliance. Children must not clean or carry out maintenance on the appliance unless they are being
supervised.
C500 Style (Before 2019)
C600 Style
C510 Style, C520 Style, C556 Style
C610 Style, C620 Style
C500 Style

GB
9
Tap out the knock out inside the stove leg. Thread the control box and the plug through the rear panels.
Stoves with dampers must not
be equipped with a fan! !!
In case of not using the fire over
a longer period (e.g. during the
summer) please unplug the fan.
This is to protect the fan’s sensitive
electronics against lightning strike.
Installing the fan
Insert the fan in the rectangular opening in the hearth. The
rear edge of the fan must be supported against the edge of
the opening. Check that the rubber strip on the fan is against
the edge of the opening in the foot plate otherwise noise will
occur.
The fan has a 230V power supply, ignoring
the instructions is potentially lethal. The
fan or its components must not be worked
on. Impacts on the cable sheaths are
potentially lethal. If there is a fault in the
fan it must be returned to the place of
purchase.
!
C500 Style
C600 Style
510/ 520S/T/ 556 62 mm
590/ 596 160 mm
610/ 620T 65 mm
690 175 mm

GB
10
Automatic device
The fan uses a control module to start and stop the fan
automatically. It functions as follows:
The fan starts when it is approximately time for the first
addition of firewood, this occurs approximately 25 minutes
after the fire is lit (read lighting instructions). When the fire
is dying the fan stops approximately 2 hours after the fire
has turned to embers. The fan uses the heat that the stove
produces and circulates it around the room efficiently. This
means that the fan may stop and restart a couple of times
before it stops completely. If the stove is already warm and
the switch is turned to “auto” the fan needs a few minutes to
sense the heat of the stove before it starts. The times can
vary depending on the amount and type of wood. For example,
dry wood starts more quickly and a large bed of embers takes
longer to cool.
In the event of running problems the control module can be
reset to correct the problem. This is done by pulling the plug
out and reconnecting it after approximately 15 minutes.
Technical specifications
Power supply: 230V 50Hz Output: 40W
Installing the control box
The plug and control box are threaded out through the
knockout in the rear of the stove. Install the control box on
the wall at a suitable height. Connect the plug only when the
fan is fully installed.
Operating
Connect the plug to the mains.
The fan control box has eight positions.
Mode (0) = The fan is completely switched off.
Mode (1-4 Auto) = Four different speeds when the fan starts
and stops automatically when the stove becomes hot or cold.
Mode (1-3 Man) = The fan is controlled manually with three
speeds.
Remove the inner screw on the plate at the grate control.
Secure the temperature sensor in the hole using the M6X20
screw supplied.
The temperature sensor must only be
attached using cable terminals. Impacts
on the cable sheath are potentially lethal.
!
C500 Style
C500 Style (Before 2019)
C600 Style

IT
11
Premessa
Leggere attentamente tutte le istruzioni di montaggio prima di
montare la ventola. La ventola aumenta l’emissione di calore dalla
stufa e ricircola l’aria della stanza, migliorando la diffusione del
calore ed uniformando la temperatura.
Prima dell'installazione
Estrarre dall’imballaggio e controllare il contenuto. Se si monta il
raccordo per la presa d’aria esterna è necessario mantenere una
distanza di circa 75 mm tra l’isolamento anticondensa e il fondo
del focolare, per lasciare spazio sufficiente alla ventola.
!
I bambini a partire da 8 anni e le persone con facoltà fisiche, sensoriali e mentali ridotte oppure senza la necessaria
esperienza o competenza possono usare l’apparecchio unicamente se sorvegliati, se istruiti sull’utilizzo in sicurezza
dell’apparecchio, e qualora comprendano i pericoli connessi. Non lasciare giocare i bambini con l’apparecchio. I
bambini non possono effettuare operazioni di pulizia o manutenzione senza sorveglianza.
C500 Style (Prima del 2019)
C600 Style
C510 Style, C520 Style, C556 Style
C610 Style, C620 Style
C500 Style

IT
12
Montaggio della ventola
Inserire la ventola nell’apertura rettangolare presente
sotto la camera di combustione. Sul retro, la ventola
deve appoggiarsi al bordo dell’apertura. Controllare
che il listello in gomma della ventola si apoggi al bordo
dell’apertura nella piastra di supporto della stufa. In caso
contrario, la ventola può risultare rumorosa.
La ventola funziona a 230 V, la mancata
osservanza delle istruzioni comporta il
rischio di morte. Non manomettere la
ventola o i suoi componenti. Eventuale
danno alla guaina dei cavi comporta il
rischio di morte. Se la ventola è difettosa,
riportarla al venditore.
!
Rompere il tappo nella parete della stufa. Inserire quindi il comando e il connettore attraverso le due
pareti posteriori.
!
Se si monta la ventola, non
è possibile dotare la stufa di
frontalino di convezione!
In caso di interruzione prolungata nell’uso
della stufa (ad esempio d’estate), estrarre
il connettore per proteggere i sensibili
componenti elettronici della ventola da
eventuali fulmini.
!
510/ 520S/T/ 556 62 mm
590/ 596 160 mm
610/ 620T 65 mm
690 175 mm
C500 Style
C600 Style

IT
13
Rimuovere la vite interna della staffa sulla regolazione della
griglia. Fissare il sensore di temperatura nel foro con la vite
M6x20 in dotazione.
Funzione automatica:
La ventola utilizza una centralina per avviarsi e spegnersi
automaticamente. La centralina funziona come segue:
La ventola si avvia quando è ora di effettuare il primo
inserimento, cioè circa 25 minuti dopo aver acceso il fuoco
(leggere le istruzioni per l’accensione). La ventola continua
a funzionare per due ore dopo che la legna dell’ultimo
inserimento si è consumata in braci. La ventola ricircola il
calore prodotto dalla stufa e lo immette nella stanza in modo
efficace. Ciò significa che la ventola può spegnersi e avviarsi
un paio di volte subito prima che si spenga definitivamente.
Se la stufa è già calda e si gira la manopola su “automatico”,
la ventola avrà bisogno di qualche minuto per registrare
la temperatura della stufa prima di avviarsi. Il tempo può
variare leggermente a seconda del tipo e della quantità di
legna presente. Ad esempio, con legna secca la ventola si avvia
più rapidamente, uno spesso letto di braci dà un tempo di
raffreddamento più lungo.
In caso di difetto di funzionamento, si può resettare la
centralina per cercare di risolvere il problema. Per resettare
la centralina, estrarre il connettore e reinserirlo dopo circa 15
minuti.
Dati tecnici
Alimentazione elettrica: 230V 50Hz Potenza: 40W
Il sensore di temperatura può essere
fissato solamente con un capocorda.
Eventuale danno alla guaina del cavo
comporta il rischio di morte.
Montaggio del comando
Far uscire il connettore e il comando attraverso il foro del
tappo sul retro della stufa. Montare il comando sulla parete,
all’altezza desiderata. Collegare il contatto solo dopo aver
terminato il montaggio della ventola.
Utilizzo
Collegare la spina alla presa a parete.
Il comando della ventola ha otto posizioni.
Posizione (0) = la ventola è spenta.
Posizioni (1-4 Auto) = quattro diverse velocità, con avviamento
e spegnimento in automatico della ventola quando la stufa è
rispettivamente calda o fredda.
Posizioni (1-3 Man) = la ventola può essere comandata in
manuale con tre diverse velocità.
!
C500 Style
C500 Style (Prima del 2019)
C600 Style


811330 MAV Fläkt C500/C600 Style SE-EX-2
2018-12-19
NIBE AB · Box 134 · 285 23 Markaryd · Sweden
www.contura.eu
Contura reserves the right to change colours, materials,
dimensions and models at any time without special notice.
Your dealer can provide you with the latest information.
Other manuals for Contura C500 Style
1
This manual suits for next models
1
Table of contents
Languages:
Other Nibe Fan manuals

Nibe
Nibe Contura C500 Style User manual

Nibe
Nibe ERS S10-400 User manual

Nibe
Nibe IEC VDY Instruction manual

Nibe
Nibe ERS S10-400 User guide

Nibe
Nibe GV-HR 130 User guide

Nibe
Nibe ESV 20 User manual

Nibe
Nibe FLM S45 User guide

Nibe
Nibe ERS 20-250 User guide

Nibe
Nibe ERS S40-400 User manual

Nibe
Nibe ERS S40-350 User guide
Popular Fan manuals by other brands

Bestron
Bestron DFA30 instruction manual

Orion
Orion OF16HS instruction manual

Domus Ventilation
Domus Ventilation DX Series Installation and Maintenance

Hunter
Hunter 22459 owner's guide

BAHAG
BAHAG UR42-5ZM-3L installation instructions

Davis Instruments
Davis Instruments Fan-Aspirated Radiation Shield installation manual