Nibe FLM S45 User guide

IHB EN 1926-1
531269
INSTALLER MANUAL
Exhaust air module
NIBE FLM S45

LEK
LEK
LEK

41 Important information
4Safety information
72 Delivery and handling
7Transport
7Assembly
8Supplied components
8Removing the covers
93 The design of the exhaust air module
10Pipe connections
10HVAC components
10Sensors etc.
10Electrical components
10Ventilation
10Miscellaneous
114 Pipe and ventilation connections
11General pipe connections
12Dimensions and pipe connections
12Mounting
13Brine side
14Condensation water hose
15General ventilation connection
15Ventilation flow
15Adjusting ventilation
15Dimension and ventilation connections
16Installation alternative
185 Electrical connections
18General
18Connections
226 Commissioning and adjusting
22Preparations
22Filling and venting
23Start-up and inspection
267 Program settings
26Menu system
288 Service
28Service actions
299 Disturbances in comfort
29Troubleshooting
3010 Accessories
3111 Technical data
31Dimensions and setting-out coordinates
32Technical specifications
33Electrical circuit diagram
35Item register
39Contact information
3Table of ContentsNIBE FLM S45
Table of Contents

Safety information
This manual describes installation and service proced-
ures for implementation by specialists.
The manual must be left with the customer.
This appliance can be used by children
aged from 8 years and above and persons
with reduced physical, sensory or mental
capabilities or lack of experience and
knowledge if they have been given super-
vision or instruction concerning use of the
appliance in a safe way and understand
the hazards involved. Children shall not
play with the appliance. Cleaning and user
maintenance shall not be made by children
without supervision.
Rights to make any design or technical
modifications are reserved.
©NIBE 2019.
SYMBOLS
NOTE
This symbol indicates danger to person or ma-
chine .
Caution
This symbol indicates important information
about what you should consider when installing
or servicing the installation.
TIP
This symbol indicates tips on how to facilitate
using the product.
MARKING
The CE mark is obligatory for most products sold in
the EU, regardless of where they are made.
CE
Classification of enclosure of electro-technical equip-
ment.
IP21
Danger to person or machine.
!
Read the User Manual.
NIBE FLM S45Chapter 1 | Important information4
1 Important information

SERIAL NUMBER
The serial number can be found at the bottom left inside
the front cover.
LEK
Caution
You need the product's (14 digit) serial number
for servicing and support.
RECOVERY
Leave the disposal of the packaging to the in-
staller who installed the product or to special
waste stations.
When disposing of the product, its constituent
materials and components, e.g. compressors,
fans, circulation pumps and circuit boards, must be dis-
posed of at a special waste station or dealer who
provides this type of service.
To access the separate components, refer to the section
that shows the construction of the product. No special
tools are required for access.
Improper disposal of the product by the user results in
administrative penalties in accordance with current le-
gislation.
5Chapter 1 | Important informationNIBE FLM S45

INSPECTION OF THE INSTALLATION
In addition, fill in the page for the installation data in the User Manual.
Current regulations require the heating installation to be inspected before it is commissioned. The inspection must
be carried out by a suitably qualified person. Current regulations require the exhaust air module to be inspected
before it is commissioned. The inspection must be carried out by a suitably qualified person. In addition, fill in the
page for the installation data in the User Manual.
DateSignatureNotesDescription
✔
Ventilation
Setting the ventilation flow
Brine
Non-return valve
System flushed
System vented
Antifreeze
Expansion vessel
Particle filter
Safety valve
Shut off valves
Circulation pump setting
Checking the condensation water seal
Trim valve
Electricity
Connections
Phase voltage
Supply connected 230 V
Circuit fuses
NIBE FLM S45Chapter 1 | Important information6

Transport
The exhaust air module should be transported and stored
in the dry.
Assembly
FLM S45 is installed on top of the ground heat pump or
freestanding on brackets. Noise from the circulation
pump or fan can be transferred to the brackets.
•Install with its back to an outside wall, ideally in a room
where noise does not matter, in order to eliminate
noise problems. If this is not possible, avoid placing
it against a wall behind a bedroom or other room
where noise may be a problem.
• Wherever the unit is located, walls to sound sensitive
rooms should be fitted with sound insulation.
• Route pipes so they are not fixed to an internal wall
that backs on to a bedroom or living room.
INSTALLATION AREA
Leave a free space of 800 mm in front of the product.
Leave free space between FLM S45 and wall/fit-
tings/cables/pipes etc. It is recommended that a space
of at least 10 mm is left to reduce the risk of noise and
of any vibrations being propagated.
800
NOTE
Ensure that there is sufficient space (300 mm)
above FLM S45 for installing ventilation hoses.
7Chapter 2 | Delivery and handlingNIBE FLM S45
2 Delivery and handling

Supplied components
Non-return valve (RM1)
Ø 32 mm
LEK
Trim valve (RN1)
Ø 15 mm
2 x screws (T25) for in-
stalling FLM S45 on NIBE
heat pump
LEK
Condensation water hose
Ø 20 mm
LOCATION
The bag of supplied items is placed on top of FLM S45.
Removing the covers
FRONT COVER
1. Remove the service cover by pulling it straight out.
LEK
SIDE COVERS
1. Undo the screws at the upper edge.
2. Lift the side hatches upwards and twist the cover
outwards slightly.
3. Assembly takes place in the reverse order.
LEK
NIBE FLM S45Chapter 2 | Delivery and handling8

LEK
LEK
S3 AA5-S2 AA5
SF3
AA5
LEK
LEK
PF1 HQ10 AA100 BT21
BT20 QM21 XL32
XL31
XL32 BT20
HQ10
XL31
AA100
QM21
PZ1
BT21
LEK
W1
SF2 SF1
XL40W6
LEK
LEK
EP16 GQ2 GP2
XL6 XL7BT27
BT26
GQ2EP16
XL6 XL7
GP2
BT26 BT27
9Chapter 3 | The design of the exhaust air moduleNIBE FLM S45
3 The design of the exhaust air
module

Pipe connections
Connection, brine in, compression ring Ø 15 mmXL6
Connection, brine out, compression ring Ø 15 mmXL7
Ventilation connection exhaust air, Ø 160 mmXL31
Ventilation connection extract air, Ø 160 mmXL32
Drip-pan drainXL40
HVAC components
Heat exchangerEP16
Circulation pump, brineGP2
Venting brineQM21
Sensors etc.
Temperature sensor, exhaust airBT20
Temperature sensor, extract airBT21
Temperature sensor, collector inBT26
Temperature sensor, collector outBT27
Electrical components
Accessory cardAA5
Joint cardAA100
Switch, position 0 - 1, main switchSF1
Switch, position 0 - 1, circulation pumpSF2
PotentiometerSF3
Cord with connection plugW1
Communication cableW6
Ventilation
Exhaust air fanGQ2
Exhaust air filterHQ10
Miscellaneous
Type platePZ1
Designations according to standard EN 81346-2.
NIBE FLM S45Chapter 3 | The design of the exhaust air module10

General pipe
connections
Pipe installation must be carried out in accordance with
current norms and directives.
Lowest permitted temperature of incoming brine is -8°C.
Pipes and other cold surfaces must be insulated with
diffusion-proof material to prevent condensation.
SYMBOL KEY
MeaningSymbol
Shut-off valve
Non-return valve
Circulation pump
Expansion vessel
Filterball
Fan
Pressure gauge
Safety valve
Trim valve
Manual reversing valve/shunt
Bore hole
Ground collector
Heat pump
OUTLINE DIAGRAM
P
-QZ20
The brine system must be fitted with a pressure expan-
sion vessel and a particle filter or filterball. In order to
make any future servicing easier, one or more shut-off
valves should be fitted.
NOTE
Venting may be necessary during installation
and after a period of use. Venting takes place
through vent valve (QM21). When venting, set
the switch for the circulation pump (SF2) to
position "0".
COMPATIBLE NIBE HEAT PUMPS
FLM S45 ventilates the building and preheats the brine,
regardless of which ground source heat pump is in-
stalled, but when FLM S45 is installed together with a
compatible ground source heat pump, it is possible to
adjust settings and read off sensor values etc. in the
heat pump’s display.
Compatible products
• S1255• S1155
11Chapter 4 | Pipe and ventilation connectionsNIBE FLM S45
4 Pipe and ventilation
connections

Dimensions and pipe
connections
32
320
38
58
408
100
72
Mounting
CONNECTING TO COMPATIBLE PRODUCT
1. Remove the front cover from the heat pump.
2. Remove the top panel from the heat pump (installed
with 6 screws).
3. Remove the cover in front of the circuit board.
Caution
A description of the removal of panels and
covers can be found in the manual for the
compatible product.
4. Remove the display.
5. Install FLM S45 from the top and slide into position.
6. Secure FLM S45 with the 2 screws supplied.
NIBE FLM S45Chapter 4 | Pipe and ventilation connections12

7. Route the communication cable from FLM S45 as
illustrated.
INSTALLING ON BRACKETS
FLM S45 can also be installed freestanding on the
bracket BAU 40.
Brine side
OUTPUT TRANSFER TO BRINE
Output transfer to brine
0
100 150 200 250
0,5
1,0
1,5
2,0
verförd effekt
(kW)
(m3/h)
(l/s)
Luftflöde
0°
5°
30 50 75
Airflow
Transferred power
The diagram shows the power that is transferred from
the ventilation air to the brine at 0°C and 5°C, and applies
to an air temperature of +20°C and 50% relative air hu-
midity.
EXPANSION VESSEL
The brine circuit must be provided with pressure expan-
sion vessel (CM3). If there is a level vessel (CM2), this
should be replaced. The brine side must be pressurised
to at least 0.5 bar.
To prevent malfunctions, the pressure expansion vessel
should be dimensioned as set out in the diagram. The
pressure expansion vessel covers the temperature range
from -10°C to +20 °C for the brine at a pre-pressure of
0.5 bar and with the safety valve’s opening pressure set
at 3 bar.
Expansion vessel
00 200 400 600 800 1000
10
20
30
40
50
Storlek
(l)
Köldbärarvolym
(l)
Size
Brine volume
13Chapter 4 | Pipe and ventilation connectionsNIBE FLM S45

Condensation water
hose
1. Connect the condensation water hose to the drip-
pan drain (XL40).
2. Shape the hose into a water seal (see image). If
FLM S45 is connected to S1255, there is space for
the hose and the water seal in the heat pump's in-
sulation.
3. Route the hose to a floor drain or similar.
4. Refill the water seal with water.
Ensure that the end of the hose runs out above the
water level in the floor drain. The hose must be easily
accessible for future cleaning.
LEK
NIBE FLM S45Chapter 4 | Pipe and ventilation connections14

General ventilation
connection
• Ventilation installation must be carried out in accord-
ance with current norms and directives.
• Connections must be made via flexible hoses, which
should be installed so that they are easy to replace.
• Provision must be made for inspection and cleaning
of the duct.
• Make sure that there are no reductions of cross-sec-
tional area in the form of creases, tight bends, etc.,
since this will reduce the ventilation capacity.
• The air duct system must be a minimum of air tight-
ness class B.
• To prevent fan noise being transferred to the ventila-
tion devices, silencers should be installed in the duct
system. In the event of ventilation devices in noise-
sensitive rooms, silencers must be installed.
• The extract air duct and ducts intended for supply air
for FLM cooling have to be insulated with diffusion-
proof material (at least PE30 or equivalent) along their
entire length.
• Ensure that the condensation insulation is fully sealed
at any joints and/or at lead-in nipples, silencers, roof
cowls or similar.
• A duct in a masonry chimney stack must not be used
for extract air.
EXHAUST AIR DUCT /KITCHEN FAN
Exhaust air duct (kitchen fan) must not be connected to
FLM S45.
To prevent food vapour being transferred to FLM S45
the distance between the kitchen fan and the exhaust
air device must be considered. The distance should not
be less than 1.5 m, but this can vary between different
installations.
Always use a kitchen fan when cooking.
Ventilation flow
Connect FLM S45 so that all the exhaust air, except
kitchen duct air (kitchen fan), passes through the heat
exchanger (EP16) in the product.
The ventilation flow must comply with the applicable
national standards.
If the exhaust air module is connected to a compatible
heat pump, set the ventilation capacity in the heat
pump’s menu system (menu 7.1.4.1). Otherwise, set
the ventilation capacity via potentiometer (AA5-SF3).
Adjusting ventilation
To obtain the necessary air exchange in every room of
the house, the exhaust air devices must be correctly
positioned and adjusted and the fan in the exhaust air
module adjusted.
Immediately after installation adjust the ventilation so
that it is set according to the projected value of the
house.
Incorrect adjustment of the ventilation may lead to re-
duced installation efficiency and thus poorer operating
economy, and may cause moisture damage in the
building
Dimension and
ventilation
connections
Ø160
451
158
275
195
LEK
Extract air
Exhaust air
15Chapter 4 | Pipe and ventilation connectionsNIBE FLM S45

Installation alternative
ANOTHER HEAT PUMP
When FLM S45 is installed together with another heat
pump, the brine circuit is supplied with a trim valve
(RN1). This is necessary for adjusting the brine flow.
FLM COOLING
Where cooling is prioritised, FLM S45 can be installed
in the brine circuit after the heat pump in the direction
of flow.
FLM cooling Requires an external fan (GQ4), four
dampers that are controlled by two motors (QM40),
(QM41) and a non-return damper (RM2). A room sensor
(AZ10-BT50) is also required in one of the rooms where
cooling is required. For electrical connection, see page
20.
The external fan (GQ4) takes over ventilation, which is
led out of the house without recovery. At the same time,
FLM S45 circulates air to and from other rooms where
cooling is required, normally two to three bedrooms.
Bedroom Hall
Kitchen/
bathroom/
WC
QM41
QM40
GQ4
RM2
Normal operation.
Bedroom Hall
Kitchen/
bathroom/
WC
QM41
QM40
GQ4
RM2
NIBE FLM S45Chapter 4 | Pipe and ventilation connections16

NOTE
When installing with cooling, the supply air
ducts have to be insulated with diffusion-proof
material (at least PE30 or equivalent) along their
entire length.
17Chapter 4 | Pipe and ventilation connectionsNIBE FLM S45

General
All electrical equipment is connected at the factory.
• Disconnect FLM S45 before insulation testing the
house wiring.
• For the exhaust air module wiring diagram, see page
33.
• Signal cables to external connections must not be laid
close to high current cables.
• If the supply cable is damaged, only NIBE, its service
representative or similar authorised person may re-
place it to prevent any danger and damage.
NOTE
Electrical installation and service must be car-
ried out under the supervision of a qualified
electrician. Electrical installation and wiring
must be carried out in accordance with the
stipulations in force.
Connections
CONNECTING TO COMPATIBLE HEAT PUMP
Connection of supply to FLM S45
The exhaust air module is connected to an earthed single
phase wall socket or a permanent installation. For per-
manent installations, FLM S45 must be preceded by a
circuit breaker with at least a 3 mm breaking gap.
Connecting the communication to FLM S45
no. 1
S1155/S1255: The communication control cable (W6)
with connector connects to contact X6 on the PCB (AA2)
in the main product.
AA2-X6
AA2-X21-X6W6
FLMS45 Main product
The DIP switch (AA5-S2) has to be set as follows.
ON
1 2 3 4 5 6 7 8
AA5-S2
LEK
LEK
S3 AA5-S2 AA5
AA5-S2
NIBE FLM S45Chapter 5 | Electrical connections18
5 Electrical connections

Connecting the communication to FLM S45
no. 2-4
FLM S45 no. 2 connects directly to the main product on
the PCB (terminal block AA2-X30).
FLM S45 no. 3 connects to the accessory board’s ter-
minal block (AA5-X4) in FLM S45 no. 2.
FLM S45 no. 4 connects in a similar way in FLM S45
no. 3.
Use cable type LiYY, EKKX or similar.
B
A
GND
+12V
AA2-X30
1234
AA5-X4
1
2
3
4
5
6
7
8
A
B
GND
A
B
GND
AA5-X4
1
2
3
4
5
6
7
8
A
B
GND
A
B
GND
FLMS45 1
Main product
FLMS45 2
FLM S45 2-4 can be connected in a similar way to a
previously installed accessory and its accessory board.
The DIP switch (AA5-S2) must be set as follows.
LEK
LEK
S3 AA5-S2 AA5
AA5-S2
ON
1 2 3 4 5 6 7 8
AA5-S2
FLM S45 no. 3
ON
1 2 3 4 5 6 7 8
AA5-S2
FLM S45 no. 2
ON
1 2 3 4 5 6 7 8
AA5-S2
FLM S45 no. 4
19Chapter 5 | Electrical connectionsNIBE FLM S45

CONNECTING TO ANOTHER HEAT PUMP
LEK
LEK
S3 AA5-S2 AA5
AA5
SF3
T20
S2
Connecting the supply
The exhaust air module is connected to an earthed single
phase wall socket or a permanent installation. For per-
manent installations, FLM S45 must be preceded by a
circuit breaker with at least a 3 mm breaking gap.
Circulation pump for brine (GP2)
Disconnect the PWM cable from terminal block AA5-
X2:7-8. Insulate the wires properly.
Connecting communication
For installation with another heat pump, do not connect
the communication cable (W6).
The DIP switch (AA5-S2) must be set as follows.
ON
1 2 3 4 5 6 7 8
AA5-S2
OPTIONAL CONNECTIONS
Room sensor for FLM cooling
For optimum function, a separate room sensor (AZ10-
BT50) should be connected when installing with cooling.
This sensor is placed in the room that is to be kept
coolest. The room sensor has up to three functions:
•Offers the opportunity to set a different target temper-
ature in the room that is to be kept coolest.
• Show current room temperature in the display on the
heat pump.
• Provides the opportunity to activate FLM cooling.
Install the sensor in a neutral position where the set
temperature is required, 1.5 m above the floor. It is im-
portant that the sensor is not prevented from measuring
the correct room temperature, for example by being
located in a recess, between shelves, behind a curtain,
above or close to a heat source, in a draught from an
external door or in direct sunlight. Closed radiator ther-
mostats can also cause problems.
Connection of room sensor for FLM cooling
Room sensor (AZ10-BT50) is connected to any AUX in-
put (AA2-X28:3-11) and to GND (AA2-X29) in the com-
patible main product.
6 7 8
54
3
AUX4
AUX5
AUX6
AUX3
AUX2
AUX1
AA2-X28
AA2-X29
GND
Main product External
NIBE FLM S45Chapter 5 | Electrical connections20
Other manuals for FLM S45
1
Table of contents
Other Nibe Fan manuals

Nibe
Nibe DVC 10-50 User manual

Nibe
Nibe Contura C500 Style User manual
Nibe
Nibe IEC VDY Instruction manual

Nibe
Nibe Contura C34T User manual

Nibe
Nibe ERS S10-400 User manual

Nibe
Nibe ESV 20 User manual

Nibe
Nibe ERS 20 User manual
Nibe
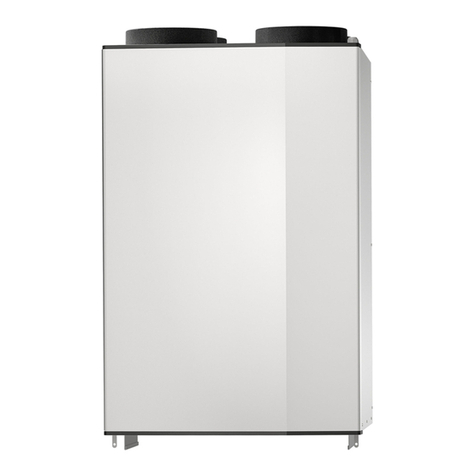
Nibe FLM S45 User manual

Nibe
Nibe ERS S40-400 User manual

Nibe
Nibe Contura C500 Style User manual

Nibe
Nibe SAM 40 User guide

Nibe
Nibe Contura C30 User manual

Nibe
Nibe ERS S10-400 User guide
Nibe
Nibe SAM 42 User manual

Nibe
Nibe GV-HR 130 User guide

Nibe
Nibe ERS 20-250 User guide

Nibe
Nibe GV-HR 120 User guide

Nibe
Nibe ERS S40-350 User guide

Nibe
Nibe FLM 40 User manual

Nibe
Nibe Flakt Contura C600 User manual