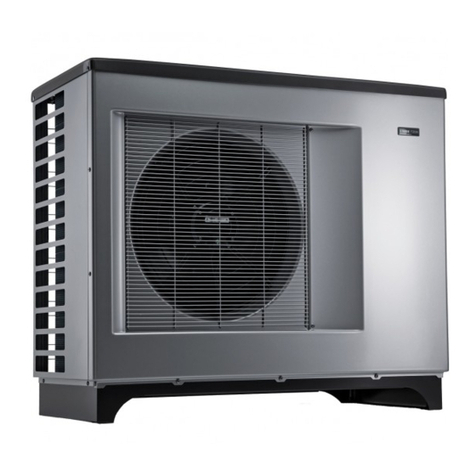
Nibe F1155 Series User guide

Installer manual
LEK
NIBE™ F1155
Ground source heat pump
IHB GB 1428-4
231565

4XLFN JXLGH
1DYLJDWLRQ
2N EXWWRQ FRQILUPVHOHFW
%DFN EXWWRQ EDFNXQGRH[LW
&RQWURO NQRE PRYHLQFUHDVHUHGXFH
A detailed explanation of the button functions can be found on page 31.
How to scroll through menus and make different settings is described on page 33.
6HW WKH LQGRRU FOLPDWH
;
The mode for setting the indoor temperature is reached, when in the start mode in the main menu, by pressing
the OK button twice. Read more about the settings on page 35.
,QFUHDVH KRW ZDWHU YROXPH
;
;
To temporarily increase the amount of hot water (if a hot water heater is installed to your F1155), first turn the
control knob to mark menu 2 (water droplet) and then press the OK button twice. Read more about the settings
on page 43.
In event of disturbances in comfort
If a disturbance in comfort of any type occurs there are some measures that can be taken before you need to
contact your installer. See page 65 for instructions.

Table of Contents
21 Important information
2Safety information
52 Delivery and handling
5Transport
5Assembly
6Supplied components
6Removing the covers
73 The heat pump design
7General
8Distribution boxes
9Cooling section
114 Pipe connections
11General
12Dimensions and pipe connections
12Brine side
13Heating medium side
13Hot water heater
14Docking alternatives
165 Electrical connections
16General
18Connections
20Settings
23Optional connections
26Connecting accessories
276 Commissioning and adjusting
27Preparations
27Filling and venting
28Start guide
29Post adjustment and venting
317 Control - Introduction
31Display unit
32Menu system
358 Control - Menus
35Menu 1 - INDOOR CLIMATE
43Menu 2 - HOT WATER
45Menu 3 - INFO
46Menu 4 - HEAT PUMP
51Menu 5 - SERVICE
599 Service
59Service actions
6510 Disturbances in comfort
65Info-menu
65Manage alarm
65Troubleshooting
6711 Accessories
6912 Technical data
69Dimensions and setting-out coordinates
70Technical specifications
76Index
1Table of Contents |NIBE™ F1155

Safety information
This manual describes installation and service proced-
ures for implementation by specialists.
This appliance can be used by children
aged from 8 years and above and per-
sons with reduced physical, sensory or
mental capabilities or lack of experience
and knowledge if they have been given
supervision or instruction concerning
use of the appliance in a safe way and
understand the hazards involved. Chil-
dren shall not play with the appliance.
Cleaning and user maintenance shall
not be made by children without super-
vision.
Rights to make any design or technical
modifications are reserved.
©NIBE 2014.
Symbols
NOTE
This symbol indicates danger to machine or
person.
Caution
This symbol indicates important information
about what you should observe when main-
taining your installation.
TIP
This symbol indicates tips on how to facilitate
using the product.
Marking
The CE marking means that NIBE ensures that the
product meets all regulations that are placed on it
based on relevant EU directives. The CE mark is obligat-
ory for most products sold in the EU, regardless where
they are made.
Serial number
The serial number can be found at the bottom right of
the front cover and in the info menu (menu 3.1).
6HULDO QXPEHU
Caution
Always give the product's serial number (14
digits) when reporting a fault.
Country specific information
Installer manual
This installer manual must be left with the customer.
NIBE™ F1155Chapter 1 | Important information2
1 Important information

Inspection of the installation
Current regulations require the heating installation to be inspected before it is commissioned. The inspection must
be carried out by a suitably qualified person. Fill in the page for information about installation data in the User
manual.
DateSignatureNotesDescription
✔
Brine (page 12)
System flushed
System vented
Antifreeze
Level/Expansion vessel
Particle filter
Safety valve
Shut off valves
Circulation pump setting
Heating medium (page 13)
System flushed
System vented
Expansion vessel
Particle filter
Safety valve
Shut off valves
Circulation pump setting
Electricity (page 16)
Fuses heat pump
Fuses property
Outside sensor
Room sensor
Current sensor
Safety breaker
Earth circuit-breaker
Setting of emergency mode thermostat
Miscellaneous
Guarantee submitted
3Chapter 1 | Important informationNIBE™ F1155

Contact information
KNV Energietechnik GmbH, Gahberggasse 11, 4861 SchörflingAT
Tel: +43 (0)7662 8963-0 Fax: +43 (0)7662 8963-44 E-mail: mail@knv.at www.knv.at
NIBE Wärmetechnik AG, Winterthurerstrasse 710, CH-8247 FlurlingenCH
Druzstevni zavody Drazice s.r.o, Drazice 69, CZ - 294 71 Benatky nad JizerouCZ
NIBE Systemtechnik GmbH, Am Reiherpfahl 3, 29223 CelleDE
Vølund Varmeteknik A/S, Member of the Nibe Group, Brogårdsvej 7, 6920 VidebækDK
NIBE Energy Systems OY, Juurakkotie 3, 01510 VantaaFI
NIBE Energy Systems France Sarl, Zone industrielle RD 28, 01600 ReyrieuxFR
NIBE Energy Systems Ltd, 3C Broom Business Park, Bridge Way, Chesterfield S41 9QGGB
NIBE Energietechniek B.V., Postbus 634, NL 4900 AP OosterhoutNL
ABK AS, Brobekkveien 80, 0582 Oslo, Postadresse: Postboks 64 Vollebekk, 0516 OsloNO
NIBE-BIAWAR Sp. z o. o. Aleja Jana Pawła II 57, 15-703 BIAŁYSTOKPL
Tel: 085 662 84 90 Fax: 085 662 84 14 E-mail: sekretariat@biawar.com.pl www.biawar.com.pl
© "EVAN" 17, per. Boynovskiy, Nizhny NovgorodRU
NIBE AB Sweden, Box 14, Hannabadsvägen 5, SE-285 21 MarkarydSE
For countries not mention in this list, please contact Nibe Sweden or check www.nibe.eu for more information.
NIBE™ F1155Chapter 1 | Important information4

Transport
F1155 should be transported and stored vertically in a
dry place. When being moved into a building, F1155
may be leant back 45 °.
NOTE
The product can be tail heavy!
If the cooling module is pulled out and transported
upright, F1155 can be transported on its back.
Remove the outer panels in order to protect them when
moving in confined spaces inside buildings.
R
0
R
0
Pulling out the cooling module
To simplify transport and service, the heat pump can
be separated by pulling the cooling module out from
the cabinet.
See page 61 for instructions about the separation.
Assembly
႑Position F1155 on a firm base that can take the
weight, preferably on a concrete floor or foundation.
Use the product's adjustable feet to obtain a horizont-
al and stable set-up.
30 - 50 mm
႑The area where F1155 is located must be equipped
with floor drainage.
႑Install with its back to an outside wall, ideally in a
room where noise does not matter, in order to elim-
inate noise problems. If this is not possible, avoid
placing it against a wall behind a bedroom or other
room where noise may be a problem.
႑Wherever the unit is located, walls to sound sensitive
rooms should be fitted with sound insulation.
႑Route pipes so they are not fixed to an internal wall
that backs on to a bedroom or living room.
Installation area
Leave a space of 800 mm in front of the product. Ap-
prox 50 mm free space is required in order to open the
side hatches. The hatches do not need to be opened
during service, all service on F1155 can be carried out
from the front. Leave space between the heat pump
and wall behind (and any routing of supply cables and
pipes) to reduce the risk reproduction of any vibration.
(50) (50)
* A normal installation needs 300 - 400 mm (any side) for connec-
tion equipment, i.e. level vessel, valves and electrical equipment.
5Chapter 2 | Delivery and handlingNIBE™ F1155
2 Delivery and handling

Supplied components
LEK
LEK
LEK
Room sensorCurrent sensorOutside sensor
1x3x1x
(only 3x400V)
LEK
LEK
O-ringsSafety valve
(0.3 MPa) (3 bar)
Level vessel
1x 8x
1x
Conex connectorsParticle filter
5x2x
LEK
Aluminium tape
1x
LEK
Insulation tapeTubes for sensorsTemperature
sensor 1x3x
3x
Location
The kit of supplied items is placed in packaging on top
of the heat pump.
Removing the covers
Front cover
1
2
LEK
LEK
1. Remove the screws from the lower edge of the
front cover.
2. Lift the cover out at the bottom edge and up.
Side covers
LEK
LEK
LEK
The side covers can be removed to facilitate the install-
ation.
1. Remove the screws from the upper and lower
edges.
2. Twist the cover slightly outward.
3. Move the hatch outwards and backwards.
4. Assembly takes place in the reverse order.
NIBE™ F1155Chapter 2 | Delivery and handling6

General
F1155
UB1
EB1
QM34
QM31
UB2
QM32
QM33
XL1
XL6 XL7
XL2XL9
QN10
PF1
PF3
PF2
BT2
UB3
AA4
AA4-XJ3
AA4-XJ3
SF1
W130
View from behind
%)
Pipe connections
Connection, heating medium flowXL 1
Connection, heating medium returnXL 2
Connection, brine inXL 6
Connection, brine outXL 7
Connection, hot water heaterXL 9
HVAC components
Shut-off valve, heating medium flowQM 31
Shut off valve, heating medium returnQM 32
Shut off valve, brine outQM 33
Shut-off valve, brine inQM 34
Shuttle valve, climate system/water heaterQN 10
Sensors etc.
Flow meter**BF 1
Outdoor temperature sensor*BT 1
Temperature sensors, heating medium flowBT 2
**Only heat pumps with energy meter
* Not illustrated
Electrical components
Display unitAA 4
AA4-XJ3 USB socket
AA4-XJ4 Service outlet (No function)
Immersion heaterEB 1
SwitchSF 1
Network cable for NIBE UplinkTM
W130
Miscellaneous
Rating platePF 1
Type plate, cooling sectionPF 2
Serial number platePF 3
Cable gland, incoming electricityUB 1
Cable glandUB 2
Cable gland, rear side, sensorUB 3
Designations in component locations according to
standard IEC 81346-1 and 81346-2.
7Chapter 3 | The heat pump designNIBE™ F1155
3 The heat pump design

Distribution boxes
F1155
FD1
AA1
FA1
AA3
AA2AA23
Electrical components
Immersion heater cardAA 1
Base cardAA 2
Input circuit boardAA 3
Communication boardAA 23
Miniature circuit-breakerFA 1
Temperature limiter/Emergency mode thermo-
stat
FD 1
Designations in component locations according to
standard IEC 81346-1 and 81346-2.
NIBE™ F1155Chapter 3 | The heat pump design8

Cooling section
6kW
LEK
BT10
AA100
BT3
QM2
GP1
GP2
QM1
BT11
BT12
16 kW
LEK
BT10
AA100
BT11
BT3
BT12
GP1
GP2
QM1
QM2
RF2
6kW
LEK
EP2
BT14
QA40
BP2
BT15
BP1
EB10
BT17
EP1
GQ10
HS1
XL20
QN1
XL21
BT29
RA1
CA1
16 kW
LEK
EP2
BT14
BT17
EP1
BP2
BT15
BP1
GQ10
HS1
XL20
QN1
EB10 XL21
QA40
BT29
9Chapter 3 | The heat pump designNIBE™ F1155

Pipe connections
Service connection, high pressureXL 20
Service connection, low pressureXL 21
HVAC components
Circulation pumpGP 1
Brine pumpGP 2
Drainage, climate systemQM 1
Draining, brine sideQM 2
Sensors etc.
High pressure pressostatBP 1
Low pressure pressostatBP 2
Temperature sensors, heating medium returnBT 3
Temperature sensor, brine inBT 10
Temperature sensor, brine outBT 11
Temperature sensor, condenser supply lineBT 12
Temperature sensor, hot gasBT 14
Temperature sensor, fluid pipeBT 15
Temperature sensor, suction gasBT 17
Temperature sensor, compressorBT 29
Electrical components
Joint cardAA 100
CapacitorCA 1
Compressor heaterEB 10
InverterQA 40
ChokeRA 1
EMC-filterRF 2
Cooling components
EvaporatorEP 1
CondenserEP 2
CompressorGQ 10
Drying filterHS 1
Expansion valveQN 1
Designations in component locations according to
standard IEC 81346-1 and 81346-2.
NIBE™ F1155Chapter 3 | The heat pump design10

General
Pipe installation must be carried out in accordance with
current norms and directives. F1155 can operate with
a return temperature of up to 58 °C and an outgoing
temperature from the heat pump of 70 (65 °C with
only the compressor).
F1155 is not equipped with external shut off valves;
these must be installed to facilitate any future servicing.
Caution
Any high points in the climate system, must
be equipped with air vents.
NOTE
The pipe system needs to be flushed out be-
fore the heat pump is connected so that debris
cannot damage component parts.
Symbol key
MeaningSymbol
Venting valve
Shut-off valve
Non-return valve
Shunt / shuttle valve
Safety valve
Trim valve
Temperature sensor
Level vessel
Expansion vessel
Pressure gauge
P
Circulation pump
Particle filter
Auxiliary relay
Flow meter (only for Germany, Switzerland,
Austria and Norway)
Compressor
Heat exchanger
System diagram
F1155 consists of heat pump, immersion heater, circu-
lation pumps and control system. F1155 is connected
to the brine and heating medium circuits.
In the heat pump evaporator, the brine (water mixed
with anti-freeze, glycol or ethanol) releases its energy
to the refrigerant, which is vaporised in order to be
compressed in the compressor. The refrigerant, of
which the temperature has now been raised, is passed
to the condenser where it gives off its energy to the
heating medium circuit and, if necessary, to any docked
water heater. If there is a greater need for heating/hot
water than the compressor can provide there is an in-
tegrated immersion heater.
;/ ;/ ;/ ;/;/
Connection, heating medium flowXL 1
Connection, heating medium returnXL 2
Connection, brine inXL 6
Connection, brine outXL 7
Connection, hot water heaterXL 9
11Chapter 4 | Pipe connectionsNIBE™ F1155
4 Pipe connections

Dimensions and pipe connec-
tions
620
600
560
70
1475
725*
725*
25-50
25
55
130
460
535
405
440
;/ ;/ ;/;/ ;/
Pipe dimensions
16
kW
6
kW
Connection
28(mm)(XL6)/(XL7) Brine in/out ext Ø
2822(mm)(XL1)/(XL2) Heating medium
flow/return ext Ø
2822(mm)(XL9) Connection, hot water heater
ext Ø
Brine side
Collector
Caution
The length of the collector hose varies depend-
ing on the rock/soil conditions, climate zone
and on the climate system (radiators or under-
floor heating) and the heating requirement of
the building Each installation must be sized
individually.
Max length per coil for the collector should not exceed
400 m.
In those cases where it is necessary to have several
collectors, these should be connected in parallel with
the possibility for adjusting the flow of the relevant
coil.
For surface soil heat, the hose should be buried at a
depth determined by local conditions and the distance
between the hoses should be at least 1 metre.
For several bore holes, the distance between the holes
must be determined according to local conditions.
Ensure the collector hose rises constantly towards the
heat pump to avoid air pockets. If this is not possible,
airvents should be used.
As the temperature of brine system can fall below 0 °C
it must be protected against freezing down to -15 °C.
1 litre of ready mixed brine per meter of collector hose
(applies when using PEM-hose 40x 2.4 PN 6.3) is used
as a guide value when making the volume calculation.
Side connection
It is possible to angle the brine connections, for connec-
tion to the side instead of top connection.
To angle out a connection:
1. Disconnect the pipe at the top connection.
2. Angle the pipe in the desired direction.
3. If necessary, cut the pipe to the desired length.
Connecting the brine side
႑Insulate all indoor brine pipes against condensation.
႑The level vessel must be installed as the highest point
in the brine system on the incoming pipe before the
brine pump (Alt. 1).
If the level vessel cannot be placed at the highest
point an expansion vessel must be used (Alt. 2).
NOTE
Note that condensation may drip from the
level vessel. Position the vessel so that this does
not harm other equipment.
႑Details of the antifreeze used must be shown on the
level vessel.
* Can be angled for side connection.
NIBE™ F1155Chapter 4 | Pipe connections12

႑Install the supplied safety valve under the level vessel
as illustrated. The entire length of the overflow water
pipe from the safety valves must be inclined to pre-
vent water pockets and must also be frost proof.
႑Install shut off valves as close to the heat pump as
possible.
႑Fit the supplied particle filter on the incoming pipe.
In the case of connection to an open groundwater
system, an intermediate frost-protected circuit must
be provided, because of the risk of dirt and freezing in
the evaporator. This requires an extra heat exchanger.
P
;/
;/
&ROOHFWRU
$OW $OW
Heating medium side
Connecting the climate system
A climate system is a system that regulates indoor
comfort with the help of the control system in F1155
and for example radiators, underfloor heating/cooling,
fan convectors etc.
႑Install all required safety devices, shut-off valves (as
close to the heat pump as possible), and supplied
particle filter.
႑The safety valve must have a maximum 0.25 MPa (2.5
bar) opening pressure and be installed on the heating
medium return as illustrated. The entire length of
the overflow water pipe from the safety valves must
be inclined to prevent water pockets and must also
be frost proof.
႑When connecting to a system with thermostats on
all radiators, a relief valve must be fitted, or some of
the thermostats must be removed to ensure sufficient
flow.
T
Hot water heater
Connecting the hot water heater
NOTE
If F1155 is not docked to a water heater or if
it is to work with fixed condensing, the connec-
tion for the water heater (XL9) must be
plugged.
႑Any docked hot water heater must be fitted with
necessary set of valves.
႑The mixing valve must be installed if the setting is
changed so that the temperature can exceed 60 °C.
႑The setting for hot water is made in menu 5.1.1.
႑The safety valve must have a maximum 1.0 MPa (10.0
bar) opening pressure and be installed on the incom-
ing domestic water line as illustrated. The entire
length of the overflow water pipe from the safety
valves must be inclined to prevent water pockets and
must also be frost proof.
Caution
Hot water production is activated in menu 5.2
or in the start guide.
13Chapter 4 | Pipe connectionsNIBE™ F1155

Fixed condensing
If F1155 is to work towards the water heater with fixed
condensing you must connect an external flow sensor
(BT25) according to the description on page 20. In ad-
dition, you must perform the following menu settings.
Menu setting (local vari-
ations may be required)
Menu
Desired temperature in the
tank.
1.9.3 - min. flow line temp.
Desired temperature in the
tank.
5.1.2 - max flow line temper-
ature
intermittent5.1.10 - op. mod heat med
pump
manual4.2 - operating mode
Docking alternatives
F1155 can be connected in several different ways, some
of which are shown below.
Further option information is available at www.nibe.eu
and in the respective assembly instructions for the ac-
cessories used. See page 67 for a list of the accessories
that can be used with F1155.
Buffer vessel
If the climate system volume is too small for the heat
pump output, the radiator system can be supplemented
with a buffer vessel, for example NIBE UKV.
T
UKV
Ground water system
An intermediate heat exchanger is used to protect the
heat pump's exchanger from dirt. The water is released
into a buried filtration unit or a drilled well. See page
26 for more information about connecting a ground
water pump.
If this docking alternative is used, "min. brine out" in
menu 5.1.7 "br pmp al set." must be changed to a
suitable value to prevent freezing in the heat ex-
changer.
Ventilation recovery
The installation can be supplemented with the exhaust
air module FLM to provide ventilation recovery.
႑Pipes and other cold surfaces must be insulated with
diffusion-proof material to prevent condensation.
႑The brine system must be supplied with a pressure
expansion vessel (CM3). If there is a level vessel (CM2)
this should be replaced.
Frånluft
Ø 160
Avluft
Ø 160
P
([WUDFW DLU
([KDXVW
DLU
)/0
NIBE™ F1155Chapter 4 | Pipe connections14

Free cooling
The installation can be supplemented with fan con-
vectors, for example, in order to allow connections for
free cooling (PCS 44).
႑Pipes and other cold surfaces must be insulated with
diffusion-proof material to prevent condensation.
႑Where the cooling demand is high, fan convectors
with drip trays and drain connection are needed.
႑The brine system must be supplied with a pressure
expansion vessel (CM3). If there is a level vessel (CM2)
this should be replaced.
P
Fläktkonvektor
3
2
1
)DQ FRQYHFWRUV
Under floor heating systems
The external circulation pump is dimensioned for the
under floor heating system’s demand.
To ensure a heating supply during hot water produc-
tion, the heating system can be supplemented with a
NIBE UKV vessel, e.g. when there is a water coil in the
FTX ventilation.
T
UKV
Two or more climate systems
When more than one climate system, with a lower
temperature, is to be heated up, the following connec-
tion can be used. The shunt valve lowers the temperat-
ure to, for example, the under floor heating system.
The ECS 40/ECS 41 accessory is required for this con-
nection.
T
Pool
Charging of the pool is controlled by the pool sensor.
In the case of low pool temperatures, the shuttle valve
reverses direction and opens towards the pool ex-
changer. The POOL 40 accessory is required for this
connection.
T
Pool
15Chapter 4 | Pipe connectionsNIBE™ F1155

General
All electrical equipment, except the outdoor sensors,
room sensors and the current sensors are ready connec-
ted at the factory.
႑Disconnect the heat pump before insulation testing
the house wiring.
႑If the building is equipped with an earth-fault
breaker, F1155 should be equipped with a separate
one.
႑If a miniature circuit breaker is used this should have
at least motor characteristic “C”. See page 70 for fuse
size.
႑For wiring diagrams for the heat pump, see separate
installation handbook for wiring diagrams.
႑Communication and sensor cables to external con-
nections must not be laid close to high current cables.
႑The minimum area of communication and sensor
cables to external connections must be 0.5 mm² up
to 50 m, for example EKKX or LiYY or equivalent.
႑When cable routing in F1155, cable grommets (e.g.
UB1-UB3, marked in image) must be used. In
UB1-UB3 the cables are inserted through the heat
pump from the back to the front.
NOTE
The switch (SF1) must not be moved to ""or
"" until the boiler has been filled with water.
Otherwise the temperature limiter, thermostat,
compressor and the immersion heater can be
damaged.
NOTE
Electrical installation and service must be car-
ried out under the supervision of a qualified
electrician. Cut the current with the circuit
breaker before carrying out any servicing.
Electrical installation and wiring must be car-
ried out in accordance with the stipulations in
force.
F1155
FD1
FA1
FD1-SF2
UB2
UB1
UB3
Miniature circuit-breaker
The heat pump operating circuit and a large proportion
of its internal components are internally fused by a
miniature circuit breaker (FA1).
Temperature limiter
The temperature limiter (FD1) cuts the current supply
to the electrical addition if the temperature rises
between 90 and 100°C and can be manually reset.
Resetting
The temperature limiter (FD1) is accessible behind the
front cover. Reset the temperature limiter by pressing
the button (FD1-SF2) using a small screwdriver.
NIBE™ F1155Chapter 5 | Electrical connections16
5 Electrical connections

Accessibility, electrical connection
The plastic cap of the electrical boxes is opened using
a screwdriver.
NOTE
The cover for the input card is opened without
a tool.
Removing the cover, input circuit board
1. Unscrew the screws and angle out the cover.
LEK
2. Pull off the cover.
LEK
Removing the hatch, electrical cabinet
1. Disconnect the contacts.
LEK
2. Unscrew the screws and angle out the cover.
LEK
3. Pull off the cover.
LEK
17Chapter 5 | Electrical connectionsNIBE™ F1155

Cable lock
Use a suitable tool to release/lock cables in the heat
pump terminal blocks.
2
1
2
3
LEK
3
4
1
2
Connections
NOTE
To prevent interference, unscreened commu-
nication and/or sensor to external connections
cables must not be laid closer than 20 cm to
high voltage cable when cable routing.
Power connection
F1155 must be installed via an isolator switch with a
minimum breaking gap of 3mm. Minimum cable area
must be dimensioned according to the fuse rating used.
Supplied cable for incoming electricity is connected to
terminal block X1 on the immersion heater card (AA1).
NOTE
F1155 is not reconnectable between 1-phase
and 3-phase, neither is it reconnectable
between 3x230V and 3x400V.
F1155
AA1-X1
Connection 3x400V
$$;
PE1
L11L2L3PE0N
Connection 3x230V
$$;
PE1
1L22L3L1PE
Connection 1x230V
$$;
PE1
0L11PEN
If separate supply to the compressor and immersion
heater is required, see section "Switch for external
blocking of addition and/or compressor" on page 24.
Tariff control
If the voltage to the immersion heater and/or the
compressor disappears during a certain period, there
must also be blocking via the AUX-input, see "Connec-
tion options- Possible selection for AUX inputs".
NIBE™ F1155Chapter 5 | Electrical connections18
Other manuals for F1155 Series
8
Table of contents
Other Nibe Heat Pump manuals

Nibe
Nibe F2040 Series User manual

Nibe
Nibe F130 User manual

Nibe
Nibe F730 User guide

Nibe
Nibe SMO 10 Original operating manual

Nibe
Nibe ERS 20-250 User guide

Nibe
Nibe F370 User guide

Nibe
Nibe FIGHTER1310 HPAC User manual

Nibe
Nibe F1145 series User manual

Nibe
Nibe VST 20 User manual

Nibe
Nibe F1126 User manual
Popular Heat Pump manuals by other brands

Baxi
Baxi Ambiflo 75 Installation, service & maintenance instruction

Daikin
Daikin Altherma 3 H HT EPRA16DAV3 Installer's reference guide

DeDietrich
DeDietrich ALEZIO S V200 user guide

Baxi
Baxi Geoflo Operation, installation & maintenance instructions

Danfoss
Danfoss DHP-H Installation and service instructions

Argo
Argo EMIX TANK 300 Operating and installation instructions