Instalación de la batería:
Advertencia - Sustituya las pilas únicamente en áreas no peligrosas.
Aplicación del equipo:
El Nightsearcher ‘NSEX160R’ cumple con los requisitos esenciales establecidos en la Directiva 94/9 / CE del Consejo de la CEE Directiva 2004/108 /
CE de la Directiva EMC, 2006/95 / EC de la LVD Directiva sobre las atmósferas potencialmente explosivas Directiva 2002/95 / CE de Rohs.
Carga:
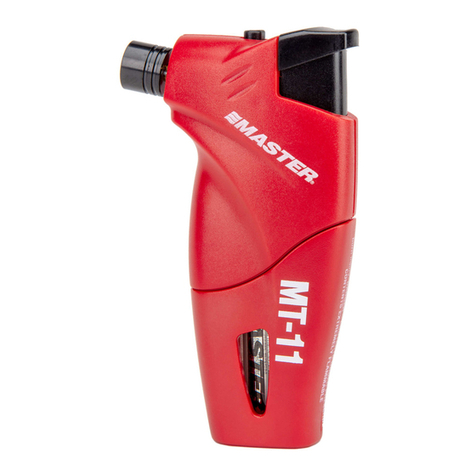
- Retire el tapón de goma de protección e inserte el cable de alimentación en la toma de carga de la linterna ‘3’
- Conecte el enchufe a una toma de corriente de CA de 100-240v.
- Encender la red: Una luz roja se iluminará durante la carga. Una luz verde se iluminará una vez totalmente recargada.
- Cuando esté totalmente cargada, apague la alimentación de CA y desconecte el cable de la linterna.
- Reemplace el enchufe de goma del cargador en el zócalo.
Operación:
- Presione el interruptor de proyector delantero ‘1’ una vez para la salida alta, presione otra vez para la salida baja, presione una tercera para la energía
apagado.Mantenga pulsado el interruptor durante más de 3 segundos para que la salida parpadee.
- Presione el interruptor de la antorcha trasera ‘2’ una vez para encenderlo y otra vez para apagarlo.
Cuando la alimentación está apagada, mantenga pulsado el interruptor durante tres segundos, el tiempo de parpadeo indica la capacidad de la
batería. Parpadeando cinco veces significa lleno.
Reemplazo de la batería:
SOLAMENTE REEMPLAZA LA BATERÍA EN UN AMBIENTE SEGURO.
- Desenrosque la cubierta de la cola y retire la batería y el plomo.
- Separar las dos partes de la cubierta verde para liberar la batería.
- Extraiga la batería y sustituya la batería nueva.
- Asegúrese de que el PCB esté en la ranura de retención correctamente.
- Reemplace la caja externa verde sobre la batería.
- Alinee la llave principal dentro de la carcasa de la antorcha e inserte la pila en el soplete.
- Enrosque la tapa trasera en la antorcha.
Advertencia General:
- No exponga la batería a un calor excesivo, ya que puede provocar una explosión.
- No utilice objetos metálicos para cortocircuitar los extremos positivo y negativo de la batería.
- No deseche la pila en la basura doméstica, utilice el método correcto de eliminación.
- No soldar directamente sobre la batería.
- No deje que la batería se moje ni sumerja la batería en agua.
- Mantenga la batería alejada de los niños.
- El rango de temperatura de funcionamiento de la batería del flash: Carga: 0 ° C a 45 ° C / Descarga: -20 ° C a 60 ° C
- No encienda la linterna directamente en los ojos de las personas, ya que puede dañar su vista.
- Si la linterna no se utiliza durante mucho tiempo, las baterías deben ser retiradas para evitar la fuga de la batería que puede dañar la linterna.
- No intente reparar la unidad. En caso de cualquier problema o pregunta, póngase en contacto con NightSearcher Limited o un distribuidor
autorizado.
Batterie-Installation:
Warnung - Ersetzen Sie die Batterien nur in explosionsgefährdeten Bereichen.
Geräteanwendung:
Der Nightsearcher ‘NSEX160R’ entspricht den grundlegenden Anforderungen der EG-Richtlinie 94/9 / EG zur bestimmungsgemäßen Verwendung in
der Richtlinie über explosionsgefährdete Bereiche, Richtlinie 2004/108 / EG der EMV-Richtlinie 2006/95 / EG des LVD Richtlinie und der
Rohs-Richtlinie 2002/95 / EG.
Aufladung:
- Entfernen Sie den Gummistopfen und stecken Sie das Netzkabel in die Ladebuchse der Taschenlampe ‘3’
- Schließen Sie den Netzstecker an eine Netzsteckdose 100-240V an.
- Netzspannung einschalten: Während des Ladevorgangs leuchtet ein rotes Licht. Ein grünes Licht leuchtet einmal vollständig aufgeladen auf.
- Wenn Sie voll aufgeladen sind, schalten Sie das Netzkabel aus und trennen Sie das Kabel von der Taschenlampe.
- Den Gummistopfen des Ladegeräts wieder in die Steckdose einsetzen.
Betrieb:
- Drücken Sie vorne ‘1’ Scheinwerfer-Schalter einmal für hohe Leistung, drücken Sie erneut für niedrigen Ausgang, drücken Sie eine dritte für die
Stromversorgung aus.
Halten Sie den Schalter für mehr als 3 Sekunden für blinkende Ausgabe gedrückt.
- Drücken Sie den ‘2’ hinteren Brennerschalter einmal, um ihn einzuschalten und wieder auszuschalten. Wenn das Gerät ausgeschaltet ist, halten
Sie den Schalter für drei Sekunden gedrückt, die Blinkzeit zeigt die Kapazität der Batterie an. Blinkt fünfmal voll.
Ersetzen der Batterie:
ERSETZEN SIE NUR DIE BATTERIE IN EINER SICHEREN UMGEBUNG.
- Schwanzdeckel abschrauben und Batterie und Leiterplatte ausbauen.
- Trennen Sie die beiden Teile der grünen Abdeckung, um die Batterie freizugeben.
- Batterie entnehmen und neue Batterie austauschen.
- Vergewissern Sie sich, dass die Platine richtig eingezogen ist.
- Tauschen Sie das grüne Gehäuse über der Batterie aus.
- Hauptschlüssel innerhalb des Brennergehäuses ausrichten und Batterie wieder in den Brenner einlegen.
- Heckkappe wieder auf Fackel schrauben.
Allgemein Warnung:
- Setzen Sie die Batterie keinen übermäßigen Hitze aus, da dies zu Explosionen führen kann.
- Verwenden Sie keine Metallgegenstände zum Kurzschließen des positiven und negativen Endes der Batterie.
- Entsorgen Sie den Akku nicht im Hausmüll, verwenden Sie bitte die richtige Entsorgungsmethode.
- Nicht direkt an die Batterie anlöten.
- Die Batterie nicht nass werden lassen oder die Batterie in Wasser tauchen.
- Halten Sie die Batterie von Kindern fern.
- Der Betriebstemperaturbereich der Blitzlichtbatterie: Laden: 0 ° C bis 45 ° C / Entladen: -20 ° C bis 60 ° C
- Glänzen Sie nicht die Taschenlampe direkt in die Augen der Leute, da sie ihr Sehvermögen schädigen kann.
- Wenn die Taschenlampe längere Zeit nicht benutzt wird, sollten Batterien entfernt werden, um ein Austreten von Batterien zu vermeiden, die die
Taschenlampe beschädigen können.
- Versuchen Sie nicht, das Gerät zu reparieren. Im Falle von Problemen oder Fragen kontaktieren Sie bitte NightSearcher Limited oder einen
autorisierten Händler.
Installation de la batterie:
Avertissement - Remplacez les piles uniquement dans des zones non dangereuses.
Le Application d’équipement:
Le Nightsearcher ‘NSEX160R’ est conforme aux exigences essentielles de la Directive 94/9 / CE du Conseil de l’Europe Directive 2004/108 / CE de la
Directive EMC 2006/95 / EC de la LVD Directive 2004/108 / EC Equipements destinés à être utilisés dans les atmosphères potentiellement explosives
Directive 2002/95 / CE.
Se charge:
- Retirer la fiche en caoutchouc de protection et insérer le cordon d’alimentation dans la prise de charge de la lampe de poche ‘3’
- Branchez la fiche secteur à une prise secteur 100-240v.
- Mise sous tension: Un voyant rouge s’allume pendant le chargement. Un voyant vert s’allume une fois complètement rechargé.
- Lorsque la batterie est complètement chargée, éteignez l’alimentation du secteur et débranchez le fil de la lampe de poche.
- Remplacer la fiche en caoutchouc du chargeur dans la prise.
Opération:
- Appuyez une fois sur le commutateur de spot avant ‘1’ pour une sortie haute, appuyez de nouveau pour une sortie faible, appuyez sur un troisième
pour mettre hors tension.
Maintenez le bouton enfoncé pendant plus de 3 secondes pour clignoter.
- Appuyez une fois sur le commutateur de la torche arrière ‘2’ pour l’allumer et le remettre en marche. Lorsque l’alimentation est éteinte, maintenez le
bouton enfoncé pendant
trois secondes, le temps de clignotement indique la capacité de la batterie. Clignotant cinq fois signifie plein.
Remplacement de la pile:
REMPLACER SEULEMENT LA BATTERIE DANS UN ENVIRONNEMENT SÛR.
- Dévisser le couvercle arrière et retirer la batterie et le circuit imprimé.
- Séparer les deux parties du couvercle vert pour libérer la batterie.
- Retirez la pile et remplacez la pile neuve.
- Assurez-vous que la carte de circuit imprimé est bien en place.
- Remplacez le boîtier externe vert par la batterie.
- Alignez la clé principale à l’intérieur de la torche et insérez la pile dans la torche.
- Vissez le capuchon arrière sur la torche.
Avertissement général:
- N’exposez pas la batterie à une chaleur excessive, car cela pourrait provoquer une explosion.
- N’utilisez pas d’objets métalliques pour court-circuiter l’extrémité positive et négative de la batterie.
- Ne jetez pas la batterie dans les ordures ménagères, veuillez utiliser la bonne méthode d’élimination.
- Ne pas souder directement sur la batterie.
- Ne laissez pas la batterie mouiller ou immergez la batterie dans l’eau.
- Gardez la batterie hors de portée des enfants.
- La plage de température de fonctionnement de la batterie du flash: Charge: 0 ° C à 45 ° C / Décharge: -20 ° C à 60 ° C
- Ne pas briller la lampe de poche directement dans les yeux des gens, car il peut endommager leur vue.
- Si la lampe de poche n’est pas utilisée pendant une longue période, les piles doivent être enlevées pour éviter toute fuite des piles qui pourrait en
dommager la lampe de poche.
- N’essayez pas de réparer l’appareil. En cas de problèmes ou de questions, veuillez contacter NightSearcher Limited ou un distributeur autorisé.
Installazione della batteria:
Attenzione - Sostituire le batterie solo in zone non pericolose.
Attrezzature per l’applicazione:
conforme Il Nightsearcher ‘NSEX160R’ ai requisiti essenziali di cui il Consiglio CEE Direttiva 94/9 / EC destinati ad essere utilizzati nella direttiva
atmosfere potenzialmente esplosive, 2004/108 / CE della direttiva EMC, 2006/95 / CE del LVD la direttiva e la direttiva RoHS 2002/95 / CE.
Charging:
- Togliere il tappo di protezione in gomma e alimentazione inserto portano nella presa di ricarica la torcia ‘3’
- Collegare la spina ad una presa di corrente 100-240V AC.
- Accendere l’alimentazione: Una luce rossa si accende durante la carica. Una luce verde si accende una volta completamente ricaricata.
- Quando si volta completamente carica fuori dal CA alimentazione di rete e scollegare il cavo dalla torcia.
- Sostituire tappo di gomma del caricatore nella presa.
Operazione:
- Press ant ‘1’ interruttore una volta per alto rendimento, premere di nuovo per l’uscita bassa, premere un terzo per lo spegnimento.
Tenere premuto l’interruttore per più di 3 secondi per lampeggiante uscita.
- Premere l’interruttore della torcia posteriore ‘2’, una volta per accendere e di nuovo per spegnere.
Quando l’alimentazione è spenta, tenere premuto l’interruttore per tre secondi, i tempi di lampeggiante indica la capacità della batteria.
Lampeggiante cinque volte significano pieno.
Sostituzione della batteria:
SOLO SOSTITUIRE BATTERIA in un ambiente sicuro.
- Svitare il coperchio posteriore e rimuovere la batteria e portare PCB.
- Separare le due parti della copertura vegetale per rilasciare la batteria.
- Estrarre la batteria e sostituirla nuova batteria.
- Assicurare PCB è nel mantenere correttamente slot.
- Sostituire involucro esterno verde sopra la batteria.
- Allineare modo chiave principale all’interno della custodia torcia e inserire la batteria di nuovo in torcia.
- Tappo a vite coda posteriore sulla torcia.
Attenzione Generale:
- Non esporre la batteria a calore eccessivo, si potrebbero causare un’esplosione.
- Non utilizzare oggetti metallici per corto circuito alla fine positivo e negativo della batteria.
- Non gettare le batterie nei rifiuti domestici, si prega di utilizzare il metodo corretto di smaltimento.
- Non saldare direttamente alla batteria.
- Non lasciare che la batteria si bagni o immergere la batteria in acqua.
- Tenere la batteria lontano dalla portata dei bambini.
- La gamma di temperature di funzionamento della batteria del flash di luce: Carica: 0 ° C a 45 ° C / scarica: -20 ° C a 60 ° C
- Non puntare la torcia direttamente negli occhi della gente, in quanto potrebbe danneggiare la loro vista.
- Se la torcia non viene utilizzato per un lungo periodo di tempo, le batterie devono essere rimosse per evitare perdite batteria che potrebbero
danneggiare la torcia.
- Non cercare di riparare l’unità. In caso di problemi o domande si prega di contattare NightSearcher Limited o un distributore autorizzato.


