manuals.online logo
Brands
  1. Home
  2. •
  3. Brands
  4. •
  5. NightSearcher
  6. •
  7. Flashlight
  8. •
  9. NightSearcher NAVIGATOR-310 User manual

NightSearcher NAVIGATOR-310 User manual

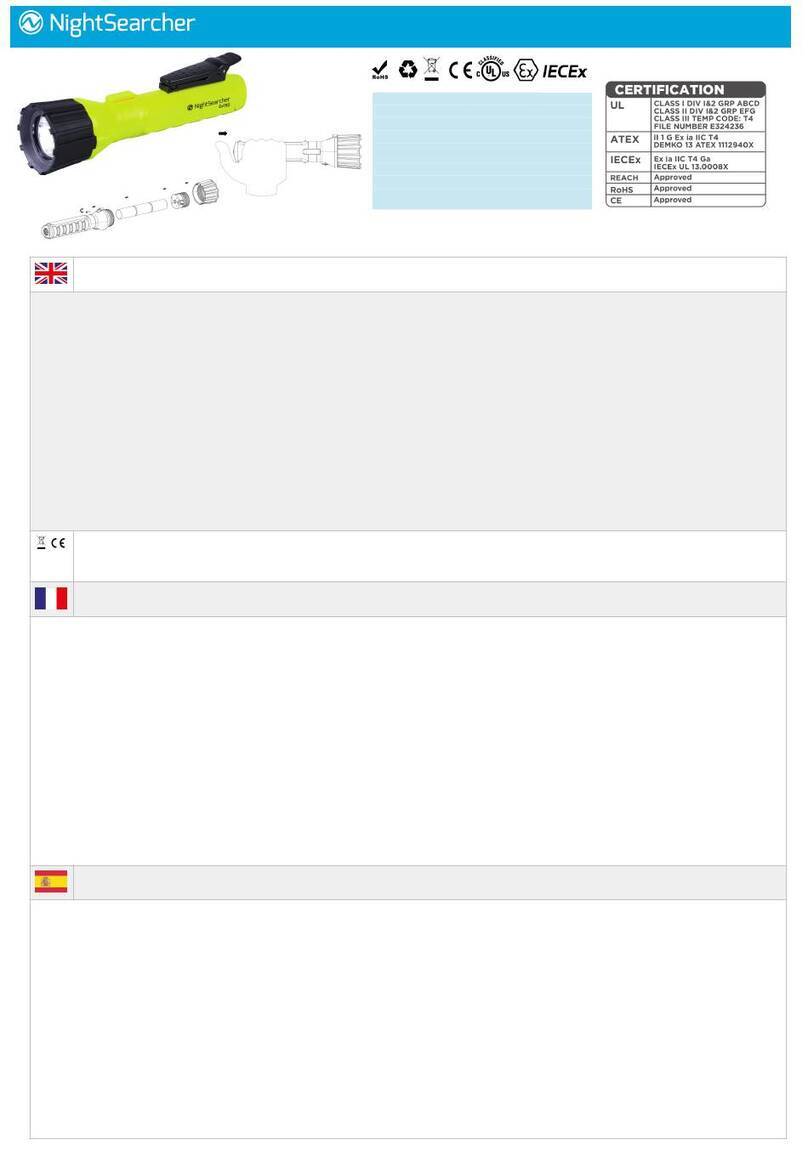
Specications
Battery 1.5V AA Alkaline Batteries x2
Product size ø 25.5mm x 161.1mm
Product weight 76g without batteries
NS Part No. NSNAVIGATOR310
NAVIGATOR310 - USER MANUAL
Battery tail cap
Capuchon de la batterie
Tapa de la batería
Tappo della coda della batteria
Batterie-Heckkappe
电池尾盖
バッテリテールキャップ
On/off/mode button
Bouton marche/arrêt/mode
Botón de encendido/apagado/ modo
Pulsante di accensione/spegnimento/
modalità
Ein/Aus/Modus-Taste
开/关/模式按钮
オン/オフ/モードボタン
Warning
• Do not fully submerse ashlight in any water or other liquids.
• To avoid decolonisation of the ashlight; do not expose it constantly to sunlight,
water, chemicals, corrosive gases, etc.
• Do not stare into light beam or point it at the eyes of other people.
• Always make sure the ashlight system is disconnected from power sources and
turn off when performing any routine cleaning or maintenance.
• Do not try to repair the unit yourself. Take it to a qualied service facility or return it
to Nightsearcher Ltd.
• To remove ngerprints from the ashlight’s lens; use a camera lens cleaner and soft
cloth and rub gently upon the lens surface.
If at any time, you need to dispose of this product or parts of this
product: please note that waste electrical products, bulbs and
batteries should not be disposed of with ordinary household waste.
Recycle where facilities exist. Check with your local authority for
recycling advice. Alternatively, NightSearcher is happy to take
receipt of this product at end-of-life and will recycle it on your
behalf.
Instructions d’utilisation
Insertion de la batterie
Dévissez le capuchon de la queue et insérez le positif de la batterie vers la tête de la
DEL. Remplacez et serrez le capuchon de la queue.
Indicateur de batterie
Le bouton Marche / Arrêt / Mode allumera 3 couleurs différentes en fonction de l’état
de la batterie:
• Vert: bon niveau de batterie
• Jaune: niveau moyen de la batterie
• Rouge: faible niveau de batterie
Gradateur lisse
1. Pour utiliser la fonction gradateur de la torche; Appuyez brièvement sur le bouton
arche / Arrêt / Mode pour allumer la lumière.
2. Maintenez la touche enfoncée pour diminuer ou égayer.
Lorsque les limites les plus légères / les plus sombres sont atteintes lors de
l’obscurité, la lumière clignote deux fois.
3. Appuyez brièvement sur le bouton Marche / Arrêt / Mode une fois pour éteindre la
lumière.
Élimination sûre des déchets de produits électriques, batteries et ampoules
Si à tout moment, vous devez éliminer ce produit ou des parties de ce produit: veuillez noter que les déchets
de produits électriques, d’ampoules et de piles ne doivent pas être éliminés avec les ordures ménagères.
Recyclez les installations existantes. Consultez votre autorité locale pour obtenir des conseils sur le
recyclage. Alternativement, NightSearcher est heureux de recevoir ce produit en n de vie et le recyclera
en votre nom.
Eliminación de residuos de productos eléctricos, baterías y bombillas
Si en algún momento necesita deshacerse de este producto o de partes de este producto: tenga en cuenta
que los residuos de productos eléctricos, bombillas y baterías no deben eliminarse con la basura doméstica
ordinaria. Recicle donde existen instalaciones. Consulte con su autoridad local para obtener consejos de
reciclaje. Alternativamente, NightSearcher se complace en recibir este producto al nal de su vida útil y lo
recicla en su nombre.
Instrucciones de operación
Inserción de la batería
Desenrosque la tapa de la cola e inserte el positivo de la batería hacia la cabeza de la luz
del LED. Vuelva a colocar y apriete la tapa de la cola.
Indicador de bateria
El botón On / Off / Mode iluminará 3 colores diferentes dependiendo del estado de la
batería:
• Verde: buen nivel de batería
• Amarillo: Nivel de batería medio
• Rojo: Nivel de batería bajo
Atenuador suave
1. Para usar la característica de atenuador de la antorcha; Presione brevemente el botón
On / Off / Mode para encender la luz.
2. Mantenga presionado el botón para atenuar o aclarar.
3. Cuando se alcanzan los límites más claros / oscuros mientras se atenúa, la luz parp
deará dos veces.
4. Presione brevemente el botón On / Off / Mode una vez para apagar la luz.
Brillo Memoria
El ajuste del nivel de brillo anterior siempre se memorizará y se reanudará cuando la luz de
la antorcha vuelva a encenderse.
Mémoire de luminosité
Le réglage du niveau de luminosité avant sera toujours mémorisé et reprendra lorsque la lampe
de la torche sera réactivée.
Verrouillage de sécurité
Le verrouillage du bouton marche / arrêt / mode empêche la perte de courant accidentelle pendant
le stockage et le déplacement. Pendant que la lampe torche est éteinte; Maintenez le bouton
enfoncé pendant 5 secondes pour verrouiller. Pour déverrouiller la lampe de poche; Maintenez le
bouton enfoncé pendant 5 secondes.
Attention
Ne pas mélanger complètement la lampe de poche dans de l’eau ou d’autres liquides.
• Pour éviter la décolonisation de la lampe de poche; Ne l’exposez pas constamment à la lumière
du soleil, à l’eau, aux produits chimiques, aux gaz corrosifs, etc.
• Ne regardez pas dans le faisceau de lumière ou ne le pointez pas aux yeux d’autres personnes.
• Assurez-vous toujours que le système de lampe de poche est débranché des sources
d’alimentation et éteins lors d’un nettoyage ou d’une maintenance de routine.
• N’essayez pas de réparer vous-même l’unité. Prenez-le dans un service qualié ou renvoyez-le
à Nightsearcher Ltd.
• Pour supprimer les empreintes digitales de l’objectif de la lampe de poche; Utilisez un nettoyant
pour lentilles et un chiffon doux et frottez doucement sur la surface de l’objectif.
Seguridad Llavero
El bloqueo del botón de encendido / apagado / modo impide la pérdida accidental de energía
durante el almacenamiento y el desplazamiento. Mientras que la linterna está apagada; Manten-
ga presionado el botón durante 5 segundos para bloquearlo.
Para desbloquear la linterna; Mantenga presionado el botón durante 5 segundos.
Advertencia
• No sumerja completamente la linterna en agua u otros líquidos.
• Para evitar la descolonización de la linterna; No lo exponga constantemente a la luz
solar, agua, productos químicos, gases corrosivos, etc.
• No mire jamente al rayo de luz ni apunte a los ojos de otras personas.
• Asegúrese siempre de que el sistema de la linterna esté desconectado de las fuentes
de alimentación y se apague al realizar cualquier limpieza o mantenimiento rutinario.
• No trate de reparar la unidad usted mismo. Llévelo a un centro de servicio calicado
devuélvalo a Nightsearcher Ltd.
• Para eliminar las huellas dactilares de la lente de la linterna; Utilice un limpiador
delentes de la cámara y un paño suave y frote suavemente sobre la supercie de la lente.
Operation Instructions
Battery Insertion
Unscrew tail cap and insert the battery’s positive towards the LED
light head. Replace and tighten the tail cap.
Battery Indicator
The On/Off/Mode button will illuminate 3 different colours depending on the battery
status:
• Green: good battery level
• Yellow: medium battery level
• Red: low battery level
Smooth Dimmer
1. To use the torch’s dimmer feature; short press On/Off/Mode button to turn on light.
2. Hold down button to dim or brighten.
3. When lightest/darkest limits are reached whilst dimming the light will ash twice.
4. Short press On/Off/Mode Button once to turn off light.
Brightness Memory
Previous brightness level setting will always be memorised and will resume when
torch’s light is switched back on again.
Safety Keylock
On/Off/Mode button lock prevents accidental power loss during storage and travel.
Whilst ashlight is off; hold down button for 5 seconds to lock.
To unlock the ashlight; hold down button for 5 seconds.
NightSearcher products have been carefully tested and inspected before shipment and are guaranteed to be free from defective materials and workmanship for a
period of 12 months (battery not covered) from the date of purchase, provided that the enclosed instructions have been followed. Should you experience problems
with your NightSearcher product, please return the item, complete with any chargers, to your place of purchase or contact NightSearcher Ltd direct.
Your NightSearcher guarantee does not apply to normal wear and tear, nor does it cover any damage caused by misuse, careless or unsafe handling, alterations,
accidents or repairs attempted or made by any personnel without prior approval from NightSearcher Ltd. Your NightSearcher guarantee is not effective unless you
can provide a dated proof of purchase. Please note that this guarantee does not affect your statutory rights. If at any time, you need to dispose of this product or
parts of this product: Please note that waste electrical products, batteries and bulbs should not be disposed of with household waste. Please recycle where facilities
exist, check with your local authority for recycling advice.
NightSearcher Limited - Unit 4 Applied House - Fitzherbert Spur – Farlington – PORTSMOUTH – Hampshire - PO6 1TT – UK
廃電気製品、バッテリー、電球の廃棄
本製品または本製品の一部を処分する必要がある場合は、いつでも廃棄してください。電気製品、電球お
よび電池は、一般家庭の廃棄物と一緒に廃棄しないでください。 施設が存在する場所でリサイクル。 リ
サイクルのアドバイスについては、自治体にお問い合わせください。 また、NightSearcherは、この製品を
寿命末期に受領して喜んでリサイクルします。
GUARANTEE TERMS
Sicherheits-Keylock
Ein / Aus / Modus-Tastensperre verhindert versehentliche Verlustleistung während
der Lagerung und der Fahrt. Während die Taschenlampe ausgeschaltet ist; Halten
Sie die Taste für 5 Sekunden gedrückt, um zu sperren.
Um die Taschenlampe zu entsperren; Halten Sie die Taste für 5 Sekunden gedrückt.
Warnung
• Die Taschenlampe nicht vollständig in Wasser oder andere Flüssigkeiten
eintauchen.
• Um eine Entkolonialisierung der Taschenlampe zu vermeiden; Setzen Sie es nicht
ständig dem Sonnenlicht, Wasser, Chemikalien, korrosiven Gasen usw. aus.
• Nicht in Lichtstrahl starren oder auf die Augen anderer Leute hinweisen.
• Vergewissern Sie sich immer, dass das Taschenlichtsystem von den Stromquellen
getrennt ist, und schalten Sie es ab, wenn Sie eine routinemäßige Reinigung oder
Wartung durchführen.
• Versuche nicht, das Gerät selbst zu reparieren. Nehmen Sie es zu einer
qualizierten Service-Einrichtung oder schicken Sie es an Nightsearcher Ltd.
• Um Fingerabdrücke aus der Linse der Taschenlampe zu entfernen; Verwenden
Sie einen Objektivreiniger und ein weiches Tuch und reiben Sie sanft auf die
Linsenoberäche.
Depurazione sicura dei riuti prodotti elettrici, batterie e lampadine
Se in qualsiasi momento, è necessario smaltire questo prodotto o parti di questo prodotto: si prega di
notare che i riuti di prodotti elettrici, lampadine e batterie non devono essere smaltiti con i riuti domestici
ordinari. Riciclare dove esistono le strutture. Consultare il proprio ente locale per i consigli di riciclaggio. In
alternativa, NightSearcher è lieto di ricevere il ricevimento di questo prodotto alla ne della vita e riciclarlo
a suo nome.
Sichere Entsorgung von Elektro- und Elektronik-Altgeräten, Batterien und
Glühlampen
Sollten Sie zu diesem Zeitpunkt jederzeit dieses Produkt oder Teile dieses Produkts entsorgen
müssen, beachten Sie bitte, dass Abfälle von elektrischen Produkten, Glühlampen und
Batterien nicht mit normalem Hausmüll entsorgt werden dürfen. Recycling wo Einrichtungen
vorhanden sind. Überprüfen Sie mit Ihrer örtlichen Behörde auf Recycling Beratung. Alternativ,
NightSearcher ist glücklich, den Empfang dieses Produkts am Ende des Lebens zu nehmen
und wird es in Ihrem Namen recyceln.
废弃电气产品,电池和灯泡的安全处置
如果在任何时候,您需要处理本产品或本产品的部件:请注意,废电气产品,灯泡和
电池不应与普通家庭垃圾一起处理。 循环使用设施。 请向当地政府查询回收建议。 或
者,NightSearcher很乐意在此期间收到此产品,并代您回收。
Istruzioni per l’uso
Inserimento della batteria
Svitare il coperchio della coda e inserire il positivo della batteria verso la testa della
luce del LED. Sostituire e serrare il tappo di coda.
Indicatore della batteria
Il pulsante On / Off / Mode illumina 3 diversi colori a seconda dello stato della
batteria:
• Verde: buon livello della batteria
• Giallo: livello di batteria medio
• Rosso: basso livello della batteria
• Smooth Dimmer
1. Per utilizzare la funzione dimmer della torcia; Premere brevemente il
pulsante On / Off / Mode per accendere la luce.
2. Tenere premuto il pulsante per sbiadire o illuminare.
3. Quando si raggiungono i limiti più leggeri / più scuri, mentre la luminosità
della luce lampeggerà due volte.
4. Premere brevemente il tasto On / Off / Mode una volta per spegnere la luce.
5. Memoria di luminosità
L’impostazione del livello di luminosità precedente verrà sempre memorizzata e
riprenderà quando la luce della torcia viene accesa nuovamente.
Bedienungsanleitungen
Batterieeinsatz
Ziehen Sie die Kappe ab und legen Sie die Batterie in Richtung des LED-Lichtkopfes
ein. Ersetzen und ziehen Sie die Heckkappe an.
Batterieanzeige
Die On / Off / Mode-Taste beleuchtet je nach Batteriestatus 3 verschiedene Farben:
• Grün: guter Batteriestand
• Gelb: mittlerer Batteriestand
• Rot: niedriger Batteriestand
• Glatter Dimmer
1. Um die Dimmerfunktion des Fackels zu benutzen; Drücken Sie kurz die
Taste Ein / Aus / Modus, um das Licht einzuschalten.
2. Halten Sie die Taste gedrückt, um zu dimmen oder zu erhellen.
3. Wenn die hellsten / dunkelsten Grenzwerte erreicht sind, blinkt das Licht
zweimal.
4. Drücken Sie kurz die Taste Ein / Aus / Modus, um das Licht auszuschalten.
Helligkeitsspeicher
Die vorherige Helligkeitsstufe wird immer gespeichert und wird wieder aufgenommen,
wenn das Licht des Brenners wieder eingeschaltet wird.
操作说明
电池插入
取下尾盖并将电池的正极插入LED灯头。 更换并拧紧尾盖。
电池指示灯
根据电池状态,开/关/模式按钮将照亮3种不同的颜色:
• 绿色:电池电量好
• 黄色:中等电量
• 红色:电池电量不足
光滑调光
1. 使用手电筒的调光功能; 短按开/关/模式按钮打开灯。
2. 按住按钮变暗或变亮。
3. 当达到最亮/最暗限制时,调光时,指示灯将闪烁两次。
4. 短按开/关/模式按钮一次以关闭指示灯。
亮度记忆
以前的亮度级别设置将始终被记忆,并且当割炬灯再次打开时将会恢复。
安全钥匙锁
开/关/模式按钮锁定可防止存储和旅行期间的意外断电。 当火炬关闭时 按住5秒钟按钮锁定。
警告
• 不要将手电筒完全浸没在任何水或其他液体中。
• 避免手电筒的非殖民化; 不要将其暴露于阳光,水,化学品,腐蚀性气体等。
• 不要盯着光束或将其指向别人的眼睛。
• 始终确保手电筒系统与电源断开连接,并执行常规清洁或维护时关闭电源。
• 不要尝试自己修理单元。 把它带到一个合格的服务机构,或者把它交还给Nightsearcher Ltd.
• 从手电筒的镜头去除指纹; 使用相机镜头清洁剂和软布轻轻擦拭镜头表面。
取扱説明書
バッテリ挿入
テールキャップを外し、LEDの光ヘッドに向かって電池のプラスを挿入します。 テー
ルキャップを交換して締めます。
バッテリインジケータ
オン/オフ/モードボタンは、バッテリーの状態に応じて3種類の色を点灯します:
• グリーン:良好なバッテリーレベル
• イエロー:中程度のバッテリーレベル
• 赤:バッテリー残量が少ない
スムースディマー
1. トーチの調光機能を使用するには、 オン/オフ/モードボタンを短く押すとライトが点灯します。
2. ボタンを押し続けると、暗くなったり明るくなります。
3. 最も明るい/暗い限界に達すると、ライトが2回点滅します。
4. オン/オフ/モードボタンを短く1回押して消灯させます。
明るさの記憶
以前の輝度レベルの設定は常に記憶され、トーチのライトが再びオンに戻ったときに再開します。
安全キーロック
オン/オフ/モードボタンロックは、保管中および移動中の偶発的な電力損失を防ぎます。 トーチはオフで
すが、 ボタンを5秒間押し続けるとロックされます。
警告
• 水やその他の液体に懐中電灯を完全に浸しないでください。
• 懐中電灯の脱色を避けるため。 太陽光、水、化学薬品、腐食性ガスなどに絶えず暴露しないでく
ださい。
• 光線を凝視したり、他の人の目に向けたりしないでください。
• いつもの清掃やメンテナンスを行うときは、必ず懐中電灯システムが電源から切り離されていること
を確認してください。
• 自分で装置を修理しようとしないでください。 資格のあるサービス施設に持ち込むか、Nightsearcher
Ltd.に返却してください。
• 懐中電灯のレンズから指紋を取り除くには カメラのレンズクリーナーと柔らかい布を使用し、レンズ
の表面を軽くこする。
Blocco tastiera di sicurezza
IIl blocco del pulsante On / Off / Mode impedisce la perdita di potenza accidentale
durante lo stoccaggio e il viaggio. Mentre la torcia elettrica è spenta; Tenere premuto
il tasto per 5 secondi per bloccare.
Per sbloccare la torcia elettrica; Tenere premuto il pulsante per 5 secondi..
Avvertimento
• Non immergere completamente la torcia in alcuna acqua o altri liquidi.
• Per evitare la decolonizzazione della torcia elettrica; Non esporlo costantemente
alla luce solare, all’acqua, ai prodotti chimici, ai gas corrosivi, ecc.
• Non ssi un fascio di luce né lo indichi agli occhi di altre persone.
• Assicurarsi sempre che il sistema della torcia elettrica sia scollegato dalle fonti di
alimentazione e spegnere quando si esegue qualsiasi pulizia o manutenzione]
ordinaria.
• Non cercare di riparare l’unità da soli. Portalo a un servizio di assistenza qualic
to o riprovato a Nightsearcher Ltd.
• Rimuovere le impronte digitali dalla lente della torcia; Utilizzare un detergente
per lenti fotograche e un panno morbido e stronare delicatamente sulla
supercie dell’obiettivo.

This manual suits for next models

1

Other NightSearcher Flashlight manuals

NightSearcher MAGNUM-3500 User manual

NightSearcher

NightSearcher MAGNUM-3500 User manual

NightSearcher HT-550 User manual

NightSearcher

NightSearcher HT-550 User manual

NightSearcher NAVIGATOR-620R User manual

NightSearcher

NightSearcher NAVIGATOR-620R User manual

NightSearcher ZOOM 500 User manual

NightSearcher

NightSearcher ZOOM 500 User manual

NightSearcher EXPLORER MINI User manual

NightSearcher

NightSearcher EXPLORER MINI User manual

NightSearcher HeadStar Pro User manual

NightSearcher

NightSearcher HeadStar Pro User manual

NightSearcher EXPLORER-PL User manual

NightSearcher

NightSearcher EXPLORER-PL User manual

NightSearcher NSEXPLORERX1 User manual

NightSearcher

NightSearcher NSEXPLORERX1 User manual

NightSearcher Star Buddy NSSTARBUDDY User manual

NightSearcher

NightSearcher Star Buddy NSSTARBUDDY User manual

NightSearcher NS3LED User manual

NightSearcher

NightSearcher NS3LED User manual

NightSearcher Mini Magnum User manual

NightSearcher

NightSearcher Mini Magnum User manual

NightSearcher TRIO-550 User manual

NightSearcher

NightSearcher TRIO-550 User manual

NightSearcher EXPLORER-XSR User manual

NightSearcher

NightSearcher EXPLORER-XSR User manual

NightSearcher NSZOOM480 User manual

NightSearcher

NightSearcher NSZOOM480 User manual

NightSearcher TRIO-550 User manual

NightSearcher

NightSearcher TRIO-550 User manual

NightSearcher HT2IN1LED User manual

NightSearcher

NightSearcher HT2IN1LED User manual

NightSearcher SAFATEX HT MINI User manual

NightSearcher

NightSearcher SAFATEX HT MINI User manual

NightSearcher ZOOM 580R User manual

NightSearcher

NightSearcher ZOOM 580R User manual

NightSearcher TRIO-550 User manual

NightSearcher

NightSearcher TRIO-550 User manual

NightSearcher iSpector 750 User manual

NightSearcher

NightSearcher iSpector 750 User manual

NightSearcher NSUV395 User manual

NightSearcher

NightSearcher NSUV395 User manual

NightSearcher ATEX PENLIGHT User manual

NightSearcher

NightSearcher ATEX PENLIGHT User manual

NightSearcher SAFATEX RA User manual

NightSearcher

NightSearcher SAFATEX RA User manual

NightSearcher EXPLORER XM-L User manual

NightSearcher

NightSearcher EXPLORER XM-L User manual

Popular Flashlight manuals by other brands

Groz LED 150 instruction manual

Groz

Groz LED 150 instruction manual

Knog BlinderARC 5.5 quick start guide

Knog

Knog BlinderARC 5.5 quick start guide

Alcochem Hygiene UV POWERLIGHT instruction manual

Alcochem Hygiene

Alcochem Hygiene UV POWERLIGHT instruction manual

TecLINE US-30 quick start guide

TecLINE

TecLINE US-30 quick start guide

Black & Decker Bright Bar user manual

Black & Decker

Black & Decker Bright Bar user manual

tekton 6119 Operator's manual

tekton

tekton 6119 Operator's manual

STAMOS MIG15 user manual

STAMOS

STAMOS MIG15 user manual

Umarex Walther GL2000r operating instructions

Umarex

Umarex Walther GL2000r operating instructions

Avacom AVACOM Ain user manual

Avacom

Avacom AVACOM Ain user manual

HIKOKI UB18DEL instruction manual

HIKOKI

HIKOKI UB18DEL instruction manual

Walther PL31r operating instructions

Walther

Walther PL31r operating instructions

Olympia RG580 CREE XM-L2 user guide

Olympia

Olympia RG580 CREE XM-L2 user guide

PARFORCE DGL8 Operating Instructions & Technical Details

PARFORCE

PARFORCE DGL8 Operating Instructions & Technical Details

Coleman WideBeam 5306 How to use and enjoy

Coleman

Coleman WideBeam 5306 How to use and enjoy

AEG 97141 FITTING INSTRUCTION

AEG

AEG 97141 FITTING INSTRUCTION

Cel-Tec AL500 COB user manual

Cel-Tec

Cel-Tec AL500 COB user manual

Varta PAUL THE BEAR quick start guide

Varta

Varta PAUL THE BEAR quick start guide

GreatLite EXPE51 Operating instructions and parts manual

GreatLite

GreatLite EXPE51 Operating instructions and parts manual

manuals.online logo
manuals.online logoBrands
  • About & Mission
  • Contact us
  • Privacy Policy
  • Terms and Conditions

Copyright 2025 Manuals.Online. All Rights Reserved.