NightSearcher NEXSUN-ST1200 User manual

User Manual
NightSearcher Limited:
Unit 4 Applied House
Fitzherbert Spur
Farlington
PORTSMOUTH
Hampshire, UK
PO6 1TT
www.nightsearcher.co.uk
Tel: (0)23 9238 9774.
All NightSearcher products have a 3-year standard warranty on all manufacturing defects
from the date of purchase. Extended Warranty: Customers have the option to extend
the warranty of the product to 5 years for manufacturing defects. Registration of the
product must be made within one month of purchase by sending us an email sales@
nightsearcher.co.uk. In the message please state in your own words that you would
like to register your NightSearcher product for the extended warranty.
To view NightSearcher’s warranty policy, please visit:
http://nightsearcher.com/en/warranty.html or scan the QR code.
Guarantee Terms
Safe disposal of waste electrical products:
If at any time, you need to dispose of this product or parts of this product: please note
that waste electrical products, should not be disposed of with ordinary household waste.
Recycle where facilities exist. Check with your local authority for recycling advice.
Alternatively, NightSearcher is happy to take receipt of this product at end-of-life
and will recycle it on your behalf.
If you would like to view this manual in any of the following languages:
Scan the QR code or visit our website:
https://nightsearcher.co.uk/en/category/products-d3a/solar-lights.html
NEXSUN-ST1200
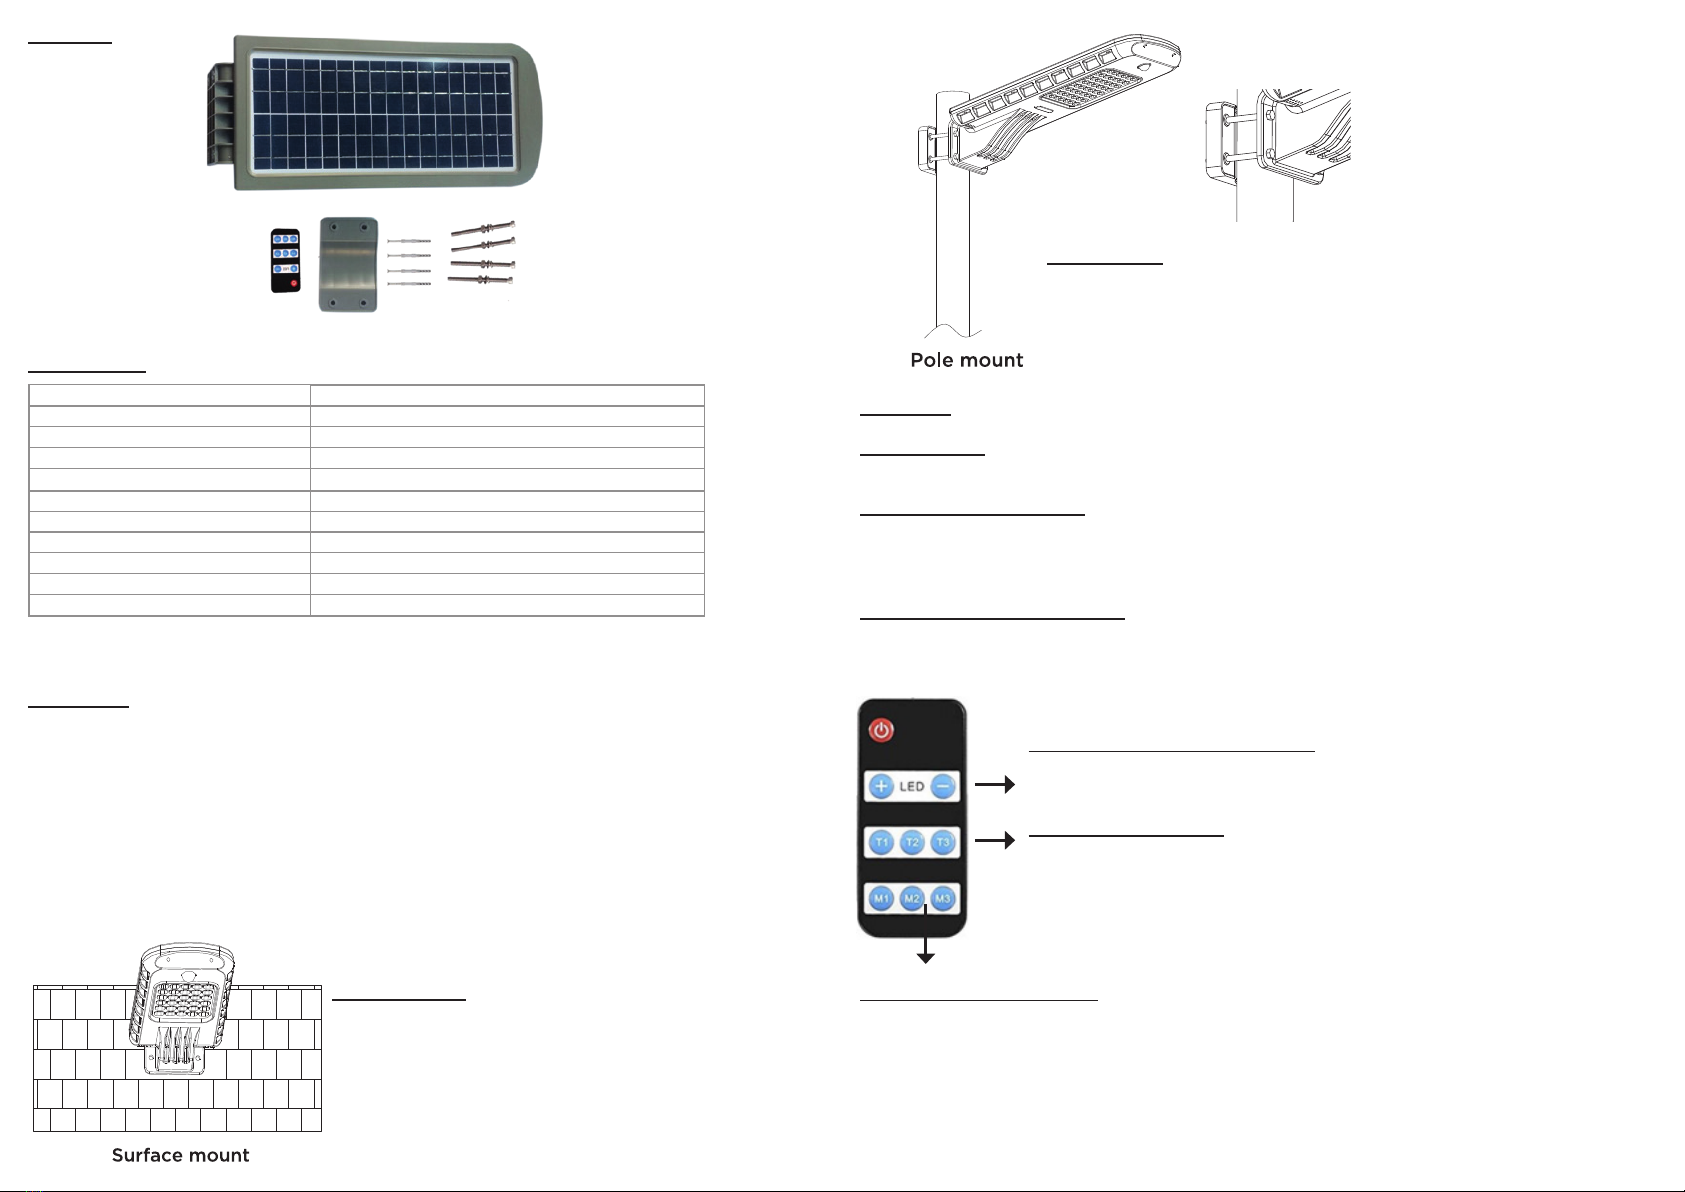
Contents:
- Lamp
- Pole xings
- Wall xings
- Remote controller
- User Manual
Installation:
- Install in a location where the solar panel will receive direct sunlight and not blocked or covered by
buildings, trees or other structures that would prevent the solar panel from charging sufciently.
- Choose installation methods as desired (installing to a wall or pole as required).
- Recommendation Installation height: 3.5-4.5m. Pole diameter: 70-100mm
Distance between lamps: 10-15m.
- Activate the solar lamp to the light mode you require before continuing (see Operational
Instructions).
- Please ensure installation kits are tightened rmly.
Install to a wall:
1. Mark out the required holes needed to mount the lamp.
2. Drill suitable holes and insert wall plugs either supplied of
suitable substitutes.
3. Position the lamp and secure into place with supplied or
other suitable xing’s.
Charging time: 6 hours
Install to pole:
User can install to pole by provided
bracket and screws contained within
the kit provided.
Solar panel 12W 16V, Polycrystalline
Battery (in lamp) 4AH, 11.1V Rechargeable lithium battery
Lumen 1200lm
PIR distance / Detection range 6-12m/ 140°
Charging time 6 hours
Working temperature -20°~+60°
IP Rating IP65
Pole diameter 70-100mm
Dimensions 515x220x95mm
Weight 2.12kg
Stock code NEXSUN-ST1200
Specication:
Operation:
Dusk to Dawn:
This solar light will automatically come on at dusk, and turn off during the daytime.
Movement activated (PIR):
The LED light will operate when motion is detected near the light.
Please note that the lamp needs to be turned on using the provided remote control.
PIR distance: 6-12m/140°
Brightness Adjustment: + / - LED
Press the + or - button to increase or decrease the brightness of the lamp.
Please note this button is effective only when lamp is under mode M1 or M2.
T1, T2, T3: Timer mode
T1=15s: Set working time of high brightness under M1 or M2 to 15 seconds
T2=30s: Set working time of high brightness under M1 or M2 to 30 seconds
T3=60s: Set working time of high brightness under M1 or M2 to 60 seconds
Please note this button is effective only when lamp is under mode M1 or M2.
M1, M2, M3: working modes
M1: If no motion is detected, the light will power at dimmed level for up to 8 hours in total. If motion
is detected, the light will switch to full power for you selected time (Exact timing length of high
brightness will depend on which time mode you have chosen: T1, T2, or T3).
M2: If no motion is detected the light will remain off. Once motion is detected: light will illuminate to
full brightness for you selected time (Exact timing length of high brightness will depend on
which time mode you have chosen: T1, T2, or T3).
M3: Light is powered in low mode from dusk, until battery is depleted of dawn.
How to use the remote control:
Press Red power button: To turn the lamp on/off the additional buttons control and change
the light level and timer modes.
Other NightSearcher Lighting Equipment manuals

NightSearcher
NightSearcher GALAXY-PRO 6K User manual

NightSearcher
NightSearcher Sequential Pulsar Pro User manual

NightSearcher
NightSearcher Pulsar Max Fast Deployment User manual

NightSearcher
NightSearcher I-SPECTOR UV User manual

NightSearcher
NightSearcher LunarStar 40K User manual

NightSearcher
NightSearcher EX-125 User manual

NightSearcher
NightSearcher Sports Star User manual

NightSearcher
NightSearcher Kanga Star 10K User manual

NightSearcher
NightSearcher WORKBRITE PRO 2500 User manual

NightSearcher
NightSearcher NS750 LED LITE User manual


