NightSearcher PULSAR-PRO User manual

PULSAR-PRO
; User manual
Mode operation - Product information - Warning
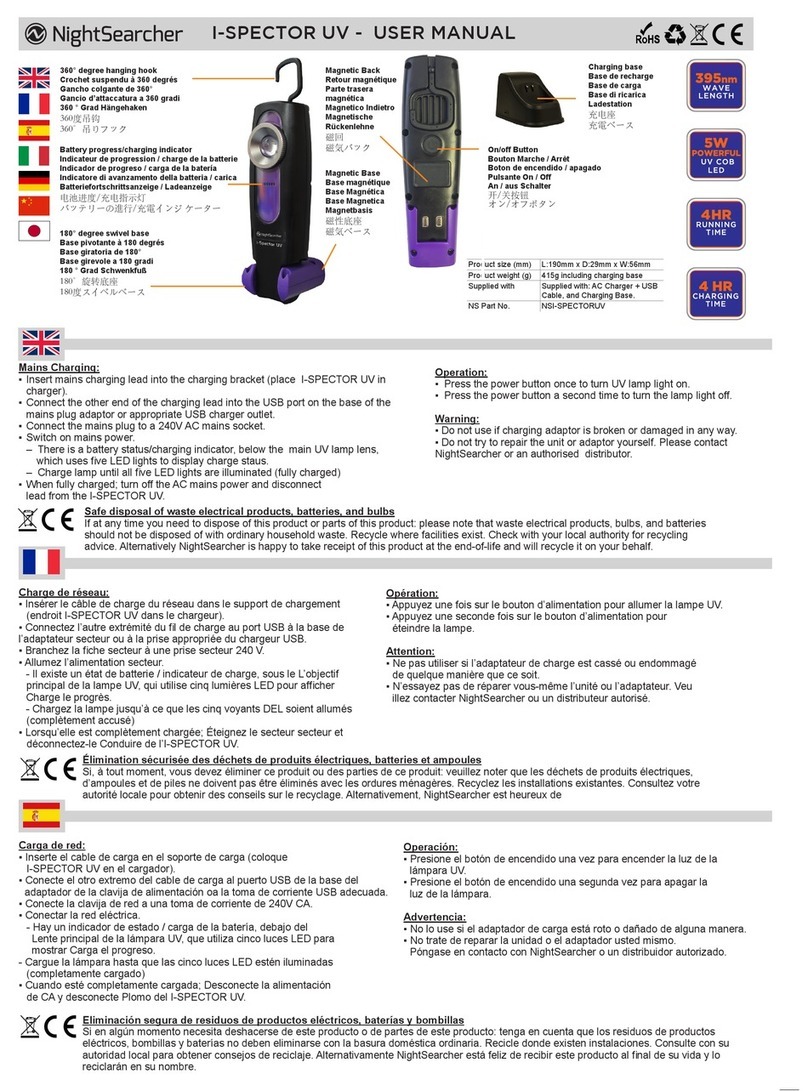
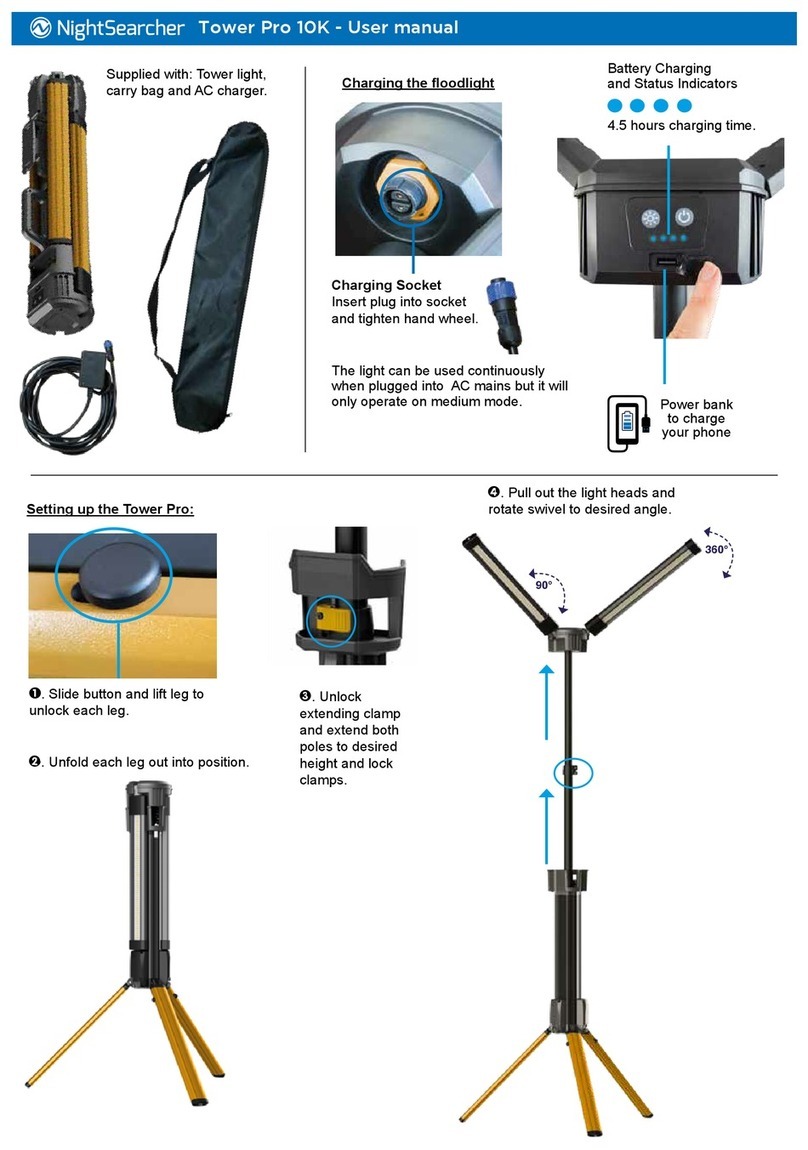
Operation
Press the switch, located near the front white LED, once. Press again to change and cycle through the 9 modes.
To turn off the warning light without cycling through the 9 light pattern, press and hold the ON/OFF button for 2 seconds. Two LEDs will flash five
times and then turn off. When ready to operate again, press the ON/OFF button once and it will return to the last flash pattern that was selected
before turning off. To switch on the six white LEDs press the switch twice in rapid succession. To switch off the six white LEDs press the switch
twice in rapid succession again
Battery charging
The Pulsar may be charged using either a 12V car charger or 100-240V wall charger.
Plug the USB PLUG into the appropriate 12V or 100-240V CHARGING ADAPTER, depending on your application. Plug the male end of the USE CABLE
into the female port of the MAGNETIC CONNECTOR HUB. Connect the MAGNETIC CONNECTOR HUB to the PULSAR, aligning the (+) and (-) terminal
symbols on each. The MAGNET in the center will keep the two items connected.
Plug the 12V or 100-240V CHARGING ADAPTER into either a 12V power receptacle or 100-240V wall outlet.
Green LED = charge in process // Red LED = fully charged OR the Pulsar and Hub are misaligned and need to be adjusted
Warning
Do not expose the battery to excessive heat, to do so may cause an explosion. Do not use metal objects to short circuit the positive and negative
end of the battery. Do not dispose of the battery in the domestic waste, please use the correct method of disposal. Do not solder directly on to the
battery. Do not let the battery become wet or immerse the battery in water. Keep the battery away from children. The operating temperature range
of the warning light’s battery: Charging: 0°C to 30°C / Discharging: -40°C to 60°C
General
There are no user serviceable parts in this unit. In case of any problems or questions please contact NightSearcher Limited or an
authorised distributor. Do not shine the warning light directly into people’s eyes, as it may damage their eyesight.
Utilisation - Information produit - Avertissement
Opération
Appuyez sur l'interrupteur, situé à proximité de la LED blanche avant, une fois. Appuyez de nouveau pour changer et faire défiler les 9 modes. Pour éteindre la lumière
d'avertissement sans piste cyclable du 9 motif lumineux, appuyez et maintenez le bouton ON / OFF pendant 2 secondes. Deux LED clignotent cinq fois et puis éteignez.
Lorsque vous êtes prêt à faire fonctionner à nouveau, appuyez sur le bouton ON / OFF une fois et il retournera au dernier motif flash qui a été sélectionné avant
d'éteindre. Pour allumer les trois LED blanches appuyez sur la touche deux fois de suite. Pour éteindre les trois LED blanches appuyez sur l'interrupteur deux fois de
suite à nouveau
Charge de la batterie
Le Pulsar peut être rechargé à l'aide soit d'un chargeur allume-cigare 12V ou chargeur mural 100-240. Branchez la prise USB dans le 12V ou 100-240V adaptateur
approprié CHARGER, en fonction de votre application. Branchez l'extrémité mâle du câble USE. Dans le port femelle du moyeu MAGNETIQUE Branchez le connecteur
CONNECTEUR MAGNETIQUE HUB à Pulsar, en alignant le (+) et (-) borne symboles sur chacun. Le MAGNET dans le centre gardera les deux éléments connectés.
Brancher le 12V ou 100-240 adaptateur de charge soit dans un réceptacle d'alimentation de 12 V ou 100-240 prise murale.
LED verte = Charge en cours // LED rouge = complètement chargée ou le Pulsar et Hub sont mal alignées et doivent être ajustés
Avertissement
Ne pas exposer la batterie à une chaleur excessive, de le faire peut provoquer une explosion. Ne pas utiliser d'objets métalliques pour court-circuiter le positif et négatif
fin de la batterie. Ne jetez pas la batterie dans les ordures ménagères, s'il vous plaît utiliser la bonne méthode d'élimination. Ne pas souder directement sur la
la batterie. Ne laissez pas la batterie mouiller ou plonger la batterie dans l'eau. Gardez la batterie hors de portée des enfants. La plage de température de
fonctionnement de la batterie du voyant: Charge: 0 ° C à 30 ° C / décharge: -40 ° C à 60 ° C
Général
Il n'y a aucune pièce dans cet appareil. En cas de problème ou des questions s'il vous plaît communiquer avec NIGHTSEARCHER Limited ou un
distributeur agréé. Ne pas briller la lumière d'avertissement directement dans les yeux des gens, car cela pourrait nuire à leur vue.
Uso - Informacion sobre el producto - Advertencia
www.nightsearcher.co.uk
Running time per lighting mode
Rotate
9h
Steady on high
5h
Quad flash
9h
Steady on low
35h
Single blink
60h
2 LED light
28h
Alternating blink
9h
4 LED light
18h
SOS Rescue
14h
White flood
8h
Battery
Li-ion 700mAh 3.7V
Product Dimensions
Dia 110 x H 34 mm
Product Weight
200g including battery
NS Part No
NSPULSAPRO-(R/Y/B/G)
Supplied with
Charging base, USB lead, car charger
ON/OFF
switch
Charging
connectors
Operación
Pulse el interruptor, situado cerca de la parte frontal LED blanco, una vez. Pulse de nuevo para cambiar y cambiar entre los 9 modos.
Para apagar la luz de advertencia sin recorrer el 9 patrón de luz, pulse y mantenga pulsado el botón ON / OFF durante 2 segundos. Dos LEDs parpadean cinco
veces y luego se apaga. Cuando esté listo para funcionar de nuevo, pulse el botón ON / OFF una vez y volverá a la última patrón de parpadeo que se seleccionó
antes de apagar. Para activar los tres LEDs blancos pulse el interruptor dos veces en rápida sucesión. Para apagar los tres LEDs blancos pulse el interruptor
dos veces en rápida sucesión de nuevo.
Carga de la batería
El Pulsar se puede cargar utilizando un cargador de coche de 12 V o cargador de pared 100-240V. Enchufe el conector USB en el 12V apropiado o 100-240V adaptador
de carga, dependiendo de su aplicación. Enchufe el extremo macho del cable utilizan. En el puerto hembra del casquillo de conectador magnéticos conectan el HUB
conector magnético de la PULSAR, alineando el (+) y (-) de la símbolos en cada uno. El imán en el centro mantendrán los dos elementos conectados. Enchufe el 12V o
100-240V adaptador de carga ya sea en un receptáculo de alimentación de 12 V o 100-240V toma de corriente. El LED verde = carga en proceso // LED rojo =
completamente cargada o el Pulsar y Hub están mal alineados y necesitan ser ajustado.
Advertencia
No exponga la batería a un calor excesivo, no hacerlo puede causar una explosión. No utilice objetos de metal a un cortocircuito en la positiva y negativa extremo de la
batería. No se deshaga de la batería en la basura doméstica, por favor utilice el método de eliminación correcto. No soldar directamente a la de la batería. No deje que la
batería se moje o sumerja la batería en agua. Mantenga la batería lejos de los niños. El rango de temperatura de funcionamiento de la batería de la luz de advertencia:
Carga: 0 ° C a 30 ° C / descarga: -40 ° C a 60 ° C
Général
No hay piezas reparables por el usuario en esta unidad. En caso de cualquier problema o pregunta, por favor póngase en contacto con Nightsearcher Limited o un
distribuidor autorizado. no brilla la luz de advertencia directamente a los ojos de las personas, ya que puede dañar su vista.

Uso - Informazioni batteria - Attenzione
Operazione
Premere l'interruttore, situato vicino al LED bianco anteriore, una volta. Premere nuovamente per modificare e scorrere le 9 modalità.
Per spegnere la spia, senza bicicletta attraverso la configurazione della luce 9, tenere premuto il pulsante ON / OFF per 2 secondi. Due LED lampeggiano cinque
volte e poi si spegne. Quando si è pronti ad operare di nuovo, premere il pulsante ON / OFF una volta e tornerà l'ultimo modello di flash che è stato selezionato
prima di spegnere. Per accendere tre LED bianchi premere l'interruttore due volte in rapida successione. Per spegnere i tre LED bianchi premere l'interruttore
due volte in rapida successione nuovamente.
La carica della batteria
La Pulsar può essere addebitata utilizzando un caricabatteria per auto 12V o 100-240V caricatore da muro. Inserire la spina USB nella 12V appropriato o 100-240V
adattatore di carico, a seconda dell'applicazione in uso. Inserire l'estremità maschio del cavo USO terminale. - nella porta femmina del MOZZO CONNETTORE
MAGNETICO Collegare HUB connettore magnetico PULSAR, allineando il (+) e () simboli su ogni. Il magnete al centro manterranno i due elementi collegati.
Collegare il 12V o 100-240V adattatore di carico in una presa di alimentazione sia 12V o 100-240V presa a muro. LED verde = carica nel processo // LED rosso =
completamente carica o il Pulsar e Hub sono disallineati e hanno bisogno di essere regolato.
Avvertimento
Non esporre la batteria a calore eccessivo, si potrebbero causare esplosioni. Non utilizzare oggetti metallici per corto circuito positivo e negativo
fine della batteria. Non smaltire la batteria nei rifiuti domestici, si prega di utilizzare il metodo corretto di smaltimento. Non saldare direttamente al
la batteria. Non lasciare che la batteria si bagni o immergere la batteria in acqua. Tenere la batteria lontano dalla portata dei bambini. Il campo di temperatura di.
Esercizio
Della batteria del spia: carica: 0 ° C a 30 ° C / scarica: -40 ° C a 60 ° C. Generale Non ci sono parti riparabili dall'utente in questa unità. In caso di problemi o domande si
prega di contattare NightSearcher limitata o un distributore autorizzato. Non brillare la spia direttamente negli occhi della gente, in quanto potrebbe danneggiare
la loro vista.
Betrieb - Produktinformationen - Achtung
Betrieb
Drücken Sie den Schalter, der sich in der Nähe der vorderen weißen LED befindet. Drücken Sie erneut, um die 9 Modi zu ändern und zu durchlaufen.
Um die Warnleuchte auszuschalten, ohne durch das 9 Lichtmuster zu fahren, drücken und halten Sie die EIN / AUS-Taste für 2 Sekunden. Zwei LEDs blinken fünf
Mal und dann abschalten. Wenn Sie es wieder betätigen möchten, drücken Sie einmal die ON / OFF-Taste und kehren zum zuletzt gewählten Blitzmuster zurück
Vor dem Ausschalten. Um die drei weißen LEDs einzuschalten, drücke den Schalter zweimal kurz hintereinander. Um die drei weißen LEDs auszuschalten, drücken
Sie den Schalter Zweimal in rascher Folge wieder.
Batterieladung
Der Pulsar kann mit einem 12V Kfz-Ladegerät oder 100-240V Wandladegerät aufgeladen werden. Stecken Sie den USB-PLUG je nach Anwendung in das entsprechende
12V oder 100-240V CHARGING ADAPTER. Stecken Sie das männliche Ende des USE CABLE ein In den weiblichen Anschluss des MAGNETIC CONNECTOR HUB. Verbinden
Sie den MAGNETIC CONNECTOR HUB mit dem PULSAR und richten Sie den (+) und (-) - Anschluss aus Symbole auf jedem. Der MAGNET in der Mitte hält die beiden
Elemente verbunden. Stecken Sie die 12V oder 100-240V CHARGING ADAPTER entweder in eine 12V Steckdose oder 100-240V Steckdose. Grüne LED = Ladevorgang
// Rote LED = voll aufgeladen ODER Pulsar und Hub sind fehlausgerichtet und müssen angepasst werden
Warnung
Setzen Sie den Akku keiner übermäßigen Hitze aus, da dies zu Explosionen führen kann. Verwenden Sie keine Metallgegenstände, um den Positiven und Negativen
kurzzuschließen Ende der Batterie. Entsorgen Sie den Akku nicht im Hausmüll, bitte verwenden Sie die richtige Entsorgungsmethode. Nicht direkt anlöten
Batterie. Lassen Sie den Akku nicht nass werden oder tauchen Sie den Akku in Wasser ein. Halten Sie den Akku von Kindern fern. Der Betriebstemperaturbereich
Der Batterie der Warnlampe: Aufladung: 0 ° C bis 30 ° C / Entladung: -40 ° C bis 60 ° C
General
In diesem Gerät befinden sich keine vom Benutzer zu wartenden Teile. Bei Problemen oder Fragen wenden Sie sich bitte an NightSearcher Limited oder an
Autorisierten Händler. Glänzen Sie die Warnlampe nicht direkt in die Augen der Menschen, da sie ihr Sehvermögen beschädigen können.
- - - -
GUARANTEE TERMS
NightSearcher products have been carefully tested and inspected before shipment and are guaranteed to be free from defective materials and workmanship for a period
of 12 months from the date of purchase, provided that the enclosed instructions have been followed. Should you experience problems with your NightSearcher product,
please return the item, complete with any chargers, to your place of purchase or contact NightSearcher Ltd direct. Your NightSearcher guarantee does not apply to
normal wear and tear, nor does it cover any damage caused by misuse, careless or unsafe handling, alterations, accidents or repairs attempted or made by any
personnel without prior approval from NightSearcher Ltd. Your NightSearcher guarantee is not effective unless you can provide a dated proof of purchase. Please note
that this guarantee does not affect your statutory rights. If at any time, you need to dispose of this product or parts of this product: Please note that waste electrical
products, batteries and bulbs should not be disposed of with household waste. Please recycle where facilities exist, check with your local authority for recycling advice.
NightSearcher Limited - Unit 4 Applied House - Fitzherbert Spur – Farlington – PORTSMOUTH – Hampshire - PO6 1TT – UK
www.nightsearcher.co.uk
操作
按下位于前白色LED附近的开关一次。再次按下可以更改和循环9种模式。
要关闭警告灯,不要循环通过9灯图案,请按住ON / OFF按钮2秒钟。两个LED
将闪烁五个次,然后关闭。准备再次操作时,按ON / OFF按钮一次,
并返回到所选的最后一个闪光灯模式 关闭前。要打开三个白色LED,
请快速按下开关两次。要关闭三个白色LED,请按开关
再次快速连续两次
电池充电
脉冲星可能使用12V车载充电器或100-240V墙壁充电器充电。根据您的应用,
将USB PLUG插入适当的12V或100-240V充电适配器。插上使用电缆的公端
进入MAGNETIC CONNECTOR HUB的母口。将MAGNETIC CONNECTOR
HUB连接到PULSAR,对齐(+)和( - )端子 每个符号。
中心的MAGNET将保持两个连接。
将12V或100-240V充电适配器插入12V电源插座或100-240V墙壁插座。
绿色LED =正在进行充电//红色LED =充满电或脉冲和集线器未对准,需要调整
警告
请勿将电池暴露在过热的地方,否则可能会导致爆炸。
不要使用金属物体短路正极和负极
电池末端。不要将电池丢在生活垃圾中,请使用正确的处理方法。
不要直接焊接到
电池。请勿让电池变湿或将电池浸入水中。保持电池远离儿童。工作温度范围
警告灯的电池:充电:0°C至30°C /放电:-40°C至60°C
一般
本机没有用户可维修的部件。如有任何问题或疑问,请联系NightSearcher Limited或
授权经销商。不要将警告灯直接照射到人眼中,否则可能会损害他们的视力。
操作
前面の白色LEDの近くにあるスイッチを1回押します。もう一度押すと、9つのモードを切り替え
て変更できます。
9ライトパターンをサイクリングせずに警告灯をオフにするには、ON / OFFボタンを2秒間押
し続けます。 2つのLEDが5回点滅します回してから消灯してください。もう一度操作する準備
ができたら、ON / OFFボタンを1回押すと、最後に選択されたフラッシュパターンに戻ります
電源を切る前に。 3つの白色LEDをスイッチオンするには、スイッチを2回押し続けます。
3つの白色LEDをオフにするには、スイッチを押します
もう一度急速に2回
バッテリーの充電
Pulsarは、12V車用充電器または100-240V壁用充電器のいずれかを使用して充電できます。
アプリケーションに応じて、USB PLUGを適切な12Vまたは100-240V充電アダプタに接続します。
USE CABLEのオス側を差し込みますMAGNETIC CONNECTOR HUBの雌ポートに接続します。
MAGNETIC CONNECTOR HUBをPULSARに接続し、(+)と( - )端子を合わせます
それぞれのシンボル。センターのMAGNETは2つのアイテムをつなぎ続けます。
12Vまたは100-240V充電アダプタを12V電源コンセントまたは100-240Vコンセントに接続します。
緑色のLED =処理中の充電//赤色のLED =完全に充電されているか、
PulsarとHubの位置がずれているため調整が必要です
警告
電池を過度の熱にさらさないでください。爆発の原因となります。
プラスとマイナスを短絡するために金属物を使用しないでください
バッテリーの端。バッテリを家庭廃棄物に廃棄しないでください。
適切な廃棄方法を使用してください。直接はんだ付けしないでください。
電池。バッテリーを濡らしたり、水に浸したりしないでください。
バッテリーは子供の手の届かないところに保管してください。動作温度範囲
充電灯:0°C~30°C /放電:-40°C~60°C
一般
このユニットには、ユーザーが修理できる部品はありません。問題が発生した場合は
NightSearcher Limitedまたは
認可された代理店。人々の目に警告灯を直接照射しないでください。
視力が損なわれる可能性があります。
Table of contents
Other NightSearcher Lighting Equipment manuals
NightSearcher
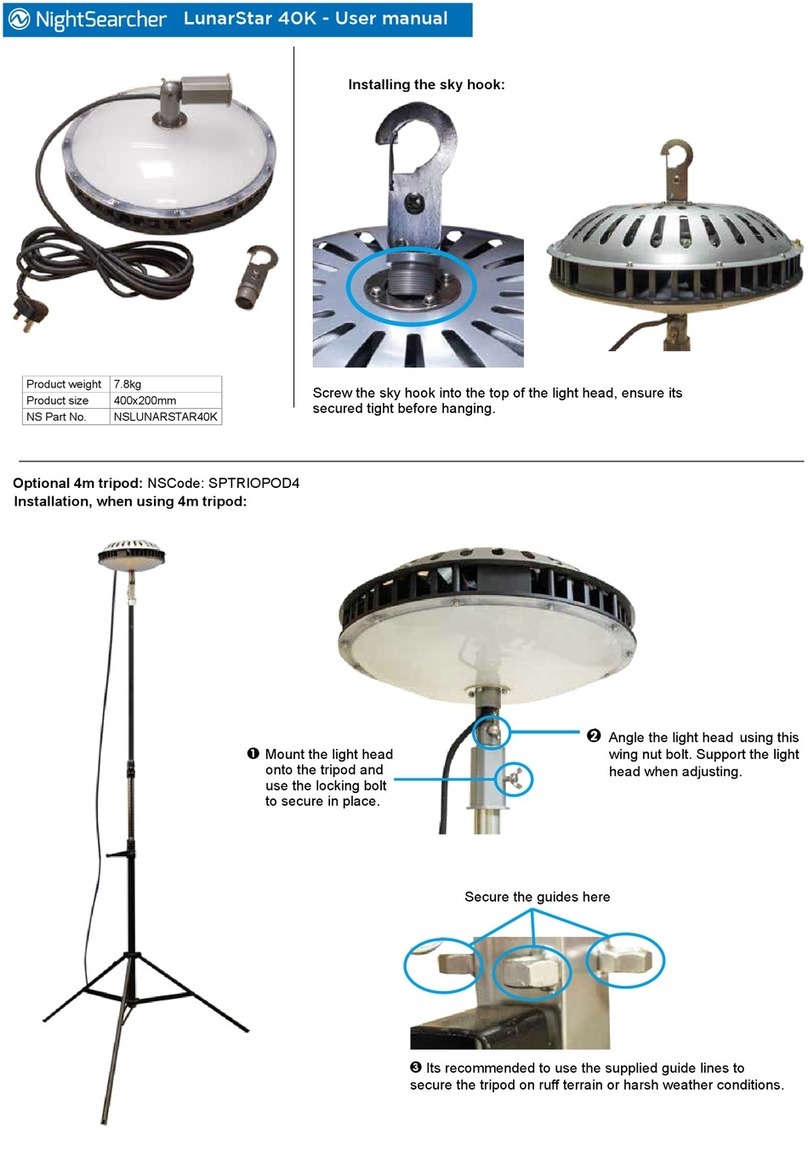
NightSearcher LunarStar 40K User manual

NightSearcher
NightSearcher EX-125 User manual

NightSearcher
NightSearcher NEXSUN-ST1200 User manual
NightSearcher
NightSearcher NS750 LED LITE User manual

NightSearcher
NightSearcher WORKBRITE PRO 2500 User manual
NightSearcher
NightSearcher Sequential Pulsar Pro User manual

NightSearcher
NightSearcher Kanga Star 10K User manual

NightSearcher
NightSearcher Sports Star User manual

NightSearcher
NightSearcher GALAXY-PRO 6K User manual
NightSearcher
NightSearcher Pulsar Max Fast Deployment User manual
