manuals.online logo
Brands
  1. Home
  2. •
  3. Brands
  4. •
  5. NightSearcher
  6. •
  7. Lighting Equipment
  8. •
  9. NightSearcher Pulsar Max Fast Deployment User manual

NightSearcher Pulsar Max Fast Deployment User manual

Pulsar Max Fast Deployment - User Manual
Product size (mm) 380x370x65mm NS
Part No
NSPULSARMAX8-FD/-EU
Product weight 199g
Attention:
Ne jetez pas la batterie avec les ordures ménagères, veuillez utiliser la méthode
d’élimination appropriée. Ne modiez ni ne modiez la batterie de quelque façon
que ce soit. N’exposez pas la batterie à l’humidité ou à des liquides d’aucune sorte.
Les pulsars ne sont pas des jouets et doivent être tenus à l’écart des enfants. Ne
dirigez pas le voyant directement dans les yeux des personnes, car cela pourrait
endommager leur vue. La plage de température de fonctionnement de la batterie:
Charge: 0 ° C à 30 ° C / Décharge: -40 ° C à 60 ° C. N’exposez pas la batterie à
des températures en dehors de cette plage.
Général:
Cet appareil ne contient aucune pièce réparable par l’utilisateur. En cas de
problème ou de question, veuillez contacter NightSearcher Limited ou un
distributeur agréé.
Setup:
- Retirez le pulsar du boîtier de charge et placez-le au sol, un voyant vert apparaîtra
et le pulsar commencera à clignoter.
- Appuyez sur le bouton 4pour basculer entre les 6 modes clignotants.
- Appuyez sur le bouton 5pour basculer entre les modes de couleur - bleu / ambre
/ rouge.
- Posez le pulsar restant sur le sol et il se synchronisera automatiquement avec le
mode clignotant du pulsar précédent.
- Les boutons de n’importe quel pulsar peuvent être enfoncés pour changer les
modes clignotants 4/ couleur 5.
- Lorsque les pulsars sont congurés sur le mode de clignotement et de couleur
choisi, replacez tous les pulsars dans les poches de la mallette de transport, en
vous assurant l’aimant est face vers le bas et le groupe de 4 LED est face vers le
haut. Les Pulsar sont maintenus à l’intérieur de la poche par l’aimant. Maintenant,
ils sont prêts à être facturés.
Remarque: Les lumières pulsar ne s’éteindront pas avant d’être replacées dans le
boîtier.
Batterie en charge:
- Branchez le câble du chargeur dans la prise 3 et connectez le chargeur à une
alimentation (AC ou DC), selon le chargeur utilisé.
- Le voyant d’état de charge 2 sur le boîtier s’allume: voyant rouge = chargement
en cours. Voyant vert = complètement chargé.
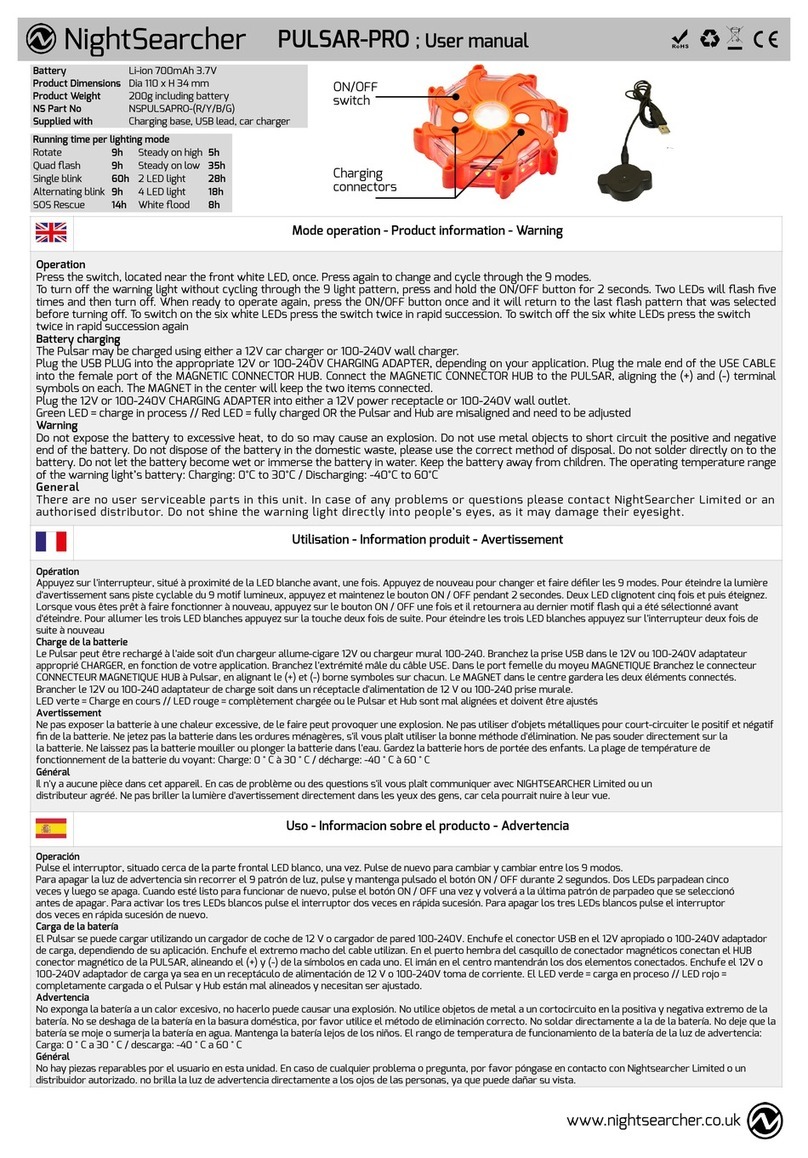
Warning:
Do not dispose of the battery in the domestic waste, please use the correct method
of disposal. Do not modify or tamper with the battery in anyway. Do not expose
the battery to moisture or liquid of any kind. Pulsars are not toys and must be kept
away from children. Do not shine the warning light directly into people’s eyes, as
it may damage their eyesight. The operating temperature range of the battery:
Charging: 0°C to 30°C /Discharging: -40°C to 60°C. Do not expose the battery to
temperatures outside this range.
General:
There are no user serviceable parts in this unit. In case of any problems or
questions please contact NightSearcher Limited or an authorised distributor.
Preparar:
- Retire el púlsar de la caja de carga y colóquelo en el suelo, aparecerá una luz
verde y el púlsar comenzará a parpadear.
- Presione el botón 4para cambiar entre los 6 modos de parpadeo.
- Presione el botón 5 para cambiar entre los modos de color: azul / ámbar / rojo.
- Coloque el púlsar restante en el suelo y se sincronizarán automáticamente con el
modo intermitente del púlsar anterior.
- Los botones en cualquiera de los púlsar se pueden presionar para cambiar los
modos parpadeantes 4/ color 5.
- Cuando tenga los púlsares congurados en el modo de parpadeo y color elegido,
vuelva a colocar todos los púlsares en los bolsillos de la funda de transporte,
asegurándose de que el imán está boca abajo y el grupo de 4 LED está boca
arriba. El imán mantiene el Pulsar dentro del bolsillo. Ahora están listos para ser
cargados.
Nota: Las luces del púlsar no se apagarán hasta que se vuelvan a colocar en la caja.
Bateria cargando:
- Conecte el cable del cargador a la toma 3 y conecte el cargador a una fuente de
alimentación (CA o CC), según el cargador que se utilice.
- La luz de estado de carga 2 en la caja se iluminará: luz roja = carga en proceso.
Luz verde = completamente cargada.
- Cuando los púlsares están cargados, están listos para un despliegue rápido.
Advertencia:
No deseche la batería en la basura doméstica, utilice el método correcto de
eliminación. No modique ni altere la batería de ninguna manera. No exponga
la batería a la humedad o líquidos de ningún tipo. Los púlsares no son juguetes
y deben mantenerse fuera del alcance de los niños. No haga brillar la luz de
advertencia directamente en los ojos de las personas, ya que puede dañar su
vista. El rango de temperatura de funcionamiento de la batería: Carga: 0 ° C a 30 °
C / Descarga: -40 ° C a 60 ° C. No exponga la batería a temperaturas fuera de este
rango.
General:
No hay piezas reparables por el usuario en esta unidad. En caso de problemas
o preguntas, comuníquese con NightSearcher Limited o con un distribuidor
autorizado.
4Flashing mode switch
Interrupteur marche / arrêt
Interruptor encendido / apagado
Interruttore on / off
Ein / Aus Schalter
开/关
オン/オフスイッチ
4
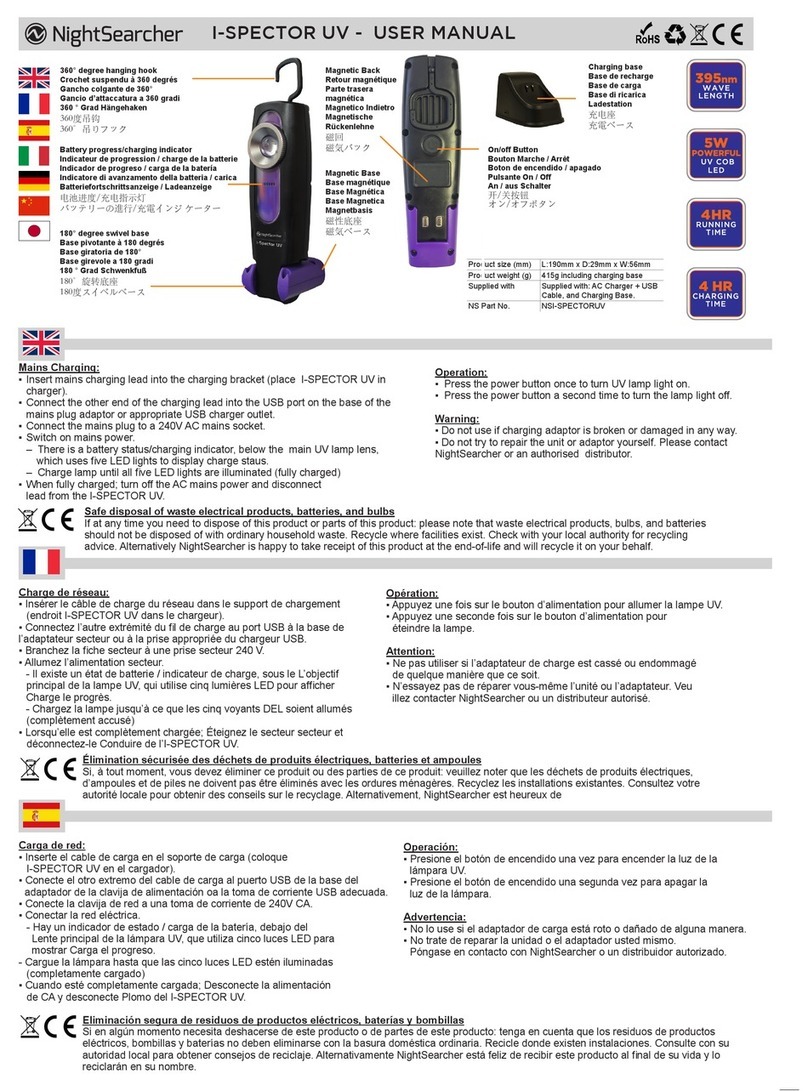
Safe disposal of waste electrical products, batteries and bulbs:
If at any time, you need to dispose of this product or parts of this product:
please note that waste electrical products, bulbs and batteries should not
be disposed of with ordinary household waste. Recycle where facilities
exist. Check with your local authority for recycling advice. Alternatively,
NightSearcher is happy to take receipt of this product at end-of-life and
will recycle it on your behalf.
Élimination sûre des déchets de produits électriques et des batteries:
Si à tout moment, vous devez vous débarrasser de ce produit ou de parties
de ce produit: veuillez noter que les batteries de produits électriques usagés
ne doivent pas être jetées avec les ordures ménagères ordinaires. Recycler
là où les installations existent. Vériez auprès de votre autorité locale pour
des conseils de recyclage. Alternativement, NightSearcher est heureux de
recevoir ce produit en n de vie et le recyclera en votre nom.
Eliminación segura de residuos de productos eléctricos y baterías
Si en algún momento necesita deshacerse de este producto o partes de
este producto: tenga en cuenta que las baterías de productos eléctricos de
desecho no deben desecharse con los residuos domésticos comunes. Reciclar
donde existen las instalaciones. Consulte con su autoridad local para obtener
consejos de reciclaje. Alternativamente, NightSearcher se complace en recibir
este producto al nal de su vida útil y lo reciclará en su nombre.
3
1Carry Case
Mallette de transport
Bolsa de transporte
Custodia per il trasporto
Tragetasche
开/关
オン/オフスイッチ
1
2Charge status light
Connecteur du chargeur
Luz del conector del cargador
Luce del connettore del caricabatterie
Ladeanschlussleuchte
キャリーケース
手提箱
2
3Recharge via 100-240V or 24V/12V charger
Recharge via un chargeur 100-240V ou 24V / 12V
Recargue a través de un cargador de 100-240V o 24V / 12V
Ricarica tramite caricabatterie 100-240 V o 24 V / 12V
Auaden über 100-240V oder 24V / 12V Ladegerät
通过100-240V或24V / 12V充电器充电
100-240Vまたは24V / 12Vの充電器で充電
5
5Colour mode switch
Interrupteur marche / arrêt
Interruptor encendido / apagado
Interruttore on / off
Ein / Aus Schalter
开/关
オン/オフスイッチ
Setup:
- Remove pulsar from charging case and place on ground, a green light will appear
and the pulsar will start ashing.
- Press the button 4 to change between the 6 ashing modes.
- Press the button 5to change between the colour modes - blue/amber/red.
- Lay the remaining pulsar on the ground and they will the automatically synchronise
with the ashing mode of the previous pulsar.
- The buttons on any of the pulsar can be pressed to change the ashing 4/colour
5modes.
- When you have the pulsars set up to the chosen ashing and colour mode,
place all Pulsars back into the pockets in the carry case, ensuring the
magnet is face down and the cluster of 4 LEDS is face up. The Pulsar are held
inside of the pocket by the magnet. Now they are ready to be charged.
Note: The pulsar lights will not turn off until they are replaced back into the case.
Battery Charging:
- Connect the charger lead into the socket 3and connect the charger into a power
supply (AC or DC), depending on the charger being used.
- The charging status light 2 on the case will illuminate : Red light = charging
in process. Green light = fully charged.
- When the pulsars are charged they are ready for fast deployment.
- Lorsque les pulsars sont chargés, ils sont prêts pour un déploiement rapide.
in process. Red light = fully charged.
- When the pulsars are charged they are ready for fast deployment.
设定:
-将脉冲星从充电盒中取出并放在地面上,绿灯会出现并且脉冲星开始闪烁。
-按下按钮4在6种闪烁模式之间切换。
-按下按钮5可以在颜色模式-蓝色/琥珀色/红色之间进行切换。
-将剩余的脉冲星放在地面上,它们将自动与前一个脉冲星的闪烁模式同步。
-可以按下任何脉冲星上的按钮以更改闪烁的4 /彩色5模式。
-将脉冲星设置为所选的闪烁和彩色模式时,请将所有脉冲星放回手提箱中的口袋中,确保
磁铁朝下,四个LED簇朝上。脉冲星被磁铁固定在口袋内。现在,他们可以收取费用了。
注意:在将脉冲星灯重新装回外壳之前,它们不会熄灭。
电池充电:
-根据所使用的充电器,将充电器导线连接到插座3中,并将充电器连接到电源(交流或直
流)上。
-外壳上的充电状态指示灯2会点亮:红灯=正在充电。 绿灯=充满电。
-当脉冲星充满电后,它们即可快速部署。
警告:
请勿将电池丢入生活垃圾中,请使用正确的处置方法。无论如何,请勿修改或篡改电池。
请勿使电池接触湿气或任何液体。脉冲星不是玩具,必须远离儿童。不要将警告灯直接
照射到人的眼睛中,否则可能会损害他们的视力。电池的工作温度范围:充电:0°C至
30°C /放电:-40°C至60°C。请勿将电池暴露在此范围之外的温度下。
一般:
本机中没有用户可维修的零件。如有任何问题,请联系NightSearcher Limited或授权分销
商。
セットアップ:
-充電ケースからパルサーを取り外して地面に置くと、緑色のライトが表示され、パルサー
が点滅し始めます。
-ボタン4を押して、6つの点滅モードを切り替えます。
-ボタン5を押して、カラーモードを切り替えます-青/ a /赤。
-残りのパルサーを地面に置くと、前のパルサーの点滅モードと自動的に同期します。
-パルサーのいずれかのボタンを押すと、点滅する4/カラー5モードを変更できます。
-パルサーを選択した点滅モードとカラーモ ードに設定したら、すべてのパルサーをキャリ
ーケースのポケットに戻し、
磁石は下向きで、4つのLEDのクラスターは上向きです。パルサーは、磁石によってポケッ
トの内側に保持されます。これで、充電する準備が整いました。
注:パルサーライトは、ケースに戻されるまで消灯しません。
バッテリーの充電:
-充電器のリード線をソケット3に接続し、充電器を使用する充電器に応じて電源(ACまたはDC)
に接続します。
-ケースの充電ステータスライト2が点灯します。赤色のライト=充電中です。 緑色のライト=完全
に充電されています。
-パルサーが充電されると、パルサーは高速展開の準備が整います。
警告:
バッテリーを家庭廃棄物として廃棄しないでください。正しい廃棄方法を使用してくだ
さい。とにかくバッテリーを改造したり、改ざんしたりしないでください。バッテリー
を湿気や液体にさらさないでください。パルサーはおもちゃではなく、子供から遠ざけ
なければなりません。警告灯を人の目に直接当てないでください。視力を損なう可能
性があります。バッテリーの動作温度範囲:充電:0°Cから30°C /放電:-40°Cから
60°C。この範囲外の温度にバッテリーをさらさないでください。
全般:
このユニットにはユーザーが修理できる部品はありません。問題や質問がある場合
は、NightSearcher Limitedまたは認定代理店にお問い合わせください。
Installieren:
- Nehmen Sie den Pulsar aus dem Ladekoffer und stellen Sie ihn auf den Boden.
Es erscheint ein grünes Licht und der Pulsar beginnt zu blinken.
- Drücken Sie die Taste 4, um zwischen den 6 Blinkmodi zu wechseln.
- Drücken Sie die Taste 5, um zwischen den Farbmodi Blau / Bernstein / Rot zu
wechseln.
- Legen Sie den verbleibenden Pulsar auf den Boden und dieser synchronisiert sich
automatisch mit dem Blinkmodus des vorherigen Pulsars.
- Die Tasten eines beliebigen Pulsars können gedrückt werden, um die blinkenden
4/ color 5-Modi zu ändern.
- Wenn Sie die Pulsare auf den gewählten Blink- und Farbmodus eingestellt haben,
stecken Sie alle Pulsare zurück in die Taschen in der Tragetasche, und achten
Sie darauf, dass dieDer Magnet ist verdeckt und die Gruppe von 4 LEDs zeigt
nach oben. Der Pulsar wird vom Magneten in der Tasche gehalten. Jetzt können
sie aufgeladen werden.
Hinweis: Die Pulsarlichter erlöschen erst, wenn sie wieder in das Gehäuse
eingesetzt werden.
Batterieladung:
- Verbinden Sie das Ladekabel mit der Buchse 3 und verbinden Sie das Ladegerät
mit einer Stromversorgung (Wechselstrom oder Gleichstrom), je nachdem,
welches Ladegerät verwendet wird.
- Die Ladestatusanzeige 2 am Gehäuse leuchtet auf: Rote Anzeige = Ladevorgang
läuft. Grünes Licht = voll aufgeladen.
- Wenn die Pulsare aufgeladen sind, können sie schnell eingesetzt werden.
Warnung:
Entsorgen Sie den Akku nicht über den Hausmüll, sondern entsorgen Sie ihn
ordnungsgemäß. Ändern oder manipulieren Sie den Akku auf keinen Fall. Setzen
Sie den Akku keiner Feuchtigkeit oder Flüssigkeit aus. Pulsare sind kein Spielzeug
und dürfen nicht in die Hände von Kindern gelangen. Richten Sie das Warnlicht
nicht direkt auf die Augen von Personen, da dies deren Sehkraft beeinträchtigen
kann. Der Betriebstemperaturbereich des Akkus: Laden: 0 ° C bis 30 ° C /
Entladen: -40 ° C bis 60 ° C. Setzen Sie den Akku keinen Temperaturen außerhalb
dieses Bereichs aus.
Allgemeines:
Dieses Gerät enthält keine vom Benutzer zu wartenden Teile. Bei Problemen oder
Fragen wenden Sie sich bitte an NightSearcher Limited oder einen autorisierten
Händler.
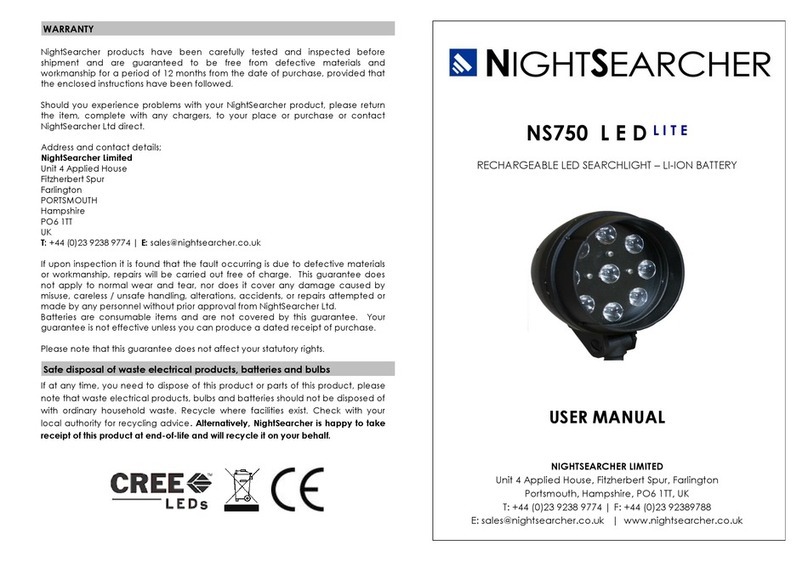
All NightSearcher products have a 3-year standard warranty on all manufacturing defects from the date of purchase. Extended Warranty: From 1st September 2018,
customers have the option to extend the warranty of the product to 5 years for manufacturing defects. Registration of the product must be made within one month of
purchase by sending us an email sales@nightsearcher.co.uk. In the message please state in your own words that you would like to register your NightSearcher
product for the extended warranty. To view NightSearcher’s warranty policy, please visit: http://nightsearcher.com/en/warranty.html or scan the QR code.
NightSearcher Limited - Unit 4 Applied House - Fitzherbert Spur- Farlington - PORTSMOUTH - Hampshire - PO6 1TT - UK
GUARANTEE TERMS
Smaltimento sicuro di riuti di prodotti elettrici e batterie
Se in qualsiasi momento è necessario smaltire questo prodotto o parti
di questo prodotto: si prega di notare che le batterie dei riuti prodotti
elettrici non devono essere smaltite con i normali riuti domestici.
Ricicla dove esistono strutture. Rivolgersi alle autorità locali per i
consigli sul riciclaggio. In alternativa, NightSearcher è felice di ricevere
questo prodotto alla ne del suo ciclo di vita e lo riciclerà per tuo conto.
Sichere Entsorgung von Elektroschrott und Batterien
Wenn Sie dieses Produkt oder Teile dieses Produkts zu irgendeinem
Zeitpunkt entsorgen müssen: Bitte beachten Sie, dass Batterien für
elektrische Altgeräte nicht mit dem normalen Hausmüll entsorgt werden
dürfen. Recyceln Sie, wo Einrichtungen vorhanden sind. Erkundigen Sie sich
bei Ihrer örtlichen Behörde nach Recycling-Empfehlungen. Alternativ nimmt
NightSearcher dieses Produkt am Ende der Lebensdauer entgegen und
recycelt es für Sie.
废弃电气产品,电池和灯泡的安全处置
如果在任何时候,您需要处理本产 品或本产品的部件:请注意,废电气产品,
灯泡和电池不应与普通家庭垃圾一起处理。循环使用设施。请向当地政府查询
回收建议。或者,NightSearcher很乐意在此期间收到此产品,并代您回收。
無駄な電気製品やバッテリーの安全な廃棄
本製品または本製品の一部を廃棄する必要がある場合は、いつでも廃棄して
ください。電気製品の廃棄バッテリは、一般家庭の廃棄物と一緒に廃棄しな
いでください。施設が存在する場所でリサイクル。リサイクルに関するアド
バイスについては、地方自治体にお問い合わせください。また、
NightSearcherは、この製品を寿命末期に受領して喜んでリサイクルします。
Avvertimento:
Non gettare la batteria nei riuti domestici, utilizzare il metodo di smaltimento
corretto. Non modicare o manomettere la batteria. Non esporre la batteria a
umidità o liquidi di alcun tipo. Le pulsar non sono giocattoli e devono essere
tenute alla larga dai bambini. Non accendere la luce di avvertimento direttamente
negli occhi delle persone, poiché potrebbe danneggiare la vista. La gamma di
temperature di funzionamento della batteria: ricarica: da 0 ° C a 30 ° C / scarica:
da -40 ° C a 60 ° C. Non esporre la batteria a temperature al di fuori di questo
intervallo.
Generale:
Non ci sono parti riparabili dall’utente in questa unità. In caso di problemi o
domande, contattare NightSearcher Limited o un distributore autorizzato.
Impostare:
- Rimuovere la pulsar dalla custodia di ricarica e posizionarla a terra, apparirà una
luce verde e la pulsar inizierà a lampeggiare.
- Premere il pulsante 4 per passare tra le 6 modalità di lampeggiamento.
- Premere il pulsante 5 per cambiare tra le modalità colore: blu / ambra / rosso.
- Appoggiare la pulsar rimanente a terra e si sincronizzeranno automaticamente con
la modalità lampeggiante della pulsar precedente.
- È possibile premere i pulsanti su qualsiasi pulsar per cambiare le modalità
lampeggianti 4/ colore 5.
- Quando le pulsar sono impostate su nella modalità di lampeggiamento e colore
prescelta, rimettere tutte le pulsar nelle tasche nella custodia, assicurandosi che
il magnete è rivolto verso il basso e il gruppo di 4 LED è rivolto verso l’alto. I Pulsar
sono tenuti all’interno della tasca dal magnete. Ora sono pronti per essere caricati.
Nota: le luci pulsar non si spengono no a quando non vengono rimesse nella custodia.
Batteria in carica:
- Collegare il cavo del caricabatterie nella presa 3e collegare il caricabatterie a una
fonte di alimentazione (CA o CC), a seconda del caricabatterie in uso.
- La spia di stato di carica 2 sulla custodia si illumina: Luce rossa = carica in corso.
Luce verde = completamente carica.
- Quando le pulsar sono cariche sono pronte per un rapido dispiegamento.

This manual suits for next models

3

Other NightSearcher Lighting Equipment manuals

NightSearcher PULSAR-PRO User manual

NightSearcher

NightSearcher PULSAR-PRO User manual

NightSearcher WORKBRITE PRO 2500 User manual

NightSearcher

NightSearcher WORKBRITE PRO 2500 User manual

NightSearcher GALAXY-PRO 6K User manual

NightSearcher

NightSearcher GALAXY-PRO 6K User manual

NightSearcher LunarStar 40K User manual

NightSearcher

NightSearcher LunarStar 40K User manual

NightSearcher I-SPECTOR UV User manual

NightSearcher

NightSearcher I-SPECTOR UV User manual

NightSearcher NEXSUN-ST1200 User manual

NightSearcher

NightSearcher NEXSUN-ST1200 User manual

NightSearcher EX-125 User manual

NightSearcher

NightSearcher EX-125 User manual

NightSearcher Sports Star User manual

NightSearcher

NightSearcher Sports Star User manual

NightSearcher Kanga Star 10K User manual

NightSearcher

NightSearcher Kanga Star 10K User manual

NightSearcher NS750 LED LITE User manual

NightSearcher

NightSearcher NS750 LED LITE User manual

NightSearcher Tower Pro 10K User manual

NightSearcher

NightSearcher Tower Pro 10K User manual

NightSearcher Sequential Pulsar Pro User manual

NightSearcher

NightSearcher Sequential Pulsar Pro User manual

NightSearcher Kanga Star 10K User manual

NightSearcher

NightSearcher Kanga Star 10K User manual

Popular Lighting Equipment manuals by other brands

Infinity TCYC-7 manual

Infinity

Infinity TCYC-7 manual

X-laser Aurora 4C Product manual and user guide

X-laser

X-laser Aurora 4C Product manual and user guide

GRILL MEISTER 360468 2007 Operation?and safety

GRILL MEISTER

GRILL MEISTER 360468 2007 Operation?and safety

Konig & Meyer 12295 quick start guide

Konig & Meyer

Konig & Meyer 12295 quick start guide

TowMate TM2 Guide to operations

TowMate

TowMate TM2 Guide to operations

Future light POS-60 LED TCL POWERSTICK Color Changer user manual

Future light

Future light POS-60 LED TCL POWERSTICK Color Changer user manual

RANCEO See Snake CLH25 instruction manual

RANCEO

RANCEO See Snake CLH25 instruction manual

PR Lighting PR-8120 manual

PR Lighting

PR Lighting PR-8120 manual

RAB Lighting SR2 installation instructions

RAB Lighting

RAB Lighting SR2 installation instructions

Microh Ultra Wash 1200 user manual

Microh

Microh Ultra Wash 1200 user manual

JB Systems OIL 150 Operation manual

JB Systems

JB Systems OIL 150 Operation manual

Inspire LEDFLEXI 2128KS-5-RGBW-P instruction manual

Inspire

Inspire LEDFLEXI 2128KS-5-RGBW-P instruction manual

GENI OBY-600 WASH user manual

GENI

GENI OBY-600 WASH user manual

Laserworld Club Series manual

Laserworld

Laserworld Club Series manual

SLV 1002985 instruction manual

SLV

SLV 1002985 instruction manual

Pixapro LED Series user guide

Pixapro

Pixapro LED Series user guide

DOTLUX ADplus 1964-060160S user manual

DOTLUX

DOTLUX ADplus 1964-060160S user manual

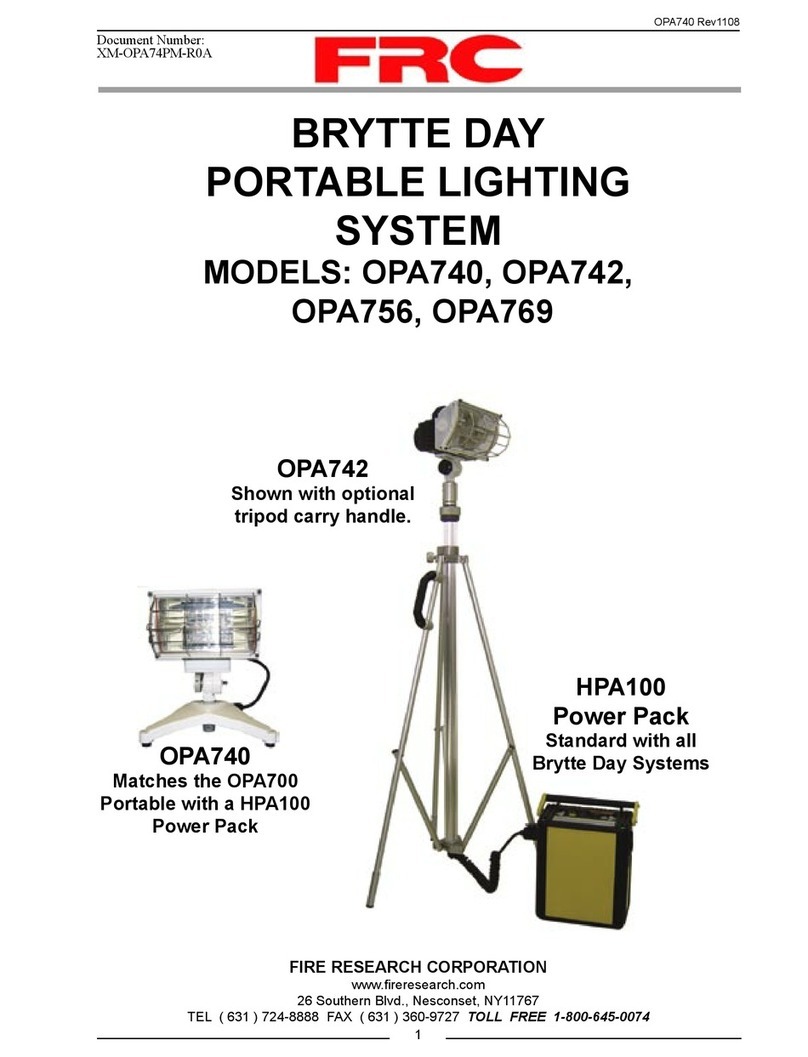
FRC BRYTTE DAY Series manual

FRC

FRC BRYTTE DAY Series manual

manuals.online logo
manuals.online logoBrands
  • About & Mission
  • Contact us
  • Privacy Policy
  • Terms and Conditions

Copyright 2025 Manuals.Online. All Rights Reserved.