OFF
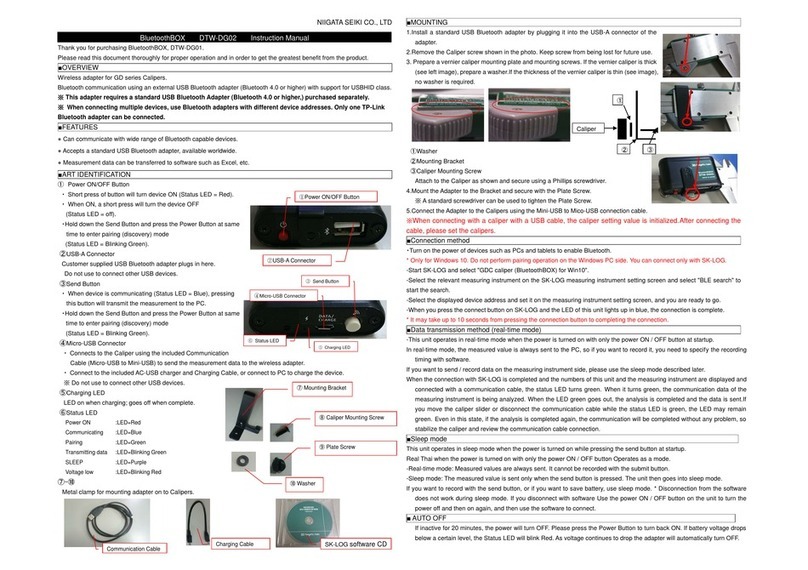
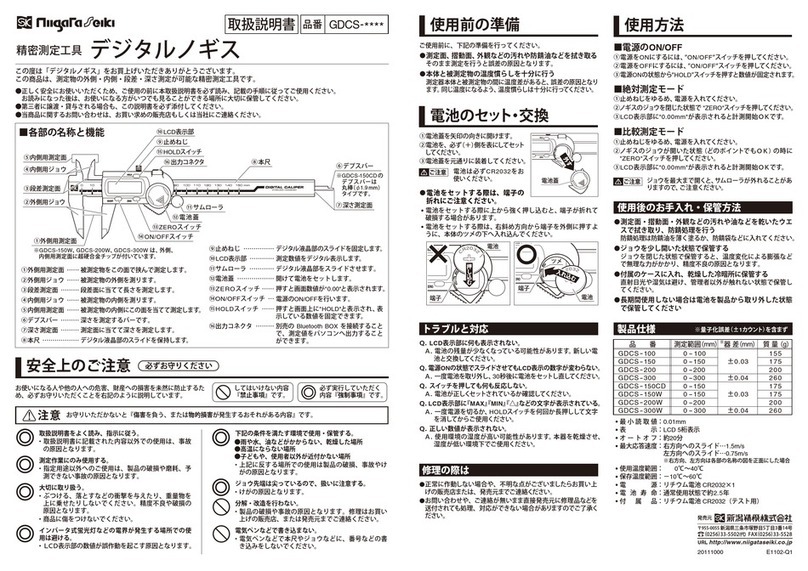
ON/ZERO
HOLD
ADD
SUB
OFF
ON/ZERO
HOLD
ADD
SUB
OFF
ON/ZERO
HOLD
ADD
SUB
OFF
ON/ZERO
HOLD
ADD
SUB
90° 90°
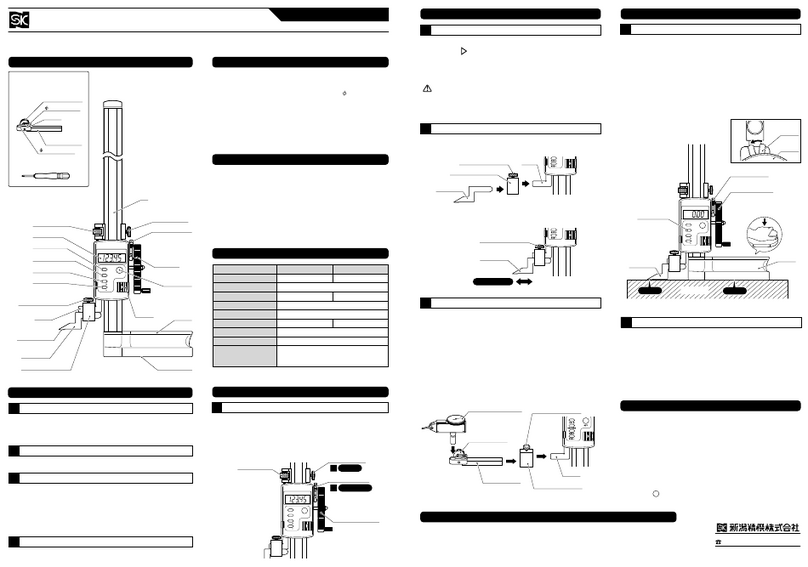
Example using dial indicator with measurement
read off the Height Gauge LCD display.
Scribe
Scribe Clamp Screw
Scribe Clamp Screw
Scribe
Scribe Clamp
Jaw
Jaw
Scribe Clamp
Scribe Clamp
Screw
Indicator Mounting Arm
1Example with measurement read off the Dial
Indicator and LCD display of the Height Gauge.
2
INSTRUMENT ERROR WHEN USING ACCESSORY DIAL INDICATOR (WTI-8038S)
To measure the height from reference surface:
①Place the Indicator Stylus on the reference surface, and set
the Indicator to 0.00mm.
②Set the Height Gauge reading to 0.00mm. This is the
reference position.
③Measuring Height.
Reposition the Dial Indicator Stylus to the surface to be
measured, and adjust the Height Gauge so that the Dial
Indicator reading is 0.00mm.
④The LCD display of the Height Gauge now shows the height
relative to the reference surface.
For this method, the total error is the sum of the Height
Gauge Instrument Error (VHS-30D : ±0.04mm,
VHS-60D : ±0.05mm)+Dial Indicator repeatability
(0.003mm)
To measure the height from reference surface:
①Place the Indicator Stylus on the reference surface, and set
the Indicator to 0.00mm.
②Set the Height Gauge reading to 0.00mm. This is the
reference position.
③Measuring Height.
Reposition the Dial Indicator Stylus to the surface to be
measured, and read the LCD display of the Height Gauge.
This value is 10.51mm
④Read the scale of the Dial Indicator.This value is +0.10mm
⑤The height relative to the reference surface is the sum, 10.51
+0.10=10.61mm
Make sure the sign (+, −)of the measurement
from the Dial Indicator is same as sign for the
Height Gauge.
For this method, the total error is the sum of the Height
Gauge Instrument Error (VHS-30D: ±0.04mm, VHS-60D:
±0.05mm)+Dial Indicator Wide Range Error (0.013mm)2. Insert the Scribe to desired overhang and secure by
tightening the Scribe Clamp Screw.
Overhang Adjustment
Indicator Clamp
Screw
Dial Indicator
30mm
Workpiece
③
0.00
④
30.00
Surface Plate Surface Plate
Surface Plate Surface Plate
Workpiece
Reference Surface
Surface to Measure
Surface to Measure
Reference Surface
①
0.00
②
0.00
Dial Indicator
②
Digital Height Gauge
Stylus
10.61mm
Workpiece
④
+0.10
③
10.51
Workpiece
①
0.00
0.00
Dial Indicator
Direction of
Measurement
Direction of
Measurement
Digital Height Gauge
Stylus
PLEASE NOTE
NOTE:
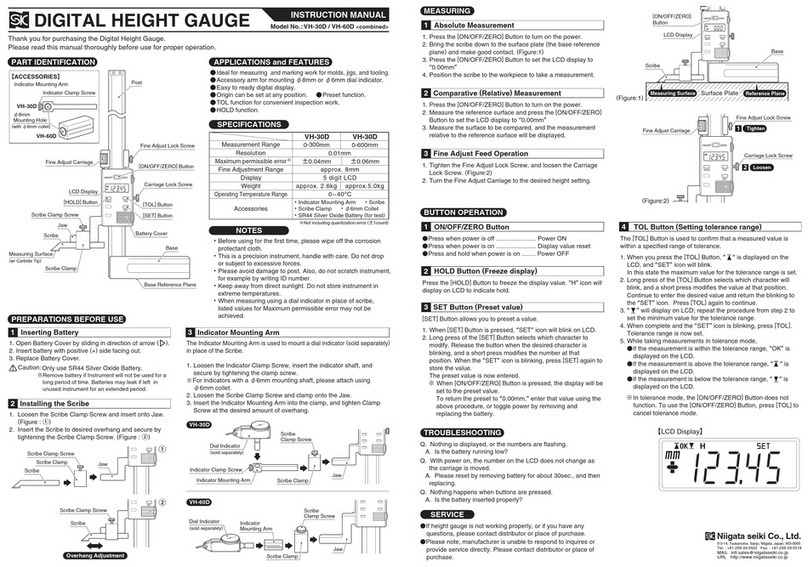
■Digital Height Gauge
・Max Measuring Height : VHS-30D…300mm
VHS-60D…600mm
・Resolution:0.01mm
・Instrument Error : VHS-30D…±0.04mm
VHS-60D…±0.05mm
※Instrument error will vary when used with dial indicator;
Please refer to section: “Instrument Error When Using
Accessory Dial Indicator (WTI-8038S)ʼʼ
・Fine Adjustment Range : 10mm
・Display : 5 Digit LCD
・Approx. Weight : VHS-30D…6.4kg
VHS-60D…7.5kg
・Power Supply : SR44 Silver Oxide Battery
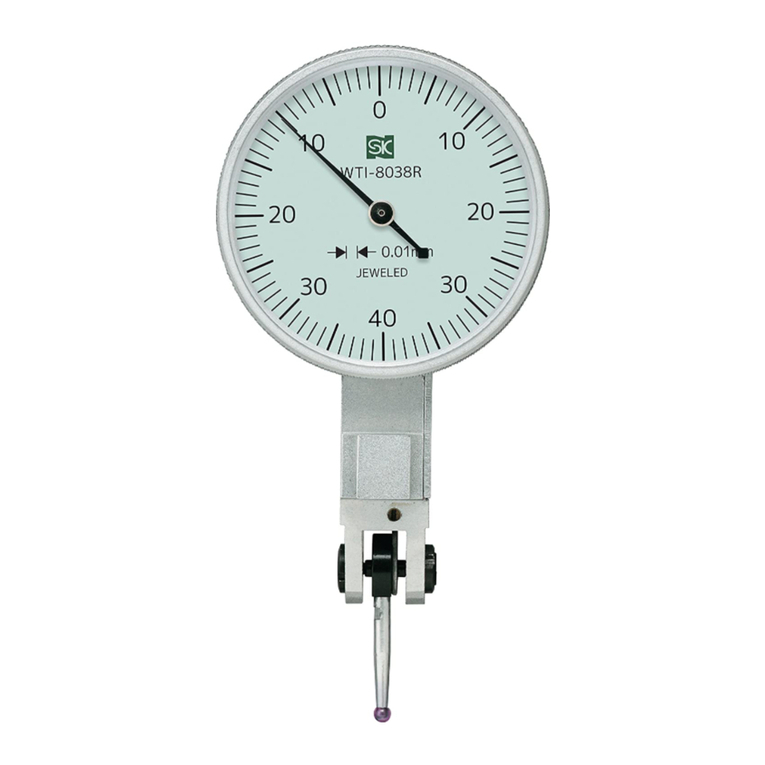
・Included Accessories : Dial Indicator (WTI-8038S)
Dial Indicator Holder
SR44 Silver Oxide Battery (For test)
Driver for Battery Cover
■Dial Indicator WTI-8038S (Accessory)
・Measurement Range : 0−0.8mm
・Graduation : 0.01mm
・Scale Type : 0−40−0
・Wide Range Error : 0.013mm
・Retrace Error : 0.003mm
・Repeatability : 0.003mm
・Adjacent Error : 0.01mm
・Measurement Force : Less than 0.5N
・When using the Dial Indicator, make sure measuring element
(Stylus)is perpendicular to the direction of measurement. If
held at an angle, measurement will not be accurate.
・When measuring using a Dial Indicator in place of the Scribe,
specified values for instrument error (※)may not be
achieved.
※VHS-30D : ±0.04mm、VHS-60D : ±0.05m
SPECIFICATIONS
Direction of
Measurement
Direction of
Measurement
PREPARATION BEFORE USE
Inserting the Battery
1
1. Using the provided driver, remove the Battery Cover Screws.
2. Open the Battery cover by sliding in the direction of the
arrow ().
3. Insert the Battery with (+)side facing outward.
4. Return the Battery Cover to it's original position.
5. Replace the Battery Cover Screws to secure the cover.
Only use SR44 Silver Oxide Battery.
Installing the Scribe
2
1. Loosen the Scribe Clamp Screw and insert onto Jaw.
Dial Indicator Holder
3
The Dial Indicator Holder is used to mount the accessory dial
indicator in place of the Scribe.
1. Loosen the Indicator Clamp Screw, insert the indicator shaft,
and secure by tightening the clamp screw.
2. Loosen the Scribe Clamp Screw and place the Clamp onto
the Jaw.
3. Insert the Indicator Mounting Arm into the Clamp, and
tighten Clamp Screw at the desired amount of overhang.
NOTE:
