Proper alignment
Object to be measured is positioned between these surfaces.
Measures extremal dimensions. Move Slide to open and close.
Measures the height of steps.
Measures internal dimensions. Move Slide to open and close.
Position surfaces inside object to be measured.
Locks the Vernier Slide position.
Indicates measured value in 1mm graduations.
Position thumb on knob for precise control of vernier slide.
Scale for measuring with a resolution of 0.05mm.
Refer to following page for usage instructions.
①Measuring Surfaces for outside measurements …②Outside Jaws …………………………………………③Measuring surfaces for step measurements ……④Inside Jaws……………………………………………⑤Measuring surfaces for internal measurements …⑥Lock Screw……………………………………………⑦Main Scale ……………………………………………⑧Thumb Knob …………………………………………⑨Vernier Slide (Vernier Scale)………………………Thank you for purchasing the Vernier Calipers.
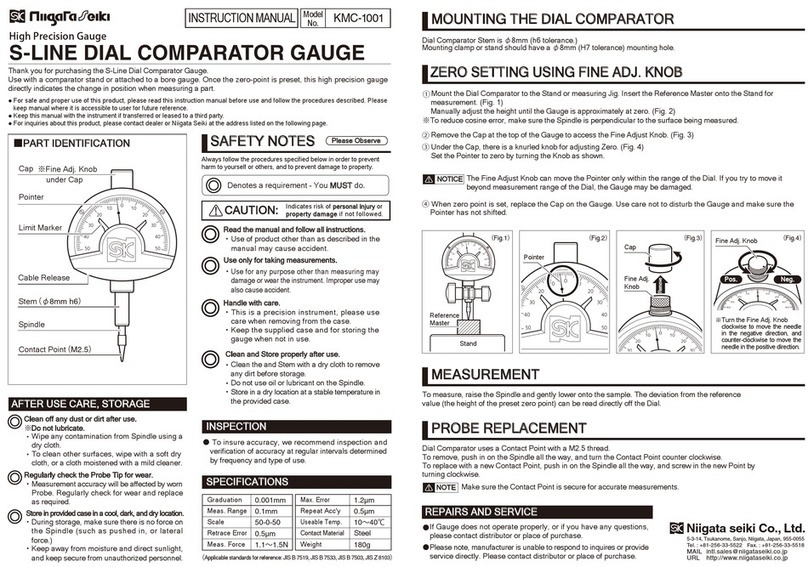
This product is a precision measurement tool with a main scale and a vernier scale to indicate the measured value.
●For safe and proper use of this product, please read this instruction manual before use and follow the procedures described. Please
keep manual where it is accessible to user for future reference.
●Keep this manual with the instrument if transferred or leased to a third party.
●For inquiries about this product, please contact distributor or place of purchase.
SAFETY PRECAUTIONS Please Observe
Always follow the proper operating procedures in order to prevent
harm to yourself or others, and to prevent damage to property.
Read the manual and follow the directions.
・Use of product other than as described in the manual
may cause accident.
Use only for measuring.
・Use for any purpose other than measuring may
damage or wear the instrument. Improper use may
also cause accident.
Handle with Care.
・Do not drop or subject instrument to excessive shock.
Do not place under heavy objects. Improper handling
may cause damage or poor accuracy.
・Do not scratch instrument, for example by writing ID
number.
Indicates risk of personal injury or property damage if not followed.
WARNING
Denotes a prohibition -
You MUST NOT do
Denotes a requirement -
You MUST do
Use In Proper Environment.
・Please do not use instrument in rain or locations with
excessive humidity. Do not use at extreme high or low
temperatures. Keep out of direct sunlight.
Jaw Tips Are SharpHandle With Care.
・Careless handling may cause injury.
Do not move the Vernier Slide when the Lock Screw
is tightened.
・Excessive force applied to Slide may cause damage or
affect accuracy.
Do not disassemble or modify.
・
Do not remove the vernier slide, Please do not attempt to
disassemble or modify as it may cause damage or poor accuracy.
CALIBRATION
●In order to maintain instrument accuracy, it is recommended that
accuracy is confirmed through calibration on a periodic basis.
Wear of measuring surfaces from repeated use may affect accuracy and periodic
accuracy checks should be performed.
We provide calibration services.
Please contact agent in country
of purchase to make
arrangements.
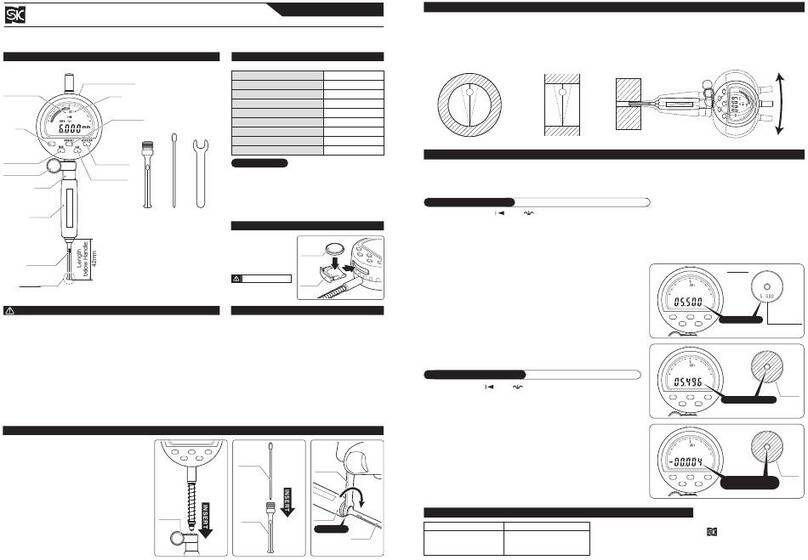
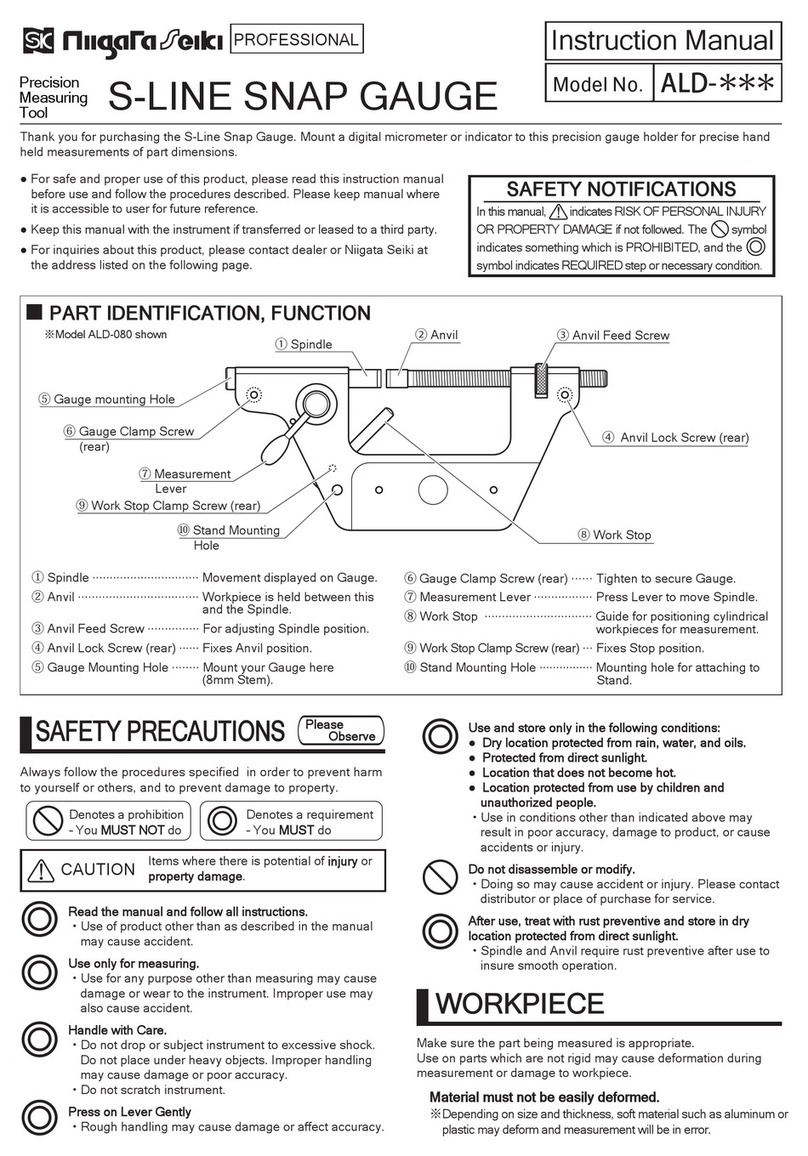
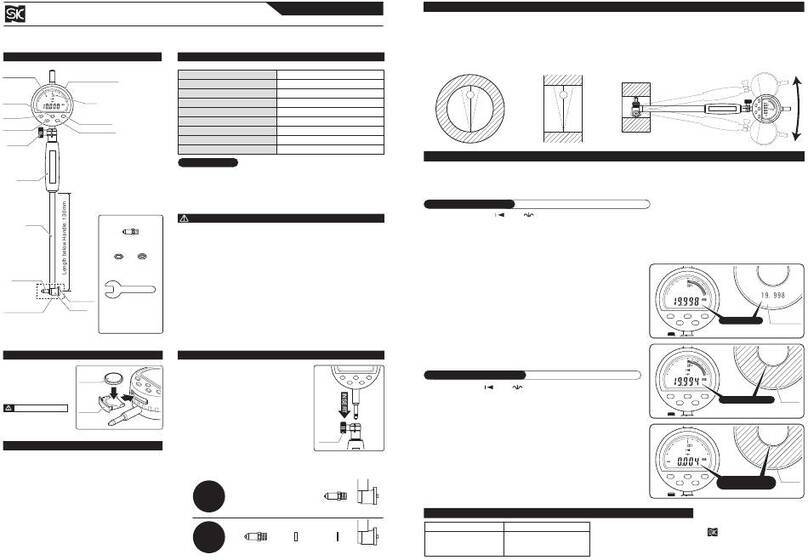
■PART IDENTIFICATION AND FUNCTION
①Measuring surfaces for outside measurements
②Outside Jaws
③
Measuring surfaces for
step measurements
⑤Measuring surfaces for internal measurements
⑥Lock Screw
⑧Thumb Knob ⑦Main Scale
④Inside Jaws ⑨Vernier Slide (Vernier Scale)
VERNIER CALIPERS
PRECISION MEASURING TOOLS
Niigata seiki Co., Ltd.
5-3-14, Tsukanome, Sanjo, Niigata, Japan, 955-0055
Tel. : +81-256-33-5522 Fax. : +81-256-33-5518
MAIL intl.sales@niigataseiki.co.jp
URL http://www.niigataseiki.co.jp
PREPARATION FOR USE
Before using the caliper, follow the steps below:
●Loosen the lock screw.
Moving the vernier slide with the lock screw tightened may cause excessive force to the slide which will damage the caliper and affect
accuracy.
●Wipe off any corrosion, dirt, or oil from measuring surfaces and slide.
Contamination of surfaces may cause measurement error.
●Allow the caliper and object to be measured time to reach the same temperature.
A temperature difference between the object to be measured and the caliper may cause measurement error. Allow enough time for
the temperatures to equilibrate.
●Performing an accuracy check.
①Jaw Alignment
In closed position, make sure the measuring surfaces on the outside jaws
align properly and there is no gap (no light should leak past.)
②Confirm “0”points on scale (see diagram at right)
With jaws closed as in step ①above, make sure the reading is zero and
the vernier scale graduations align at the “0”and “39”positions as shown.
③Depth Confirmation
Position caliper on a flat surface for depth measurement. Reading should
be “0”as in step ②above, with the verier graduations aligned at the “0”
and “39”positions.
READING THE SCALE
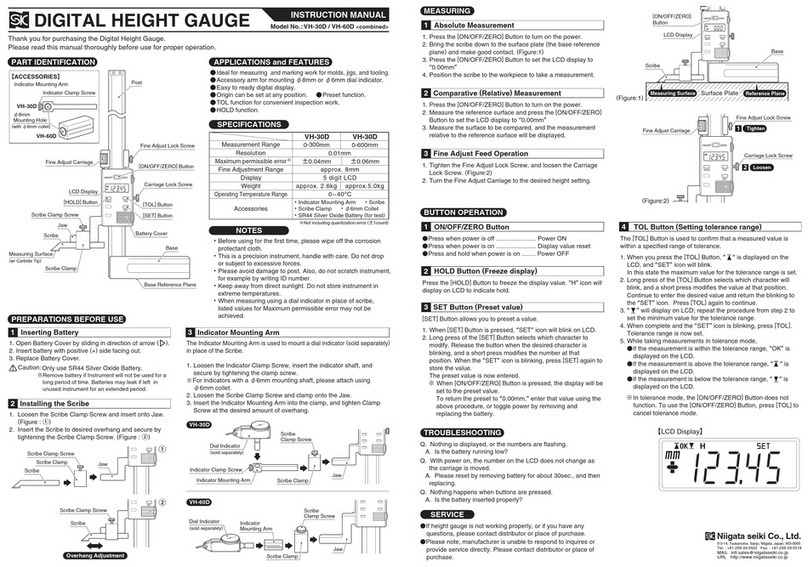
The measured value is determined by reading the main scale,
and then adding the Vernier Scale reading as determined by
the position where the vernier and main scale graduations align.
PREVENTING ERRORS
In order to prevent measurement error, please note the following.
AFTER USE CARE, STORAGE NOTES
●Material : Stainless Steel
SPECIFICATIONS
●As required, wipe slide and measuring surfaces with a
dry cloth treated with anti-corrosive oil. When not in use,
apply anti-corrosive treatment or keep in anti-corrosive
bag.
●When not in use, keep jaws slightly open and lock screw
slightly loose to prevent over tightening due to thermal
expansion which may affect accuracy.
●Store in supplied case in a cool, dry location.
●EXAMPLE 1 Measured Value: 77.00mm
●EXAMPLE 2 Measured Value: 77.30mm
●EXAMPLE 3 Measured Value: 77.35mm
VIEWING THE SCALE
POSITIONING CALIPER ON OBJECT
<Flat surfaces>When measuring features
with flat surfaces, make sure
the measuring surface of the
jaws are parallel to the
surfaces to be measured.
<Cylindrical surfaces>When measuring cylindrical
features, make sure the
caliper jaws are perpendicular
to the cylinder axis as shown.
Scale should be read from
directly above the calipers.
Due to step in height of vernier
scale relative to main scale, if
viewing direction is not directly
above the reading may have
parallax error.
※Model TVC-60 shown.
TVC
-
60/ TVC
-
100
Model No.
INSTRUCTION MANUAL
Measured Value = Main Scale Reading + Vernier Scale Reading
77
0.35+77.35
Reading
77
0.30+77.30
Reading
77
0.00+77.00
Reading
Main Scale
(1mm)
Vernier Scale
(0.05mm)
Main Scale
(1mm)
Vernier Scale
(0.05mm)
Main Scale
(1mm)
Vernier Scale
(0.05mm)
Jaw
Object being measured
TVC
-
60
600mm
±0.10mm
approx. 1.2 kg
0.05mm
TVC
-
100
1000mm
±0.15mm
approx. 2.5kg
Model No.
Measuring Range
Resolution
Maximum permissible error
Weight
