Jp
使用説明書
En
User’s Manual
Fr
Manuel d’utilisation
Sc
ҋᅶᢪϷ
Es
Manual del usuario
Kr
사용설명서
Jp
使用説明書
ご使用の前に、この使用説明書をよくお読みの上、正しくお使いください。また、
カメラの説明書もご覧ください。
• このレンズは、ニコン Zマウントのミラーレスカメラ専用です。
• このレンズを Z 7、Z 6 または Z 50 でお使いの場合は、カメラのファームウェアを最
新版にバージョンアップしてください。ファームウェアが最新になっていない場合、
レンズを正しく認識しなかったり、手ブレ補正機能など一部の機能が使用できないこ
とがあります。最新のファームウェアは、ニコンダウンロードセンターからダウンロー
ドできます。
安全上のご注意
あなたや他の人々への危害や財産への損害を未然に防止するため、ご使用の前に「安全上の
ご注意」をよくお読みの上、正しくお使いください。
この説明書をお読みになった後は、いつでも参照できるように保管してください。
A警告 「死亡または重傷を負うおそれがある内容」です。
A注意
「軽傷を負うことや財産の損害が発生するおそれがある内容」です。
お守りいただく内容を、以下の図記号で区分しています。
Fは、してはいけない内容です。
Cは、実行しなければならない内容です。
A警告
E分解
禁止
分解、修理または改造をしない
落下などによる破損で内部が露出したら、露出部に触らない
感電やけがの原因になります。
C実行
熱くなる、煙が出る、こげ臭いなどの異常時は、直ちにカメラの電源を取り
外す
放置すると、発火、やけどの原因になります。
F禁止
水でぬらさない
ぬれた手で触らない
感電や発火の原因になります。
F禁止
引火、爆発のおそれのある場所では使わない
プロパンガス、ガソリン、可燃性スプレーなどの引火性ガスや粉塵の発生す
る場所で使うと、爆発や火災の原因になります。
F禁止
レンズで直接太陽や強い光を見ない
失明や視力障碍の原因になります。
F禁止
幼児の手の届くところに置かない
故障やけがの原因になります。
小さな付属品を誤って飲み込むと、身体に悪影響を及ぼします。飲み込んだ
ら、すぐに医師の診断を受けてください。
G禁止 高温環境や低温環境では、直接触らない
やけどや低温やけど、凍傷の原因になることがあります。
A注意
F禁止
レンズを太陽や強い光源に向けたままにしない
集光して、内部部品の破損や発火の原因になることがあります。逆光撮影では、
太陽を画角から十分にずらしてください。画角から太陽をわずかに外しても、
発火の原因になります。
F禁止 夏場の車内や直射日光の当たる所など高温環境に放置しない
故障や発火の原因になります。
F禁止 三脚などにカメラやレンズを取り付けたまま移動しない
故障やけがの原因になります。
レンズの使い方
各部の名称と機能
左図で示されている各部の名称と機能は以下の通りです。
●●
qレンズフード
着脱指標
レンズにレンズフードを取り付けるときの指標
です。
詳しくは
B
●
wズームリング このリングを回転させるとズーミングができ
ます。
●
e焦点距離目盛 ズーミング時の焦点距離の目安として使用し
ます。
●
r焦点距離目盛指標
●
tコントロールリング
オートフォーカス時
このリングを回転させると、[フォーカス(M/A)]
や[絞り]などカメラで設定した機能を使用で
きます。詳しくは、カメラの説明書に記載され
ている[カスタムボタンの機能]または[カスタ
ムボタンの機能 (撮影 )]の説明をご覧ください。
マニュアルフォーカス時
このリングを回転させると手動でピント合わせ
ができます。
●
yレンズ着脱指標 カメラにレンズを取り付けるときの指標です。 詳しくは
A
●
uレンズマウント
ゴムリング
●
iCPU 信号接点 カメラとレンズの間で情報を伝達します。
●
oズームロック
スイッチ
焦点距離を 24mm にして、ズームロックス
イッチを[LOCK]にセットすると、ズームリ
ングがロックされます。カメラを持ち歩く際
は、レンズ自体の重みで繰り出さないように、
ロックしてください。
!0 レンズフード 画像に悪影響を及ぼす光線をカットします。
レンズ面の保護にも役立ちます。
詳しくは
B
!1 レンズフードセット
指標 レンズにレンズフードを取り付けるときの指標
です。
!2 レンズフード取り付
け指標
!3 レンズキャップ
(フロントキャップ)
!4 レンズキャップ
(リアキャップ)
Aカメラへの取り付け方・取り外し方
取り付け方
z
カメラの電源を OFF にして、レンズのリアキャップとカメラのボ
ディーキャップを外す
x
カメラとレンズのレンズ着脱指標を合わせ、反時計回りにカチッ
と音がするまでレンズを回す
取り外し方
z
カメラの電源を OFF にする
x
レンズ取り外しボタンを押しながら、時計回りにレンズを回して
取り外す
Bレンズフードの取り付け方・取り外し方
• レンズフード着脱指標とレンズフード取り付け指標を合わせて(q)、レン
ズフードを矢印(w)の方向に回転させ、レンズフード着脱指標とレンズフー
ドセット指標を合わせてください(e)。
レンズフードセット指標
レンズフード取り付け指標
レンズフード着脱指標
• レンズフード先端を強くつかむと着脱が困難になります。着脱の際は、レンズフー
ド取り付け指標(●)付近を持って回転させてください。
• 取り外しは、取り付けと逆の手順で行ってください。
• 収納時はレンズフードを逆向きにしてレンズに取り付けられます。
内蔵フラッシュ搭載のカメラでフラッシュ撮影すると
きのご注意
内蔵フラッシュ搭載のカメラの場合、フラッシュの光がレンズやレンズフードでさえぎ
られると画像に影が写り込みます。レンズフードは取り外して撮影してください。レン
ズフードを取り外しても、レンズの焦点距離と撮影距離によっては影が写り込みます。
影影
• 下記のカメラでは、このレンズを装着して内蔵フラッシュを使ったときに、画像に影が写
り込むことがあります。影が写り込まずに撮影できる焦点距離と撮影距離は次の通りです。
カメラ※1焦点距離 影が写り込まない撮影距離※2
Z 50
24mm すべての撮影距離で影が写り
込みます。
35mm 1.5 m 以上
50mm 1.0 m 以上
70 200mm 制約なし
※1 最新情報はカメラの説明書でご確認ください。
※2 レンズフードを取り付けていない場合の値です。
手ブレ補正機能
このレンズには手ブレ補正機能があります。手ブレ補正機能はカメラで設定できま
す。詳しくは、カメラの説明書をご覧ください。
手ブレ補正機能を使用すると、使わないときと比べて 5.0 段(カメラの手ブレ補正機能
を[ノーマル]にしているとき)
※シャッタースピードを遅くして撮影できるため、シャッ
タースピードの選択範囲が広がります。
※CIPA 規格準拠。ただし、FX フォーマット対応レンズは FX フォーマットのミラーレスカメラ使用時、
DX レンズは DX フォーマットのミラーレスカメラ使用時。ズームレンズは最も望遠側で測定。
D
手ブレ補正使用時のご注意
• 手ブレ補正機構の構造上、レンズを振るとカタカタ音がすることがありますが、故
障ではありません。
• 三脚撮影時にカメラの手ブレ補正機能を[ノーマル]または[スポーツ]に設定す
ると、三脚ブレを軽減します。ただし、三脚の種類や撮影条件により、[しない]
に
した方がよい場合があります。
• 一脚を使用するときには、[ノーマル]または[スポーツ]に設定することをおすす
めします。
カメラにレンズを取り付けたときのご注意
ピント合わせを行った後に、カメラの電源を OFF にして再び ON にするとピント位置
が変わることがあります。ピントをあらかじめ合わせておいて被写体を待つ置きピン撮
影などでは、ピントを合わせてからシャッターをきるまでにカメラの電源を OFF にしな
いことをおすすめします。
取り扱い上のご注意
• レンズフードをレンズに装着した状態で、レンズフードだけを持たないでください。
• CPU 信号接点は汚さないようにご注意ください。
• レンズマウントゴムリングが破損した場合は、そのまま使用せず販売店またはニコン
サービス機関に修理を依頼してください。
• レンズをカメラに装着していないときは、必ずレンズキャップを取り付けてください。
• レンズを保管するときは、レンズ内部を保護するために太陽光のあたらない所に保管し
てください。
• レンズを水にぬらしたり、湿気の多い場所に置かないでください。部品がサビつくな
どして故障の原因になりますのでご注意ください。
• 火の近くなど、極端に温度が高くなるところに置かないでください。外装の一部に使
用している強化プラスチックが変形することがあります。
• 極端に温度差のある場所に急にレンズを持ち込むと、レンズ内外に水滴が生じ、故障の
原因となります。レンズをバッグやビニール袋などに入れて、周囲の温度になじませて
からお使いください。
• レンズを傷から守るために、持ち運ぶときはレンズケースに入れることをおすすめします。
En
User’s Manual
Before using this product, please read these instructions carefully. You will also need to
consult the camera manual.
• This lens is intended exclusively for use with mirrorless cameras featuring a Nikon Z mount.
• Update to the latest version of the camera firmware before using this lens with the
Z 7, Z 6, or Z 50, as otherwise the camera may fail to correctly recognize the lens and
features such as vibration reduction may be unavailable. The latest firmware is avail-
able from the Nikon Download Center.
For Your SafetyFor Your Safety
To prevent damage to property or injury to yourself or to others, read“For Your Safety”
in its entirety before using this product.
Keep these safety instructions where all those who use this product will read them.
AWARNING: Failure to observe the precautions marked with this icon could
result in death or severe injury.
ACAUTION: Failure to observe the precautions marked with this icon could
result in injury or property damage.
AAWARNINGWARNING
•• Do not disassemble or modify this product.Do not disassemble or modify this product.
Do not touch internal parts that become exposed as the result of a fall orDo not touch internal parts that become exposed as the result of a fall or
other accident.other accident.
Failure to observe these precautions could result in electric shock or other injury.
•• Should you notice any abnormalities such as the product producing smoke, heat, orShould you notice any abnormalities such as the product producing smoke, heat, or
unusual odors, immediately disconnect the camera power source.unusual odors, immediately disconnect the camera power source.
Continued operation could result in fire, burns or other injury.
•• Keep dry.Keep dry.
Do not handle with wet hands.Do not handle with wet hands.
Failure to observe these precautions could result in fire or electric shock.
•• Do not use this product in the presence of flammable dust or gas such asDo not use this product in the presence of flammable dust or gas such as
propane, gasoline or aerosols.propane, gasoline or aerosols.
Failure to observe this precaution could result in explosion or fire.
•• Do not directly view the sun or other bright light source through the lens.Do not directly view the sun or other bright light source through the lens.
Failure to observe this precaution could result in visual impairment.
•• Keep this product out of reach of children.Keep this product out of reach of children.
Failure to observe this precaution could result in injury or product malfunction. In
addition, note that small parts constitute a choking hazard. Should a child swallow any
part of this product, seek immediate medical attention.
•• Do not handle with bare hands in locations exposed to extremely high orDo not handle with bare hands in locations exposed to extremely high or
low temperatures.low temperatures.
Failure to observe this precaution could result in burns or frostbite.
AACAUTIONCAUTION
•• Do not leave the lens pointed at the sun or other strong light sources.Do not leave the lens pointed at the sun or other strong light sources.
Light focused by the lens could cause fire or damage to product’s internal parts. When shooting
backlit subjects, keep the sun well out of the frame. Sunlight focused into the camera when the sun
is close to the frame could cause fire.
•• Do not leave the product where it will be exposed to extremely highDo not leave the product where it will be exposed to extremely high
temperatures, for an extended period such as in an enclosed automobiletemperatures, for an extended period such as in an enclosed automobile
or in direct sunlight.or in direct sunlight.
Failure to observe this precaution could result in fire or product malfunction.
•• Do not transport cameras or lenses with tripods or similar accessoriesDo not transport cameras or lenses with tripods or similar accessories
attached.attached.
Failure to observe this precaution could result in injury or product malfunction.
Notices for Customers in the U.S.A.Notices for Customers in the U.S.A.
This device complies with part 15 of the FCC Rules. Operation is subject to the follow-
ing two conditions: (1) this device may not cause harmful interference, and (2) this
device must accept any interference received, including interference that may cause
undesired operation.
Federal Communications Commission (FCC) Radio Frequency InterferenceFederal Communications Commission (FCC) Radio Frequency Interference
StatementStatement
This equipment has been tested and found to comply with the limits for a Class B digital
device, pursuant to Part 15 of the FCC rules. These limits are designed to provide reason-
able protection against harmful interference in a residential installation. This equipment
generates, uses, and can radiate radio frequency energy and, if not installed and used in
accordance with the instructions, may cause harmful interference to radio communica-
tions. However, there is no guarantee that interference will not occur in a particular instal-
lation. If this equipment does cause harmful interference to radio or television reception,
which can be determined by turning the equipment off and on, the user is encouraged to
try to correct the interference by one or more of the following measures:
• Reorient or relocate the receiving antenna.
• Increase the separation between the equipment and receiver.
• Connect the equipment into an outlet on a circuit different from that to which the
receiver is connected.
• Consult the dealer or an experienced radio/television technician for help.
CAUTIONSCAUTIONS
Modications
The FCC requires the user to be notified that any changes or modifications made to
this device that are not expressly approved by Nikon Corporation may void the user’s
authority to operate the equipment.
Nikon Inc., 1300 Walt Whitman Road,
Melville, New York 11747-3064, U.S.A.
Tel.: 631-547-4200
Notice for Customers in CanadaNotice for Customers in Canada
CAN ICES-3 B / NMB-3 B
Using the LensUsing the Lens
Parts of the Lens: Names and FunctionsParts of the Lens: Names and Functions
Refer to the diagram on the left edge of this sheet.
qLens hood mounting
mark Use when attaching the lens hood. See B
wZoom ring Rotate to zoom in or out. —
eFocal length scale Determine the approximate focal length when
zooming the lens in or out. —
rFocal length mark
tControl ring
Autofocus mode selected:
In autofocus mode, rotate the ring to adjust
a setting such as [Focus (M/A)] or [Aperture]
assigned using the camera. For more informa-
tion, see the description of [Custom control as-
signment]/[Custom controls (shooting)] in the
camera manual.
—
Manual focus mode selected:
Rotate the ring to focus.
●
yLens mounting mark Use when mounting the lens on the camera. See A
●
uRubber lens-mount
gasket ——
●
iCPU contacts Used to transfer data to and from the camera. —
●
oZoom lock switch
To lock the zoom ring, zoom out to the 24 mm
position and slide the switch to LOCK. This pre-
vents the lens extending under its own weight
while you are carrying the camera.
—
!0 Lens hood
Lens hoods block stray light that would other-
wise cause flare or ghosting. They also serve to
protect the lens.
See B
!1 Lens hood lock mark
Use when attaching the lens hood.
!2 Lens hood alignment
mark
!3 Lens cap (front cap) ——
!4 Lens cap (rear cap) ——
AAttachment and RemovalAttachment and Removal
Attaching the Lens
z
Turn the camera o, remove the body cap, and detach the rear lens cap.
xPosition the lens on the camera body, keeping the mounting mark
on the lens aligned with the mounting mark on the camera body,
and then rotate the lens counterclockwise until it clicks into place.
Removing the Lens
zTurn the camera o.
x
Press and hold the lens release button while turning the lens clockwise.
BAttaching and Removing the Lens HoodAttaching and Removing the Lens Hood
Align the lens hood mounting mark with the lens hood alignment mark (q) and
then rotate the hood (w) until the mounting mark is aligned with the lens hood
lock mark (e).
To remove the hood, reverse the above steps.
Lens hood lock mark
Lens hood alignment mark
Lens hood mounting mark
When attaching or removing the hood, hold it near the lens hood alignment mark (●)
and avoid gripping the front of the hood too tightly. The hood can be reversed and
mounted on the lens when not in use.
Using the Lens on Cameras with a Built-in FlashUsing the Lens on Cameras with a Built-in Flash
Shadows will be visible in photos where the light from the built-in flash is obscured by
the lens or lens hood. Remove the lens hood before shooting. Note, however, that even
if the hood is removed, shadows may still be visible at some focal lengths and subject
distances.
Shadow Shadow
• The lens may produce shadows in photographs taken with the built-in flash when
mounted on the following camera.The focal lengths and minimum subject distances
at which shadows will not appear are as follows:
CameraCamera 1Focal lengthsFocal lengths Minimum distance without shadowMinimum distance without shadow 2
Z 50Z 50
24 mm Shadows occur at all subject distances
35 mm 1.5 m (5 ft)
50 mm 1.0 m (3 ft 4 in.)
70 – 200 mm No shadows
1 See the camera manual for the latest information.
2 Lens hood removed.
Vibration Reduction (VR)Vibration Reduction (VR)
The lens’s on-board vibration reduction can be enabled or disabled using camera
controls; see the camera manual for details. With [Normal] selected for the on-camera
vibration reduction option, vibration reduction allows speeds up to 5.0 stops* slower
than would otherwise be the case, expanding the range of shutter speeds available.
* Measured according to CIPA standards. Values for lenses that support FX format are mea-
sured on FX -format mirrorless cameras, those for DX lenses on DX-format mirrorless cam-
eras. Values for zoom lenses are measured at maximum zoom.
DVibration Reduction
• Due to the design of the vibration reduction system, the lens may rattle when shaken. This does not indicate
a malfunction.
• To reduce blur caused by tripod shake, select [Normal] or [Sport] for the on-camera vibration reduction op-
tion when the camera is mounted on a tripod. Note, however, that depending on the type of tripod and
shooting conditions, there may be cases in which [O] is the preferred option.
• [Normal] or [Sport] is recommended when the camera is mounted on a monopod.
When the Lens Is AttachedWhen the Lens Is Attached
The focus position may change if you turn the camera off and then on again after fo-
cusing. If you have focused on a pre-selected location while waiting for your subject to
appear, we recommend that you do not turn the camera off until the picture is taken.
Precautions for UsePrecautions for Use
• Do not pick up or hold the lens or camera using only the lens hood.
• Keep the CPU contacts clean.
• Should the rubber lens-mount gasket be damaged, cease use immediately and take
the lens to a Nikon-authorized service center for repair.
• Replace the lens caps when the lens is not in use.
• To protect the interior of the lens, store it out of direct sunlight.
• Do not leave the lens in humid locations or in locations in which it may be exposed to
moisture. Rusting of the internal mechanism can cause irreparable damage.
• Do not leave the lens next to open flames or in other extremely hot locations. Ex-
treme heat could damage or warp exterior parts made from reinforced plastic.
• Rapid changes in temperature may cause damaging condensation inside and outside
the lens. Before taking the lens from a warm to a cold environment or vice versa, place
it in a bag or plastic case to slow the change in temperature.
• We recommend that you place the lens in its case to protect it from scratches during
transport.
サービスとサポート
修理サービスのご案内
■インターネットでのお申込み
ニコンイメージングジャパン修理センターで承ります。
下記のホームページからお申込みいただけます。
https://www.nikon-image.com/support/repair/
• ニコン ピックアップサービスで発送する場合
梱包資材のお届け・修理品のお引き取り、修理後のお届け・集金までをニコン指定の配送
業者(ヤマト運輸)が一括して代行するサービスです。全国一律の料金にて承ります(大
きさや重さには制限があり、取り扱いできない製品もあります)。
• ご自身で発送する場合
インターネットでお申込みいただいた後、お客様ご自身で修理品を梱包し、修理センター
まで発送してください。
株式会社ニコンイメージングジャパン修理センター
〒230-0052 横浜市鶴見区生麦 2-2-26 修理センターナビダイヤル 0570-02-8200
※
修理センターでは、宅配便、郵送をお受けします。ご来所の方の受付はしておりません。
■お電話でのお申込み
お電話でのお申込みの場合は、ニコンピックアップサービスをご利用いただけます。
ニコン ピックアップサービス専用 フリーダイヤル(ヤマト運輸にて承ります)
0120-02-8155
営業時間:9:00 〜18:00(年末年始を除く毎日)
※
上記フリーダイヤルは、ニコン指定の配送業者(ヤマト運輸)にて承ります。修理内容に
関するお問い合わせにはお答えできません。修理内容に関するお問い合わせは修理センター
へお願いいたします。
■サービスセンターでのお手続き
ニコンプラザのサービスセンター窓口でお見積り・受付をいたします。
D
修理品をお預けいただく場合のご注意
• ボディーキャップやレンズキャップが付属している製品の場合は、製品保護のため、装着して
お預けください。
• 修理に必要と思われるもの以外の付属品は、ご自身で保管ください。
• カメラなどの修理では、受付や修理の過程で撮影データをやむを得ず消去する場合があります。
大切なデータは必ずバックアップをお取りください。
修理に関するお問い合わせ先
株式会社ニコンイメージングジャパン修理センター
修理センター ナビダイヤル
0570-02-8200
営業時間:9:30 〜18:00
(土曜日、日曜日、祝日、年末年始、夏期休業日など弊社定休日
を除く毎日)
• ナビダイヤルをご利用いただけない場合は、ニコンカスタマーサポートセンター
(03) 6702-0577 におかけください。
ニコンプラザについて
ニコンプラザは、ショールーム、サービスセンター、ギャラリーを統合したニコン映像製品
の総合情報拠点です。
※
ニコンプラザサービスセンターでは持ち込み修理の受け付けも行っています。
ニコンプラザショールーム ナビダイヤル
0570-02-8080
ニコンプラザサービスセンター ナビダイヤル
0570-02-8060
• 音声ガイダンスにしたがってご利用ください。
• ナビダイヤルをご利用いただけない場合は、ニコンカスタマーサポートセンター
(03) 6702-0577 におかけください。
ニコンプラザの所在地、営業時間などについては、下記 URL を
ご覧ください。
https://www.nikon-image.com/support/showroom/
Lens CareLens Care
• Removing dust is normally sufficient to clean the glass surfaces of the lens.
• The uorine-coated front lens element can be cleaned as described below.
-Smudges, fingerprints, and other oily stains can be removed using a soft, clean cot-
ton cloth or lens cleaning tissue; clean from the center outwards using a circular
motion.
-To remove stubborn stains, wipe gently using a soft cloth lightly dampened with a
small amount of distilled water, ethanol, or lens cleaner.
-Any drop-shaped marks left from this process on the water- and oil-repellent sur-
face can subsequently be removed with a dry cloth.
• When cleaning the rear lens element, which is not uorine-coated, remove smudges, fingerprints,
and other oily stains using a soft, clean cotton cloth or lens cleaning tissue lightly
dampened with a small amount of ethanol or lens cleaner. Wipe gently from the cen-
ter outwards in a circular motion, taking care not to leave smears or touch the lens
with your fingers.
• Never use organic solvents such as paint thinner or benzene to clean the lens.
• Neutral Color (NC) filters (available separately) and the like can be used to protect the
front lens element.
• If the lens will not be used for an extended period, store it in a cool, dry location to
prevent mold and rust. Do not store in direct sunlight or with naphtha or camphor
moth balls.
AccessoriesAccessories
Supplied AccessoriesSupplied Accessories
• LC-67B Lens Cap (front cap)
• LF-N1 Lens Cap (rear cap)
• HB-93 Lens Hood
• CL-C1 Lens Case
DUsing the Lens Case
• The case is intended to protect the lens from scratches, not from falls or other physical shocks.
• The case is not water resistant.
• The material used in the case may fade, bleed, stretch, shrink, or change color when rubbed or wet.
• Remove dust with a soft brush.
• Water and stains can be removed from the surface with a soft, dry cloth. Do not use alcohol, benzene, thinner,
or other volatile chemicals.
• Do not store in locations exposed to direct sunlight or high temperatures or humidity.
• Do not use the case to clean the monitor or lens elements.
• Be careful that the lens does not fall from the case during transport.
Material: Polyester
Compatible AccessoriesCompatible Accessories
67 mm screw-on filters
DFilters
• Use only one lter at a time.
• Remove the lens hood before attaching lters or rotating circular polarizing lters.
SpecicationsSpecications
MountMount Nikon Z mount
Focal lengthFocal length 24 – 200 mm
Maximum apertureMaximum aperture
f/4 – 6.3
Lens constructionLens construction 19 elements in 15 groups (including 2 ED elements, 1 aspherical ED element,
2 aspherical elements, and elements with an ARNEO coat and a uorine-coated front
lens element)
Angle of viewAngle of view • FX format:
84
°–
12
°
20’
• DX format:
61
°–
8
°
Focal length scaleFocal length scale Graduated in millimeters (24, 35, 50, 70, 105, 135, 200)
Focusing systemFocusing system Internal focusing system
Vibration reductionVibration reduction Lens shift using voice coil motors (VCMs)
Minimum focusMinimum focus
distance (measureddistance (measured
from focal plane)from focal plane)
• 24 mm zoom position: 0.5 m (1.64 ft)
• 35 mm zoom position: 0.54 m (1.78 ft)
• 50 mm zoom position: 0.55 m (1.81 ft)
• 70 mm zoom position: 0.58 m (1.91 ft)
• 105 mm zoom position: 0.65 m (2.14 ft)
• 135 mm zoom position: 0.68 m (2.24 ft)
• 200 mm zoom position: 0.7 m (2.30 ft)
Maximum reproduc-Maximum reproduc-
tion ratiotion ratio
0.28×
Diaphragm bladesDiaphragm blades 7 (rounded diaphragm opening)
Aperture rangeAperture range
• 24 mm zoom position: f/4
–
22
• 200 mm zoom position: f/6.3
–
36
Filter-attachmentFilter-attachment
sizesize 67 mm (P = 0.75 mm)
DimensionsDimensions Approx. 76.5 mm/3.1 in. maximum diameter × 114 mm/4.5 in.
(distance from camera lens mount ange)
WeightWeight Approx. 570 g (1 lb 4.2 oz)
Nikon reserves the right to change the appearance, specifications, and performance of this
product at any time and without prior notice.
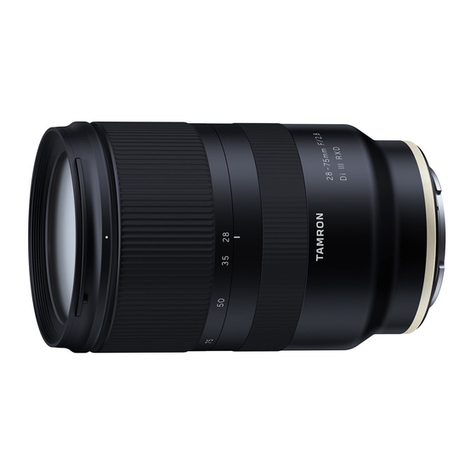
NIKKOR Z 24-200mm f/4-6.3 VR
Fr
Manuel d’utilisation
Avant d’utiliser ce produit, veuillez lire ces instructions attentivement. Vous devrez
également consulter le manuel de l’appareil photo.
• Cet objectif est destiné exclusivement aux appareils photo hybrides dotés d’une
monture Nikon Z.
• Mettez à jour le firmware de l'appareil photo avant d'utiliser cet objectif avec le Z7,
Z6 ou Z50, car sinon l'appareil photo risque de ne pas reconnaître correctement
l'objectif; de plus, il se peut que certaines fonctionnalités comme la réduction de
vibration soient indisponibles. La dernière version du firmware est téléchargeable
depuis le Centre de téléchargement de Nikon.
Pour votre sécuritéPour votre sécurité
Afin d’éviter de provoquer des dommages matériels ou de vous blesser ou de blesser un
tiers, lisez intégralement «Pour votre sécurité» avant d’utiliser ce produit.
Conservez ces consignes de sécurité dans un endroit facilement accessible à tous
ceux qui pourraient se servir de ce produit.
AAVERTISSEMENT: le non-respect des consignes indiquées par cette icône peut
vous exposer à un danger de mort ou à de graves blessures.
AATTENTION: le non-respect des consignes indiquées par cette icône peut vous
exposer à des blessures ou provoquer des dommages matériels.
AAAVERTISSEMENTAVERTISSEMENT
•• Ne démontez pas ou ne modifiez pas ce produit.Ne démontez pas ou ne modifiez pas ce produit.
Ne touchez pas les composants internes qui sont exposés suite à une chuteNe touchez pas les composants internes qui sont exposés suite à une chute
ou à un autre accident.ou à un autre accident.
Le non-respect de ces consignes peut provoquer un choc électrique ou d’autres blessures.
•• Si vous observez des anomalies provenant du produit comme de la fumée,Si vous observez des anomalies provenant du produit comme de la fumée,
de la chaleur ou des odeurs inhabituelles, débranchez immédiatement lade la chaleur ou des odeurs inhabituelles, débranchez immédiatement la
source d’alimentation de l’appareil photo.source d’alimentation de l’appareil photo.
Continuer d’utiliser le matériel risque de provoquer un incendie, des brûlures ou
d’autres blessures.
•• Gardez votre matériel au sec.Gardez votre matériel au sec.
Ne le manipulez pas avec les mains mouillées.Ne le manipulez pas avec les mains mouillées.
Le non-respect de ces consignes de sécurité peut provoquer un incendie ou un
choc électrique.
•• N’utilisez pas ce produit en présence de poussières ou de gaz inflammablesN’utilisez pas ce produit en présence de poussières ou de gaz inflammables
comme du propane, de l’essence ou des aérosols.comme du propane, de l’essence ou des aérosols.
Le non-respect de cette consigne peut provoquer une explosion ou un incendie.
•• N’observez pas directement le soleil ou toute autre source lumineuseN’observez pas directement le soleil ou toute autre source lumineuse
puissante à travers l’objectif.puissante à travers l’objectif.
Le non-respect de cette consigne peut provoquer des troubles visuels.
•• Conservez ce produit hors de portée des enfants.Conservez ce produit hors de portée des enfants.
Le non-respect de cette consigne peut provoquer des blessures ou le dysfonctionnement
du produit. En outre, notez que les petites pièces présentent un risque d’étouffement. Si
jamais un enfant avalait une pièce de ce produit, consultez immédiatement un médecin.
•• Ne manipulez pas le matériel à mains nues dans des lieux exposés à desNe manipulez pas le matériel à mains nues dans des lieux exposés à des
températures extrêmement basses ou élevées.températures extrêmement basses ou élevées.
Le non-respect de cette consigne peut provoquer des brûlures ou des engelures.
AAATTENTIONATTENTION
•• Ne pointez pas l’objectif en direction du soleil ou d’autres sources très lumineuses.Ne pointez pas l’objectif en direction du soleil ou d’autres sources très lumineuses.
La lumière focalisée par l’objectif peut provoquer un incendie ou endommager les
composants internes du produit. Lorsque vous photographiez un sujet à contre-
jour, veillez à garder toujours le soleil à l’extérieur du cadre. Lorsque le soleil se
trouve près du cadre, sa lumière risque de se concentrer dans l’appareil photo et de
provoquer un incendie.
•• Ne laissez pas le produit exposé à des températures excessivement chaudesNe laissez pas le produit exposé à des températures excessivement chaudes
pendant une période prolongée, comme dans une voiture fermée ou en plein soleil.pendant une période prolongée, comme dans une voiture fermée ou en plein soleil.
Le non-respect de cette consigne peut provoquer un incendie ou le dysfonctionnement
du produit.
•• Ne transportez pas les appareils photo ou les objectifs si des trépieds ouNe transportez pas les appareils photo ou les objectifs si des trépieds ou
accessoires similaires sont fixés.accessoires similaires sont fixés.
Lenon-respectdecetteconsignepeutprovoquerdesblessuresouledysfonctionnement
du produit.
Avis pour les clients au CanadaAvis pour les clients au Canada
CAN ICES-3 B / NMB-3 B
Utilisation de l’objectifUtilisation de l’objectif
Descriptif de l’objectif : noms et fonctionsDescriptif de l’objectif : noms et fonctions
Reportez-vous aux figures situées à gauche.
qRepère de montage
du parasoleil
Référez-vous à ce repère lorsque vous fixez le
parasoleil. Voir B
wBague de zoom Tournez cette bague pour effectuer un zoom
avant ou arrière. —
eÉchelle des focales Définissez la focale approximative lorsque
vous effectuez un zoom avant ou arrière. —
rRepère des focales
tBague de réglage
Mode autofocus sélectionné:
En mode autofocus, tournez la bague pour
modifier un réglage, tel que la [Mise au point
(M/A)] ou l’[Ouverture], attribué à l’aide de
l’appareil photo. Pour en savoir plus, reportez-
vous à la description de [Définition réglages
perso.]/[Commandes perso (prise de vue)] dans
le manuel de l’appareil photo.
—
Mode de mise au point manuelle sélectionné:
Tournez la bague pour effectuer la mise au
point.
●
yRepère de montage
de l’objectif
Référez-vous à ce repère lorsque vous fixez
l’objectif sur l’appareil photo. Voir A
●
u
Joint en caoutchouc
de la monture
d’objectif
——
●
iContacts du
microprocesseur
Utilisés pour transférer les données depuis ou
vers l’appareil photo. —
●
oCommutateur de
verrouillage du zoom
Pour verrouiller la bague de zoom, effectuez
un zoom arrière jusqu’à la focale 24 mm et
positionnez le commutateur sur LOCK. Cela
empêche l’objectif de sortir, entraîné par
son propre poids, lorsque vous transportez
l’appareil photo.
—
!0 Parasoleil
Le parasoleil bloque la lumière diffuse pouvant
provoquer de la lumière parasite ou une image
fantôme. Il permet aussi de protéger l’objectif.
Voir B
!1 Repère de verrouillage
du parasoleil Référez-vous à ce repère lorsque vous fixez le
parasoleil.
!2 Repère d’alignement
du parasoleil
!3 Bouchon d’objectif
(avant) ——
!4 Bouchon d’objectif
(arrière) ——
AFixation et retraitFixation et retrait
Fixation de l’objectif
z
Mettez l’appareil photo hors tension, retirez le bouchon du boîtier et
détachez le bouchon arrière de l’objectif.
xPlacez l’objectif sur le boîtier de l’appareil photo, en maintenant le
repère de montage de l’objectif aligné sur le repère de montage du
boîtier de l’appareil photo, puis faites pivoter l’objectif dans le sens
inverse des aiguilles d’une montre jusqu’au déclic.
Retrait de l’objectif
z
Mettez l’appareil photo hors tension.
x
Maintenez appuyée la commande de déverrouillage de l’objectif tout
en faisant pivoter ce dernier dans le sens des aiguilles d’une montre.
BFixation et retrait du parasoleilFixation et retrait du parasoleil
Alignez le repère de montage du parasoleil sur le repère d’alignement du parasoleil
(q), puis tournez ce dernier (w) jusqu’à ce que le repère de montage s’aligne sur
le repère de verrouillage du parasoleil (e).
Pour retirer le parasoleil, effectuez les étapes ci-dessus dans le sens inverse.
Repère de verrouillage
du parasoleil
Repère d’alignement du parasoleil
Repère de montage du parasoleil
Lorsque vous fixez ou retirez le parasoleil, tenez-le à proximité du repère
d’alignement (●) et évitez de le saisir trop fermement à l’avant. Le parasoleil peut
être retourné et monté sur l’objectif lorsqu’il n’est pas utilisé.
Utilisation de l’objectif avec des appareils photo équipés d’un flash intégréUtilisation de l’objectif avec des appareils photo équipés d’un flash intégré
Des ombres seront visibles sur les photos si la lumière provenant du flash intégré est
occultée par l’objectif ou le parasoleil. Retirez le parasoleil avant la prise de vue. Notez
cependant que même si vous retirez le parasoleil, il est possible que des ombres soient
toujours visibles à certaines focales et à certaines distances du sujet.
Ombre Ombre
• Il est possible que l’objectif produise des ombres sur les photos prises avec le flash
intégré lorsqu’il est fixé sur l’appareil photo suivant. Les focales et les distances
minimales au sujet auxquelles aucune ombre n’est présente sont les suivantes :
Appareil photoAppareil photo 1FocalesFocales Distance minimale sans ombreDistance minimale sans ombre 2
Z 50Z 50
24 mm Des ombres sont présentes à toutes les
distances du sujet
35 mm 1,5 m
50 mm 1,0 m
70 – 200 mm Aucune ombre
1
Reportez-vous au manuel de l’appareil photo pour obtenir les dernières informations
.
2 Parasoleil retiré.
Réduction de vibration (VR)Réduction de vibration (VR)
Vous pouvez activer ou désactiver la fonction de réduction de vibration intégrée à
l’objectif à l’aide des commandes de l’appareil photo ; reportez-vous au manuel de
l’appareil photo pour en savoir plus. Lorsque [Normal] est sélectionné pour l’option de
réduction de vibration intégrée à l’appareil photo, il est possible d’utiliser des vitesses
jusqu’à 5,0 fois* plus lentes que celles normalement utilisées, ce qui augmente la plage
des vitesses d’obturation disponibles.
* Mesures effectuées selon les normes CIPA. Les valeurs des objectifs compatibles avec le format
FX sont mesurées sur des appareils photo hybrides de format FX, celles des objectifs DX sur
des appareils photo hybrides de format DX. Les zooms sont réglés sur leur focale maximale
lorsque les mesures sont effectuées.
D Réduction de vibration
• En raison de la conception du système de réduction de vibration, l’objectif risque d’émettre des cliquetis
lorsqu’il est secoué. Ce phénomène n’est pas le signe d’un dysfonctionnement.
• Pour réduire l’eet de ou provoqué par le bougé du trépied, sélectionnez [Normal] ou [Sport] pour l’option de
réduction de vibration intégrée à l’appareil photo lorsque ce dernier est xé sur un trépied. Notez cependant que selon
le type de trépied et les conditions de prise de vue, il peut exister des cas où [Désactivé] est l’option la mieux adaptée.
• [Normal] ou [Sport] est recommandé lorsque l’appareil photo est xé sur un monopode.
Lorsque l’objectif est fixéLorsque l’objectif est fixé
Le réglage de mise au point risque de changer si vous mettez l’appareil photo hors
tension puis à nouveau sous tension après avoir fait le point. Si vous avez fait le point sur
un emplacement sélectionné au préalable en attendant que votre sujet apparaisse, nous
vous recommandons de ne pas mettre l’appareil photo hors tension tant que vous n’avez
pas pris la photo.
Précautions d’utilisationPrécautions d’utilisation
• Ne prenez pas ou ne tenez pas l’objectif ou l’appareil photo en saisissant uniquement le parasoleil.
• Maintenez les contacts du microprocesseur propres.
• Silejointencaoutchoucdelamontured’objectifestendommagé,cessezimmédiatement
l’utilisation et confiez l’objectif à un centre Nikon agréé pour le faire réparer.
• Remettez les bouchons en place lorsque vous n’utilisez pas l’objectif.
• Pour protéger l’intérieur de l’objectif, rangez-le à l’abri du soleil.
• Ne laissez pas l’objectif dans des endroits humides ou dans des lieux où il risque
d’être exposé à l’humidité. La formation de rouille sur les mécanismes internes peut
provoquer des dommages irréparables.
• Ne laissez pas l’objectif à proximité d’un feu ou dans d’autres endroits extrêmement
chauds. La chaleur extrême pourrait endommager ou déformer les pièces extérieures
composées de plastique renforcé.
• Les changements brusques de température peuvent être à l’origine d’une
condensation préjudiciable à l’intérieur et à l’extérieur de l’objectif. Avant de faire
passer l’objectif d’un environnement chaud à froid ou vice versa, rangez-le dans un
sac ou dans une boîte en plastique pour ralentir le changement de température.
• Nous vous recommandons de ranger l’objectif dans son étui afin de le protéger des
rayures lors du transport.
Entretien de l’objectifEntretien de l’objectif
• Normalement, enlever la poussière suffit pour nettoyer les surfaces en verre de l’objectif.
• Vous pouvez nettoyer la lentille avant traitée au uor comme décrit ci-dessous.
-Les taches, les traces de doigt et autres taches huileuses peuvent être retirées avec un
tissu propre et doux en coton ou un chiffon optique; nettoyez avec un mouvement
circulaire à partir du centre vers l’extérieur.
-Pour retirer les taches tenaces, essuyez délicatement avec un chiffon doux et
légèrement imbibé d’une petite quantité d’eau distillée, d’éthanol ou de nettoyant
pour objectif.
-Les marques en forme de goutte éventuellement présentes suite à ce nettoyage sur
la surface hydrofuge et oléofuge peuvent ensuite être retirées avec un chiffon sec.
• Lorsque vous nettoyez la lentille arrière non traitée au uor, retirez les taches, les traces de doigts et
les autres taches huileuses avec un tissu propre et doux en coton ou un chiffon optique
légèrement imbibé d’une petite quantité d’éthanol ou de nettoyant pour objectif. Essuyez
délicatement avec un mouvement circulaire à partir du centre vers l’extérieur, en prenant
soin de ne pas laisser de traces, ni de toucher le verre avec les doigts.
• N’utilisez jamais de solvants organiques comme un diluant à peinture ou du benzène
pour nettoyer l’objectif.
• Les filtres neutres (NC, disponibles séparément) et autres accessoires similaires
permettent de protéger la lentille avant.
• Si vous n’avez pas l’intention d’utiliser l’objectif pendant une période prolongée, rangez-
le dans un endroit frais et sec pour éviter la moisissure et la rouille. Ne le rangez pas à
la lumière directe du soleil ou avec des boules antimites de naphtaline ou de camphre.
AccessoiresAccessoires
Accessoires fournisAccessoires fournis
• Bouchon d’objectif LC-67B (avant)
• Bouchon d’objectif LF-N1 (arrière)
• Parasoleil HB-93
• Pochette pour objectif CL-C1
D Utilisation de la pochette pour objectif
• La pochette est destinée à protéger l’objectif des rayures et non des chutes ou autres chocs physiques.
• La pochette n’est pas résistante à l’eau.
• La matière utilisée dans cette pochette peut se décolorer, déteindre, s’étirer, rétrécir ou changer de couleur en
cas de frottement ou d’humidité.
• Retirez la poussière avec une brosse à poils doux.
• L’eau et les taches peuvent être retirées de la surface avec un chion doux et sec. N’utilisez pas d’alcool, de
benzène, de diluant ou d’autres substances chimiques volatiles.
• Nerangezpaslapochettedansdes lieux exposés à la lumièredirecte du soleil, à des températuresélevéesouà l’humidité.
• N’utilisez pas la pochette pour nettoyer le moniteur ou les lentilles.
• Veillez à ce que l’objectif ne tombe pas de la pochette lorsque vous le transportez.
Matière : polyester
Accessoires compatiblesAccessoires compatibles
Filtres à visser 67mm
D Filtres
• N’utilisez qu’un seul ltre à la fois.
• Retirez le parasoleil avant de xer un ltre ou de faire pivoter un ltre polarisant circulaire.
CaractéristiquesCaractéristiques
MontureMonture Monture Nikon Z
FocaleFocale 24 – 200 mm
Ouverture maximaleOuverture maximale f/4 – 6.3
Construction optiqueConstruction optique 19 lentilles en 15 groupes (dont 2 lentilles en verre ED, 1 lentille asphérique en
verre ED, 2 lentilles asphériques, des lentilles bénéciant du traitement ARNEO et une
lentille avant traitée au uor)
Angle de champAngle de champ • Format FX : 84°–12° 20’
• Format DX : 61°–8°
Échelle des focalesÉchelle des focales Graduée en millimètres (24, 35, 50, 70, 105, 135, 200)
Système de mise au pointSystème de mise au point
Système de mise au point interne
Réduction de vibrationRéduction de vibration Décentrement avec voice coil motors (VCM)
Distance minimaleDistance minimale
de mise au pointde mise au point
(mesurée à partir du(mesurée à partir du
plan focal)plan focal)
• Focale 24 mm : 0,5 m
• Focale 35 mm : 0,54 m
• Focale 50 mm : 0,55 m
• Focale 70 mm : 0,58 m
• Focale 105 mm : 0,65 m
• Focale 135 mm : 0,68 m
• Focale 200 mm : 0,7 m
Rapport deRapport de
reproduction maximalreproduction maximal 0,28×
Lamelles de diaphragmeLamelles de diaphragme
7 (diaphragme circulaire)
Plage des ouverturesPlage des ouvertures • Focale 24 mm : f/4 – 22
• Focale 200 mm : f/6.3 – 36
Diamètre de xationDiamètre de xation
pour ltrepour ltre 67 mm (P = 0,75mm)
DimensionsDimensions Environ 76,5 mm de diamètre maximum × 114 mm
(distance à partir du plan d’appui de la monture d’objectif de l’appareil photo)
PoidsPoids Environ 570 g
Nikon se réserve le droit de modifier à tout moment l’apparence, les caractéristiques et les
performances de ce produit sans avis préalable.
レンズのお手入れ
• レンズ面を清掃する場合、通常はほこりを払う程度にしてください。
• 最前面のレンズ面(フッ素コートあり)
- 指紋など油分を含む汚れがついたときは、柔らかい清潔な木綿の布または市販のレ
ンズクリーニングペーパーでレンズの中心から外周へ渦巻き状に拭いてください。
- 汚れがひどいときは、少量の真水、無水アルコール(エタノール)、または市販の
レンズクリーナーで湿らせた柔らかい布を使って軽く拭いてください。
- フッ素コート加工されたレンズ面は、撥水性、撥油性が高いため、水滴状の拭き残
りが生じることがあります。その場合は、乾いた布で拭き取ってください。
• 最後面のレンズ面(フッ素コートなし)
- 指紋など油分を含む汚れがついたときは、少量の無水アルコール(エタノール)や
市販のレンズクリーナーで湿らせた柔らかい清潔な木綿の布または市販のレンズク
リーニングペーパーを使って、レンズの中心から外周へ渦巻き状に拭いてください。
その場合、拭きムラや拭き残りがないように注意してください。
• シンナーやベンジンなどの有機溶剤は絶対に使用しないでください。
• レンズ表面の汚れや傷を防ぐには、別売のニュートラルカラー NC フィルターなどの
使用をおすすめします。
• レンズを長期間使用しないときは、カビやサビを防ぐために、高温多湿のところを避
けて風通しのよい場所に保管してください。また、直射日光のあたるところ、防虫剤
のあるところも避けてください。
アクセサリー
付属アクセサリー
• レンズキャップ LC-67B(フロントキャップ)
• レンズキャップ LF-N1(リアキャップ)
• レンズフード HB-93
• レンズケース CL-C1
D
レンズケースのお取り扱いについて
• レンズケースはレンズを傷から守ることを目的としており、落下や衝撃からレンズ
を保護する機能はありません。
• レンズケースに撥水機能はありません。
• レンズケースは材質の特性上、雨や水などで濡れた場合や摩擦によって、色落ち、
変色、色移り、伸縮することがあります。
• ほこりは柔らかいブラシで払い落としてください。
• 表面に付着した汚れや水分は、乾いた柔らかい布で拭き取ってください。アルコール、
ベンジン、シンナーなどの溶剤は使わないでください。
• 直射日光があたる場所や、温度、湿度の高い場所に放置しないでください。
• レンズ面や液晶画面などを拭くクリーニングクロスとしては使用できません。
• レンズを収納して持ち運ぶ際、レンズが転がり出ないようご注意ください。
レンズケースの素材:ポリエステル
使用できるアクセサリー
67mm ネジ込み式フィルター
D
フィルターを使用する場合
• フィルターは 1枚で使用してください。
• フィルターは、レンズフードを取り外してから装着してください。また、円偏光フィ
ルターの偏光効果の調節も、レンズフードを取り外した状態で行ってください。
仕様
マウント ニコン Zマウント
焦点距離 24mm 200mm
最大口径比 1:4 6.3
レンズ構成
15 群19 枚(ED レンズ 2 枚、ED 非球面レンズ 1枚、非球
面レンズ 2 枚、アルネオコートあり 、最前面のレンズ面
にフッ素コートあり )
画角
84°12°20′(
撮像範囲 FX
)
61°8°(撮像範囲 DX)
焦点距離目盛 24、35、50、70、105、135、200mm
フォーカシング方式 IF(インターナルフォーカス)方式
手ブレ補正 ボイスコイルモーター(VCM)によるレンズシフト方式
最短撮影距離
• 焦点距離 24mm 時:撮像面から 0.5m
• 焦点距離 35mm 時:撮像面から 0.54 m
• 焦点距離 50mm 時:撮像面から 0.55m
• 焦点距離 70mm 時:撮像面から 0.58m
• 焦点距離 105 mm 時:撮像面から 0.65m
• 焦点距離 135 mm 時:撮像面から 0.68 m
• 焦点距離 200mm 時:撮像面から 0.7m
最大撮影倍率 0.28 倍
絞り羽根枚数 7枚(円形絞り)
絞りの範囲 • 焦点距離 24mm 時:f/4 22
• 焦点距離 200mm 時:f/6.3 36
アタッチメントサイズ 67mm(P=0.75mm)
寸法 約76.5mm(最大径)× 114mm(レンズマウント基準
面からレンズ先端まで)
質量 約570g
※製品の外観・仕様・性能は予告なく変更することがありますので、ご了承ください。
製品の使い方に関するお問い合わせ先
■インターネットでのお問い合わせ
https://www.nikon-image.com/support/contact/
■お電話でのお問い合わせ
ニコン カスタマーサポートセンター ナビダイヤル
0570-02-8000
営業時間:9:30 〜18:00(年末年始、夏期休業日等を除く毎日)
• ナビダイヤルをご利用いただけない場合は、ニコンカスタマーサポートセンター
(03)
6702-0577 におかけください。
• ファクシミリは、(03)
5977-7499 にお送りください。
お問い合わせ時のお願い
• おわかりになる範囲で「製品名」、「製品番号」、「ご購入日」、問題が発生した場合は「手順」、「現象
(表示されたメッセージ)」、「発生頻度」などをご確認のうえ、お問い合わせください。
ニコンイメージング会員「製品登録」のご案内
ニコンでは製品を安全に、安心してご使用いただくため「製品登録」へのご協力をお願いしてお
ります。ご登録いただいた製品に関するファームアップ情報や重要なお知らせなどをメールでご
案内いたします。
■製品登録方法
製品は、「ニコンイメージング会員」(無料)の「製品登録」ページからご登録いただけます。
ニコンイメージング会員登録および製品登録は以下ニコンホームページからお手続きください。
ニコンイメージング会員のご案内
https://www.nikon-image.com/enjoy/membership/about/
■ニコンイメージング会員とは
登録製品に関するサポート情報・ニコン製品情報や、お得で便利な会員特
典※などフォトライフをよりお楽しみいただくための会員サービスです。
※
特典は登録製品ごとに異なります。
ご注意
• ご登録にはメールアドレスとインターネットに接続できる環境が必要です。
• 登録製品の製品番号(製品本体および保証書に記載)が必要です。
• 特典の内容は、予告なく変更される場合があります。あらかじめご了承ください。
ニコンイメージングサポートページのご案内
https://www.nikon-image.com/support/
最新の製品テクニカル情報や、ソフトウェアのアップデート情報をご覧いただ
けます。
製品をより有効にご利用いただくために、定期的なアクセスをお
すすめします。
Printed in Thailand
7MMA3364-02 U
