manuals.online logo
Brands
  1. Home
  2. •
  3. Brands
  4. •
  5. Noctua
  6. •
  7. Computer Hardware
  8. •
  9. Noctua NH-L9 65 Series User manual

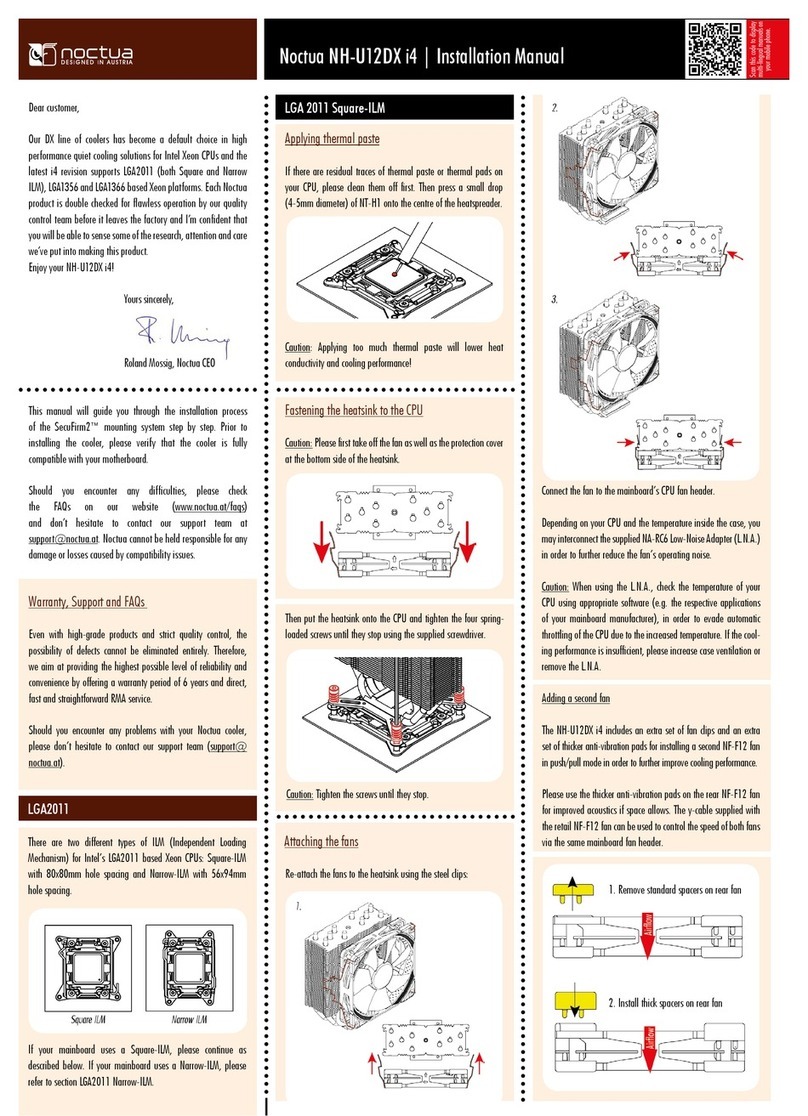
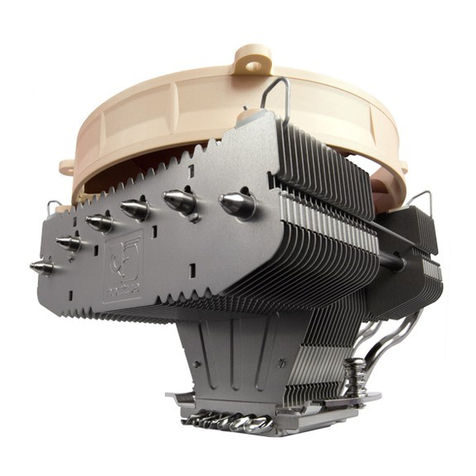
Noctua NH-L9 65 Series User manual

Required mounting parts:
Dear customer,
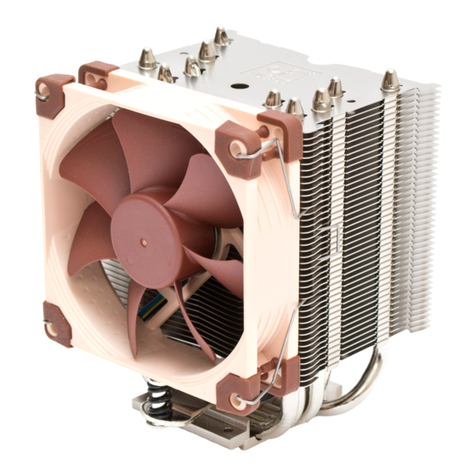
Congratulations on choosing the Noctua NH-L9x65. The NH-
L9x65 is a taller, performance-enhanced version of our award-
winning NH-L9 low-profile coolers. It fuses everything users
have come to expect from our larger coolers into a compact
premium package for space restricted systems.
Enjoy your NH-L9x65!
Yours sincerely,
Roland Mossig, Noctua CEO
This manual will guide you through the installation process of the
SecuFirm2™ mounting system step by step.
Prior to installing the cooler, please consult the compatibility list
on our website (www.noctua.at/compatibility) and verify that
the cooler is fully compatible with your motherboard.
Should you encounter any difficulties, please check the FAQs on
our website (www.noctua.at/faqs) and don’t hesitate to contact
our support team at support@noctua.at.
Noctua cannot be held responsible for any damage or losses
caused by compatibility issues.
Multilingual versions of this manual are available on our
website: www.noctua.at/manuals
Removing the mainboard
In case you want to use the cooler on an assembled system and
your case doesn’t have a cut-out at the rear side of the mainboard
tray, you first have to remove the mainboard from the case in
order to be able to install the supplied backplate.
Step 1
2x NM-IMB2 Mounting Bars1x NM-IBP2 Backplate
4x NM-ITS1 Thumbscrews4x NM-IPS1 Spacers
Place the backplate on the rear side of the mainboard so that the
bolts stick through the mounting holes.
Caution: Please make sure that the three cut-outs in the
supplied backplate align with the screws of the mainboard’s stock
backplate.
Installing the mounting bars
Caution: Choose the alignment of the mounting bars according to
the desired final orientation of the cooler:
Step 3
First put the plastic spacers onto the bolts of the backplate, then
add the mounting bars.
Attaching the backplate
Caution: The supplied backplate will install over the mainboard’s
stock backplate, so the mainboard’s stock backplate must not be
taken off.
Step 2
Noctua NH-L9x65 | Installation Manual | LGA115x
LGA115x
Orientation A Orientation B
Caution: Make sure that the curved sides of the mounting bars are
pointing outwards.
Fix the mounting bars using the 4 thumb screws.
Caution: Gently tighten the screws until they stop, but don’t use
excessive force.
Caution: Tighten the screws until they stop.
Noctua NH-L9x65 | Installation Manual | LGA115x
LGA115x
Fastening the heatsink to the CPU
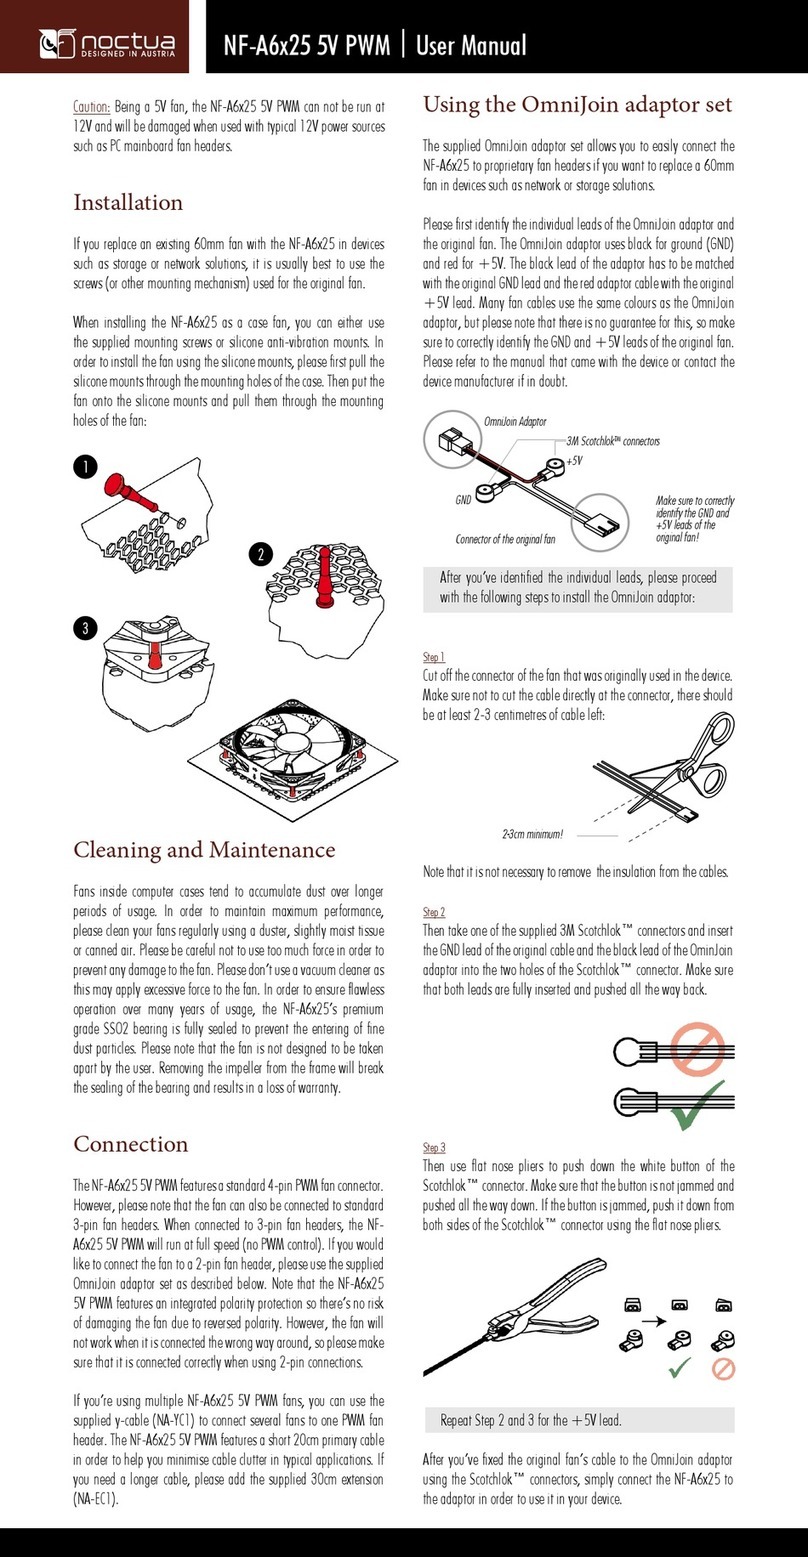
Caution: Please first take off the protection cover at the bottom
side of the heatsink.
Then put the heatsink onto the CPU and screw it to the screw
threads of the mounting bars. Note that you can reach through
the blades of the fan using the supplied screw driver. There is
thus no need to take off the fan for installation.
Step 5
Connect the fan to the mainboard’s CPU fan header. Depending
on your CPU and the temperature inside the case, you may
interconnect the supplied NA-RC7 Low-Noise Adaptors (L.N.A.)
in order to further reduce the fans’ operating noise.
Caution: When using the L.N.A., check the temperature of your
CPU using appropriate software (e.g. the respective applications
of your mainboard manufacturer), in order to evade automatic
throttling of the CPU due to the increased temperature. If the
cooling performance is insufficient, please increase case
ventilation or remove the L.N.A.
Even with high-grade products and strict quality control, the
possibility of defects cannot be eliminated entirely. Therefore,
we aim at providing the highest possible level of reliability and
convenience by offering a warranty period of 6 years and direct,
fast and straightforward RMA service.
Should you encounter any problems with your NH-L9x65, please
don’t hesitate to contact our support team ([email protected]).
Please also consult the FAQ section on our website:
www.noctua.at/faqs.
Warranty, Support and FAQs
Applying thermal paste
If there are residual traces of thermal paste or thermal pads on
your CPU, please clean them off first. Then press a small drop
(4-5mm diameter) of NT-H1 onto the centre of the heatspreader.
Step 4
Caution: Applying too much thermal paste will lower heat
conductivity and cooling performance!
Installing the mounting bars
First screw the NM-IBT2 bolts into the screw threads of the
LGA2011 socket frame.
Step 1
Then put the NM-IMB2 mounting-bars onto the bolts.
Caution: Make sure that the curved sides of the mounting bars are
pointing outwards.
Noctua NH-L9x65 | Installation Manual | LGA2011
LGA2011
Caution: Choose the alignment of the mounting bars according to
the desired final orientation of the cooler:
Orientation A Orientation B
Fix the mounting bars using the 4 thumb screws.
Caution: Gently tighten the screws until they stop, but don’t use
excessive force.
Required mounting parts:
Dear customer,
Congratulations on choosing the Noctua NH-L9x65. The NH-
L9x65 is a taller, performance-enhanced version of our award-
winning NH-L9 low-profile coolers. It fuses everything users
have come to expect from our larger coolers into a compact
premium package for space restricted systems.
Enjoy your NH-L9x65!
Yours sincerely,
Roland Mossig, Noctua CEO
This manual will guide you through the installation process of the
SecuFirm2™ mounting system step by step.
Prior to installing the cooler, please consult the compatibility list
on our website (www.noctua.at/compatibility) and verify that
the cooler is fully compatible with your motherboard.
Should you encounter any difficulties, please check the FAQs on
our website (www.noctua.at/faqs) and don’t hesitate to contact
our support team at support@noctua.at.
Noctua cannot be held responsible for any damage or losses
caused by compatibility issues.
Multilingual versions of this manual are available on our
website: www.noctua.at/manuals
2x NM-IMB2 Mounting Bars
4x NM-ITS1 ThumbscrewsNM-IBT2 Bolts
Applying thermal paste
If there are residual traces of thermal paste or thermal pads on
your CPU, please clean them off first. Then press a small drop
(4-5mm diameter) of NT-H1 onto the centre of the heatspreader.
Step 2
Caution: Applying too much thermal paste will lower the heat
conductivity and cooling performance!
Noctua NH-L9x65 | Installation Manual | LGA2011
LGA2011
Even with high-grade products and strict quality control, the
possibility of defects cannot be eliminated entirely. Therefore,
we aim at providing the highest possible level of reliability and
convenience by offering a warranty period of 6 years and direct,
fast and straightforward RMA service.
Should you encounter any problems with your NH-L9x65, please
don’t hesitate to contact our support team ([email protected]).
Please also consult the FAQ section on our website:
www.noctua.at/faqs.
Warranty, Support and FAQs
Caution: Tighten the screws until they stop.
Fastening the heatsink to the CPU
Caution: Please first take off the protection cover at the bottom
side of the heatsink.
Then put the heatsink onto the CPU and screw it to the screw
threads of the mounting bars. Note that you can reach through
the blades of the fan using the supplied screw driver. There is
thus no need to take off the fan for installation.
Step 3
Connect the fan to the mainboard’s CPU fan header. Depending
on your CPU and the temperature inside the case, you may
interconnect the supplied NA-RC7 Low-Noise Adaptors (L.N.A.)
in order to further reduce the fans’ operating noise.
Caution: When using the L.N.A., check the temperature of your
CPU using appropriate software (e.g. the respective applications
of your mainboard manufacturer), in order to evade automatic
throttling of the CPU due to the increased temperature. If the
cooling performance is insufficient, please increase case
ventilation or remove the L.N.A.
Attaching the mounting bars
First put the plastic spacers onto the screw threads, then fix the
mounting bars using the 4 long screws.
Step 2
Caution: The SecuFirm2™ mounting system requires a back-
plate, which is preinstalled on most AMD mainboards. If your
mainboard doesn’t have a backplate, please contact our support
team at suppor[email protected].
Removing the retention module
If your mainboard uses a retention module for CPU cooler instal-
lation, please remove it first. The SecuFirm2™ mounting system
will install directly to your mainboard’s stock backplate on the rear
side of the socket.
Step 1
AMD stock backplate
Noctua NH-L9x65 | Installation Manual | AMD
AMD
Caution: Tighten the screws until they stop.
Caution: Make sure that the curved sides of the mounting bars are
pointing inwards.
Required mounting parts:
Dear customer,
Congratulations on choosing the Noctua NH-L9x65. The NH-
L9x65 is a taller, performance-enhanced version of our award-
winning NH-L9 low-profile coolers. It fuses everything users
have come to expect from our larger coolers into a compact
premium package for space restricted systems.
Enjoy your NH-L9x65!
Yours sincerely,
Roland Mossig, Noctua CEO
This manual will guide you through the installation process of the
SecuFirm2™ mounting system step by step.
Prior to installing the cooler, please consult the compatibility list
on our website (www.noctua.at/compatibility) and verify that
the cooler is fully compatible with your motherboard.
Should you encounter any difficulties, please check the FAQs on
our website (www.noctua.at/faqs) and don’t hesitate to contact
our support team at support@noctua.at.
Noctua cannot be held responsible for any damage or losses
caused by compatibility issues.
Multilingual versions of this manual are available on our
website: www.noctua.at/manuals
2x NM-AMB1 Mounting Bars
4x NM-APS1 Plastic Spacers4x NM-ALS1 Screws
Applying thermal paste
If there are residual traces of thermal paste or thermal pads on
your CPU, please clean them off first. Then press a small drop
(4-5mm diameter) of NT-H1 onto the centre of the heatspreader.
Step 3
Caution: Applying too much thermal paste will lower the heat
conductivity and cooling performance!
Noctua NH-L9x65 | Installation Manual | AMD
AMD
Caution: Tighten the screws until they stop.
Fastening the heatsink to the CPU
Caution: Please first take off the protection cover at the bottom
side of the heatsink.
Then put the heatsink onto the CPU and screw it to the screw
threads of the mounting bars. Note that you can reach through
the blades of the fan using the supplied screw driver. There is
thus no need to take off the fan for installation.
Step 4
Connect the fan to the mainboard’s CPU fan header. Depending
on your CPU and the temperature inside the case, you may
interconnect the supplied NA-RC7 Low-Noise Adaptors (L.N.A.)
in order to further reduce the fans’ operating noise.
Caution: When using the L.N.A., check the temperature of your
CPU using appropriate software (e.g. the respective applications
of your mainboard manufacturer), in order to evade automatic
throttling of the CPU due to the increased temperature. If the
cooling performance is insufficient, please increase case
ventilation or remove the L.N.A.
Even with high-grade products and strict quality control, the
possibility of defects cannot be eliminated entirely. Therefore,
we aim at providing the highest possible level of reliability and
convenience by offering a warranty period of 6 years and direct,
fast and straightforward RMA service.
Should you encounter any problems with your NH-L9x65, please
don’t hesitate to contact our support team ([email protected]).
Please also consult the FAQ section on our website:
www.noctua.at/faqs.
Warranty, Support and FAQs

Other Noctua Computer Hardware manuals
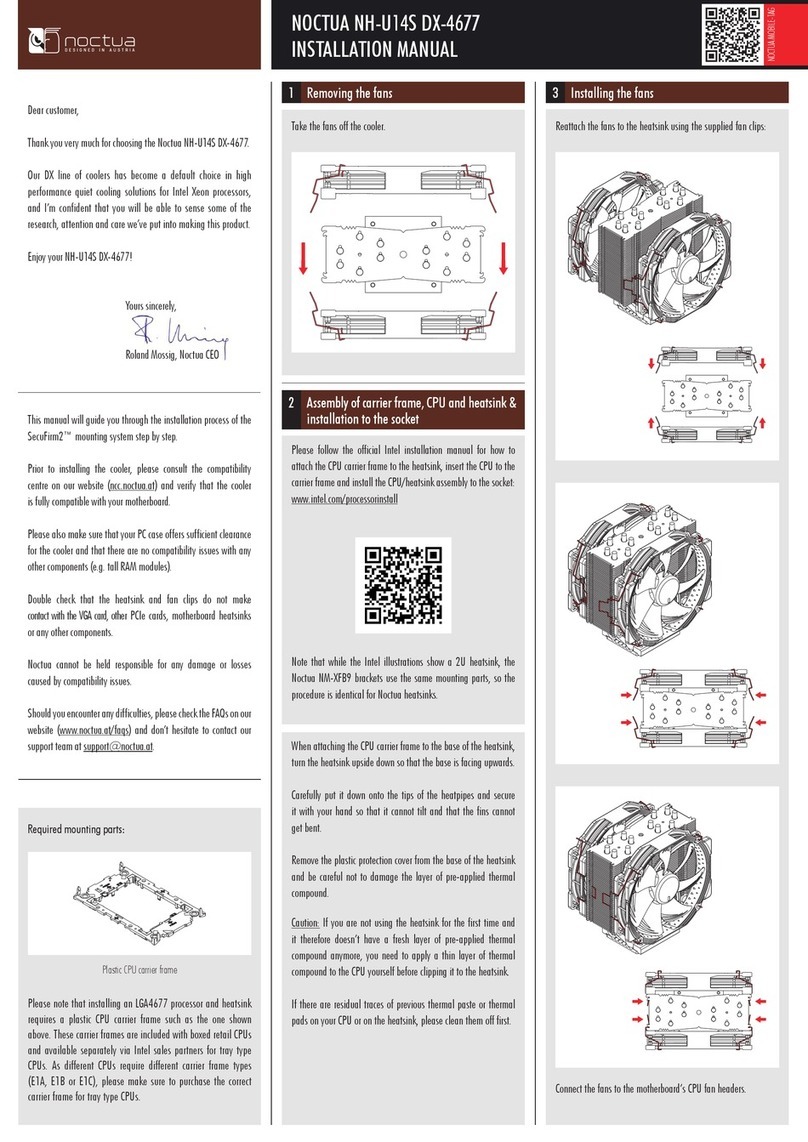
Noctua NH-C14S User manual

Noctua

Noctua NH-C14S User manual

Noctua NA-SAV4 User manual

Noctua

Noctua NA-SAV4 User manual

Noctua NH-U14S DX-4677 User manual

Noctua

Noctua NH-U14S DX-4677 User manual
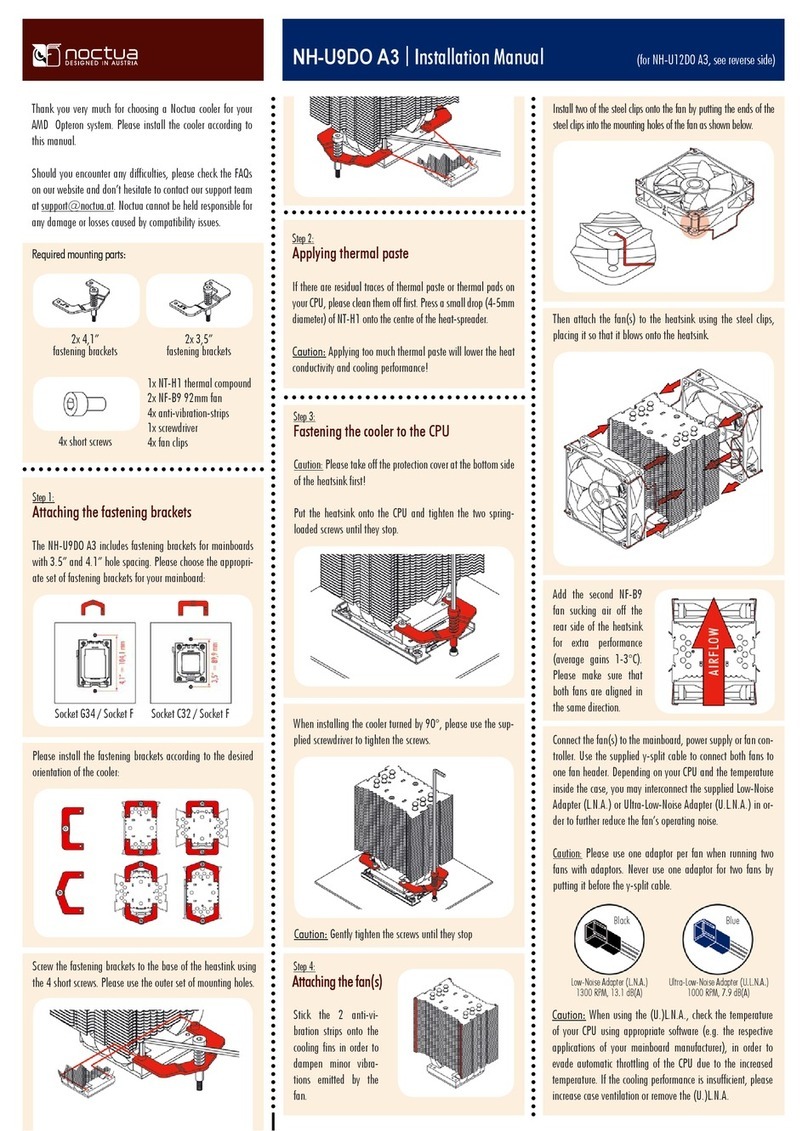
Noctua NM-A90 User manual

Noctua

Noctua NM-A90 User manual

Noctua NA-IS1-14 Sx2 User manual

Noctua

Noctua NA-IS1-14 Sx2 User manual

Noctua NF-S12AFIX User manual

Noctua

Noctua NF-S12AFIX User manual

Noctua NH-U12S chromax.black User manual

Noctua

Noctua NH-U12S chromax.black User manual

Noctua NH-U Series User manual

Noctua

Noctua NH-U Series User manual

Noctua DX Series User manual

Noctua

Noctua DX Series User manual

Noctua NH-D9 DX-3647 4U User manual

Noctua

Noctua NH-D9 DX-3647 4U User manual

Noctua DX Series User manual

Noctua

Noctua DX Series User manual

Noctua NF-A9 User manual

Noctua

Noctua NF-A9 User manual

Noctua NH-U9DO A3 User manual

Noctua

Noctua NH-U9DO A3 User manual
Noctua NF-A12x25 5V User manual

Noctua

Noctua NF-A12x25 5V User manual
Noctua NF-F12 5V User manual

Noctua

Noctua NF-F12 5V User manual

Noctua NM-i4677 User manual

Noctua

Noctua NM-i4677 User manual

Noctua NH-U9B SE2 User manual

Noctua

Noctua NH-U9B SE2 User manual

Noctua NH-U12A User manual

Noctua

Noctua NH-U12A User manual

Noctua NH-D15S User manual

Noctua

Noctua NH-D15S User manual

Noctua NH-U12S DX-3647 User manual

Noctua

Noctua NH-U12S DX-3647 User manual

Noctua NF-A12x25 ULN User manual

Noctua

Noctua NF-A12x25 ULN User manual

Noctua NH-D15 User manual

Noctua

Noctua NH-D15 User manual
Noctua NF-A4x10 5V User manual

Noctua

Noctua NF-A4x10 5V User manual

Noctua NH-D15 User manual

Noctua

Noctua NH-D15 User manual

Popular Computer Hardware manuals by other brands

iWave FMS-8480 user manual

iWave

iWave FMS-8480 user manual

Avalue Technology ENX-LX800 user manual

Avalue Technology

Avalue Technology ENX-LX800 user manual

Lexicon MPX 1 V1.10 - UPGRADE manual

Lexicon

Lexicon MPX 1 V1.10 - UPGRADE manual

Link electronics SDI to Analog Composite & Y/C DigiFlex 1159 Specification sheet

Link electronics

Link electronics SDI to Analog Composite & Y/C DigiFlex 1159 Specification sheet

BE QUIET! sTRX4 Product information

BE QUIET!

BE QUIET! sTRX4 Product information

IBM THINKCENTER 8128 Hardware Maintenance Manual

IBM

IBM THINKCENTER 8128 Hardware Maintenance Manual

Nvidia TESLA M2050 Board specification

Nvidia

Nvidia TESLA M2050 Board specification

Lenovo ThinkPad 43N3218 user guide

Lenovo

Lenovo ThinkPad 43N3218 user guide

Advantech PCE-GIGE2 Startup manual

Advantech

Advantech PCE-GIGE2 Startup manual

Thermaltake Pacific MX1 Plus manual

Thermaltake

Thermaltake Pacific MX1 Plus manual

NuDAQ PET-48DIO user guide

NuDAQ

NuDAQ PET-48DIO user guide

NEC IE-703242-G1-EM1 Preliminary user's manual

NEC

NEC IE-703242-G1-EM1 Preliminary user's manual

Seco Qseven ATLAS user manual

Seco

Seco Qseven ATLAS user manual

Extron electronics Annotator user manual

Extron electronics

Extron electronics Annotator user manual

Cirrus Logic CobraNet Silicon Series Hardware user manual

Cirrus Logic

Cirrus Logic CobraNet Silicon Series Hardware user manual

Intel T8300 - Core 2 Duo 2.4GHz 800MHz 3MB Socket P Mobile... Documentation update

Intel

Intel T8300 - Core 2 Duo 2.4GHz 800MHz 3MB Socket P Mobile... Documentation update

Laird BL654 user guide

Laird

Laird BL654 user guide

Alesis QUADRAVERB Service manual

Alesis

Alesis QUADRAVERB Service manual

manuals.online logo
manuals.online logoBrands
  • About & Mission
  • Contact us
  • Privacy Policy
  • Terms and Conditions

Copyright 2025 Manuals.Online. All Rights Reserved.