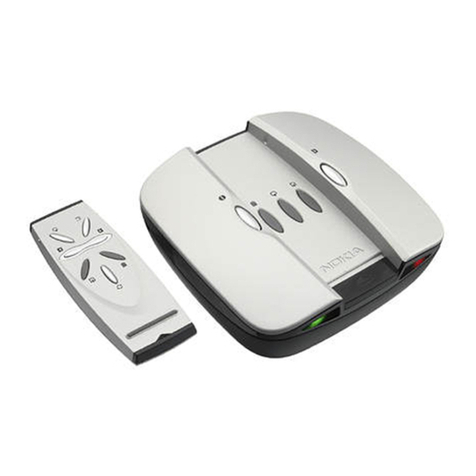
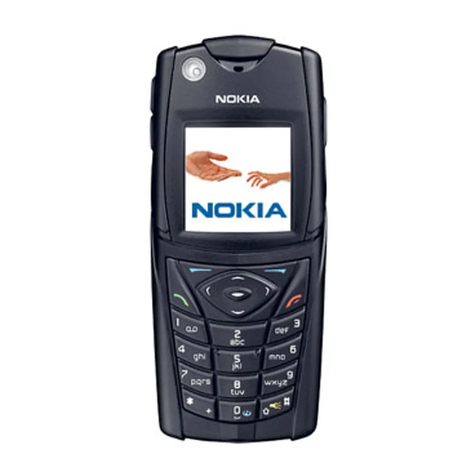
Nokia Image Viewer SU-5 User manual

User Guide for Nokia Image Viewer SU-5
9312060
Issue 1
DECLARATION OF CONFORMITY
We, NOKIA CORPORATION, declare under our sole responsibility that the product
SU-5 is in conformity with the provisions of the following Council Directive:
1999/5/EC. A copy of the Declaration of Conformity can be found at
http://www.nokia.com/phones/declaration_of_conformity/.
Copyright © 2004 Nokia. All rights reserved.
Nokia, Nokia Connecting People and Pop-Port are trademarks or registered trademarks of Nokia
Corporation. Other product and company names mentioned herein may be trademarks or
tradenames of their respective owners.
Nokia operates a policy of continuous development. Nokia reserves the right to make changes
and improvements to any of the products described in this document without prior notice.
Nokia reserves the right to revise this document or withdraw it at any time without prior
notice.
Under no circumstances shall Nokia be responsible for any loss of data or income or any
special, incidental, consequential or indirect damages howsoever caused.
The availability of particular products may vary by region. Please check with the Nokia dealer
nearest to you.
!

FOR YOUR SAFETY
2
FOR YOUR SAFETY
Read these simple guidelines. Breaking the rules may be dangerous or illegal.
Further detailed information is given in this manual.
QUALIFIED SERVICE
Only qualified personnel may repair the Nokia Image Viewer.
CONNECTING TO OTHER DEVICES
When connecting to any other device, read its user's guide for detailed
safety instructions. Do not connect incompatible products.
WATER-RESISTANCE
Your Nokia Image Viewer is not water-resistant. Keep it dry.
IMPORTANT:
Do not point the IR (infrared) beam at anyone's eye or allow it to interfere
with other IR devices. The remote control is a Class 1 Laser product.
CHARGERS AND BATTERIES
Check the model number of any charger before use with this device. The Nokia
Image Viewer is intended for use with the following chargers: ACP-8, ACP-9 and
ACP-12 and with standard AAA batteries.
Warning! Use only batteries and chargers approved by the manufacturer
for use with this particular enhancement. The use of any other types will
invalidate any approval or warranty applying to the enhancement, and
may be dangerous.
IMPORTANT:
Only use chargers in dry conditions. Never connect the device to a power
supply when the device or charger or their parts are damp or wet.
Never use any charger or battery which is damaged.
!

Introduction
3
English
Do not short-circuit the batteries.
Do not dispose of batteries in a fire!
Dispose of batteries according to local regulations (e.g. recycling). Do not dispose
as household waste.
Introduction
The Nokia Image Viewer can display pictures that you have stored in a
compatible phone or in an optional MMC card on a TV screen or
compatible video projector.
Read this user guide carefully before using the Nokia Image Viewer.
■Compatibility
• Removable storage: Full-size 16 MB - 512 MB MMC cards.
• Image display devices: The Nokia Image Viewer is compatible with the
PAL and NTSC standards. You can also connect the Nokia Image Viewer
to a compatible video projector through an AV connector. SECAM TV
sets require a special adapter which is not supplied in the sales
package. The SECAM adapter can be bought in an electrical supply
store.
• Phones: The Nokia Image Viewer is compatible with most Nokia MMS-
enabled phones with a Pop-PortTM connector. Via the MMC card, the
image viewer is compatible with the phones which have an MMC card
(such as Nokia 9210 phone).
" !

Getting started
4
1. Getting started
The Nokia Image Viewer and its
remote control have the following
parts:
1. Main unit
2. Remote control
3. Power on/off button
4. Forward/Memory Change
button
5. Delete button
6. Rotate/Slide Show button
7. Save button
8. Power indicator light (red)
The red light is shown when the
Nokia Image Viewer is on. The
light blinks when the Nokia
Image Viewer transfers images
from a connected phone.
9. Charger indicator light (green)
The green light is shown when
the Nokia Image Viewer uses
the charger instead of the
batteries as a power source.
10.IR port of the main unit
11. IR port of the remote control
!

Getting started
5
English
12.Rotate button
13.Slide Show button
14.Backward button
15.Forward button
16.Save button
17.Memory Change button
18.Delete button
There are two ways to press the
buttons.
•Press - press a button down and
release immediately
•Press and hold - press and hold
down a button for at least three
seconds
Indicators on the display
Could not find the default
image folder in the phone.
The default image folder in
the phone is empty.
The MMC memory
selected.
The phone memory
selected.
The MMC card is full.
The MMC card is
incompatible.
An image or images
successfully saved to the
MMC card.
The images in the slide
show change every 4
seconds.
The images in the slide
show change every 8
seconds.
The battery power low.
The battery power critical.
Change the batteries or
connect to the charger.
The image was
successfully deleted from
the Nokia Image Viewer or
from the MMC card,
depending on the selected
memory.
!

Getting started
6
■Using the Nokia Image Viewer for the first time
1. Open the main unit by pushing the release bar (1) and lifting the main
unit cover (2).
Note: Always switch the power off and disconnect the device from the
charger or any other enhancement before opening the unit.
2. Unwrap the RCA connector cable from around the battery cover (3).
Remove the battery cover by sliding it up as indicated by the arrow,
insert the AAA batteries (4) and slide the cover back in place.
# !

Getting started
7
English
3. Insert the MMC card (6) in the slot with the contact surface towards
the top of the main unit (where the buttons are). Lock the card in by
pushing it in. To release the card, push it slightly in again.
4. Check that the NTSC/PAL switch (5) is in the correct position, make
sure that the RCA cable is in the provided notch (7) and close the main
unit.
5. Install the provided remote control CR2032 button battery (8).
If you are using the remote control, it must be within a maximum of 7
meters of the main unit, and there must be no obstructions between
the IR ports of the main unit and the remote control.
6. Connect the lead from the
charger to the socket at the back
of the Nokia Image Viewer (9)
and connect the charger to an AC
wall socket. When connected to a
charger, the Nokia Image Viewer
does not use or recharge the
batteries.
!

Getting started
8
When using batteries as a power source, the Nokia Image Viewer
automatically enters sleep mode, if no control buttons have been
pressed for a while. Press any control button to stop the sleep mode.
7. To switch on the Nokia Image Viewer, press and hold on the main
unit until the red indicator light turns on. Note that you cannot switch
the power on with the remote control.
8. Connect the RCA connector from the Nokia Image Viewer to a TV.
If your TV does not have a RCA connector, you need a RCA/SCART
adapter, which you can obtain from an electrical supply store. If you
are using a wide screen TV set, the TV screen should be set to a 4/3
ratio.
9. Open the RCA input channel in the TV. The Nokia logo is shown on the
TV screen when the correct channel is opened.
10.Unwrap the Pop-PortTM connector from the bottom of the main unit
and connect it to the compatible phone’s Pop-PortTM. Make sure that
the phone is switched on.
A progress bar is displayed on the TV while the images are transferred
from the phone. While the progress bar is displayed, pressing any of
the buttons on the main unit or the remote control will have no effect.
If no progress bar is shown, switch the phone off and then on again.
11. When you want to stop using the Nokia Image Viewer, press and hold
to switch off the power. Note that you cannot switch the power off
with the remote control.
$ !

Using the Nokia Image Viewer
9
English
2. Using the Nokia Image Viewer
■Nokia Image Viewer memory and picture formats
The Nokia Image Viewer supports JPEG and GIF (not animated GIF) image
formats, up to 1600 * 1200 pixels. The Nokia Image Viewer scales the
images to fit optimally on the TV screen.
The Nokia Image Viewer can show images stored either in an MMC card or
in a connected phone. When phone memory is selected, the Nokia Image
Viewer transfers the images from a phone folder called SU-5, and, if no
such folder is found, from your phone´s default image folder. Depending
on your phone model and the selected language of the phone, this default
folder is shown differently on the phone´s side. See your phone´s user
guide for the exact name and location of the default image folder. When
MMC memory is selected, the Nokia Image Viewer transfers the images
from the root directory, from the "Images" folder, and from the "DCF"
folder of the MMC. When you store images from a phone in the MMC card
in the Nokia Image Viewer, the images are stored in the "Images" folder,
or, if no such folder is found, in the root directory. Although the Nokia
Image Viewer scales images before displaying them, it saves them to the
MMC card in their original format.
When you want to view images from a phone, the Nokia Image Viewer
transfers images from the phone and stores them in an internal buffer
memory. If the buffer memory is unable to hold all the images, the Nokia
Image Viewer automatically recycles the images in the buffer memory.
This means that all the images in the phone can be displayed, even if they
!

Using the Nokia Image Viewer
10
all cannot be stored in the buffer memory at the same time. If the phone is
disconnected, you can continue viewing the images stored in the buffer
memory until a phone is reconnected or the Nokia Image Viewer is
switched off. All images in the buffer memory are discarded when the
image viewer is turned off or a phone is connected.
■Selecting the memory
The icon at the left bottom corner of the TV screen shows which memory
is selected. The phone memory ( ) means that you can view the images
in the connected phone. The MMC memory ( ) means that you can view
the images in the MMC card inserted in the Nokia Image Viewer.
When you switch the Nokia Image Viewer on, it chooses the phone
memory by default. If no phone is connected, the Nokia Image Viewer
attempts to switch to the MMC memory. If no MMC card is inserted in the
image viewer, and there is still no phone connected, the icon is
displayed.
To change which memory you use, press on the remote control or
press and hold on the main unit.
■Viewing images
You can display one image at a time or a set of images as a slide show.
• Press or on the remote control to scroll through the images and
select the image you want to view. If you press and hold or , the
images scroll automatically.
!
Using the Nokia Image Viewer
11
English
If you are using the main unit, press to scroll forward. Note that if
you press and hold , the images do not scroll, as the memory
changes instead.
• To start or stop a slide show, press on the remote control or press
and hold on the main unit.
The images in the slide show change every 4 or 8 seconds. To change
the interval, press and hold on the remote control. You cannot
change the interval from the main unit.
■Rotating, saving and deleting images
• To rotate the image displayed on the TV screen 90oclockwise, press
on the remote control or the main unit.
• When phone memory is selected, you can save images from a phone to
the MMC card inserted in the Nokia Image Viewer.
To save a single image, press on the remote control or the main unit
when the image you want to save is displayed.
To save an entire slide show, press and hold on the remote control
or the main unit. Note that if the slide show is not on, only the
displayed image is saved.
Before saving the images, the Nokia Image Viewer checks that the
MMC card has room for them. If the entire slide show does not fit in
the MMC card, the icon is displayed and none of the images are
saved.
!
Care and maintenance
12
• When phone memory is selected, you can delete an image from the
Nokia Image Viewer’s internal buffer memory, not from the phone.
When the image is deleted from the buffer memory, it is not displayed
anymore.
When MMC memory is selected, you can delete an image directly from
the MMC card inserted in the Nokia Image Viewer.
When the image you want to delete is displayed, press and hold on
the remote control or the main unit, until the icon is displayed.
Care and maintenance
Treat your Nokia Image Viewer with care. The suggestions below will help you to
enjoy the product for many years.
• Keep all enhancements out of the reach of small children.
• Use the Nokia Image Viewer indoors only.
• Do not drop, knock or shake the Nokia Image Viewer. Rough handling can break
internal circuit boards.
• Do not use harsh chemicals, cleaning solvents, or strong detergents to clean the
Nokia Image Viewer.
If the Nokia Image Viewer is not working properly, take it to your nearest qualified
service facility.
!
Other manuals for Image Viewer SU-5
1
Table of contents
Other Nokia Cell Phone Accessories manuals

Nokia
Nokia Audio Adapter AD-46 User manual

Nokia
Nokia CR-116 User manual

Nokia
Nokia Xpress-on User manual

Nokia
Nokia HH-20 User manual

Nokia
Nokia 6585 - Cell Phone - CDMA2000 1X Service manual

Nokia
Nokia PT-8 User manual

Nokia
Nokia Image Viewer SU-5 User manual

Nokia
Nokia 8110 User manual

Nokia
Nokia PT-3 User manual

Nokia
Nokia HH-12 User manual

Nokia
Nokia Mediamaster 110 S User manual

Nokia
Nokia Xpress-on User manual

Nokia
Nokia LPS-5 User manual

Nokia
Nokia DT-900 User manual

Nokia
Nokia DC-19 User manual

Nokia
Nokia WS-2 User manual

Nokia
Nokia PT-3 User manual

Nokia
Nokia Music Pack User manual

Nokia
Nokia CR-82 User manual

Nokia
Nokia CR-102 User manual