Nokia 5160 - Cell Phone - AMPS User manual

OWNER’S
MANUAL
OWNER’S
MANUAL
5160cove 10/13/98 1:48 PM Page 1

Keys
0HQX
Power key
See p. 6.
Navi™ key
See p. 6. Scroll keys
See p. 6.
Emergency 9 key
See p. 28.
Voice mail key
See p. 25.
Numberkeys
See p. 11.
Fixed-length
antenna
See p. 15.
Do not
attempt to
extend or
remove!
Earpiece
See p. 16.
Screen
Current
function of
Navi™ key
Clear key
See p. 7.

0
Indicators and icons
You have an active call.
You have one or more new voice messages.
You have one or more new text messages.
Keyguard is on. Your phone will not accept any
keypresses. To turn it off, press 8QORFN, then .
The alarm clock is set.
The ringing option is set to 6LOHQW.
Digital service is available.
The phone is ready for you to enter a response.
Characters entered will be upper-case letters.
Press the key to switch letter case.
Characters entered will be lower-case letters.
Press the key to switch letter case.
Characters entered will be numbers. (When
entering letters, switch to numbers by pressing and
holding the key.)
You are in “special character” mode; select a
character, then press 8VH. (When entering letters,
switch to special characters by pressing the
key.)

i
Contents
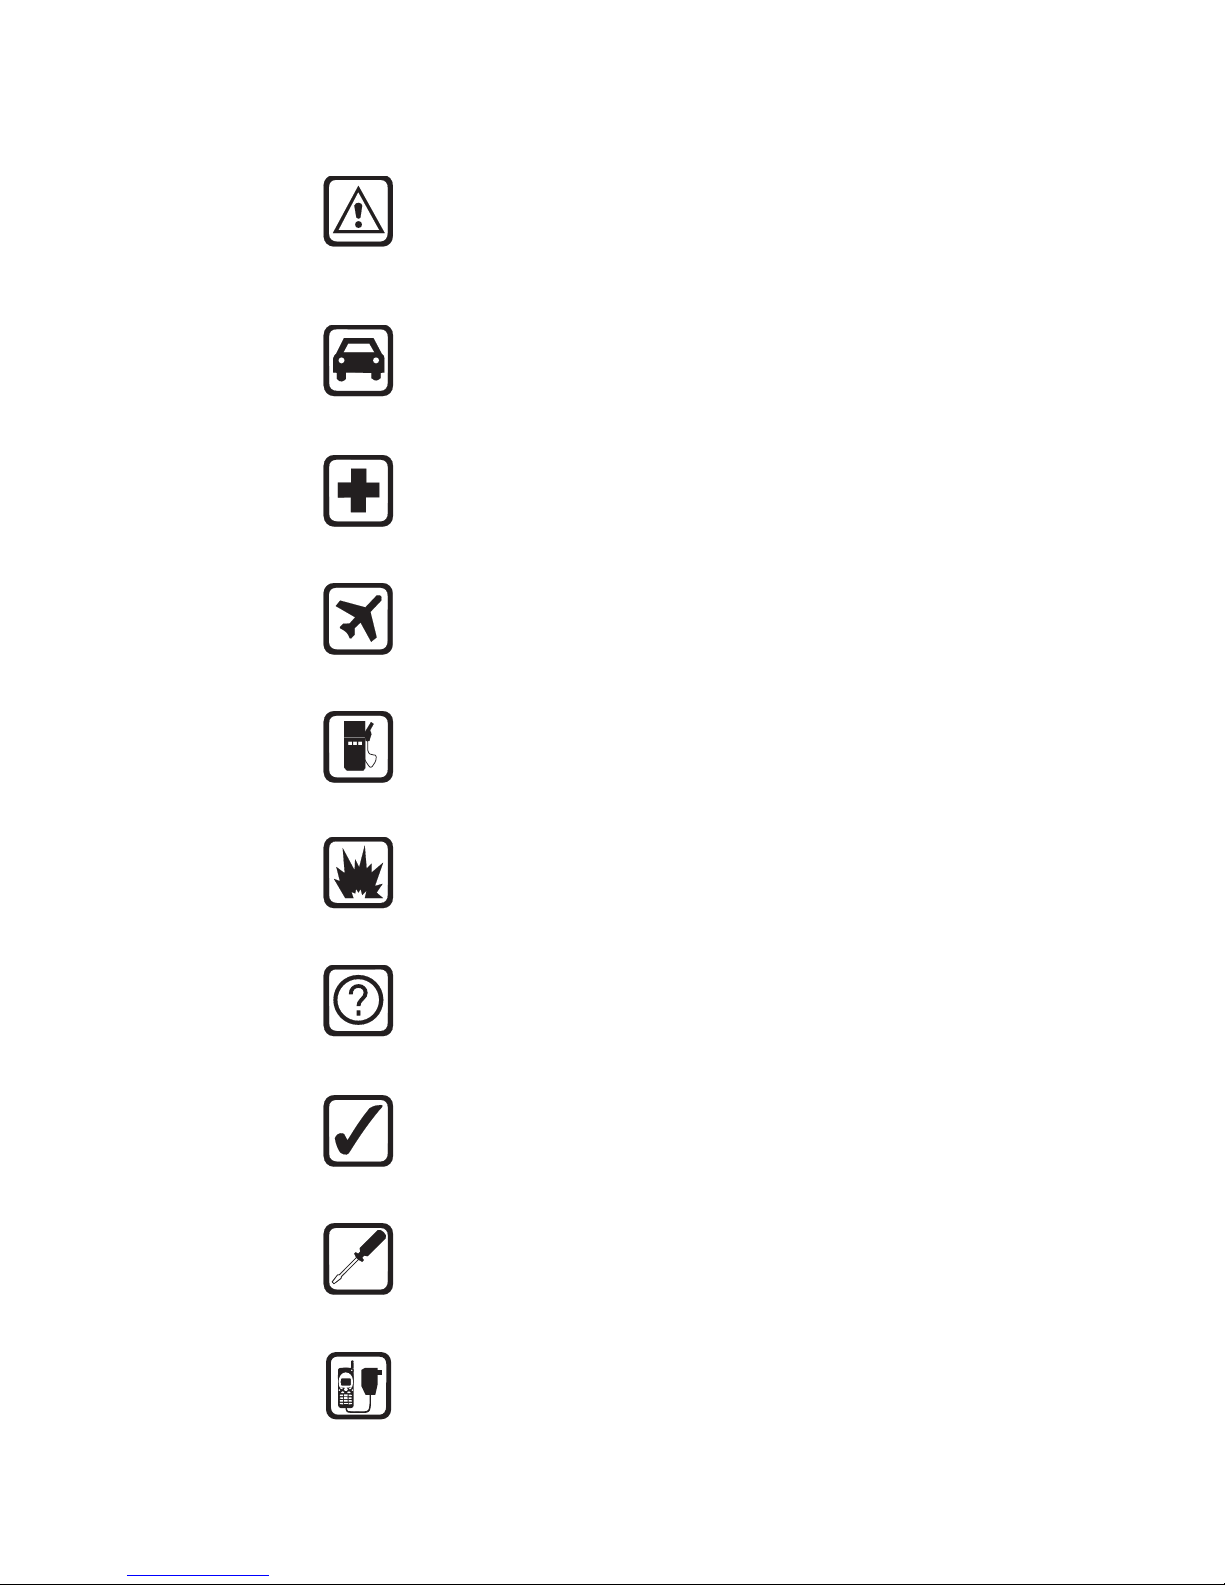
1. For your safety 1
FCC/Industry Canada Notice . . . . . . . . . . . . . . . .2
Using this Guide . . . . . . . . . . . . . . . . . . . . . . . . . .2
2. Battery installation & charging 3
Attaching the battery. . . . . . . . . . . . . . . . . . . . . .3
Battery charging. . . . . . . . . . . . . . . . . . . . . . . . . .3
Removing the battery. . . . . . . . . . . . . . . . . . . . . .4
Important battery information . . . . . . . . . . . . . .5
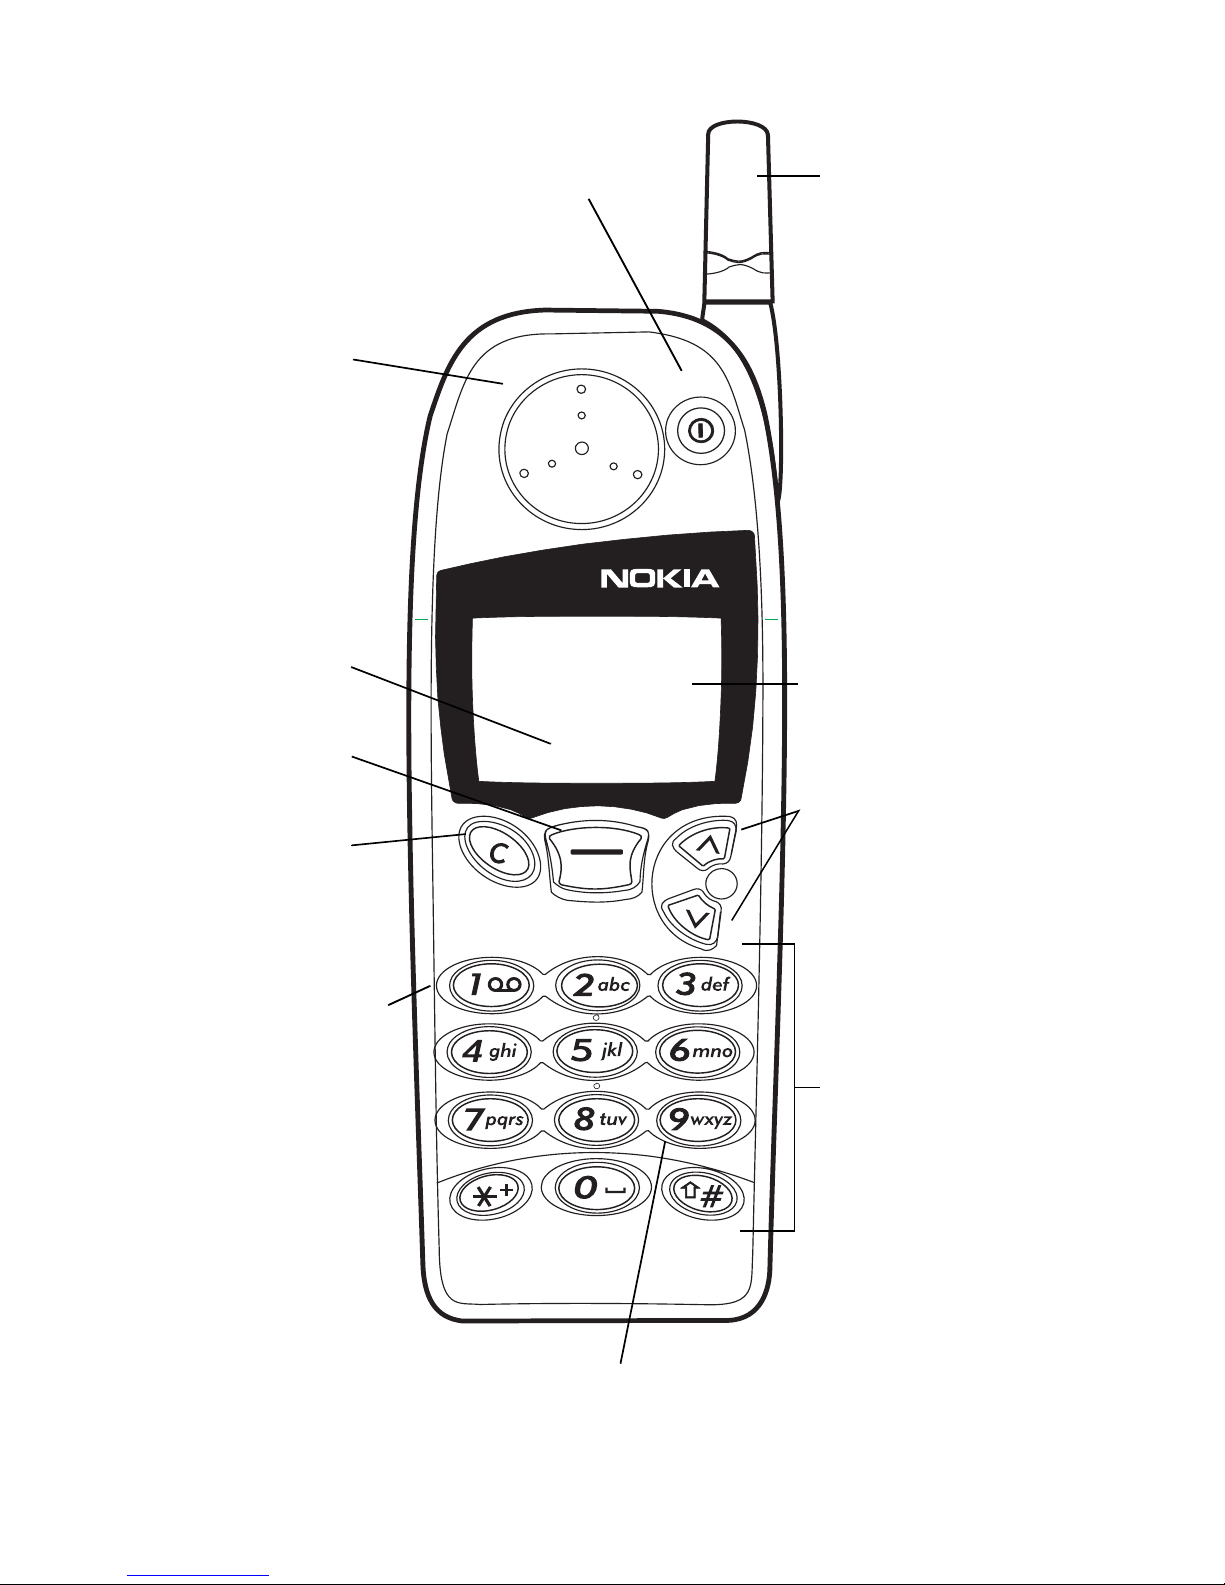
3. About the phone, keys & menu 6
Power key . . . . . . . . . . . . . . . . . . . . . . . . . . . . . . .6
Nokia Navi™ key . . . . . . . . . . . . . . . . . . . . . . . . . .6
Scroll keys . . . . . . . . . . . . . . . . . . . . . . . . . . . . . . .6
Clear key . . . . . . . . . . . . . . . . . . . . . . . . . . . . . . . .7
Lights. . . . . . . . . . . . . . . . . . . . . . . . . . . . . . . . . . .7
External antenna jack. . . . . . . . . . . . . . . . . . . . . .7
Start screen. . . . . . . . . . . . . . . . . . . . . . . . . . . . . .7
Menu . . . . . . . . . . . . . . . . . . . . . . . . . . . . . . . . . . .8
Entering letters and numbers . . . . . . . . . . . . . .11
Special characters in names . . . . . . . . . . . . . .12
Special characters in phone numbers . . . . . .12
Keyguard (locking the keypad). . . . . . . . . . . . . .13
4. Basic functions 15
Turning the phone on or off. . . . . . . . . . . . . . . .15
About the antenna . . . . . . . . . . . . . . . . . . . . . . .15
Checking signal strength . . . . . . . . . . . . . . . . . .15
Making a call . . . . . . . . . . . . . . . . . . . . . . . . . . .16
Volume adjustment (earpiece). . . . . . . . . . . . . .16
Muting the microphone. . . . . . . . . . . . . . . . . . .16
Ending a call . . . . . . . . . . . . . . . . . . . . . . . . . . . .16
Last number redial . . . . . . . . . . . . . . . . . . . . . . .17
Saving a name and number. . . . . . . . . . . . . . . .17
Finding a name and number . . . . . . . . . . . . . . .17

ii
Answering a call. . . . . . . . . . . . . . . . . . . . . . . . .17
Silencing an incoming call. . . . . . . . . . . . . . . . .18
5. Settings 19
Automatic redial. . . . . . . . . . . . . . . . . . . . . . . . .19
Calling card set-up. . . . . . . . . . . . . . . . . . . . . . .19
Clock . . . . . . . . . . . . . . . . . . . . . . . . . . . . . . . . . .21
Language. . . . . . . . . . . . . . . . . . . . . . . . . . . . . . .22
Lights. . . . . . . . . . . . . . . . . . . . . . . . . . . . . . . . . .22
Tones . . . . . . . . . . . . . . . . . . . . . . . . . . . . . . . . . .22
Quick alert settings . . . . . . . . . . . . . . . . . . . . .24
Voice mailbox number . . . . . . . . . . . . . . . . . . . .25
Voice privacy. . . . . . . . . . . . . . . . . . . . . . . . . . . .25
Welcome note. . . . . . . . . . . . . . . . . . . . . . . . . . .26
6. Emergency calls 27
Emergency key 9 . . . . . . . . . . . . . . . . . . . . . . . .28
7. Advanced functions 29
Network feature setting. . . . . . . . . . . . . . . . . . .29
Adding feature activation codes to
the menu . . . . . . . . . . . . . . . . . . . . . . . . . . . . .29
Adding feature cancellation codes to
the menu . . . . . . . . . . . . . . . . . . . . . . . . . . . . .29
In-call menu . . . . . . . . . . . . . . . . . . . . . . . . . . . .30
Making/receiving multiple calls . . . . . . . . . . . .30
Call forwarding. . . . . . . . . . . . . . . . . . . . . . . . . .32
1-touch dialing. . . . . . . . . . . . . . . . . . . . . . . . . .33
Choosing your phone number
(NAM selection) . . . . . . . . . . . . . . . . . . . . . . . . .34
Send own number. . . . . . . . . . . . . . . . . . . . . . . .34
Calling card calls . . . . . . . . . . . . . . . . . . . . . . . .35
System selection. . . . . . . . . . . . . . . . . . . . . . . . .36
Automatic answer . . . . . . . . . . . . . . . . . . . . . . .36
Touch tones. . . . . . . . . . . . . . . . . . . . . . . . . . . . .37
Restore factory settings. . . . . . . . . . . . . . . . . . .38

iii
8. Phone book 39
Saving names and numbers. . . . . . . . . . . . . . . .39
Finding names and numbers . . . . . . . . . . . . . . .40
Editing names and numbers . . . . . . . . . . . . . . .41
Erasing names and numbers . . . . . . . . . . . . . . .41
Scrolling view . . . . . . . . . . . . . . . . . . . . . . . . . . .41
Checking available memory. . . . . . . . . . . . . . . .41
9. Call log 42
Missed calls. . . . . . . . . . . . . . . . . . . . . . . . . . . . .42
Received calls . . . . . . . . . . . . . . . . . . . . . . . . . . .43
Dialed calls . . . . . . . . . . . . . . . . . . . . . . . . . . . . .43
Clearing call lists . . . . . . . . . . . . . . . . . . . . . . . .43
Call timers. . . . . . . . . . . . . . . . . . . . . . . . . . . . . .43
10. Voice messages 45
Saving your voice mailbox number. . . . . . . . . .45
Listening to new voice messages . . . . . . . . . . .45
Calling your voice mailbox at any time . . . . . .45
11. Text messages 46
Reading messages. . . . . . . . . . . . . . . . . . . . . . . .46
Storage of incoming messages . . . . . . . . . . . . .47
12. Extra features 48
Alarm clock . . . . . . . . . . . . . . . . . . . . . . . . . . . . .48
Games . . . . . . . . . . . . . . . . . . . . . . . . . . . . . . . . .49
13. Security features 51
Access codes overview. . . . . . . . . . . . . . . . . . . .51
Lock code . . . . . . . . . . . . . . . . . . . . . . . . . . . . .51
Security code . . . . . . . . . . . . . . . . . . . . . . . . . .51
Restricting calls . . . . . . . . . . . . . . . . . . . . . . . . .51
Phone lock. . . . . . . . . . . . . . . . . . . . . . . . . . . . . .53
14. Accessories 55
Nokia Xpress-on™ color covers . . . . . . . . . . . . .55
Batteries . . . . . . . . . . . . . . . . . . . . . . . . . . . . . . .58
Chargers and other accessories. . . . . . . . . . . . .59

iv
15. Reference information 63
Important safety information . . . . . . . . . . . . . .63
Emergency calls . . . . . . . . . . . . . . . . . . . . . . . . .65
Radio frequency (RF) signals . . . . . . . . . . . . . . .66
Care and maintenance. . . . . . . . . . . . . . . . . . . .67
16. Technical information 68
17. Nokia Limited Warranty 69
18. Index 72

v
NOTES

1
1. For your safety
Read these simple guidelines before using your phone.
Failure to comply with these guidelines may be dangerous
or illegal.
Road Safety Comes First
Don’t use a hand-held phone while driving; park the
vehicle first.
Switch Off In Hospitals
Follow any regulations or rules. Switch phone off near
medical equipment.
Switch Off On Aircraft
Wireless phones can cause interference. Using them on
aircraft is illegal.
Switch Off When Refueling
Don’t use phone at a refueling point. Don’t use near fuel or
chemicals.
Switch Off Near Blasting
Do not use the phone where blasting is in progress.
Observe restrictions, and follow any regulations or rules.
Interference
All wireless phones may get interference which could
affect performance.
Use Sensibly
Use only in the normal position (to ear). Don’t touch the
antenna unnecessarily.
Qualified Service
Only qualified service personnel must install or repair
equipment.
Accessories and Batteries
Use only approved accessories and batteries. Do not
connect incompatible products.

2
FCC/Industry Canada Notice
Your phone may cause TV or radio interference (for example,
when using a telephone in close proximity to receiving
equipment). The FCC or Industry Canada can require you to
stop using your telephone if such interference cannot be
eliminated. If you require assistance, contact your local
service facility.
This device complies with part 15 of the FCC rules.
Operation is subject to the condition that this device does
not cause harmful interference.
Using this Guide
The wireless phone described in this guide is approved for
use in TDMA and AMPS networks.
Network services
A number of features included in this guide are called
network services. They are special services provided by
wireless service providers. Before you can take advantage of
any of these network services, you must subscribe to the
service(s) from your home service provider and obtain
instructions for their use.
Updates
The latest version of this Owner’s Manual may be found on
Nokia’s World Wide Web site at www.nokia.com.

3
2. Battery installation & charging
Before you can use your new phone, you need to attach and
charge the battery.
Attaching the battery
To attach the battery, place it
on the back of the phone as
shown and slide it toward the
top of the phone until it clicks
into place.
Battery charging
Your phone is powered by a rechargeable NiMH or Li-Ion
battery. Note that a new NiMH battery’s full performance is
achieved only after two or three complete charge and
discharge cycles. For charging times, see ‘Charging times’ on
page 58.
How to charge your battery
Connect the lead from the charger to the bottom of your
phone or to a charging stand. Then plug the charger into a
standard wall outlet.
When the battery is charging, the battery strength indicator
on the right side of the display scrolls.
Note: When you charge the battery for the first time, the
battery strength indicatorwill not scroll the entire time; this
isnormal.

4
Problems charging
If your phone displays 1RW FKDUJLQJ, charging is suspended.
Check that the battery is connected to an approved
charging device. If the battery is very hot or cold, wait for a
while; charging will automatically resume after the battery
is restored to its normal operating state. If charging still
fails, contact your dealer.
When is charging complete?
When the charge indicators stop scrolling, your
phone is considered fully charged. However, a
slight increase in charge may occur if you leave
your phone connected to the charger.
When is a good time to charge?
You can charge anytime, but remember that when your
phone displays %DWWHU\ ORZ, you only have a couple of
minutes of talk time left.
Can I make calls while charging?
Yes, but depending on the charger used, your battery may
not charge during a call.
Discharging NiMH batteries
For good operation times, discharge NiMH batteries from
time to time by leaving your phone switched on until it
turns itself off (or by using the battery discharge facility of
any approved accessory available for your phone). Do not
attempt to discharge the battery by any other means.
Removing the battery
Note: Switch off the phone before removing the battery!

5
1Press and hold the
button at the top of the
battery.
2Slide the battery
toward the bottom of
the phone.
3Lift the battery off the
phone.
Important battery information
• The battery can be charged and discharged hundreds of times
but it will eventually wear out. When the operating time (talk
time and standby time) is noticeably shorter than normal, it is
time to buy a new battery.
• Use only batteries approved by the phone manufacturer and
recharge your battery only with the chargers approved by the
manufacturer. When a charger is not in use, disconnect it from
the power source. Do not leave the battery connected to a
charger for longer than a week, since overcharging may shorten
its life. If left unused a fully charged battery will discharge itself
over time.
• Temperature extremes will affect the ability of your battery to
charge: allow it to cool down or warm up first.
• Use the battery only for its intended purpose.
• Never use any charger or battery which is damaged or worn out.
• Do not short circuit the battery. Accidental short circuiting can
occur when a metallic object (coin, clip, or pen) causes direct
connection of the + and - terminals of the battery (metal strips
on the back of the battery), for example when you carry a spare
battery in your pocket or purse. Short circuiting the terminals
may damage the battery or the connecting object.
• Leaving the battery in hot or cold places, such as in a closed car
in summer or winter conditions, will reduce the capacity and
lifetime of the battery. Always try to keep the battery between
59º F and 77º F (15º C and 25º C). A phone with a hot or cold
battery may temporarily not work, even when the battery is fully
charged. NiMH batteries’ performance is particularly limited in
temperatures below 14º F (-10º C). Li-ion batteries’ performance
is particularly limited in temperatures below 32º F (0º C).
• Do not dispose of batteries in a fire!
• Batteries must be recycled or disposed of properly. They must not
be disposed of in municipal waste.

6
3. About the phone, keys & menu
Power key
You can use the power key to:
• turn the phone on or off (press and hold)
• turn the phone’s lights on for 15 seconds
• select a quick alert setting (see page 24) (if Keyguard is
off and the phone is not connected to a headset or
handsfree car kit)
• silence the ringing of an incoming call
Nokia Navi™ key
Your phone’s Navi™ key appears
below the display. Its current function
is indicated by the word that appears
above it (for example, 0HQX). Simply
press the Navi™ key to perform the
function.
Throughout this guide, when you see “press 0HQX,” “press
/LVWHQ,” etc., press the Navi™ key when that word appears
above it.
Scroll keys
The scroll keys are located to the right of the
Navi™ key. Use the scroll keys to:
• browse menus
• move the cursor (see page 11) to the right or the left
• adjust the earpiece volume while in a call
• access your phone book (press from the start screen)
• access the dialed calls list (press from the start
screen)

7
Clear key
Use the clear key to:
• delete a character to the left of the cursor
• clear all characters from the display (press and hold)
• return to the previous menu level
• return from the menu to the start screen (press and
hold)
• access the in-call menu while in a call
Lights
To turn your phone’s lights on for 15 seconds:
• if Keyguard is off, press any key
• if Keyguard is on, you must press the key briefly (this
conserves battery power by keeping the lights from
turning on when the phone is in a pocket or purse)
For information about controlling your phone’s lights when
the phone is in a car kit, see page 22.
External antenna jack
At the back of the phone, below the antenna, there is a
connector for an external antenna. The connector may be
protected by a rubber cap. Remove the cap before
connecting an external antenna. After removing the
antenna, replace the cap.
Note: Keep the cap out of the reach of small children.
Start screen
The start screen appears when you first
turn on your phone. 0HQX appears
above the Navi™ key so you can access
your phone’s menu. Several features
can be used only when the phone is at
the start screen.

8
To get tothe start screen, press and hold for a second.
(If there are characters on the display this clears the
characters, then you must press and hold again.)
Menu
Your phone’s menu allows you to easily access the many
powerful features in your phone.
Scroll bar
When you use your phone’s menu, a scroll bar
appears at the far right of the screen. This bar
indicates where you are in the menu; each tab
location on the bar represents a different menu
item.
For example, press 0HQX once. The scroll bar appears with
the first (top) tab displayed. A different tab appears each
time you press one of the scroll keys .
Help text
Many menu items have brief help text. To view the help text,
scroll to the menu item and wait for about 10 seconds for
the text to appear. Press 0RUH or to see the next page of
text, to see the previous page, or to return to the
menu.

9
Menu shortcuts
When you select a menu item, numbers appear on
the display above the scroll bar. If you become
familiar with these numbers, you can use them as
shortcuts for accessing different menu items. For
example, to access the 3KRQH VHWWLQJV menu, you
can simply press 0HQX 4 2. The phone displays the first item
in that menu, 7RXFK WRQHV.
Note: (1) Menu itemsin your phone varydepending on the
network and accessories used. (2) This is not a complete list;
see entries about individual features for more information.
1 Phone book
11 Search
12 Add new
13 Edit
14 Erase
141 One by one
142 Erase all
15 Options
151 Scrolling view
152 Memory status
16 1-touch dialing
2 Messages
21 Text messages
211 Inbox
212 Saved
22 Voice messages
221 Listen to voice
messages
222 Voice mailbox number
23 Welcome note
3 Call log
31 Missed calls
32 Received calls
33 Dialed calls
34 Clear call lists
341 All
342 Missed
343 Received
344 Dialed
35 Call timers
351 Last call
352 All calls
353 Life timer
354 Clear timers

10
4 Settings
41 Call settings
411 Emergency key 9
412 Automatic redial
413 Calling card
414 Automatic answerh
42 Phone settings
421 Touch tones
422 Language
423 Restore factory settings
424 Lightsc
43 Security settings
431 Restrict calls
432 Access codes
44 Network services
441 Voice privacy
442 Network feature setting
443 Call forwardingm
444 Call waitingm
445 Send own numberm
45 NAM selection
5System
51 Automatic
52 Manual
53 New search
6Games
61 Memory
62 Snake
63 Logic
7Clock
71 Alarm clock
72 Clock settings
721 Display/Hide clock
722 Adjust time
723 Time format
8 My tones
81 Ringing options
811 Ring
812 Ascending
813 Ring once
814 Beep once
815 Silent
82 Ringing tone
83 Ringing volume
831 Level 1
832 Level 2
833 Level 3
834 Level 4
835 Level 5
84 Message alert tone
841 No tone
842 Standard
843 Special
844 Beep once
845 Long & loud
85 Keypad tones
851 Off
852 Level 1
853 Level 2
854 Level 3
86 Warning and game
tones
861 On
862 Off
87 Vibrating alertv
871 On
872 Off
9Keyguard
c
Visible only when used with car kit
hVisible only when used with headset or car kit
mMust be added to the menu manually; see ‘Network feature setting’ on page 29
vVisible only when vibrating battery is attached

11
Entering letters and numbers
Cursor
The cursor is a blinking vertical line that appears on the
screen when you are entering text or numbers. Characters
you enter appear to the right of the cursor. Pressing the
key deletes the character to the left of the cursor. Use
the scroll keys to move the cursor to the right or left
.
ABC mode
When your phone is ready for you to enter text, such as a
name or message, it switches to ABC mode. The icon
shows that it is in ABC mode.
When is displayed, you can enter these characters by
pressing the indicated key repeatedly:
Key Characters Key Characters
1 . , ‘ ? ! - 1 7 PQRS7
2ABC2 8TUV8
3 DEF3 9 WXYZ9
4GHI4 0space,0
5 JKL5 See ‘Special
characters in
names’ on page 12.
6 MNO6 Changes letter case,
switches between
letters and numbers

12
Changing letter case
Press the key to switch between upper- and lower-case
letters. The icon switches to to indicate that you
are using lower case.
Entering numbers
To enter numbers while in ABC mode, you can:
• press and hold the corresponding key until the number
appears, or
• switch between ABC mode and number mode by
pressing and holding the key.
Special characters in names
In ABC mode you can press the key to view the special
characters below. You can use these characters when saving
names in your phone book. Simply press or to
highlight the one you want, then press 8VH.
. , ? ! : ; - + # * ( ) ‘ “ _ @ & $ £ % / < > ¿ ¡ § = [ ] ¥
Tip: To choose a character that appears near the end
of the list, immediately press to go to the end of
the list.
Special characters in phone numbers
You can use special characters to dial or save phone
numbers of automated services such as bank account
information. When entering numbers, press the key
repeatedly until you see the character you want.
Character Use
-This character is used to request services
from the network. Contact your service
provider for details.
.This character is not currently used.
Table of contents
Other Nokia Cell Phone manuals

Nokia
Nokia 3610 User manual

Nokia
Nokia COMMUNICATOR 9210i Quick start guide

Nokia
Nokia N96 User manual

Nokia
Nokia Lumia 710 User manual

Nokia
Nokia 5320 XpressMusic User manual

Nokia
Nokia Lumia 521 User manual

Nokia
Nokia CLASSIC 6220 User manual

Nokia
Nokia 5730 XpressMusic User manual

Nokia
Nokia 6020 User manual

Nokia
Nokia X5-01 User manual

Nokia
Nokia 2310 - Cell Phone - GSM User manual

Nokia
Nokia 6800 User manual

Nokia
Nokia 6650 - Smartphone 40 MB Service manual

Nokia
Nokia 130 User manual

Nokia
Nokia INTRIGUE 7205 User manual

Nokia
Nokia 2720 User manual

Nokia
Nokia E71 User manual

Nokia
Nokia 6300 4G User manual

Nokia
Nokia 7610 Supernova User manual

Nokia
Nokia 9500 - Communicator Smartphone 80 MB User manual