10 1998 Nokia Mobile Phones. All Rights Reserved.
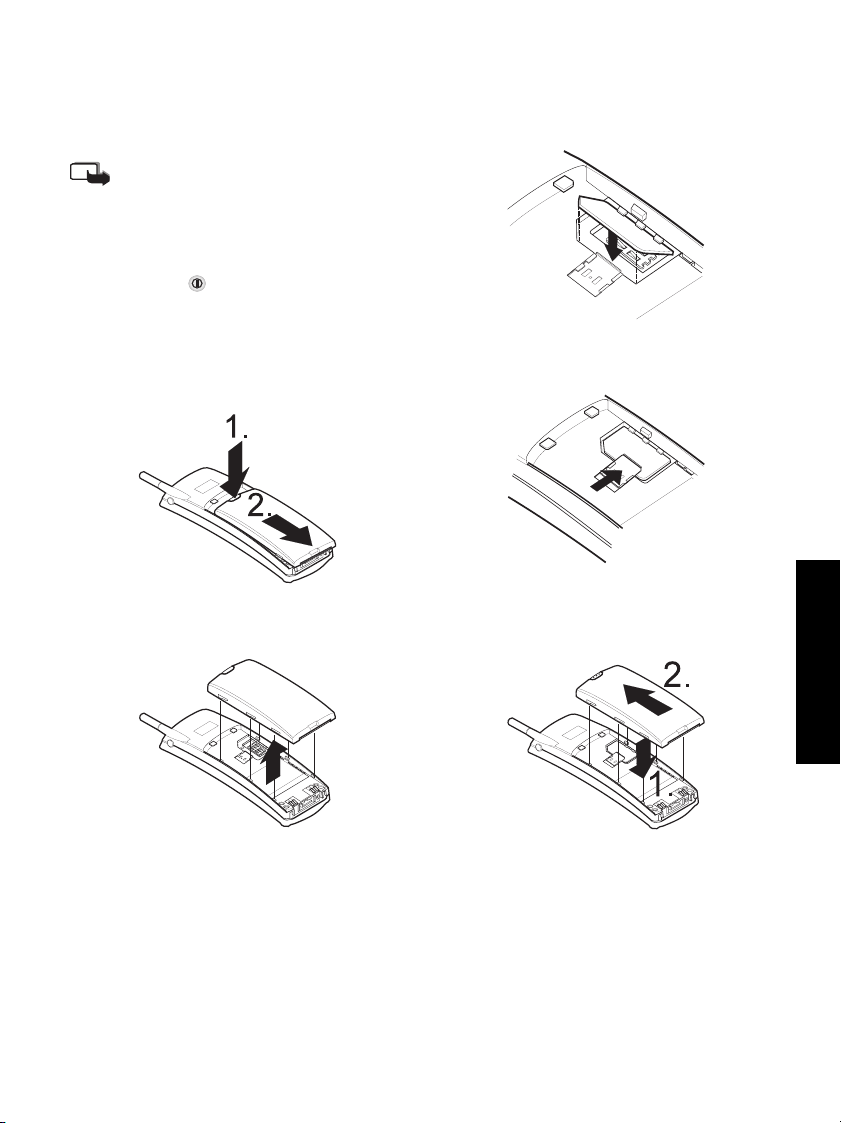
Batteries
Your phone is powered by a rechargeable Li-Ion
battery. Use only batteries approved by the
phone manufacturer and recharge your battery
only with the chargers approved by the manu-
facturer.
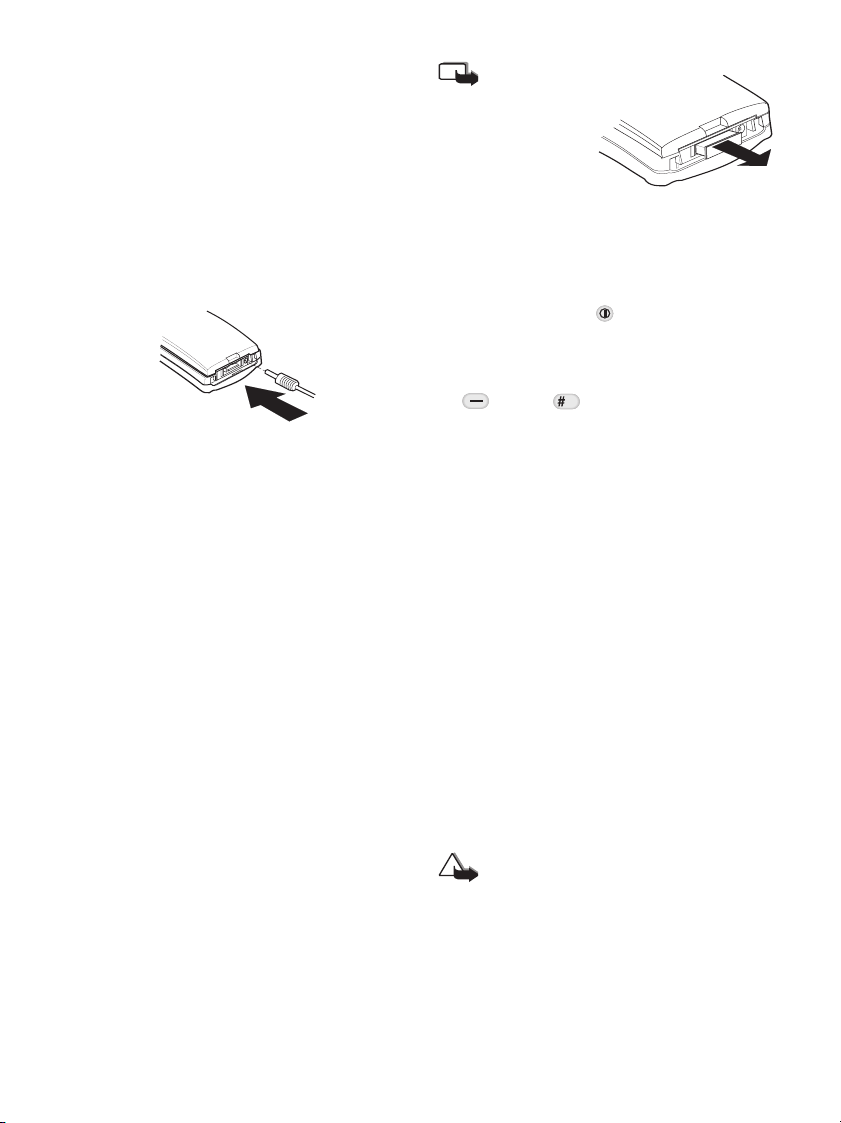
Charging a new battery or recharging a bat-
tery by using the Fast & Light Charger ACH-6
1Connect the lead from the charger to the
bottom of the phone.
•When the battery is charging, the battery in-
dicator on the right side of the display is
scrolling.
•The battery is fully charged when the scroll-
ing stops, the bar appears entirely and the
BATTERY FULL message is briefly dis-
played. The phone may be used during charg-
ing. The approximate charging time for a
BLJ-2 battery is 1-1.5 hours.
2When charging is finished, disconnect the
charger from the phone and from the power
source.
When the charge is low and only a few minutes
of talk time remain, a warning tone will be
heard and the message BATTERY LOW will
be repeated at regular intervals on the display.
When the charge level becomes too low for op-
eration, the RECHARGE BATTERY mes-
sage will be displayed accompanied by a
warning tone and the phone switches itself au-
tomatically off.
Note:
The bottom of your
phone may have a
plastic cap. Before
attaching any acces-
sory to the system
connector, remove the plastic cap. Remember to
replace the cap.
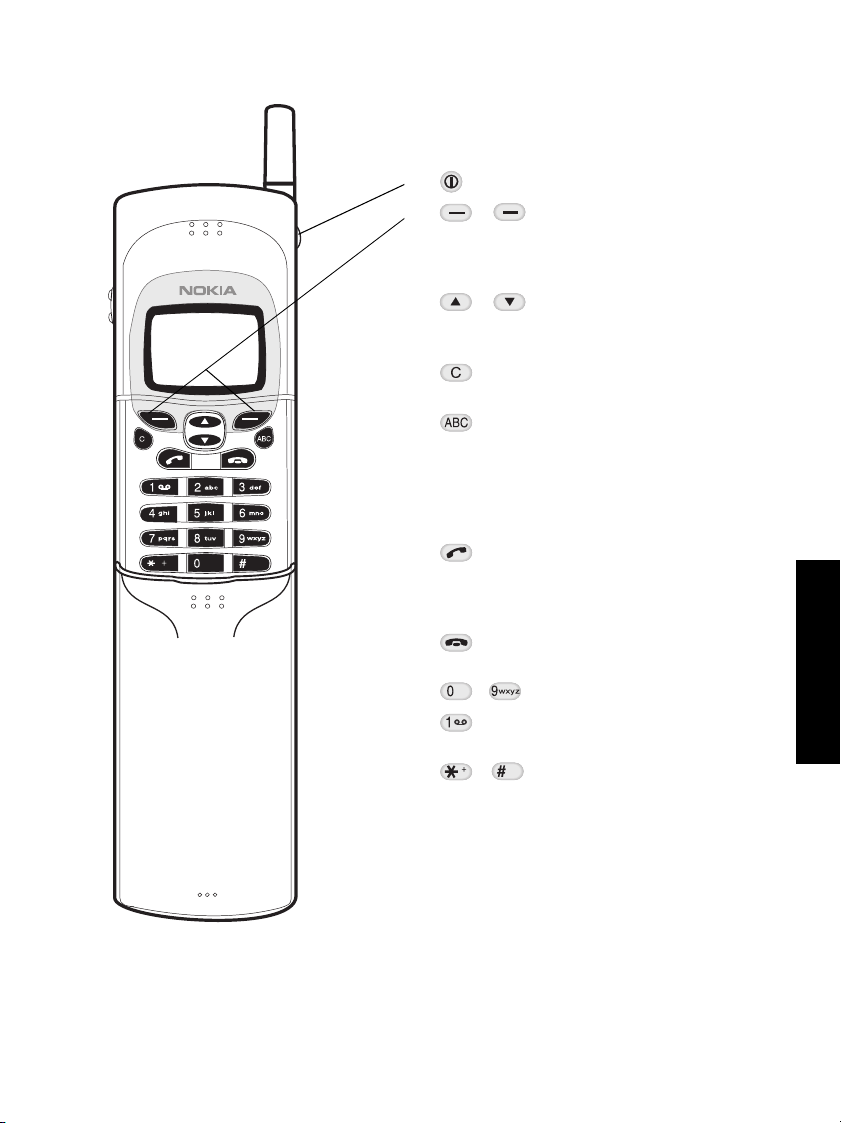
Switching on
1Press and hold the key to switch on the
phone. If the phone displays the prompt
Enter PIN code: enter the PIN code
provided with the SIM card and press the left
(OK) or .
•Hold the phone as you would any other tele-
phone with the antenna pointed up and over
your shoulder.
•If your phone has an extendable antenna, ex-
tend your antenna fully. As with any other
radio transmitting device, do not touch the
antenna unnecessarily when the phone is
switched on. Contact with the antenna af-
fects call quality and may cause the phone to
operate at a higher power level than other-
wise needed.
•The phone can make and receive calls only
when it is switched on, has a valid SIM card
inserted and is located in the service area of
the cellular network.
2If needed, change the language of the dis-
play texts by pressing Menu 48.
WARNING!
Do not switch on the phone when wireless
phone use is prohibited or when it may cause in-
terference or danger.