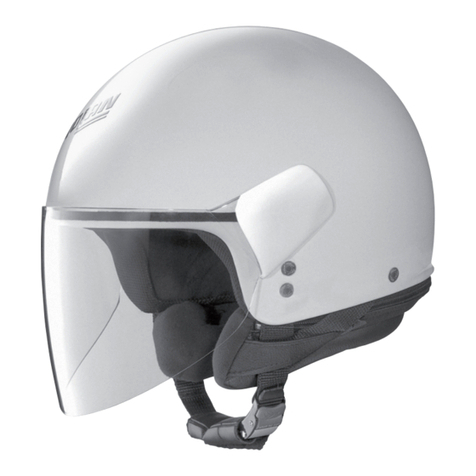
Imbottitura di conforto interna amovibile
1 - Estrazione dell’imbottitura di conforto interna.
1.1 Aprire il sottogola (vedi istruzioni relative) e tirare il guanciale sinistro,
dalla parte anteriore verso l’interno del casco, per sganciare i bottoni di
fissaggio posti sul retro, quindi ripetere l’operazione anche con il guan-
ciale destro (fig. 1).
1.2 Estrarre il guanciale sinistro dal casco facendo sfilare la bandella sinistra
del sottogola dall’asola presente nel guanciale (fig. 2); ripetere la stessa
operazione per la bandella destra.
1.3 Sganciare la linguetta posteriore di fissaggio sinistro dal supporto fissato
alla calotta interna deformando leggermente la guarnizione di bordo
della calotta e tirando leggermente l’imbottitura di conforto, in corri-
spondenza della nuca, verso l’interno (fig. 3). Successivamente ripetere
l’operazione anche con la linguetta centrale e con la linguetta posteriore
destra.
1.4 Sganciare la linguetta frontale di fissaggio sinistra dal supporto fissato
alla calotta interna tirando leggermente l’imbottitura di conforto verso
l’interno del casco (fig. 4), quindi ripetere l’operazione anche con la lin-
guetta centrale e con la linguetta frontale destra.
1.5 Estrarre l’imbottitura di conforto interna dal casco.
""ATTENZIONE!
- Estrarre l’imbottitura solo quando è necessario pulirla o lavarla.
- Non usare mai il casco senza aver rimontato completamente e corret-
tamente la sua imbottitura interna di conforto ed i suoi guanciali.
- Non modificare in nessun modo le componenti interne del casco.
- Per eseguire le operazioni sopra esposte non utilizzare mai attrezzi e
utensili.
2 - Montaggio dell’imbottitura di conforto interna.
2.1 Inserire correttamente l’imbottitura di conforto all’interno del casco.
2.2 Agganciare le linguette frontali di fissaggio nel supporto fissato alla
calotta interna spingendo leggermente la cuffia verso l’esterno del casco
(fig. 4).
2.3 Agganciare la linguetta posteriore destra, centrale e sinistra dell’interno di
conforto nelle rispettive sedi del supporto posto nella zona nuca (fig. 3).
Per effettuare questa operazione, deformare leggermente la guarnizione
di bordo della calotta e spingere fino a sentire il clic degli agganci, aven-
do cura di stendere la cuffia in modo di farla aderire al polistirolo interno.
2.4 Infilare il nastro e la bandella sinistra del sottogola, nell’asola presente
nel guanciale sinistro (fig. 2).
2.5 Infilare le linguette posteriori del guanciale sinistro tra la calotta esterna e
quella interna spingendolo verso la parte posteriore del casco; succes-
sivamente premere il guanciale per agganciare i bottoni di fissaggio posti
sul suo retro (fig. 1). Ripetere le operazioni 2.4 e 2.5 con il guanciale destro.
""ATTENZIONE!
Se il tuo casco è dotato di sistema di ritenzione D-Rings chiudilo
come indicato nel cartellino istruzioni D-Rings allegato.
3 - Pulizia.
3.1 Imbottitura interna in tessuto:
- Lavare delicatamente a mano ed utilizzare solo acqua a 30° C max e
sapone neutro.
- Risciacquare in acqua fredda ed asciugare a temperatura ambiente al
riparo dal sole.
""ATTENZIONE!
L’imbottitura di conforto interna non deve mai essere lavata in lavatrice.
3.2 Interno in polistirolo:
Pulire utilizzando esclusivamente un panno umido, quindi lasciare asciu-
gare a temperatura ambiente al riparo dal sole.
""ATTENZIONE!
- Il polistirolo interno è un materiale facilmente deformabile ed ha lo
scopo di assorbire gli urti mediante alterazione o parziale distruzione.
- NON MODIFICARE, ALTERARE O RIMUOVERE IN ALCUN MODO LE
COMPONENTI INTERNE IN POLISTIROLO.
- NON USARE MAI BENZINA, DILUENTE, BENZOLO, ALTRI SOLVENTI
E/O SOSTANZE CHIMICHE.
Removable & washable comfort padding
1 - Inner comfort padding extraction.
1.1 Undo the chin strap (see relevant instructions), then remove the left
cheek pads by pulling its front end towards the inside of the helmet, to
snap open the buttons on the pad rear end. Repeat the same operations
for the right cheek pad (fig. 1 ).
1.2 To remove the left cheek pad release the left chin strap padding from its
slot in the cheek pad (fig. 2); repeat the same operations for the right chin
strap padding.
1.3 Release the rear fixing flap on the left-hand side from its support in the
inner shell, by gently working the shell edge seal and pulling the comfort
padding at the nape height towards the inside (fig. 3). Then do the same
for the central flap and the rear right-hand flap.
1.4 Release the front fixing flap on the left-hand side from its support in the
inner shell, by gently pulling the comfort padding towards the inside of
the helmet (fig. 4). Then do the same for the central flap and the front
right-hand flap.
1.5 Extract the comfort padding from the helmet inside.
""WARNING!
- Take out the inner padding only to clean and wash it.
- Never use your helmet without having correctly and completely
replaced the inner comfort padding as well as the cheek pads.
- Never modify the inner parts of the helmet.
- Never use any tools to carry out the above-described operations.
2 - Inner comfort padding fitting.
2.1 Correctly insert the inner padding into the helmet.
2.2 Insert the visor fixing front flaps into the shell support, by gently pushing
the liner towards the helmet outside (fig. 4).
2.3 Insert the left- front- and right-hand padding rear flaps in the special sup-
port in the nape area (fig. 3). To do this, gently work the shell edge seal
and push until you hear the locks go click, taking care to spread the liner
in such a way that it adheres to the internal polystyrene.
2.4 Insert the band and the left chin strap in the special slot in the left cheek
pad (fig. 2).
2.5 Insert the left-hand cheek padding rear flaps between the outer and the
inner shells by gently pushing towards the helmet back. Then press the
cheek pad front to snap close the buttons on the pad rear end (fig. 1).
Repeat 2.4 and 2.5 operations for the right-hand cheek pad.
""WARNING!
If your helmet is equipped with the “D-Ring” fas-tening system,
fasten it according to the special instructions (see “D-Ring” leaflet
attached).
3 - Cleaning.
3.1 Inner padding:
- Wash gently by hand, with mild soap and luke-warm (max 30° C) water
only.
- Rinse in cold water and let dry at room temperature, away from direct
sunlight.
""WARNING!
Do not machine wash.
3.2 Inner polystyrene:
Wipe clean with a damp cloth, then let dry at room temperature, away
from direct sunlight.
""WARNING!
- Inner polystyrene is easily deformed to absorb impact energy by partial
alteration or destruction.
- NEVER MODIFY OR REMOVE THE INNER COMPONENTS OF THE
HELMET POLYSTYRENE.
- NEVER USE GASOLINE, THINNING AGENTS, BENZOL, OR ANY
OTHER SOLVENTS AND/OR CHEMICALS TO CLEAN THE HELMET
POLYSTYRENE.
.
Abnehmbare und waschbare Komfortpolsterung
1 - Herausnehmen der Komfortpolsterung.
1.1 Den Kinnriemen öffnen (siehe entsprechende Anleitung) und eine
Wangenpolsterung vorne zur Helmmitte hin ziehen, um den dahinterlie-
genden Befestigungsknopf zu öffnen. Den Vorgang bei der anderen
Wangenpolsterung wiederholen (Abb. 1).
1.2 Das linke Band des Kinnriemens aus der Schlaufe der linken
Wangenpolsterung ziehen (Abb. 2); den selben Vorgang beim rechten
Band wieder-holen.
1.3 Die hintere Befestigungslasche links von dem in der Innenschale befe-
stigten Träger lösen. Dabei die Dichtung am Schalenrand leicht weg-
drücken und die Komfortpolsterung im Nackenbereich leicht nach innen
ziehen (Abb. 3). Dann den Vorgang auch bei der hinteren rechten Lasche
und der Mittellasche wiederholen.
1.4 Die vordere Befestigungslasche links von dem in der Innenschale befe-
stigten Träger lösen, indem die Komfortpolsterung leicht in Richtung
Helmmitte gezogen wird (Abb. 4), dann den Vorgang auch bei der vor-
deren rechten Lasche und der Mittellasche wiederholen.
1.5 Die Komfortpolsterung aus dem Helm nehmen.
""ACHTUNG!
- Die Polsterung nur zum Reinigen entfernen.
- Den Helm nie ohne korrekt und vollständig angebrachte
Komfortpolsterung bzw. Wangenpolsterungen verwenden.
- Die inneren Teile des Helms in keiner Weise verändern.
- Die oben angeführten Schritte müssen ohne den Einsatz von
Werkzeugen ausgeführt werden.
2 - Einsetzen der Komfortpolsterung.
2.1 Die Komfortpolsterung richtig in den Helm einlegen.
2.2 Die vorderen Befestigungslaschen in den in der Innenschale befestigten
Träger stecken, indem die Polsterung leicht nach außen gedrückt wird
(Abb. 4).
2.3 Die hinteren Laschen (rechts, links und Mitte) in die entsprechenden
IGB DRahmen im Nackenbereich stecken (Abb. 3). Dazu die Schalendichtung
leicht wegdrücken und drücken, bis das Klicken der eingerasteten
Haken zu hören ist. Dabei darauf achten, dass die Polsterung so einge-
legt wird, dass sie am Polystyrol anliegt.
2.4 Das linke Band des Kinnriemens durch die Schlaufe in der linken
Wangenpolsterung führen (Abb. 2).
2.5 Die hinteren Laschen der linken Wangenpol-sterung in die Aussparung
zwischen Innen- und Außenschale einführen und nach hinten drücken;
dann die Polsterung im vorderen Bereich drücken, um den dahinterlie-
genden Befestigungsknopf zuzuknöpfen (Abb. 1). Die Schritte 2.4 und
2.5 bei der anderen Wangenpolsterung wiederholen.
""ACHTUNG!
Sollte der Helm mit einem “D-Ring”-Rückhalteystem ausgestattet
sein, ist dieser laut beiliegendem Infoblatt zu schließen.
3 - Reinigung.
3.1 Innere Stoffpolsterung:
- Die Polsterung vorsichtig mit lauwarmem Wasser (nicht über 30°C!) und
etwas milder Seife von Hand waschen.
- Die Polsterung mit kaltem Wasser spülen und vor Sonne geschützt bei
Zimmertemperatur trocknen lassen.
""ACHTUNG!
Das Futter niemals in der Waschmaschine waschen.
3.2 Innenschale aus Polystyrol:
Die Innenschale nur mit einem feuchten Tuch reinigen und dann bei
Zimmertemperatur, vor Sonne geschützt, trocknen lassen.
""ACHTUNG!
- Die Innenschale aus Polystyrol ist leicht verformbar, um Stoßkräfte
durch Deformation und teilweise Zerstörung absorbieren zu können.
- DIE INNENTEILE DES HELMS AUS POLYSTYROL NIEMALS ÄNDERN.
- NIEMALS BENZIN, VERDÜNNUNGSMITTEL, BEN-ZOL,
LÖSUNGSMITTEL ODER ANDERE CHEMISCHE SUBSTANZEN ZUR
REINIGUNG DER INNENTEILE DES HELMS VERWENDEN.


