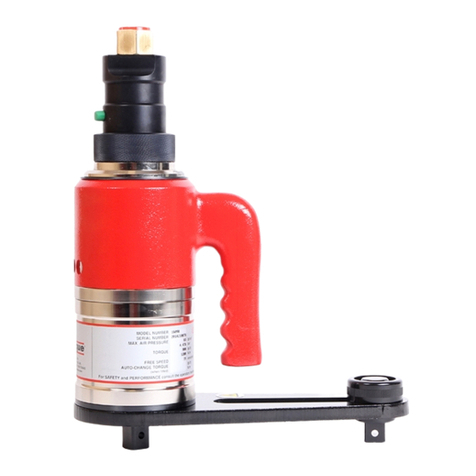
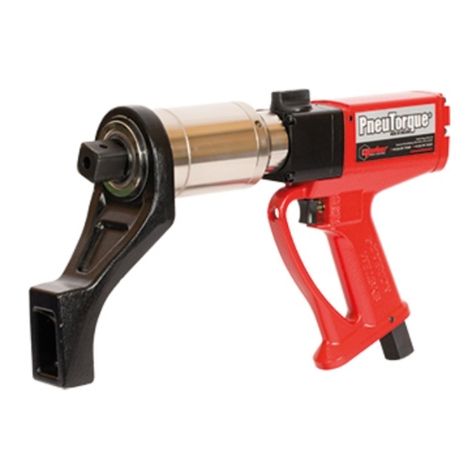
norbar PneuTorque Standard Series User manual

OPERATOR’S MANUAL
PNEUTORQUE®
STANDARD SERIES STALL TOOLS
Part Number 34317 | Issue 5 | Original Instructions (English)
NORBAR TORQUE TOOLS LTD
Wildmere Road, Banbury,
Oxfordshire, OX16 3JU
UNITED KINGDOM
Tel + 44 (0)1295 270333
Email enquiry@norbar.com
NORBAR TORQUE TOOLS
45–47 Raglan Avenue, Edwardstown,
SA 5039
AUSTRALIA
Tel + 61 (0)8 8292 9777
Email enquiry@norbar.com.au
NORBAR TORQUE TOOLS INC
36400 Biltmore Place, Willoughby,
Ohio, 44094
USA
Tel + 1 866 667 2279
Email inquiry@norbar.us
NORBAR TORQUE TOOLS PTE LTD
194 Pandan Loop
#07-20 Pantech Business Hub
SINGAPORE 128383
Tel + 65 6841 1371
Email enquires@norbar.sg
NORBAR TORQUE TOOLS (SHANGHAI) LTD
91 Building 7F, No.1122 North Qinzhou Rd,
Xuhui District, Shanghai
CHINA 201103
Tel + 86 21 6145 0368
Email sales@norbar.com.cn
NORBAR TORQUE TOOLS INDIA PVT. LTD
Plot No A-168, Khairne Industrial Area,
Thane Belapur Road, Mahape,
Navi Mumbai – 400 709
INDIA
Tel + 91 22 2778 8480
Email enquiry@norbar.in
www.norbar.com
© Norbar Torque Tools Ltd 2018

1
CONTENTS
Part Numbers Covered by this Manual 2
Safety 3
General Safety Rules 3
Projectile Hazards 3
Entanglement Hazards 3
Operating Hazards 3
Repetitive Motions Hazards 4
Accessory Hazards 4
Workplace Hazards 4
Dust and Fume Hazards 4
Noise Hazards 5
Vibration Hazards 5
Additional Safety Instructions for Pneumatic Power Tools 5
PneuTorque® Specific Safety Instructions 6
Markings on Tool 6
Introduction 7
Parts Included 7
Accessories 7
Features and Functions 8
Set up Instructions 9
Pneumatic Connections 9
Lifting Handle 9
Torque Reaction 10
Setting Forward/Reverse 12
Setting Torque for Fastener Tightening 12
Setting Torque for Fastener Loosening 12
Operating Instructions 13
Tightening 13
Releasing 15
Maintenance 16
Reaction Plate 16
Air Lubrication 16
Gearbox 16
Silencer 16
Filter 16
Drive Square 17
Cleaning 17
Disposal 17
Specifications 18
General 18
Standard Series 18
Declaration of Conformity 20
Trouble Shooting 21
Glossary of Terms 21

2
PART NUMBERS COVERED BY THIS MANUAL
This manual covers all PneuTorque® Standard Series tools; including the following:
Model (Standard
Series)
Part Number
Square
Maximum
Torque
Single Speed
Manual Two Speed
Automatic
Two Speed
PT 1
16031
16031.MTS
16031.AUT
¾”
680 N∙m
PT 1
16011
16011.MTS
16011.AUT
1”
680 N∙m
PT 1A
16098
16098.MTS
16098.AUT
¾”
1,200 N∙m
PT 1A
16097
16097.MTS
16097.AUT
1”
1,200 N∙m
PT 2
16013
16013.MTS
16013.AUT
1”
1,700 N∙m
PT 5
16015
16015.MTS
16015.AUT
1”
3,400 N∙m
PT 6
16017
16017.MTS
16017.AUT
1½”
3,400 N∙m
PT 7
16066
16066.MTS
16066.AUT
1½”
6,000 N∙m
PT 9
16072
16072.MTS
16072.AUT
1½”
9,500 N∙m
PT 11
16046
16046.MTS
-
2½”
20,000 N∙m
PT12
18086
18086.MTS
-
2½”
34,000 N∙m
PT 13
16052
16052.MTS
-
2½”
47,000 N∙m
PT 14
16045
16045.MTS
-
3½”
100,000 N∙m
PT 15
18089
18089.MTS
-
Note A
150,000 N∙m
PT 16
18090
18090.MTS
-
Note A
200,000 N∙m
PT 17
18088
18088.MTS
-
Note A
250,000 N∙m
PT 18
16054
16054.MTS
-
Note A
300,000 N∙m
NOTE A: The output drive and reaction components must be engineered specifically for each
customer application. Consult Norbar.
PneuTorque® Standard series tools are also supplied in a ‘remote’ form without a handle. These are given a
part number suffix ‘X’ (e.g. *****.X***) and are covered by operators manual part number 34318.

3
SAFETY
IMPORTANT: THIS OPERATOR’S MANUAL SHOULD BE KEPT FOR FUTURE REFERENCE.
General Safety Rules:
• For multiple hazards, read and understand the safety instructions before installing, operating, repairing,
maintaining, changing accessories on, or working near the assembly power tool for threaded fasteners.
Failure to do so can result in serious bodily injury.
• Only qualified and trained operators should install, adjust or use the assembly power tool for threaded
fasteners.
• Do not modify this assembly power tool for threaded fasteners. Modifications can reduce the
effectiveness of safety measures and increase the risks to the operator.
• Do not discard the safety instructions; give them to the operator.
• Do not use the assembly power tool for threaded fasteners if it has been damaged.
• Tools shall be inspected periodically to verify that the ratings and markings required are legibly marked
on the tool. The employer/user shall contact the manufacturer to obtain replacement marking labels
when necessary.
Projectile Hazards:
• Failure of the workpiece, of accessories or even of the tool itself can generate high-velocity projectiles.
• Always wear impact-resistant eye protection during the operation of the assembly power tool for
threaded fasteners. The grade of protection required should be assessed for each use.
• Ensure that the workpiece is securely fixed.
Entanglement Hazards:
• Entanglement hazards can result in choking, scalping and/or lacerations if loose clothing, personal
jewellery, neckware, hair or gloves are not kept away from the tool and accessories.
• Inappropriate gloves can become entangled with the rotating drive, causing severed or broken fingers.
• Rotating drive sockets and drive extensions can easily entangle rubber-coated or metal-reinforced
gloves.
• Do not wear loose-fitting gloves or gloves with cut or frayed fingers.
• Never hold the drive, socket or drive extension.
• Keep hands away from rotating drives.
Operating Hazards:
• The use of the tool can expose the operator's hands to hazards including crushing, impacts, cuts and
abrasions and heat. Wear suitable gloves to protect hands.
• These tools require the use of a suitable reaction which presents a crushing hazard. Ensure to follow
the set up instructions in this manual.
• Operators and maintenance personnel shall be physically able to handle the bulk, weight and power of
the tool.
• Hold the tool correctly; be ready to counteract normal or sudden movements and have both hands
available.

4
• Maintain a balanced body position and secure footing.
• Release the trigger in the case of an interruption of the energy supply.
• Use only lubricants recommended by the manufacturer.
• Do not use in confined spaces and beware of crushing hands between tool and workpiece.
Repetitive Motions Hazards:
• When using a power tool for threaded fasteners, the operator can experience discomfort in the hands,
arms, shoulders, neck, or other parts of the body.
• While using an assembly power tool for threaded fasteners, the operator should adopt a comfortable
posture whilst maintaining secure footing and avoiding awkward or off-balanced postures. The operator
should change posture during extended tasks, which can help avoid discomfort and fatigue.
• If the operator experiences symptoms such as persistent or recurring discomfort, pain, throbbing,
aching, tingling, numbness, burning sensations or stiffness, these warning signs should not be ignored.
The operator should tell the employer and consult a qualified health professional.
Accessory Hazards:
• Disconnect the assembly power tool for threaded fasteners from the energy supply before changing the
tool or accessory.
• Use only sizes and types of accessories and consumables that are recommended by the assembly
power tool for threaded fasteners manufacturer; do not use other types or sizes of accessories and
consumables.
Workplace Hazards:
• Slips, trips and falls are major causes of workplace injury. Be aware of slippery surfaces caused by the
use of the tool and also of trip hazards caused by the air line or hydraulic hose.
• Proceed with care in unfamiliar surroundings. Hidden hazards, such as electricity or other utility lines,
can exist.
• The assembly power tool for threaded fasteners is not intended for use in potentially explosive
atmospheres and is not insulated against coming into contact with electrical power.
• Make sure there are no electrical cables, gas pipes, etc., that can cause a hazard if damaged by use of
the tool.
Dust and Fume Hazards:
• Dust and fumes generated when using assembly power tools for threaded fasteners can cause ill health
(for example, cancer, birth defects, asthma and/or dermatitis); risk assessment and implementation of
appropriate controls for these hazards are essential.
• Risk assessment should include dust created by the use of the tool and the potential for disturbing
existing dust.
• Direct the exhaust so as to minimize disturbance of dust in a dust-filled environment.
• Where dust or fumes are created, the priority shall be to control them at the point of emission.
• All integral features or accessories for the collection, extraction or suppression of airborne dust or fumes
should be correctly used and maintained in accordance with the manufacturer's instructions.
• Use respiratory protection in accordance with employer's instructions and as required by occupational
health and safety regulations.

5
Noise Hazards:
• Unprotected exposure to high noise levels can cause permanent, disabling, hearing loss and other
problems, such as tinnitus (ringing, buzzing, whistling or humming in the ears). Therefore a risk
assessment and implementation of appropriate controls for these hazards are essential.
• Appropriate controls to reduce the risk may include actions such as damping materials to prevent
workpieces from “ringing”.
• Use hearing protection in accordance with employer's instructions and as required by occupational
health and safety regulations.
• Operate and maintain the assembly power tool for threaded fasteners as recommended in the
instruction handbook, to prevent an unnecessary increase in noise levels.
• If the assembly power tool for threaded fasteners has a silencer, always ensure it is in place and in good
working order when the assembly power tool for threaded fasteners is operating.
• Select, maintain and replace the consumable/tool as recommended in the instruction handbook, to
prevent an unnecessary increase in noise.
Vibration Hazards:
• Exposure to vibration can cause disabling damage to the nerves and blood supply of the hands and
arms.
• Wear warm clothing when working in cold conditions and keep your hands warm and dry.
• If you experience numbness, tingling, pain or whitening of the skin in your fingers or hands, stop using
the assembly power tool for threaded fasteners, tell your employer and consult a physician.
• Operate and maintain the assembly power tool for threaded fasteners as recommended in the
instruction handbook, to prevent an unnecessary increase in vibration levels.
• Do not use worn or ill-fitting sockets or extensions, as this is likely to cause an increase in vibration.
• Select, maintain and replace the consumable/tool as recommended in the instruction handbook, to
prevent an unnecessary increase in vibration levels.
• Support the weight of the tool in a stand, tensioner or balancer, if possible.
• Hold the tool with a light but safe grip, taking account of the required hand reaction forces, because the
risk from vibration is generally greater when the grip force is higher.
Additional Safety Instructions for Pneumatic Power Tools:
• Air under pressure can cause severe injury:
o Always shut off air supply, drain hose of air pressure and disconnect tool from air supply when not
in use, before changing accessories or when making repairs;
o Never direct air at yourself or anyone else.
• Whipping hoses can cause severe injury. Always check for damaged or loose hoses and fittings.
• Cold air shall be directed away from the hands.
• Air lines with safe disconnect couplings, as supplied, are recommended. Whenever universal twist
couplings (claw couplings) are used, lock pins shall be installed and whipcheck safety cables shall be
used to safeguard against possible hose-to-tool and hose-to-hose connection failure.
• Do not exceed the maximum air pressure stated on the tool.

6
• For torque-control and continuous-rotation tools, the air pressure has a safety critical effect on
performance. Therefore, requirements for length and diameter of the hose shall be specified.
• Never carry an air tool by the hose.
PneuTorque® Specific Safety Instructions:
• This tool is intended for use with threaded fasteners. Other uses within the limits of the tool may be
appropriate. Please contact Norbar for guidance.
• The user (or the user’s employer) shall assess the specific risks that can be present as a result of each
use. This Operator’s Manual contains sufficient information for the end user to be able to perform an
initial risk assessment.
• Unexpected direction of drive square movement can cause a hazardous situation.
• Isolate the tool from all energy sources before changing or adjusting the drive square or socket.
Markings on Tool
Pictograms on Tool
Meaning
Read and understand Operator’s Manual.
Unexpected tool movement due to reaction forces or breakage of drive square
or reaction bar may cause injuries.
There is a risk of crushing between the reaction bar and work piece.
Keep hands away from reaction bar.
Keep hands away from tool output.

7
INTRODUCTION
The PneuTorque® Standard Series tools are non-impacting, air driven power tools designed for applying
torque to threaded fasteners. There are models to cover torque capacities of 680 N·m to 300,000 N·m. The
tools use an external air pressure regulator (included in a Lubro Control Unit supplied as an accessory) to set
the air pressure that controls the stall torque. The PneuTorque® must always be operated with the following:-
• Filtered dry air supply. Minimum recommended compressor rating: 6.9 bar (100 psi), 19 l/s (40 CFM).
• Lubro Control Unit or similar Filter, Regulator and Lubricator Unit ½” Bore (12 mm).
• Impact or high quality sockets.
• Reaction bar.
Parts Included
Model
Part Number
Reaction
Plate / Arm
Reaction
Foot
Lifting
Ring
Lubro
Control Unit
Torque
Wrench
Transporting
Trolley
PT 1 & PT 2
16420
-
-
-
-
-
PT 5 & PT 6
16544
-
-
-
-
-
PT 7
16263
16344
-
-
-
-
PT 9
16387
16394
-
-
-
-
PT 11
16322
-
16348
16074
-
-
PT 12
18994
-
19030/1
16074
-
-
PT 13
16330
-
16311
16074
13049
16326
PT 14
16308
-
16311
16074
13049
16326
PT 15
Note A
-
-
16074
-
-
PT 16
Note A
-
16311
16074
13050
-
PT 17
Note A
-
16311
16074
13050
-
PT 18
Note A
-
16311
16074
13050
-
All tools include Operators Manual (Part number 34317), Calibration Certificate & Air pressure graph (Part
number 34208)
NOTE A: The output drive and reaction components must be engineered specifically for each
customer application. Consult Norbar.
Accessories
Nose Extensions
PT1
PT2
PT5
6” Nose Extension (¾” drive)
16480.006
-
-
9” Nose Extension (¾” drive)
16480.009
-
-
12” Nose Extension (¾” drive)
16480.012
-
-
6” Nose Extension (1” drive)
16542.006
16542.006
16694.006
9” Nose Extension (1” drive)
16542.009
16542.009
16694.009
12” Nose Extension (1” drive)
16542.012
16542.012
16694.012
Other Parts
Part Number
Replacement drive square
See Maintenance
Air Filter
18280
Silencer
16457
Lubro Control Unit
16074
Transducers
Consult Norbar

8
FEATURES AND FUNCTIONS
Replaceable Drive Square
To avoid internal damage (especially due to torque overload), the output drive square has been designed to
shear first. Tools are fitted with a drive square that can easily be replaced, alternative drive sizes are also
available.
Trigger
The trigger controls the flow of air, it must be held in to operate the tool. If the operator is not present the tool
will stop.
Forward / Reverse Collar
All tools can be used for tightening as well as releasing bolts. A collar for (Forward or clockwise) and
(Reverse or anti-clockwise) is located next to the trigger for easy access.
Gearbox
For safety the gearbox and handle can turn independently, so torque reaction is never
transmitted back to the operator.
Lifting Handle
The lifting handle allows comfortable and safe use of the tool.
The PT 11 – PT 18 are supplied with a lifting ring for easy handling.
In addition the PT 13 & PT 14 are supplied on a transporting trolley (Figure 1).
Low Operator Fatigue
The tools are quiet and do not operate with an impacting or pulsing action.
Optional Transducers
Electronic torque transducers can be directly fitted for precise torque monitoring.
FIGURE 1 – Transporting
Trolley

9
SET UP INSTRUCTIONS
Pneumatic Connections
WARNING: TO AVOID HAZARD FROM WHIPPING AIR HOSES MAKE ALL
CONNECTIONS TO THE TOOL BEFORE TURNING ON THE AIR SUPPLY.
FIGURE 2 – Tool Features
Make sure all air hoses are clean and free from dirt.
Connect the tool air inlet hose (A.) to the outlet side of the lubro control unit, observing air flow direction
arrows. Use a minimum ½” bore (12mm) hose with a maximum length of 3m.
TIP: Fit the coupling socket to air hose.
To connect, push couplings together.
To disconnect, pull back lock on socket coupling.
Connect the inlet side of the lubro control unit to the air supply. Use a minimum ½” bore (12mm) hose with a
maximum length of 5m (longer hoses will reduce the performance of the tool).
Check the lubro control unit oil level and fill to correct level if required. (see “MAINTENANCE”)
Lifting Handle
Fit lifting handle (where supplied) to top of the Air Motor Housing (‘F’ in figure 2.). Adjust the handle position
so the tool can be held comfortably. Tighten the socket screws securely.
Handle (H)
Trigger (J)
Air Inlet (A)
Forward/Reverse
Collar (C)
Air Motor
Housing (F)
Air Exhaust
Silencer (E)
Reaction
Plate (B)
Output Square
Drive (D)
Slave
Square (G)
Lubro Control Unit

10
Torque Reaction
When the PneuTorque® is in operation the reaction arm rotates in the opposite direction to the output drive
square and must be allowed to rest squarely against a solid object or surface adjacent to the bolt to be
tightened.
WARNING: IF THE REACTION PLATE IS EXTENDED FORWARD OF THE DRIVE
SQUARE, LARGER INDUCED BENDING STRESS WILL RESULT, SO THE
PLATE MAY NO LONGER BE STRONG ENOUGH.
TIP: Take the reaction as far away from the multiplier as practical.
Fit reaction plate (‘B’ in Figure 2) to tool using bolts provided and torque to value specified on reaction arm. If
no torque is specified follow table below:
Model
Reaction Plate / Arm
Fixing Bolt Size
Fixing Bolt Torque
PT 1 & PT 2
16420
2BA
9 N∙m
PT 5 & PT 6
16544
¼” BSF
19 N∙m
PT 7
16263
M10
83 N∙m
PT 9
16387
⅜” BSF
75 N∙m
PT 11
16322
M10
83 N∙m
PT 12
18994
M12
150 N∙m
PT 13
16330
M16
310 N∙m
PT 14
16308
M16
310 N∙m
PT 15
-
-
-
PT 16
-
M20
400 N∙m
PT 17
-
M20
400 N∙m
PT 18
-
M20
400 N∙m
It is recommended to check the reaction plate bolts are correctly tightened every week.
FIGURE 3 – Typical
reaction with sliding ‘slave
square’ for PT 1 to PT 5
FIGURE 4 – Typical reaction (with
adjustable foot) for PT 7 and PT 9
FIGURE 5 – Typical reaction
for PT 11

11
It is essential the reaction plate rests squarely against a solid object or surface adjacent to the fastener to be
tightened. The contact area must be within the shaded area of Figure 6, with the contact area as large as
possible.
WARNING: CARE MUST BE TAKEN TO ENSURE THAT THE REACTION ARM IS ONLY
USED WITHIN THE LIMITATIONS SHOWN IN FIGURE 6.
For special applications or where extra deep sockets must be used the standard arm may be extended but
only within the limitations shown on Figure 6. Alternative reaction devices are available.
WARNING: FAILURE TO OBSERVE THE LIMITATIONS SHOWN IN FIGURE 6 WHEN
MODIFYING STANDARD REACTION ARMS MAY RESULT IN PREMATURE
WEAR OR DAMAGE TO THE TOOL.
Standard drive square extensions MUST NOT be used as these will cause serious damage to the tool output
drive. A range of nose extensions is available for applications where access is restricted. These are
designed to support the final drive correctly.
When the PneuTorque® is in operation the reaction plate rotates in the opposite direction to the output drive
square and must be allowed to rest squarely against a solid object or surface adjacent to the bolt to be
tightened. (See Figure 7 & 8).
WARNING: ALWAYS KEEP HANDS CLEAR OF THE REACTION ARM WHEN THE
TOOL IS IN USE OR SERIOUS INJURY MAY RESULT.
TIP: For an extended tool life ensure the reaction point remains square to the multiplier, this will
minimise stress on the output square. If the multiplier tilts under load, the reaction may not
remain square.
FIGURE 8 – Example of anti-
clockwise reaction
FIGURE 7 – Example of
clockwise reaction
Torque Reaction should be
taken in the shaded areas only
Extra Length
Socket
Standard Length
Socket
FIGURE 6 – Reaction limitations

12
Setting Forward / Reverse
All tools are fitted with a direction collar, see Figure 9.
FIGURE 9 – Collar for , or operation
Rotate collar to select for forward (clockwise), for reverse (anti-clockwise) or for off.
WARNING: FAILURE TO FULLY ENGAGE THE FORWARD/REVERSE COLLAR WILL
RESULT IN DAMAGE TO THE SELECTOR VALVE.
Setting Torque for Fastener Tightening
The stall torque of these tools is determined by the air pressure set on an external lubro control unit.
Tools are supplied with an Air Pressure Graph which relates torque output to air pressure. Set the torque
output as follows:
1. Turn the collar, Figure 9, to select direction.
2. For Manual two speed tools (Part number *****.MTS) select ‘SLOW’ speed.
3. Establish the air pressure required using the Air Pressure Graph.
4. Ensure the drive square is able to free run.
5. Press and hold the trigger (‘J’ in Figure 2) and adjust the lubro control unit pressure until the correct
figure is shown on the gauge.
IMPORTANT: THE TOOL MUST BE FREE RUNNING WHILE ADJUSTING THE AIR PRESSURE TO
GIVE THE CORRECT SETTING.
WHILE THE TOOL IS FREE RUNNING CHECK THAT LUBRO CONTROL UNIT IS
SUPPLYING APPROXIMATELY SIX DROPS OF OIL PER MINUTE.
Setting Torque for Fastener Loosening
1. Ensure that the tool control system is set for the required rotation.
2. Establish maximum air pressure from the associated Air Pressure Graph or tool label.
3. Adjust the pressure regulator until the correct pressure is achieved.
WARNING: EXCEEDING THE MAXIMUM AIR PRESSURE WILL CAUSE OVERLOADING
AND MAY LEAD TO SERIOUS DAMAGE.
WARNING: CHANGING THE AIR PRESSURE AFTER SETTING THE PRESSURE
REGULATOR WILL CHANGE THE STALL TORQUE VALUE.

13
OPERATING INSTRUCTIONS
WARNING: KEEP HANDS CLEAR OF THE REACTION ARM.
WARNING: WHEN USING THIS TOOL IT MUST BE SUPPORTED AT ALL TIMES IN
ORDER TO PREVENT UNEXPECTED RELEASE IN THE EVENT OF
FASTENER OR COMPONENT FAILURE.
WARNING: BEFORE USING TOOL, WEAR SUITABLE PPE, INCLUDING SAFETY
SHOES, EYE PROTECTION, GLOVES AND OVERALLS.
WARNING: IF EQUIPMENT IS USED IN A MANNER NOT SPECIFIED BY THE
MANUFACTURER, INJURY OR DAMAGE COULD RESULT.
WARNING: CHANGING THE AIR PRESSURE AFTER SETTING THE PRESSURE
REGULATOR WILL CHANGE THE STALL TORQUE VALUE.
Tightening
1. Fit the PneuTorque® with the correct size impact or high quality
socket.
TIP: For added safety it is recommended to secure the socket to
the square drive.
This is often achieved using a pin and O-ring, see socket
manufacturer for guidance.
The drive squares all include a hole to accommodate a
socket retaining pin.
(Note: Socket & retaining pin not included)
TIP: The exhaust air (containing oil) is expelled from the tool at
the bottom of the handle. The exhaust barrel can rotate to
allow the operator to direct the flow of air away from them.
2. Ensure the Forward / Reverse collar is correctly set.
3. Set the air pressure as described in “setting torque for bolt tightening” within the Set Up section.
4. Rotate tool and reaction arm into a convenient position.
Fit the tool onto the fastener.
Locate reaction arm adjacent to the reaction point.
5. Adopt a suitable posture to counteract normal or unexpected movement of the tool due to reaction
forces.
NOTE: Follow the instructions for SINGLE SPEED, MANUAL TWO SPEED or AUTOMATIC TWO
SPEED:
Single Speed (Part Number with no suffix)
6. Press the trigger in short bursts to bring the reaction arm into contact with the reaction point.
7. Fully press the trigger and keep fully depressed until tool stalls.

14
8. Release the ‘trigger’ and turn Collar to ‘OFF’.
9. Remove tool from fastener.
Manual Two Speed (Part Number “*****.MTS”)
NOTE: ‘FAST’ speed is for initially running up of the fastener and
‘SLOW’ speed for applying the final torque.
6. Set speed selector to ‘FAST’.
TIP: To change the speed:
A. Ensure tool is not running.
B. Pull selection knob out.
C. Move knob to required speed.
D. Ensure selection knob is fully engaged in recess.
7. Press the trigger in short bursts to bring the reaction arm into contact with
the reaction point.
8. Fully press the trigger and keep fully depressed until tool stalls then release the trigger.
9. Set speed selector to ‘SLOW’.
NOTE: The air pressure calibration graph is only correct in the ‘SLOW’ setting.
10. Fully press the trigger and keep fully depressed until tool stalls.
11. Release the trigger and turn collar to ‘OFF’.
12. Remove tool from fastener.
TIP: Where there are several fasteners in the joint, eg. a flange, it may be desirable to tighten all of
the fasteners with the tool in ‘FAST’ gear. Then set the gear selector to ‘SLOW’ and apply final
torque.
Automatic Two Speed (Part Number “*****.AUT”)
NOTE: These tools operate at a ‘FAST’ speed (approximately 5 times faster than normal) until
torque is detected, then the tool automatically change to ‘SLOW’ speed for final tightening
of the fastener.
6. Press the trigger in short bursts to bring the reaction arm into contact with the reaction point.
7. Fully press the trigger and keep fully depressed until tool stalls.
8. Release the trigger and turn collar to ‘OFF’ and remove tool from fastener.
9. Remove tool from fastener.
NOTE: If the trigger is released or collar is turned back to the ‘OFF’ position before the tool stalls,
full torque will NOT be applied to the fastener.
TIP: If the tool will not release from the bolt, turn collar to the opposite direction and squeeze the
trigger for a fraction of a second.
FIGURE 10 – ’FAST’ speed above,
‘SLOW’ speed below.

15
Releasing
1. Fit PneuTorque® with the correct size impact or high quality
socket.
2. Ensure the Forward / Reverse collar is correctly set (in for right
hand threads).
3. Rotate tool and reaction arm into a convenient position.
Fit the tool onto the fastener.
Locate reaction arm adjacent to the reaction point.
4. Adopt a suitable posture to counteract normal or unexpected
movement of the tool due to reaction forces.
5. Gently press trigger to bring the reaction arm into contact with the
reaction point.
6. Fully press the trigger and keep fully depressed until fastener releases.
TIP: If unable to release the fastener increase the air pressure to the tool.
Do not use excessive air pressure.
WARNING: EXCEEDING THE MAXIMUM AIR PRESSURE WILL CAUSE OVERLOADING
AND MAY LEAD TO SERIOUS DAMAGE.
7. Remove tool from fastener.
WARNING: CHANGING THE AIR PRESSURE AFTER SETTING THE PRESSURE
REGULATOR WILL CHANGE THE STALL TORQUE VALUE.

16
MAINTENANCE
To maintain optimum performance and safety, regular maintenance needs to be carried out. The only user
maintenance required on these tools is the replacement of drive squares and the silencer. Any other
maintenance or repairs should be carried out by Norbar or a Norbar approved agent and should form part of
a service. Service intervals will depend on the type of usage of the tools and the environment in which they
are being used. The maximum recommended maintenance and recalibration interval is 12 months.
TIP: Steps the operator can take to reduce the amount of maintenance required include:
1. Use the tool in a clean environment.
2. Use an air compressor fitted with a dryer.
3. Ensure the Lubro Control Unit has sufficient hydraulic oil.
4. Ensure the Lubro Control Unit delivers hydraulic oil at the correct rate.
5. Ensure the Lubro Control Unit is regularly maintained, see product manual.
6. Maintain the correct torque reaction.
Reaction Plate
Every week check that the bolts fastening reaction plate are tightened to the torque stamped onto the
reaction plate.
Air Lubrication
Add Fuchs Silkair VG22 or Shell Tellus S2 VX15 or equivalent good quality hydraulic oil to the Lubro unit.
Gearbox
Under normal operating conditions it is not necessary to re-grease the gearbox. The gearbox contains Shell
Gadus S2 V220 or equivalent good quality grease.
Silencer
The silencer (#16457) should be changed every 12 months.
This may be more frequent for high tool usage or dirty environments.
To change silencer:
1. Remove circlip from end of handle.
2. Slide handle to access silencer.
3. Change silencer.
4. Replace handle and circlip.
Filter
The air filter (#19188) should be changed every 12 months.
This may be more frequent for high tool usage or dirty environments.
To change filter:
1. Remove inlet air hose.
2. Remove filter from inside tool air inlet.
3. Fit new filter.
4. Replace inlet air hose.
TIP: To help removal use a small screwdriver or a pair of internal circlip pliers.
FIGURE 11 – Silencer location
FIGURE 12 – Air filter

17
Drive Square
To avoid internal damage (especially due to torque overload), the output drive square has been designed to
shear first. This saves major internal damage and allows easy square removal.
FIGURE 13 – Drive square fixing (left to right): Pin, Carrier Assembly, Screw and circlip.
Tool
Square
Size
Drive Square
Part Number
Fixing
Screw Torque
(N∙m)
PT 1 / PT 2
¾”
# 16424
Pin (# 26228)
-
PT 1 / PT 2
1”
# 16425
Pin (# 26228)
-
PT 5
1”
# 16549
Pin (#26242)
-
PT 6
1 ½”
# 16548
Carrier assembly.
-
PT 7
1 ½”
# 16295
M5 screw (# 25352.45)
8 – 9
PT 9
1 ½”
# 16611
M5 screw (# 25352.40)
8 – 9
PT 11
2 ½”
# 16323
M6 screw (# 25353.60)
16 – 18
PT 12
2 ½”
# 16310
M6 screw (# 25353.60) + Circlip (# 26432)
16 – 18
PT 13
2 ½”
# 16310
M6 screw (# 25353.60) + Circlip (# 26432)
16 – 18
PT 14
3 ½”
# 16309
M6 screw (# 25353.60)
16 – 18
PT 15
-
-
M6 screw (# 25353.60)
-
PT 16
-
-
M6 screw (# 25353.60)
-
PT 17
-
-
Application specific
-
PT 18
-
-
Application specific
-
NOTE: The drive squares are designed to be replaced by a competent service engineer with
standard tools. A new fixing screw is recommended on reassembly.
TIP: If the square has sheared it may be necessary to use pliers to remove the broken parts.
Cleaning
Keep the tool in a clean condition to aid safety. Do not use abrasives or solvent based cleaners.
Disposal
Recycling considerations:
Component
Material
Handle
Aluminium casting with epoxy finish.
Annulus
Alloy steel with nickel plate finish.
Reaction plate
Alloy steel with chemical black finish.

18
SPECIFICATIONS
General
Repeatability: ± 5%.
Air Supply: Maximum pressure 6.0 bar (For maximum torque capacity).
Air consumption 19 litres / sec (40 ft³/m [CFM]).
Recommended Lubrication: Fuchs Silkair VG22 or Shell Tellus S2 VX15 for the Lubro Control Unit.
Temperature Range: 0°C to +50°C (operating). -20°C to +60°C (storage).
Maximum Operating Humidity: 85% Relative Humidity at 30°C.
Maximum Vibration at Handle: < 2.5m/s² measured in accordance with ISO 28927-2. Measured tool
vibration (ah) = 0.444 m/s² with uncertainty (K) = 0.14 m/s²
Sound Pressure Level: The sound pressure level is 81 dB(A) uncertainty K = 3dB, measured in
accordance with BS EN ISO 11148-6
Environment: Indoor & dry outdoor use within a light industrial environment.
Standard Series
Model
Torque
Free Speed
(At maximum air pressure)
Weight (kg)
Tool
Reaction
Minimum
Maximum
Single
speed
MTS / AUT
Single
speed
MTS /
AUT
PT 1
160 N∙m
(120 lbf∙ft)
680 N∙m
(500 lbf∙ft)
30 rev/min
150 rev/min
10.6
14.1
2.2
PT 1A
270 N∙m
(200 lbf∙ft)
1200 N∙m
(900 lbf∙ft)
15 rev/min
75 rev/min
11.1
14.6
2.2
PT 2
515 N∙m
(380 lbf∙ft)
1700 N∙m
(1250 lbf∙ft)
9 rev/min
45 rev/min
11.1
14.6
2.2
PT 5
880 N∙m
(650 lbf∙ft)
3400 N∙m
(2500 lbf∙ft)
5 rev/min
25 rev/min
14.0
17.5
2.5
PT 6
880 N∙m
(650 lbf∙ft)
3400 N∙m
(2500 lbf∙ft)
5 rev/min
25 rev/min
14.0
17.5
2.5
PT 7
1762 N∙m
(1300 lbf∙ft)
6000 N∙m
(4500 lbf∙ft)
2.5 rev/min
12.5 rev/min
19.7
23.2
6.3
PT 9
2710 N∙m
(200 lbf∙ft)
9500 N∙m
(7000 lbf∙ft)
1.8 rev/min
9 rev/min
24.4
27.9
8.3
PT 11
4400 N∙m
(3250 lbf∙ft)
20000 N∙m
(14700 lbf∙ft)
1.2 rev/min
6 rev/min
38.6
42.1
13.3
PT 12
9500 N∙m
(7000 lbf∙ft)
34000 N∙m
(25000 lbf∙ft)
0.5 rev/min
2.5 rev/min
49.8
53.3
6.5
PT 13
13550 N∙m
(10000 lbf∙ft)
47000 N∙m
(35000 lbf∙ft)
0.3 rev/min
1.5 rev/min
102.2
105.7
6.9
PT 14
22375 N∙m
(16500 lbf∙ft)
100000 N∙m
(73500 lbf∙ft)
0.2 rev/min
1 rev/min
119.4
122.9
10.4
PT 15
35000 N∙m
(25825 lbf∙ft)
150000 N∙m
(110500 lbf∙ft)
0.1 rev/min
0.5 rev/min
-
-
-
PT 16
46500 N∙m
(34400 lbf∙ft)
200000 N∙m
(147500 lbf∙ft)
0.08 rev/min
0.4 rev/min
266.5
270
-
PT 17
58250 N∙m
(42990 lbf∙ft)
250000 N∙m
(184500 lbf∙ft)
0.07 rev/min
0.35 rev/min
281.5
285
-
PT 18
70000 N∙m
(51630 lbf∙ft)
300000 N∙m
(221270 lbf∙ft)
0.06 rev/min
0.3 rev/min
376.5
380
-

19
Model
Dimensions (mm)
A
B
C minimum
C maximum
Single speed
MTS
AUT
Single
speed
MTS / AUT
PT 1 (¾”)
108
368
454
437
83
83
217
PT 1 (1”)
108
373
459
442
83
83
217
PT 1A
108
373
459
442
83
83
217
PT 2
108
373
459
442
83
83
217
PT 5
119
424
510
493
83
86
264
PT 6
119
430
516
499
83
86
264
PT 7
144
457
543
526
146
146
333
PT 9
184
452
538
521
169
169
351
PT 11
212
555
641
-
-
-
500
PT 12
240
593
679
-
Blank plate
PT 13
315
636
716
-
Blank plate
PT 14
315
724
810
-
Blank plate
PT 15
-
-
-
-
Application specific
PT 16
410
780
866
-
Application specific
PT 17
410
853
939
-
Application specific
PT 18
520
850
936
-
Application specific
Due to continuous improvement all specifications are subject to change without prior notice.
FIGURE 14 – Standard series tool (smaller)
FIGURE 15 – Standard series tool (larger)
A
B
FIGURE 16 – PT 15 – 18
Other manuals for PneuTorque Standard Series
2
This manual suits for next models
54
Table of contents
Other norbar Tools manuals

norbar
norbar PTM-IC Series User manual

norbar
norbar TT20 N.m User manual

norbar
norbar PNEUTORQUE PTM series User manual

norbar
norbar PneuTorque Standard Series User manual

norbar
norbar PNEUTORQUE PTM User manual

norbar
norbar Secondary Handle User manual

norbar
norbar 13295 User manual

norbar
norbar PNEUTORQUE PT 72/1000 Service manual

norbar
norbar NORTRONIC 34399 User manual

norbar
norbar ISO 1500 Service manual