manuals.online logo
Brands
  1. Home
  2. •
  3. Brands
  4. •
  5. NordicTrack
  6. •
  7. Elliptical Trainer
  8. •
  9. NordicTrack AudioStrider 990 User manual

NordicTrack AudioStrider 990 User manual

CAUTION
Read all precautions and instruc-
tions in this manual before using
this equipment. Keep this manual
for future reference.
Serial
Number
Decal
www.nordictrack.com
Visit our website at
w
E IPTICA EXERCISER
Userʼs Manual
Model No. 30708.2
Serial No.
Write the serial number in the
space above for reference.
QUESTIONS?
As a manufacturer, we are com-
mitted to providing complete
customer satisfaction. If you
have questions, or if parts are
damaged or missing, P EASE
CONTACT OUR CUSTOMER SER-
VICE DEPARTMENT
DIRECT Y.
CA TO -FREE:
1-888-936-4266
Mon.–Fri., 8:00 until 17:00 EST
(excluding holidays)
OR E-MAI US:
[email protected]
TAB E OF CONTENTS
IMPORTANTPRECAUTIONS ................................................................3
BEFOREYOUBEGIN ......................................................................4
ASSEMB Y ...............................................................................5
HOWTOUSETHEE IPTICA EXERCISER ..................................................11
MAINTENANCEANDTROUB ESHOOTING ...................................................22
EXERCISEGUIDE INES ...................................................................23
PART IST ..............................................................................24
EXP ODEDDRAWING ....................................................................26
ORDERINGREP ACEMENTPARTS ..................................................BackCover
IMITEDWARRANTY ..............................................................BackCover
2
NordicTrack is a registered trademark of ICON IP, Inc.
WARNING DECA P ACEMENT
This drawing shows the location(s) of the warning
decal(s). If a decal is missing or illegible, call the
telephone number on the front cover of this
manual and request a free replacement decal.
Apply the decal in the location shown. Note: The
decal(s) may not be shown at actual size.
3
WARNING: To reduce the risk of serious injury, read all important precautions and
instructions in this manual and all warnings on your elliptical exerciser before using your elliptical
exerciser. ICON assumes no responsibility for personal injury or property damage sustained by or
through the use of this product.
IMPORTANT PRECAUTIONS
1. Before beginning any exercise program,
consult your physician. This is especially
important for persons over the age of 35 or
persons with pre-existing health problems.
2. It is the responsibility of the owner to ensure
that all users of the elliptical exerciser are
adequately informed of all precautions.
3. Your elliptical exerciser is intended for home
use only. Do not use your elliptical exerciser
in a commercial, rental, or institutional set-
ting.
4. Keep your elliptical exerciser indoors, away
from moisture and dust. Place your elliptical
exerciser on a level surface, with a mat
beneath it to protect the floor or carpet.
Make sure that there is enough clearance
around your elliptical exerciser to mount,
dismount, and use it.
5. Inspect and properly tighten all parts regu-
larly. Replace any worn parts immediately.
6. Keep children under age 12 and pets away
from your elliptical exerciser at all times.
7. Your elliptical exerciser should not be used
by persons weighing more than 325 lbs.
(147 kg).
8. Wear appropriate exercise clothes while
exercising; do not wear loose clothes that
could become caught on your elliptical exer-
ciser. Always wear athletic shoes for foot
protection while exercising.
9. Hold the handgrip pulse sensor or the upper
body arms when mounting, dismounting, or
using your elliptical exerciser.
10. Keep your back straight while using your
elliptical exerciser; do not arch your back.
11. The pulse sensor is not a medical device.
Various factors, including the userʼs move-
ment, may affect the accuracy of heart rate
readings. The pulse sensor is intended only
as an exercise aid in determining heart rate
trends in general.
12. When you stop exercising, allow the pedals
to slowly come to a stop.
13. If you feel pain or dizziness while exercising,
stop immediately and cool down.
14. Use your elliptical exerciser only as
described in this manual.
4
BEFORE YOU BEGIN
Thank you for purchasing the revolutionary
NordicTrack®AUDIOSTRIDER 990 elliptical exerciser.
The AUDIOSTRIDER 990 elliptical exerciser provides
a wide array of features designed to make your work-
outs at home more effective and enjoyable—and when
youʼre not exercising, the unique elliptical exerciser
can be folded out of the way.
For your benefit, read this manual carefully before
you use the elliptical exerciser. If you have ques-
tions after reading this manual, please see the front
cover of this manual. To help us assist you, note the
product model number and serial number before con-
tacting us. The model number and the location of the
serial number decal are shown on the front cover of
this manual.
Before reading further, please familiarize yourself with
the parts that are labeled in the drawing below.
Pulse Sensor
Audio Cable
Upper Body Arm
Pedal Disc
Wheel
Pedal
Speakers
Water Bottle Holder*
Console
eveling Foot
Handle
Power Socket
atch Button
Ramp
Storage Magnet
Fan
Pedal Arm atch
*Water bottle is not included
eveling Foot
5
ASSEMB Y
Assembly requires two persons. Place all parts of the elliptical exerciser in a cleared area and remove the
packing materials. Do not dispose of the packing materials until assembly is completed.
In addition to the included tools, assembly requires a Phillips screwdriver and rubber
mallet .
As you assemble the elliptical exerciser, use the drawings below to identify small parts. The number in parenthe-
ses below each drawing is the key number of the part, from the PART IST near the end of this manual. The
number following the parentheses is the quantity needed for assembly. Note: Some small parts may have
been preassembled. If a part is not in the hardware kit, check to see if it has been preassembled.
M10 x 93mm Button Screw (82)–4
M10 x 25mm
Washer (87)–2
M8 Split
Washer (101)–4
M4 x 16mm
Screw (116)–16
M6 Split Washer
(102)–8
M6 x 35mm
Screw (109)–4
M6 x 62mm
Screw (108)–4
M8.5 x 16mm x
1.5mm Washer
(103)–6
Link Arm
Spacer (74)–4
M8 x 20mm Button
Screw (107)–4
M8 x 25mm Button
Screw (110)–2
M10 x 20mm Button
Screw (111)–2
M8 x 15mm Button
Screw (106)–10
M10 Curved
Washer (99)–4
Wave Washer
(100)–2
1. If there is a shipping bracket attached to the
rear of the Folding Frame (not shown), remove
the screw and the shipping bracket from the
Folding Frame. Discard the screw and the ship-
ping bracket.
See HOW TO FO D AND UNFO D THE
E IPTICA EXERCISER on page 11 and
unfold the elliptical exerciser.
While another person lifts the front of the
Frame (1), attach the Front Stabilizer (4) to the
Frame with two M10 x 93mm Button Screws
(82) and two M10 Curved Washers (99).
4
99
99
82 1
1
6
2. While another person lifts the Folding Frame
(2), attach the Rear Stabilizer (3) to the Folding
Frame with two M10 x 93mm Button Screws
(82) and two M10 Curved Washers (99). Next,
tighten the Center Foot (95) into the Frame (1).
3. Attach the Front Ramp Cover (6) to the
Ramp (5) with four M4 x 16mm Screws (116).
Slide an M10 x 25mm Washer (87) onto an
M10 x 20mm Button Screw (111). Tighten the
Button Screw into one end of the Ramp
Axle (72). Apply a small amount of the included
grease to the Ramp Axle.
Orient the Ramp (5) as shown. Make sure that
the post on the Frame (1) is in the center of
the Ramp. Align the lower end of the Ramp
with the welded tube on the Frame. Insert the
Ramp Axle (72) into the Ramp and the welded
tube.
Slide an M10 x 25mm Washer (87) onto an
M10 x 20mm Button Screw (111). Tighten the
Button Screw into the open end of the Ramp
Axle (72).
3
3
82
5
1
72
Grease
111
116
111
87
87
6
2
95
1
99
99
2
5. Insert the Roller (38) on the eft Pedal Arm (32)
and the Roller on the Right Pedal Arm (33) into
the sides of the Ramp (5).
Attach the Rear Ramp Cover (7) to the
Ramp (5) with two M4 x 16mm Screws (116).
See the inset drawing. ift the Pedal Arm
atch (41) on the eft Pedal Arm (32) and set
the end of the eft Pedal Arm on the left Crank
Bushing Sleeve (54). Release the Pedal Arm
atch; make sure that the eft Pedal Arm is
securely connected to the Crank Bushing
Sleeve.
Connect the Right Pedal Arm (33) to the
right Crank Bushing Sleeve (not shown) in
the same way.
7
4. Identify the eft Pedal (34) and the eft Pedal
Arm (32), which are marked with stickers.
Attach the eft Pedal (34) to the eft Pedal
Arm (32) with two M6 x 62mm Screws (108),
two M6 x 35mm Screws (109), and four M6
Split Washers (102).
Attach the Right Pedal (not shown) to the
Right Pedal Arm (not shown) in the same
way.
116
7
5
5
34
108
102
102
109
41
54
109
32
32
4
38
32
33
102
8
7. Attach the eft Upper Body Arm (22) to the left
Upper Body eg (24) with three M8 x 15mm
Button Screws (106).
Attach the Right Upper Body Arm (23) in the
same way.
6. While another person holds the Upright (10)
near the Frame (1), connect the Upper Wire
Harness (65) to the ower Wire Harness (64).
Carefully insert the Upright (10) into the
Frame (1); be careful not to damage the Wire
Harnesses (64, 65). Attach the Upright with
four M8 x 20mm Button Screws (107) and four
M8 Split Washers (101).
22
23
24
106
7
6
65
64
107
101 101
1
10
Be careful not
to damage the
Wire Harnesses
(64, 65) during
this step
107
9
9. Apply a small amount of grease to the axle on
the eft ink Arm (30), to the axle on the eft
Pedal Arm (32), and to a Wave Washer (100).
Slide the Wave Washer (100) onto the axle on
the eft Pedal Arm (32). Next, slide a ink Arm
Spacer (74) onto the axle on the eft ink
Arm (30).
Then, insert the axle on the eft ink Arm (30)
into the left Upper Body eg (24) while sliding
the eft ink Arm onto the axle on the eft
Pedal Arm (32).
Repeat this step with the Right ink
Arm (31).
9
32
100
30
Grease
Grease
31
24
74
8. Hold the eft Rear Upper Body Cover (26) and
the eft Front Upper Body Cover (27) around
the left Upper Body eg (24). Attach the Upper
Body Covers with five M4 x 16mm Screws (116).
Attach the Right Rear Upper Body Cover
(28) and the Right Front Upper Body Cover
(29) in the same way.
24
116
26
28
27
116
8
29
10
10. Attach the eft ink Arm (30) to the eft Pedal
Arm (32) with an M8 x 15mm Button Screw
(106), an M8.5 x 16mm x 1.5mm Washer (103),
and an Axle Cover (66).
Attach the eft ink Arm (30) to the left Upper
Body eg (24) with an M8 x 25mm Button
Screw (110), two M8.5 x 16mm x 1.5mm
Washers (103), two Axle Covers (66), a ink
Arm Spacer (74), and an M8 x 15mm Button
Screw (106) as shown.
Attach the Right ink Arm (31) in the same
way.
11. Make sure that all parts of the elliptical exerciser are properly tightened. Note: Some hardware may be
left over after assembly is completed. To protect the floor or carpet from damage, place a mat under the
elliptical exerciser.
Plug the power cord into the power socket at the rear of the elliptical exerciser (see HOW TO P UG IN THE
POWER CORD on page 11). IMPORTANT: If the ellipical exerciser has been exposed to cold tempera-
tures, allow it to warm to room temperature before plugging in the power cord. If you do not do this,
the console displays or other electronic components may become damaged.
10
66 74
103
110
66
32
30
31
103
106
24
66
103
106
11
HOW TO USE THE E IPTICA EXERCISER
HOW TO P UG IN THE POWER CORD
This product must be grounded. If it should mal-
function or break down, grounding provides a path of
least resistance for electric current to reduce the risk
of electric shock. This product is equipped with a cord
having an equipment-grounding conductor and a
grounding plug. Plug the power cord into an appro-
priate outlet that is properly installed and ground-
ed in accordance with all local codes and ordi-
nances. This product is for use on a nominal 120-
volt circuit. IMPORTANT: The elliptical exerciser is
not compatible with GFCI-equipped outlets.
A temporary
adapter may
be used to
connect the
power cord
to a 2-pole
receptacle
as shown at
the right if a
properly
grounded
outlet is not
available. The temporary adapter should be used only
until a properly grounded outlet can be installed by a
qualified electrician.
The green-colored rigid ear, lug, or the like extending
from the adapter must be connected to a permanent
ground such as a properly grounded outlet box cover.
Whenever the adapter is used, it must be held in place
by a metal screw. Some 2-pole receptacle outlet box
covers are not grounded. Contact a qualified elec-
trician to determine if the outlet box cover is
grounded before using an adapter.
HOW TO FO D AND UNFO D THE E IPTICA
EXERCISER
When the elliptical exerciser is not in use, the frame
can be folded out of the way. First, lift the latch under
each pedal arm, and lift the pedal arms off the sleeves
on the crank arms.
Next, raise the pedal arms until they touch the mag-
nets on the upper body legs; the magnets will hold the
pedal arms in place. Then, hold the handle and lift the
frame until it locks in a vertical position.
To use the elliptical exerciser, first hold the handle,
press the latch button, and lower the frame.
Next, pull the pedal arms off the magnets on the upper
body legs. Then, lift the latches under the pedal
arms, and set the pedal arms on the sleeves on the
crank arms. Release the latches, and make sure that
the pedal arms are securely connected to the crank
arms.
atch
Sleeve
Pedal
Arm
Handle
Magnet
atch
Button
Pedal Arm
DANGER: Improper connection
of the equipment-grounding conductor can
result in an increased risk of electric shock.
Check with a qualified electrician or service-
man if you are in doubt as to whether the
product is properly grounded. Do not modify
the plug provided with the product—if it will
not fit the outlet, have a proper outlet
installed by a qualified electrician.
Grounded Outlet Box
Adapter
ug
Metal Screw
12
HOW TO MOVE THE E IPTICA EXERCISER
To move the elliptical exerciser, first fold it as
described on page 11. Next, stand in front of the ellipti-
cal exerciser, hold the handgrip pulse sensors, and
place one foot against the center of the front stabilizer.
Pull the pulse sensors until the elliptical exerciser will
roll on the front wheels. Carefully move the elliptical
exerciser to the desired position, and then lower it.
HOW TO EXERCISE ON THE E IPTICA
EXERCISER
To mount the elliptical exerciser, hold the upper body
arms and step onto the pedal that is in the lowest posi-
tion. Next, step onto the other pedal. Push the pedals
until they begin to move with a continuous motion.
Note: The crank arms can turn in either direction.
It is recommended that you turn the crank arms in
the direction shown by the arrow below; however,
for variety you can turn the crank arms in the
opposite direction.
To dismount the elliptical exerciser, wait until the ped-
als come to a complete stop. Note: The elliptical
exerciser does not have a free wheel; the pedals
will continue to move until the flywheel stops.
When the pedals are stationary, step off the higher
pedal first. Then, step off the lower pedal.
Pedals
Crank Arm
Upper Body Arms
Place
your foot
here
Handgrip
Pulse
Sensors
13
FEATURES OF THE CONSO E
The advanced console offers an array of features
designed to make your workouts more effective and
enjoyable. When you select the manual mode of the
console, you can change the resistance of the pedals
and the incline of the ramp with the touch of a button.
As you exercise, the console will provide continuous
exercise feedback. You can even measure your heart
rate using the handgrip pulse sensor.
The console also offers twenty preset programs. Each
program automatically changes the resistance of the
pedals and prompts you to increase or decrease your
pedaling pace as it guides you through an effective
workout.
The console also offers two custom programs that
allow you to create your own workout programs and
store them in memory for future use.
In addition, the console features two heart rate pro-
grams that change the resistance of the pedals to
keep your heart rate near target heart rate settings
while you exercise.
The console also features the new iFit Interactive
Workout System. The iFit Interactive Workout System
enables the console to accept iFit cards containing
workout programs designed to help you achieve spe-
cific fitness goals. For example, lose unwanted
pounds with the 8-week Weight oss program. iFit
programs control the resistance of the pedals while
the voice of a personal trainer coaches you and moti-
vates you through your workouts. One iFit card with
three new programs is included. Additional iFit cards
are available separately. To purchase iFit cards, go
to www.iFit.com or call the telephone number on
the front cover of this manual. iFit cards are also
available at select stores.
You can even connect your MP3 player or CD player
to the consoleʼs sound system and listen to your
favorite music or audio books while you exercise.
To use the manual mode, see page 14. To use a
preset program, see page 16. To create a custom
program, see page 17. To use a custom program,
see page 18. To use a heart rate program, see page
19. To use an iFit program, see page 21. To use the
sound system, see page 21.
CONSO E DIAGRAM
14
HOW TO USE THE MANUA MODE
Note: If there is a sheet of clear plastic on the face of
the console, remove the plastic.
1. Press any button on the console or begin ped-
aling to turn on the console.
When you turn on the console, the display will
light. A tone will then sound and the console will
be ready for use.
2. Select the manual mode.
When you turn on the console, the manual mode
will be selected. If you have selected a program,
reselect the manual mode by pressing any of the
Programs buttons repeatedly until zeros appear in
the display.
3. Begin pedaling and change the resistance of
the pedals and the incline of the ramp as
desired.
As you pedal, change the resistance of the pedals
by pressing the OneTouch Resistance buttons.
There are fifteen resistance levels. Note: After you
press the buttons, it will take a moment for the
pedals to reach the selected resistance level.
To vary the motion of the pedals, you can change
the incline of the ramp. To change the incline,
press the OneTouch Ramp buttons. There are five
incline levels. Note: After you press the buttons, it
will take a moment for the ramp to reach the
selected incline level.
4. Follow your progress with the display.
While you pedal, the upper left corner of the dis-
play will show the elapsed time. Note: During a
program, except for heart rate program 1, the dis-
play will show the time remaining in the program.
The upper right corner of the display will show the
distance you have pedaled, in total revolutions.
The display will also show your heart rate when
you use the handgrip pulse sensor (see step 5 on
page 15).
The lower left corner of the display will show the
ramp incline level.
The lower center of the display will show the
approximate number of grams of carbs you have
burned.
The lower right corner of the display will show your
pedaling pace, in revolutions per minute.
The center of the display will show the resistance
level of the pedals for a few seconds each time
the resistance level changes.
You can also view selected information at a larger
size. Press the Display button repeatedly to view
the elapsed time and the distance you have ped-
aled, the elapsed time and the approximate num-
ber of calories you have burned, the elapsed time,
or the approximate number of calories you have
burned. Press the Display button again to view a
workout history of resistance levels and pedaling
pace.
To again view the time, distance, ramp incline,
number of grams of carbs burned, and pedaling
pace, press the Display button again.
To view the total distance pedaled since the ellipti-
cal exerciser was purchased and the trip distance,
press the Odometer button. The information will
appear in the display for a few seconds. To reset
the trip distance, hold down the Odometer button
for a few seconds.
15
5. Measure your heart rate if desired.
If there are
sheets of clear
plastic on the
metal contacts
on the handgrip
pulse sensor,
remove the plas-
tic. In addition,
make sure that
your hands are
clean. To mea-
sure your heart
rate, hold the handgrip pulse sensor with your
palms resting against the metal contacts. Avoid
moving your hands or gripping the contacts
tightly.
When your pulse is detected, your heart rate will
be shown in the display. For the most accurate
heart rate reading, hold the contacts for at least 15
seconds.
If your heart rate is not shown, make sure that
your hands are positioned as described. Be care-
ful not to move your hands excessively or to
squeeze the metal contacts tightly. For optimal
performance, clean the metal contacts using a soft
cloth; never use alcohol, abrasives, or chemi-
cals to clean the contacts.
6. Turn on the fan if desired.
To turn on the fan at high speed, press the Fan
button. To turn on the fan at low speed, press the
Fan button a second time. To select the auto
mode, press the Fan button again; when the auto
mode is selected, the speed of the fan will auto-
matically increase or decrease as you increase or
decrease your pedaling speed.
Pivot the fan louvers above the display upward or
downward to direct the airflow from the fan.
To turn off the fan, press the Fan button again.
Note: If the pedals are not moved for about thirty
seconds, the fan will automatically turn off.
7. When you are finished exercising, the console
will turn off automatically.
If the pedals are not moved for several seconds, a
series of tones will sound and the console will
pause.
If the pedals are not moved for about five minutes,
the console will turn off and the display will be
reset.
Contacts
16
HOW TO USE A PRESET PROGRAM
1. Turn on the console.
See step 1 on page 14.
2. Select a preset program.
To select a weight loss program, press the Weight
oss Programs button repeatedly; to select an aer-
obic fitness program, press the Aerobic Fitness
Programs button; to select a competition program,
press the Competition Programs button.
When you select a preset program, the name of
the program, the program time, and the maximum
pace and resistance level for the program will
appear in the display for a few seconds. A profile
of the resistance levels of the program will then
appear in the display.
3. Begin pedaling to start the program.
Each program is divided into 20, 30, or 45 one-
minute segments. One resistance level and one
target pace setting are programmed for each seg-
ment. Note: The same resistance level and/or target
pace setting may be programmed for two or more
consecutive segments.
During the program, the program profile will show
your progress (see the drawing at the left). The
flashing segment of the profile represents the cur-
rent segment of the program. The height of the
flashing segment indicates the resistance level for
the current segment. At the end of each segment
of the program, a series of tones will sound and
the next segment of the profile will begin to flash.
If a different resistance level is programmed for
the next segment, the resistance level will appear
in the display for a few seconds to alert you. The
resistance of the pedals will then change.
As you exercise, you
will be prompted to
keep your pedaling
pace near the target
pace setting for the cur-
rent segment. When an
upward-pointing arrow or the prompt SPEED UP
appears next to the pace information in the dis-
play, increase your pace. When a downward-point-
ing arrow or the prompt S OW DOWN appears,
decrease your pace. When no arrow or prompt
appears, maintain your current pace. IMPOR-
TANT: The target pace settings are intended
only to provide motivation. Make sure to pedal
at a pace that is comfortable for you.
If the resistance level for the current segment is
too high or too low, you can manually override the
setting by pressing the OneTouch Resistance but-
tons. However, when the current segment ends,
the pedals will automatically adjust to the resis-
tance level for the next segment.
If you stop pedaling for several seconds, a series
of tones will sound and the program will pause. To
restart the program, simply resume pedaling. The
program will continue until the last segment of the
profile flashes and the last segment of the pro-
gram ends.
Profile
17
4. Follow your progress with the display.
During the program, the display will show the pro-
gram profile, the time remaining in the program,
and the distance you have pedaled.
To view the profile, your pedaling pace, and the
distance you have pedaled, press the Display but-
ton. Note: The words SPEED UP or S OW DOWN
may appear in the display to prompt you to keep
your pedaling pace near the target pace setting for
the current segment.
To view the time remaining in the program and the
distance pedaled, press the Display button. Press
the Display button again to view the time remain-
ing and the approximate number of calories
burned.
To view the time remaining, distance pedaled,
ramp incline, number of grams of carbs burned,
and pedaling pace, press the Display button again.
Note: An upward- or downward-pointing arrow may
appear in the display to prompt you to keep your
pedaling pace near the target pace setting for the
current segment.
To view the first display again, press the Display
button again.
5. Measure your heart rate if desired.
See step 5 on page 15.
6. Turn on the fan if desired.
See step 6 on page 15.
7. When you are finished exercising, the console
will turn off automatically.
See step 7 on page 15.
HOW TO CREATE A CUSTOM PROGRAM
1. Turn on the console.
See step 1 on page 14.
2. Select a custom program.
To select a custom program, press the Custom
Programs button once or twice. When you select a
custom program, the name of the program and the
settings for the program will appear in the display
for a few seconds.
3. Begin pedaling to start the program, and
program the desired settings.
Each custom program is divided into 30 one-
minute segments. You can program one resistance
level and one target pace setting for each seg-
ment.
To program a resistance level for the first segment,
simply adjust the resistance of the pedals by
pressing the OneTouch Resistance buttons. To
program a target pace for the first segment, simply
pedal at the desired pace.
At the end of the first segment, the program will
store the current resistance level and your current
pace in memory. Program a resistance level and a
target pace for the second segment as described
above.
Continue exercising for up to forty minutes. Stop
pedaling when you are finished with your workout.
The program you created will then be stored in
memory. Note: If your workout is less than thirty
minutes long, any remaining segments in the pro-
gram will be stored with the last resistance level
and target pace setting you programmed.
4. When the program is finished, the console will
turn off automatically.
See step 7 on page 15.
18
HOW TO USE A CUSTOM PROGRAM
1. Turn on the console.
See step 1 on page 14.
2. Select a custom program.
To select a custom program, press the Custom
Programs button repeatedly until the words CUS-
TOM 1 or CUSTOM 2 appear in the display.
When you select a custom program, the name of
the program, the program time, and the maximum
pace and resistance level will appear in the display
for a few seconds. A profile of the resistance levels
of the program will then appear in the display.
3. Begin pedaling to start the program.
Each custom program is divided into 30 one-
minute segments. One resistance level and one
target pace setting are programmed for each seg-
ment. Note: The same resistance level and/or tar-
get pace setting may be programmed for two or
more consecutive segments.
During the program, the program profile will show
your progress. The flashing segment of the profile
represents the current segment of the program.
The height of the flashing segment indicates the
resistance level for the current segment. At the
end of each segment of the program, a series of
tones will sound and the next segment of the pro-
file will begin to flash. If a different resistance level
is programmed for the next segment, the resis-
tance level will appear in the display for a few sec-
onds to alert you. The resistance of the pedals will
then change.
As you exercise, you
will be prompted to
keep your pedaling
pace near the target
pace setting for the cur-
rent segment. When an
upward-pointing arrow or the prompt SPEED UP
appears next to the pace information in the display
(see step 4 on page 17), increase your pace.
When a downward-pointing arrow or the prompt
S OW DOWN appears, decrease your pace.
When no arrow or prompt appears, maintain your
current pace. IMPORTANT: The target pace set-
tings are intended only to provide motivation.
Make sure to pedal at a pace that is comfort-
able for you.
If the resistance level for the current segment is
too high or too low, you can manually override the
setting by pressing the OneTouch Resistance but-
tons. However, when the current segment ends,
the pedals will automatically adjust to the resis-
tance level for the next segment.
If you stop pedaling for several seconds, a series
of tones will sound and the program will pause. To
restart the program, simply resume pedaling. The
program will continue until the last segment of the
profile flashes and the last segment of the pro-
gram ends.
4. Change the program if desired.
If desired, you can change the program while
using it. To change the resistance level for the
current segment, simply press the OneTouch
Resistance buttons. At the end of the current seg-
ment, the new resistance level will be stored in
memory. To change the target pace for the cur-
rent segment, simply change your pedaling pace.
At the end of the current segment, your pace will
be stored in memory. You can continue exercising
and changing the program for up to thirty minutes.
Profile
19
5. Follow your progress with the display.
See step 4 on page 17.
6. Measure your heart rate if desired.
See step 5 on page 15.
7. Turn on the fan if desired.
See step 6 on page 15.
8. When you are finished exercising, the console
will turn off automatically.
See step 7 on page 15.
HOW TO USE A HEART RATE PROGRAM
1. Turn on the console.
See step 1 on page 14.
2. Select a heart rate program.
To select one of the heart rate programs, press the
Heart Rate Programs button repeatedly until the
words HEART RATE 1 or HEART RATE 2 appear
in the display.
3. Enter a target heart rate setting.
A few seconds after you select a heart rate pro-
gram, the words ENTER MAX TARGET HEART
RATE FOR THIS WORKOUT will appear in the
display and the number 110 will begin to flash.
During heart rate program 1, the same target
heart rate setting will be programmed for all seg-
ments of the program. If you have selected heart
rate program 1, press the increase and decrease
buttons above the Heart Rate Programs button to
enter the desired target heart rate setting (see
EXERCISE INTENSITY on page 23).
During heart rate program 2, different target
heart rate settings will be programmed for different
segments of the program. If you have selected
heart rate program 2, press the increase and
decrease buttons above the Heart Rate Programs
button to enter the desired maximum target heart
rate setting for the program (see EXERCISE
INTENSITY on page 23).
4. Hold the handgrip pulse sensor.
It is not necessary to hold the handgrip pulse sen-
sor continuously during heart rate programs; how-
ever, you should hold the handgrip pulse sensor
frequently for the programs to operate properly.
Each time you hold the handgrip pulse sensor,
keep your hands on the metal contacts for at
least 30 seconds.
20
5. Begin pedaling to start the program.
Heart rate program 1 is divided into 40 one-
minute segments. Note: For a shorter workout,
stop exercising or select a different program
before the program ends.
Heart rate program 2 is divided into 30 one-
minute segments. One target heart rate setting is
programmed for each segment. Note: The same
target heart rate setting may be programmed for
consecutive segments.
During the program, the program profile in the dis-
play will show your progress. The flashing seg-
ment of the profile represents the current segment
of the program. The height of the flashing segment
indicates the target heart rate setting for the cur-
rent segment. At the end of each segment of the
program, a series of tones will sound and the next
segment of the profile will begin to flash.
During both programs, the console will regularly
compare your heart rate to the target heart rate
setting for the current segment of the program. If
your heart rate is too far below or above the target
heart rate setting, the resistance of the pedals will
automatically increase or decrease to bring your
heart rate closer to the target heart rate setting.
Each time the resistance changes, the resistance
level will appear in the display for a few seconds
to alert you.
While you exercise, you
will be prompted to
maintain a constant
pedaling pace. When
an upward-pointing
arrow or the prompt
SPEED UP appears next to the pace information
in the display (see step 6 on this page), increase
your pace. When a downward-pointing arrow or
the prompt S OW DOWN appears, decrease your
pace. When no arrow or prompt appears, maintain
your current pace.
If the resistance level for the current segment is
too high or too low, you can manually override the
setting by pressing the OneTouch Resistance but-
tons. However, when the console compares your
heart rate to the target heart rate setting, the resis-
tance of the pedals may automatically increase or
decrease to bring your heart rate closer to the tar-
get heart rate setting.
If you stop pedaling for several seconds, a series
of tones will sound and the program will pause. To
restart the program, simply resume pedaling. The
program will continue until the last segment of the
program ends.
6. Follow your progress with the display.
During heart rate program 1, the display will
show a graphic that represents a heartbeat each
time your heartbeat is detected, the elapsed time,
and the distance that you have pedaled. During
heart rate program 2, the display will show the
program profile, the time remaining in the pro-
gram, and the distance that you have pedaled.
To view the profile, your pedaling pace, and the
distance you have pedaled, press the Display but-
ton. Note: The words SPEED UP or S OW DOWN
may appear in the display to prompt you to keep
your pedaling pace near the target pace setting for
the current segment.
To view the time remaining in the program and the
distance pedaled, press the Display button. Press
the Display button again to view the time remain-
ing and the approximate number of calories
burned.
To view the time remaining, distance pedaled,
ramp incline, number of grams of carbs burned,
and pedaling pace, press the Display button again.
Note: An upward- or downward-pointing arrow may
appear in the display to prompt you to keep your
pedaling pace near the target pace setting for the
current segment.
To view the first display again, press the Display
button again.
7. Turn on the fan if desired.
See step 6 on page 15.
8. When you are finished exercising, the console
will turn off automatically.
See step 7 on page 15.
Profile

Other manuals for AudioStrider 990

2

This manual suits for next models

1

Other NordicTrack Elliptical Trainer manuals
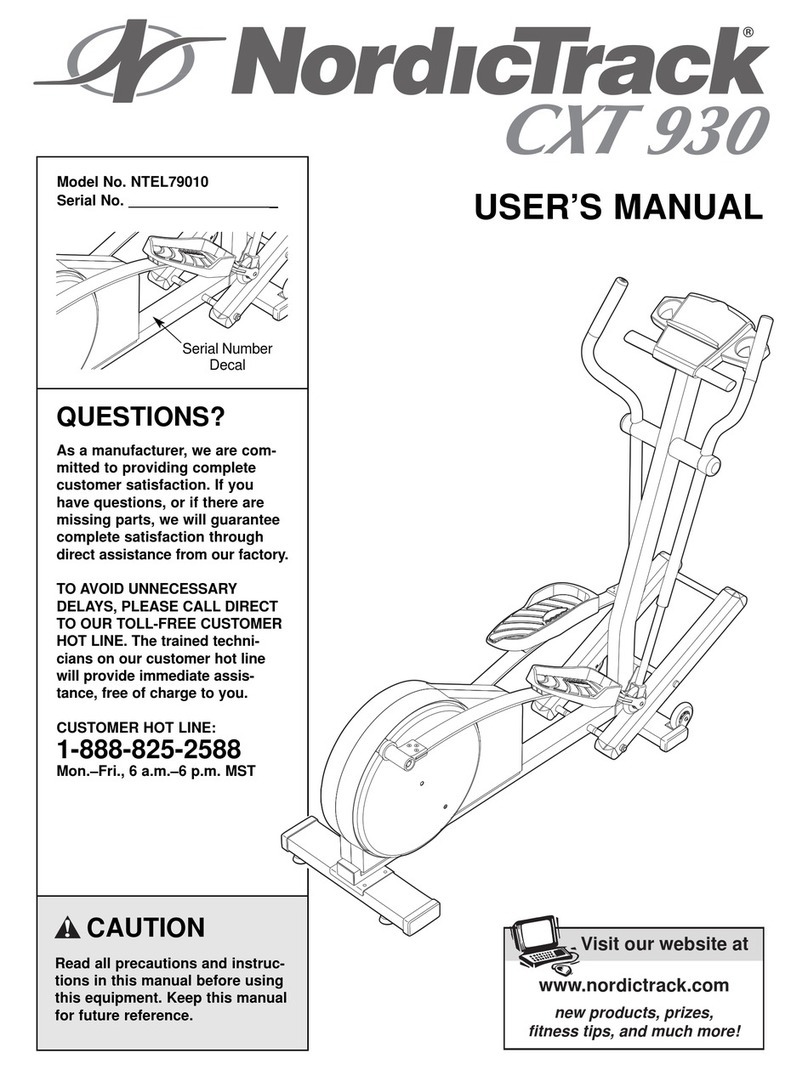
NordicTrack CXT 980 User manual

NordicTrack

NordicTrack CXT 980 User manual

NordicTrack E 9.2 Elliptical

NordicTrack

NordicTrack E 9.2 Elliptical

NordicTrack Xlt 1200 Elliptcal System manual

NordicTrack

NordicTrack Xlt 1200 Elliptcal System manual

NordicTrack NTEL09109.1 User manual

NordicTrack

NordicTrack NTEL09109.1 User manual

NordicTrack COMMERCIAL NTEL16907.0 User manual

NordicTrack

NordicTrack COMMERCIAL NTEL16907.0 User manual

NordicTrack E11.0 Elliptical User manual

NordicTrack

NordicTrack E11.0 Elliptical User manual

NordicTrack Cxt 1200 Elliptical Quick start guide

NordicTrack

NordicTrack Cxt 1200 Elliptical Quick start guide

NordicTrack E10 Rear Drive Elliptical Quick start guide

NordicTrack

NordicTrack E10 Rear Drive Elliptical Quick start guide

NordicTrack E 4.1 NTEVEL75012.0 User manual

NordicTrack

NordicTrack E 4.1 NTEVEL75012.0 User manual

NordicTrack AudioStrider 990 User manual

NordicTrack

NordicTrack AudioStrider 990 User manual

NordicTrack E9 Zl Elliptical User manual

NordicTrack

NordicTrack E9 Zl Elliptical User manual

NordicTrack Cx985 Elliptical User manual

NordicTrack

NordicTrack Cx985 Elliptical User manual

NordicTrack Commercial S22i Studio Cycle User manual

NordicTrack

NordicTrack Commercial S22i Studio Cycle User manual

NordicTrack 30710.0 User manual

NordicTrack

NordicTrack 30710.0 User manual

NordicTrack Cx 105 Elliptical Exerciser User manual

NordicTrack

NordicTrack Cx 105 Elliptical Exerciser User manual

NordicTrack Cxt 1100 Elliptical User guide

NordicTrack

NordicTrack Cxt 1100 Elliptical User guide

NordicTrack 831.298650 User manual

NordicTrack

NordicTrack 831.298650 User manual

NordicTrack NEL09940 User manual

NordicTrack

NordicTrack NEL09940 User manual

NordicTrack E 9.0 Elliptical User manual

NordicTrack

NordicTrack E 9.0 Elliptical User manual

NordicTrack A.C.T. COMMERCIAL NTEVEL13016.0 User manual

NordicTrack

NordicTrack A.C.T. COMMERCIAL NTEVEL13016.0 User manual

NordicTrack E4.0 Elliptical Manual

NordicTrack

NordicTrack E4.0 Elliptical Manual

NordicTrack E 5.9 Elliptical User guide

NordicTrack

NordicTrack E 5.9 Elliptical User guide

NordicTrack NTEL4255.2 User manual

NordicTrack

NordicTrack NTEL4255.2 User manual

NordicTrack COMMERCIAL 7 NTEVEL15518.0 User manual

NordicTrack

NordicTrack COMMERCIAL 7 NTEVEL15518.0 User manual

Popular Elliptical Trainer manuals by other brands

True CS900 owner's manual

True

True CS900 owner's manual

Sunny Health & Fitness SF-E3810 user manual

Sunny Health & Fitness

Sunny Health & Fitness SF-E3810 user manual

Reebok 1000 X Elliptical manual

Reebok

Reebok 1000 X Elliptical manual

Bodyworx E816 owner's manual

Bodyworx

Bodyworx E816 owner's manual

Nautilus Schwinn 470 Assembly manual / owner's manual

Nautilus

Nautilus Schwinn 470 Assembly manual / owner's manual

Precor C546i Service manual

Precor

Precor C546i Service manual

FRENCH FITNESS FF-FSR80 Assembly manual

FRENCH FITNESS

FRENCH FITNESS FF-FSR80 Assembly manual

SportsArt Fitness 8300 Repair guide

SportsArt Fitness

SportsArt Fitness 8300 Repair guide

Thane Fitness Orbitrek Elite BK2080 owner's manual

Thane Fitness

Thane Fitness Orbitrek Elite BK2080 owner's manual

Johnson E8000 owner's manual

Johnson

Johnson E8000 owner's manual

Vision Fitness X6150 Assembly guide

Vision Fitness

Vision Fitness X6150 Assembly guide

TOORX ERX700 Instruction

TOORX

TOORX ERX700 Instruction

ST Fitness 8810 Owner's manual & assembly instructions

ST Fitness

ST Fitness 8810 Owner's manual & assembly instructions

HMS H6512 Manual instruction

HMS

HMS H6512 Manual instruction

Spirit CE850 owner's manual

Spirit

Spirit CE850 owner's manual

Spokey HADAR user guide

Spokey

Spokey HADAR user guide

Vision Fitness X6200HRC/DA Assembly guide

Vision Fitness

Vision Fitness X6200HRC/DA Assembly guide

Horizon Fitness EG5 user guide

Horizon Fitness

Horizon Fitness EG5 user guide

manuals.online logo
manuals.online logoBrands
  • About & Mission
  • Contact us
  • Privacy Policy
  • Terms and Conditions

Copyright 2025 Manuals.Online. All Rights Reserved.